Advertisement
Table of Contents
- 1 Table of Contents
- 2 Unpacking
- 3 Specifications
- 4 Safety Warnings and Precautions
- 5 Air Connection
- 6 Control Layout
- 7 A Comparison: Conventional Versus HVLP Spray Guns
- 8 Preparation
- 9 Fan Direction and Pattern Adjustment
- 10 Techniques
- 11 Maintenance
- 12 Parts List
- 13 Assembly Diagram
- 14 Troubleshooting
- Download this manual
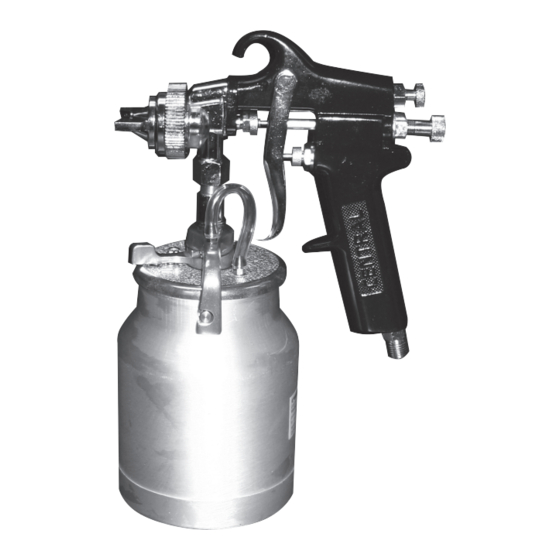
PAINT SPRAY GUN
30224
ASSEMBLY AND OPERATING
INSTRUCTIONS
Due to continuing improvements, actual product may differ slightly from the product described herein.
®
3491 Mission Oaks Blvd., Camarillo, CA 93011
Visit our Web site at http://www.harborfreight.com
TO PREVENT SERIOUS INJURY,
READ AND UNDERSTAND ALL WARNINGS
AND INSTRUCTIONS BEFORE USE.
©
®
Copyright
1997, 2005 by Harbor Freight Tools
. All rights reserved. No portion of this manual
or any artwork contained herein may be reproduced in any shape or form without the express
written consent of Harbor Freight Tools.
For technical questions and replacement parts, please call 1-800-444-3353.
Manual Updated 09/05
Advertisement
Table of Contents

Related Manuals for Central Pneumatic PAINT SPRAY GUN 30224


Summary of Contents for Central Pneumatic PAINT SPRAY GUN 30224
- Page 1 PAINT SPRAY GUN 30224 ASSEMBLY AND OPERATING INSTRUCTIONS Due to continuing improvements, actual product may differ slightly from the product described herein. ® 3491 Mission Oaks Blvd., Camarillo, CA 93011 Visit our Web site at http://www.harborfreight.com TO PREVENT SERIOUS INJURY, READ AND UNDERSTAND ALL WARNINGS AND INSTRUCTIONS BEFORE USE.
-
Page 2: Table Of Contents
IMPORTANT: Before using for the first time, the spray gun must be cleaned using a solvent based thinner. If not removed, the red oil used by the manufacturer for testing and corrosion protection may contaminate paint. IMPORTANT: The Spray Gun must be cleaned immediately after use. Improper cleaning is a common reason for the Spray Gun not to work. -
Page 3: Specifications
Inlet PSI Range Air Consumption Paint Capacity Air Inlet Nozzle Size Feed Type You will need the manual for the safety warnings and precautions, assembly instructions, operating and maintenance procedures, parts list and diagram. Keep your invoice with this manual. Write the invoice number on the inside of the front cover. Keep the manual and invoice in a safe and dry place for future reference. - Page 4 Do not overreach. Keep proper footing and balance at all times. Do not reach over or across running machines or air hoses. Maintain tools with care. Keep tools clean for better and safer performance. Follow instructions for lubricating and changing accessories. Inspect tool cords and air hoses periodically and, if damaged, have them repaired by an authorized technician.
- Page 5 Compressed air only. Never use combustible gas as a power source. Never exceed the recommended operating pressure of the any of the parts (i.e. hoses, fittings, gun) of the Sprayer system. Do not spray near open flames, pilot lights, stoves, heaters, the air compressor, or any other heat source.
-
Page 6: Air Connection
For best service you should incorporate a regulator and inline filter, as shown in the diagram above. Hoses, couplers, regulators, and filters are all available at Harbor Freight Tools. Note: Compressor pumps discharge condensed water, oil, or other contaminants along with the compressed air. -
Page 7: A Comparison: Conventional Versus Hvlp Spray Guns
A Comparison: Conventional versus HVLP Spray Guns Because conventional spray guns require a much higher air cap pressure to atomize the paint than HVLP Spray Guns, conventional guns have lower transfer efficiencies and more overspray. This translates to a significant paint/material savings for HVLP guns, in addition to making them more environmentally friendly. -
Page 8: Fan Direction And Pattern Adjustment
IMPORTANT: Before using for the first time, the spray gun must be cleaned using a solvent based thinner. If not removed, the red oil used by the manufacturer for testing and corrosion protection may contaminate paint. IMPORTANT: The Spray Gun must be cleaned immediately after use. Improper cleaning is a common reason for the Spray Gun not to work. - Page 9 Fan Direction and Pattern Adjustment (continued) Turn the Fluid Control Knob (29) clockwise until it is fully closed. See FIGURE 1 on page 6. After setting up a piece of scrap material, squeeze the Trigger (38) in short bursts while turning the Fluid Control Knob (29) counterclockwise and observe the spray patterns until you see the pattern you want.
-
Page 10: Techniques
Note: Before spraying, mask all objects you do not want sprayed and lay cloths (not included) on the floors. Always keep the gun at right angles to the workpiece (See FIGURE 6). Pull the Trigger (38) slowly and move the Spray Gun in parallel strokes to the object being painted. Keep the distance from the object being painted at 6”... -
Page 11: Maintenance
IMPORTANT: The Spray Gun must be cleaned IMMEDIATELY after use. Improper cleaning is a common reason for the Spray Gun not to work properly. Materials dry quickly which will render the gun useless. It is extremely difficult to remove dry paint from small passages within the Gun. Always follow the paint manufacturer’s recommendations for cleaning, solvent type, Latex Paints: Use warm, soapy water. -
Page 12: Parts List
PLEASE READ THE FOLLOWING CAREFULLY THE MANUFACTURER AND/OR DISTRIBUTOR HAS PROVIDED THE PARTS DIAGRAM IN THIS MANUAL AS A REFERENCE TOOL ONLY. NEITHER THE MANUFACTURER NOR DISTRIBUTOR MAKES ANY REPRESENTATION OR WARRANTY OF ANY KIND TO THE BUYER THAT HE OR SHE IS QUALIFIED TO MAKE ANY REPAIRS TO THE PRODUCT OR THAT HE OR SHE IS QUALIFIED TO REPLACE ANY PARTS OF THE PRODUCT. -
Page 13: Assembly Diagram
Assembly Diagram For technical questions, please call 1-800-444-3353; SKU 30224 Page 13 Troubleshooting section at end of manual. -
Page 14: Troubleshooting
IMPORTANT: Improper cleaning is a common reason for the unit not to work properly. Most problems can be avoided or remedied with prompt, thorough cleaning. The Patterns below resemble symptoms of spray pattern problems. Please refer to the accompanying possible problems if you are experiencing similar difficulties. The solution to each problem follows the problem in parentheses. - Page 15 Troubleshooting (continued) Problem Cause 1. Low material level 2. Cup tipped too far 3. Clogged Air Vent Sputtering Spray 4. Loose fluid inlet connections 5. Dry or loose fluid needle Packing Nut 6. Loose/damaged fluid tip/seat 1. No pressure at gun 2.
- Page 16 90 Day Warranty Harbor Freight Tools Co. makes every effort to assure that its products meet high quality and durability standards, and warrants to the original purchaser that this product is free from defects in materials and workmanship for the period of 90 days from the date of purchase. This warranty does not apply to damage due directly or indirectly, to misuse, abuse, negligence or accidents, repairs or alterations outside our facilities, criminal activity, improper installation, normal wear and tear, or to lack of maintenance.
Need help?
Do you have a question about the PAINT SPRAY GUN 30224 and is the answer not in the manual?
Questions and answers