Advertisement
Quick Links
1. Install the Trolley
Insert the column into the trolley base; then, put the trolley down and tighten the screws.
Main unit
supporting
board
Column
2. Install the Main Unit
Lock four casters of the trolley. Then, place the main unit securely on the trolley by aligning
three positioning columns under the main unit with three locating pins on the trolley, and
tighten screws.
3. Install the Breathing Circuit (Veta 5 Only)
a. Align the guiding post slots of the breathing system with the guiding post of the main unit
circuit connector, and fix the breathing circuit with screws.
b. Fix the fastener under the supporting board and insert the inner hexagon spanner into it.
c. Insert the microswitch cable plug into the slot.
Microswitch
cable plug
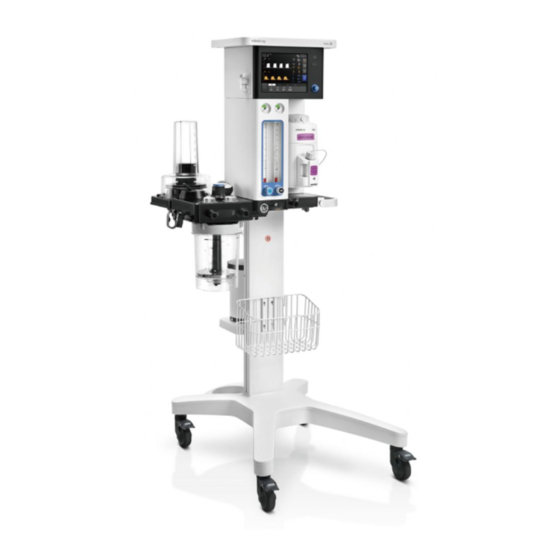
Veta 3/Veta 5 Installation Guide
Screws
Tools:
● M8X25 screws: 4
● Inner hexagon spanner
Positioning column
Screws
Tools:
● M8X25 screws: 4
● Inner hexagon spanner
Screws
Inner hexagon spanner
Tools:
● M8X25 screws: 3
● Inner hexagon spanner
4. Install the CO2 Absorbent Canister
Rotate the CO2 absorbent canister counterclockwise to fix it.
Check the
connector for
absorbent
particles.
5. Install the Bellows (Veta 5 Only)
a. Attach the bottom ring of the bellows to the bellows base and ensure that the bellows is
tightly connected to the base.
b. Align the bellows housing bayonet with the slots, and rotate it clockwise firmly.
6. Install the Basket
Hang the basket on the handrail of the machine directly or install it on the column.
Screws
Tools:
● M4X12 screws: 4
● Phillips screwdriver
Advertisement

Subscribe to Our Youtube Channel
Related Manuals for Mindray Veta 3


Summary of Contents for Mindray Veta 3
- Page 1 Veta 3/Veta 5 Installation Guide 1. Install the Trolley 4. Install the CO2 Absorbent Canister Insert the column into the trolley base; then, put the trolley down and tighten the screws. Rotate the CO2 absorbent canister counterclockwise to fix it.
- Page 2 Veta 3/Veta 5 Installation Guide 7. Install the Oxygen Generator Tray and Connector (Optional) 9. Install the Anesthesia Gas Filter Canister a. Fix the oxygen generator tray assembly to the column and trolley by using screws and the a. Place the anesthesia gas filter canister (self-prepared) on the weigher or the tray by fixing plate respectively.
Need help?
Do you have a question about the Veta 3 and is the answer not in the manual?
Questions and answers