
Related Manuals for Samsung SF-3100


Summary of Contents for Samsung SF-3100
- Page 1 InkJet Facsimile User Guide SF-3100/SF-3100T Please read this guide before you use this equipment.
- Page 2 ELECTRONICS Visit us at: http://www.samsungelectronics.com If you have access to this online service, you can download the User’s Guide and drivers from Samsung Electronics. P/N : JB68-00228A Rev. 1.00...
- Page 3 Important Precautions and Safety Information When using this fax machine, these basic safety precautions should always be followed to reduce risk of fire, electric shock, and injury to persons: 1. Read and understand all instructions. 2. Use common sense whenever operating electrical appliances. 3.
- Page 4 Unauthorized changes or modifications could void the user’s authority to operate the equipment. In the event your SAMSUNG fax machine appears to cause interference to other electronic equipment, it can often be easily remedied. First determine if the source of interference really is your FAX machine.
- Page 5 (2) identification of either business, business entity or individual sending the message; and (3) telephone number of either the sending machine, business, business entity or individual. See page 1.7 for instructions on how to enter this information into your Samsung FAX machine’s memory.
-
Page 6: Fcc Identification Number
Commission pursuant to procedures set out in FCC Rules and Regulations Subpart E of Part 68. You should also know that: • Your Samsung FAX machine is not designed to be connected to a digital PBX system. • Special features, such as “Call Waiting”, may interrupt FAX service, and we sug- gest that these services not be installed on the FAX line. -
Page 8: Table Of Contents
Reception Modes ... 3-6 Receiving in FAX Mode ... 3-7 Receiving in TEL Mode... 3-7 Receiving in AUTO Mode ... 3-8 Receiving in TAM Mode (SF-3100)... 3-8 Receiving in TAM Mode (SF-3100T)... 3-9 Receiving via an Extension Telephone... 3-10 Cancelling Reception ... 3-10 Voice Request... - Page 9 Table of Contents Answering a Voice Request ... 3-11 Chapter 4. The Answering Machine Recordng TAM Message (SF-3100T only) ... 4-2 Checking Your TAM Greeting Message ... 4-2 Monitoring an Incoming Call... 4-3 Erasing Old Messages You’ve Heard... 4-4 To Erase All Recorded Messages ... 4-4 To Erase a Selected Message...
- Page 10 Table of Contents Volume Setup... 6-12 Clearing Memory ... 6-13 Chapter 7. Care and Maintenance Cleaning the Document Scanner... 7-2 Replacing the Print Cartridge ... 7-4 Cleaning the Cartridge ... 7-6 Wiping the Print Nozzles and Contacts ... 7-6 Cleaning the Cartridge Carrier Contacts and Deflector ... 7-8 Cleaning the Printhead ...
-
Page 11: Chapter 1. Setup
Setup ETUP... -
Page 12: List Of Features
Answering messages for TAM mode Access from a remote telephone Message Paging (you can have the machine transfer a call when the caller leaves a message.) Call monitor Charge save 1. If your machine is SF-3100, you need to have an answering machine attached. -
Page 13: Familiarizing Yourself With Your New Machine
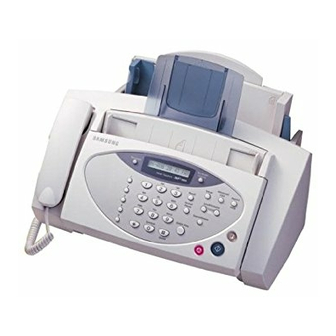
Familiarizing Take a moment to familiarize yourself with your new machine by looking at the pictures on the next few pages. Yourself with Your New Front View Machine Control Panel Document Exit Tray Rear View Connect extension phone or TAM (Tele- phone Answering Machine) here if applicable. - Page 14 Setup SF-3100T only Use to record or play outgoing message used in TAM Mode. Erase Use this to erase a message or all messages. Play Play incoming messages. Answer Activates the TAM Mode on/off. It lights when in TAM Mode, and blinks when a new message is recorded.
- Page 15 Number keypad Dial numbers manually as you would usually do with the telephone, or enter letters while setting up your machine. ➛➛(1) (SF-3100T only) Use to skip back to the previous message. ❿❿ (3) (SF-3100T only) Use to skip forward to the next message. Receive Mode/Contrast This button has two functions: When no document is loaded, pressing this button...
- Page 16 Setup You Now have learned what features each button covers. Now, let’s begin setting up your information such as fax name/number and date/time. There are two levels of setup: • Basic: Information such as fax name/number and date/time which must be entered before using the machine.
-
Page 17: Setting Fax Number/Name
Setting FAX Number/Name (Your Number and Name) Number/ This is very useful information for the recipient. It allows Name them to see who sent a fax and what number they should send a response to. You can choose from up to five IDs (Multiple ID), using different IDs for different recipients. -
Page 18: How To Enter Letters
Setup How to Enter Letters Note Note these instructions assume that the display is asking you to enter a name. Keypad Character Assignments (Space) 1 A B C 2 D E F 3 G H I 4 J K L 5 Press the appropriate button for the letter you want. -
Page 19: Time/Date Setup
Time/Date Setup The current date and time are shown in the display when the machine is on and ready for use (Standby Mode). The date and time will be printed on all faxes you send. Press Setup. Press ➛ ➛ ➛ ➛ or ❿ ❿ ❿ ❿ to choose ‘TIME/DATE SETUP’ and press Start/Enter. -
Page 20: Recording Tam Message (Sf-3100T Only)
Setup Recording The TAM (Telephone Answering Machine) message is an outgoing message (OGM) which plays whenever a call comes in and the machine is in TAM Mode. For more information about reception modes, see “Reception Modes” on page 3-6. Message (SF-3100T only) Now, you’re ready to use the TAM reception... -
Page 21: Chapter 2. Automatic Dialling
Automatic Dialling UTOMATIC IALLING... -
Page 22: One-Touch Dialling
Automatic Dialling One-Touch One-Touch dialling provides you with quick access to your most frequently used numbers. Before using One-Touch dial, Dialling you must first store a number into any of five One-Touch buttons located on the left of the machine’s Control Panel. Storing a Number for One-Touch Dial- ling Press and hold a One-Touch button for about... -
Page 23: Dialling A One-Touch Number
Enter the name by using the keypad. • If you do not want a name, just skip this step. You can assign up to 20 characters to a name. For more information, see “How to Enter Letters” on page 1-8. Press Start/Enter when you’re finished. -
Page 24: Speed Dialling
Automatic Dialling Speed Speed dialling allows you to quick dial your most frequently used numbers. You can easily access the numbers once you Dialling have stored them into two-digit Speed Dial locations. Note Storing a Number for Speed Dialling You can store up to 50 telephone or fax numbers in Speed Dial. -
Page 25: Dialling A Speed Number
Press Start/Enter. To store another Speed Dial location, repeat from step 2. Press Stop to exit when you’re finished. Dialling a Speed Number Press Speed. The display asks you to enter the location number. Enter a two-digit speed dial location number. Press Start/Enter to dial the number. -
Page 26: Group Dialling (For Multi-Address Transmission)
Automatic Dialling Group Group Dial uses the One-Touch button for quick access. Numerous Speed Dial numbers can be stored as a Group. By Dialling using the Group number, you can send a document to multiple (for Multi- parties through one operation. Your machine will dial the remote numbers in stored sequence. -
Page 27: Using Group Dialling (Multi-Address Transmission)
Press Stop when you have entered all the desired destinations. The display asks you to enter a name . Enter a name for the Group. If you don’t want to assign a name, skip this step. You can assign up to 20 characters to a name. - Page 28 Automatic Dialling...
-
Page 29: Chapter 3. The Fax Machine
The Fax Machine ACHINE... -
Page 30: Sending A Fax
The Fax Machine Sending a Sending a fax is very simple if you follow the instructions starting from here. They will describe how to load the document, set the resolution/contrast and dial the number. Loading Document Turn the page face down. Be sure that your document is dry and free of staples, paper clips, and other foreign objects. -
Page 31: Setting Document Resolution And Contrast
Setting Docu- We recommend you send documents printed using a typewriter, felt tip pen, black ink, or laserwriter. The paper ment Resolution should be white or very light, and of normal weight not and Contrast cardboard. Blue lines on a ruled pad don’t fax well. For more information on what kind of paper you can use for documents, see “Acceptable Documents (for ADF)”... -
Page 32: Sending A Fax Manually (After Talking)
The Fax Machine Sending a Fax Manually (after Talking) Pick up the handset. • For hands-off operation, press OHD/V.Req. The dis- play shows ‘PHONE.’ • To adjust the speaker volume, press ➛ or ❿ repeatedly to set the proper volume. Enter the number of the remote fax machine by using the number keypad. -
Page 33: Sending A Fax Automatically
Sending a Fax To send a fax automatically, you must have already stored numbers into either One-Touch button or two-digit Speed Dial Automatically locations, or Group Dial. To learn how to register One-Touch Dial, Speed Dial, or Group Dial, see “Automatic Dialling” on page 2-1. -
Page 34: Receiving A Fax
The automatic fax reception is turned off. You can receive a fax only by manually pressing Start/Enter. SF-3100/ Your fax machine will answer faxes automatically SF-3100T after the number of rings you specify. -
Page 35: Receiving In Fax Mode
Receiving in FAX Before receiving in FAX Mode, you have to set the machine to FAX Mode by pressing Rcv. Mode/Contrast repeatedly until Mode ‘ ❿ FAX MODE’ is displayed. Receiving in TEL Before receiving in TEL Mode, you have to set the machine to TEL Mode by pressing Rcv. -
Page 36: Receiving In Auto Mode
Receiving in TAM Before receiving in TAM Mode, you have to set the machine to TAM Mode by pressing Rcv. Mode/Contrast repeatedly Mode (SF-3100) until ‘ ❿ TAM MODE’ is displayed. • In Standby Mode, AUTO appears in the right hand corner of the display. -
Page 37: Receiving In Tam Mode (Sf-3100T)
Receiving in TAM If you are an SF-3100T user, Mode (SF-3100T) Mode by pressing the Answer button. Once you press Answer to turn TAM Mode on , the display briefly shows the time when the greeting message was recorded and shows countdown as the message is played back. -
Page 38: Receiving Via An Extension Telephone
The Fax Machine Receiving via an If you have an extension phone connected to your machine, Extension Tele- you can remote-control your fax machine to start receiving: phone Cancelling Press Stop to cancel reception at any time. Fax reception is cancelled and the machine returns to Standby Mode. -
Page 39: Voice Request
Voice If you need to speak to the person after sending or receiv- Request ing a fax, you can use Voice Request feature to alert the person at the remote site that you want to talk to him/her. You can also respond to a Voice Request made at the remote end. - Page 40 The Fax Machine 3-12...
- Page 41 This chapter is only for SF-3100T users. If your machine is SF-3100, please refer to the User’s Guide supplied by the answering machine manufacturer. All the instructions in this chapter assume that your fax machine is set to TAM Mode.
-
Page 42: Chapter 4. The Answering Machine
The Answering Machine Recordng The TAM (Telephone Answering Machine) message is an outgoing message (OGM) which plays whenever a call comes in and the machine is in TAM Mode. For more information about reception modes, see “Reception Modes” on page 3-6. Message (SF-3100T only) -
Page 43: Monitoring An Incoming Call
Monitoring Call Monitoring is useful for screening calls in case you do not want to be disturbed by the person calling. an Incoming To use this feature, you have to first set Call Monitoring ON Call through the TAM Options. To learn how to set this feature on or off, see “TAM Options (SF-3100T only)”... -
Page 44: Erasing Old Messages You've Heard
The Answering Machine Erasing The memory of your machine fills up as messages are recorded. Make room for new messages by erasing old messages that you have already listened to. If the memory becomes full while recording, your machine beeps a warning Messages and disconnects the line. -
Page 45: Playing Back Messages
Playing When there are messages waiting to be heard, the Answer button flashes and the display shows that you have new Back messages, for example, ‘NEW: 1 ICM: 3’. (‘NEW: 1’ Messages indicates there’s one new message, and ‘ICM: 3’ says that there are three incoming messages recorded in total.) Playing Back Newly Received Caller Messages... -
Page 46: Skipping Backward Or Forward
The Answering Machine Skipping Backward or Forward To skip backward To skip forward Press ! ! ! ! ! ! ! ! ➛ ➛ ➛ ➛ ➛ ➛ while listening to the message. ➛ ➛ • The machine skips back to the previous message and plays it. -
Page 47: Message Paging
Message When you’re out of the office or home and you want to be notified whenever there’s new message left on your machine, Paging you need to use the Message Paging feature supplied with your machine. In TAM Mode, you can set your machine to transfer incoming calls to another number. -
Page 48: Using The Answering Machine From A Remote Phone
The Answering Machine Using the You don’t need to be at the machine’s Control Panel to operate the answering machine. If you have access to a Touch-Tone Answering phone, you can operate many features, such as message Machine playback, regardless of where you are. To operate your machine from a remote phone, you need to from a enter a five-character: Remote Password. -
Page 49: Using Remote Commands
Using Remote The chart below describes which Remote Code you have to enter for remote operation: Commands Code Exits remote control mode. Changes the greeting message. After entering the command, speak into the handset. When you finish, press #. If you run out of recording time, the machine stops and plays back the message. Plays back all messages. - Page 50 The Answering Machine 4-10...
-
Page 51: Chapter 5. Advanced Fax
Advanced Fax DVANCED In this chapter, you will learn how to use the advanced fax features of your machine. For example, how to send the same documents to many different locations (Broadcasting) or how to set up your machine to send faxes at a preset time (Delayed fax). -
Page 52: Broadcasting
Advanced Fax Broadcasting With Broadcasting you can programme your machine to automatically scan and send documents to a number of different recipients. The documents are automatically erased from memory when Broadcasting is finished. Turn the document face down and feed it into the machine. - Page 53 Enter the name if you want to name the transmission. If not, skip this step. Press Start/Enter. The document will be scanned into memory before transmission. The display will show each number before starting each transmission. • If the scanned pages fill up the remaining memory, your fax machine will display ‘MEMORY FULL’...
-
Page 54: Delayed Fax
Advanced Fax Delayed You can set your machine to send a fax at a later time when you will not be present. Normally it is cheaper to send a fax at night because telephone rates are lower than they are during the day. - Page 55 Enter the name if you want to name the transmission. If not, skip this step. Press Start/Enter. The display shows the current time. Enter the time in 24-hour format. • For example, Enter 2230 for 10:30 P.M. • If you set a time earlier than the current time, the doc- ument will be sent at that time on the following day.
-
Page 56: Polling
Advanced Fax Polling Polling enables you (or a remote fax machine) to retrieve a document. This is useful when a person who has a document to be sent is leaving the office. The person who wants to receive the document at a later time places a call to the machine holding the original, and requests that the document be sent. -
Page 57: Setting Receive Polling
Setting Receive Polling Lift the handset or press OHD/V.Req and enter the telephone number of the remote machine. The remote machine must be in Send Polling state. Press Advanced FAX when you hear a fax tone from the remote machine. The display shows ‘RECEIVE POLLING?’. -
Page 58: To Cancel The Scheduled Job
Advanced Fax To Cancel All scheduled jobs remain in memory after they have been set. Cancel unnecessary scheduled jobs to make more memory available. Scheduled Press Advanced FAX and select ‘CANCEL SCHEDULE’ by pressing ➛ or ❿. Press Start/Enter. The display shows the assigned messages. Select the reserved transmission you want to cancel by pressing ➛... -
Page 59: Chapter 6. Special Features
Special Features PECIAL EATURES... -
Page 60: Redial/Pause
Special Features REDIAL/ The Redial/Pause button has two functions. You can use it to redial the number last called or one of the ten unique numbers PAUSE recently stored in memory. It can also be used to insert a pause in a number when you are setting up a One-Touch or Speed Dial number. -
Page 61: To Insert A Pause
To Insert a Pause With some private telephone systems, you must dial an access code (9, for example) and listen for a second dial tone before dialling an outside number. In such cases, you must insert a pause in the number when you are registering Auto Dial such as a One-Touch or Speed Dial number. -
Page 62: Chain Dialling
Special Features Chain When using special computer services, such as alternate long distance carriers, credit card calls, or bank-by-phone, you Dialling must dial the telephone number of the service and wait for the computer to answer before continuing. The length of time before the computer answers can vary, so using a pre- programmed pause after a service number is not advised. -
Page 63: User Reports
User Your fax machine can print reports containing useful information — Scheduled Info, System Data, Help report, etc. Reports The following reports are available: Help This report covers the machine’s basic functions and commands. It can also be used as a quick reference guide. Sent Journal and Received Journal These reports show information concerning the transmission and reception activities. -
Page 64: To Print A Report
Special Features Voice Status (SF-3100T only) This report shows the status of the recorded message (Outgoing and Incoming messages). You can see when you have received a message and if you’ve listened to it or not. Multi-Communication This report prints automatically if you have faxed documents to more than one location by using Broadcasting. -
Page 65: User Options
User Your fax machine has various user-selectable features. These options are preset at the factory, but you may need to change Options them.To find out how the options are currently set, print the System Data List. For more information on printing a report, see “To Print a report”... -
Page 66: System Setup Options
EXT. LINE socket (SF-3100 only) or equivalent. If you pick up the extension phone and hear a fax tone, Press the Rcv. Start Code then the fax will start receiving. The code is preset to * 9 * at the factory. -
Page 67: Special Features
Option DRPD MODE ‘Distinctive Ring’ is a telephone company service which enables a user to (Distinctive Ring use a single telephone line to answer several different telephone numbers. Pattern The particular number someone uses to call you on is identified by different Detection) ringing patterns, which consist of various combinations of long and short ringing sounds. - Page 68 Special Features Option CALLER ID You can see the number of the person calling you. (This option may Choose ON to turn on caller ID display. not work when Choose OFF to disable it. connected to a Note that the RCV. START CODE is disabled when this Caller ID option is PABX.) Before using the CALLER ID service, CALLER ID service must be installed on your telephone line by the telephone company.
-
Page 69: Tam Options (Sf-3100T Only)
TAM Options (SF-3100T only) OPTIONS CHARGE SAVE Lets you dial into your machine from a remote phone and check whether anyone has left a message without being charged. When Charge Saver is ON, the machine answers your call on the number of rings you have specified in the ‘Rings to Answer’... -
Page 70: Volume Setup
Special Features Volume You can selectively operate alarm and key volume. Setup 6-12 Press Setup. Press ➛ ➛ ➛ ➛ or ❿ ❿ ❿ ❿ button until the display shows ‘VOLUME SETUP’. Press Start/Enter. The display shows the type of volume you can choose. -
Page 71: Clearing Memory
Clearing You can selectively clear information stored in your machine’s memory. Memory Press Setup. Press ➛ ➛ ➛ ➛ or ❿ ❿ ❿ ❿ to choose ‘MEMORY CLEAR’. Press Start/Enter. The display shows the type of information you can clear from memory. Select what you want to delete by pressing ➛... - Page 72 Special Features 6-14...
-
Page 73: Chapter 7. Care And Maintenance
Care and Maintenance ARE AND AINTENANCE... -
Page 74: Cleaning The Document Scanner
Care and Maintenance Cleaning To keep your machine working properly, occasionally clean the White Roller, ADF Rubber, and the Scanning Glass. If they are dirty, documents sent to another fax machine won’t be clear. Document Scanner Note If you turn the power off to clean the scanner, documents stored in memory will be lost. - Page 75 Carefully wipe the Scanning Glass with a soft, dry cloth. If the glass is very dirty, first wipe it with a slightly dampened cloth, then with a dry one. Be careful not to scratch the glass surface. Replace the roller in reverse order, and then close the Control Panel firmly until it clicks into place.
-
Page 76: Replacing The Print Cartridge
Care and Maintenance Replacing The print cartridge includes the ink supply and the printhead. Each time you replace the print cartridge, you are replacing the Print the printhead as well. When you notice that the print becomes light or ‘INK LOW’ appears in the display, replace the print Cartridge cartridge. - Page 77 Insert the Cartridge in the Carrier, then push it firmly until it clicks into place. If the Cartridge moves loosely in the Carrier, it has not clicked into place. Repeat this step. Replace the Cartridge Compartment Cover and Control Panel. The display shows ‘NEW ’.
-
Page 78: Cleaning The Cartridge
Care and Maintenance Cleaning To maintain good printing quality, we recommend you occasionally wipe the Print Nozzles and Contacts as described below: Cartridge Wiping the Print Nozzles and Contacts When the print is not clear or dots are missing, the problem may be caused by dried ink on the: •... - Page 79 Gently blot and wipe the contacts and nozzles dry. Use a clean cloth dampened with water only to gently clean the entire copper-colored area, including the nozzles and contacts. To dissolve any dried ink, hold the damp cloth against the nozzles for about three seconds. Re-install the Cartridge and close the Cover and Panel.
-
Page 80: Cleaning The Cartridge Carrier Contacts And Deflector
Care and Maintenance Cleaning the Car- WARNING! Before cleaning these parts, there should be no scheduled job tridge Carrier such as Delayed FAX or Send Polling, etc. Once you have Contacts and unplugged the power cord from the machine, all the data will Deflector be lost. -
Page 81: Cleaning The Printhead
Cleaning If the nozzles seem to be clogged and characters are not printing completely, clean the printhead as described below: Printhead Care and Maintenance Press Setup and find ‘MAINTENANCE’ by pressing ➛ or ❿. Press Start/Enter and scroll to ‘CLEAN HEAD’ by pressing ➛... -
Page 82: Ink Level View
Care and Maintenance Ink Level Your machine allows you to check the amount of ink remaining. The machine displays a fractional number. For View examples, ‘1/8’ means that ink is low and you need to replace the cartridge.‘8/8’ means that a new cartridge is installed. To view the current ink level: 7-10 Press Setup and find ‘MAINTENANCE’... -
Page 83: Adjust Shading
Adjust The shading is adjusted at the factory. If, however, you drop and damage your machine while moving, we recommend you Shading adjust shading for optimized lightness. To adjust Shading, do as follows: Care and Maintenance Load a plain WHITE sheet of paper (no writing or graphics) into the loading slot. -
Page 84: Print Cartridge Maintenance
Care and Maintenance Print The print cartridge life is very sensitive to the content of the received fax or a copy you made. To increase its life, we Cartridge recommend you follow the instructions below: Maintenance 7-12 DO NOT unpack the cartridge until you are ready to use it. -
Page 85: Lcd Error Messages
LCD Error Messages Display RETRY REDIAL? DOCUMENT JAM LOAD DOCUMENT! NO ANSWER NO. NOT ASSIGNED POLLING ERROR SEND ERROR INK LOW MEMORY FULL MEMORY LOW NO CARTRIDGE CHECK PAPER RECEIVE ERROR MEMORY RECEIVED When it toggles with: INK LOW CHECK PAPER NO CARTRIDGE LOW BATTERY (SF-3100T Only) NO BATTERY (SF-3100T Only) -
Page 86: Fixing Problems
Care and Maintenance Fixing Your problem may be listed in “LCD Error Messages” on page 7-13. The chart below shows other problems you can Problems solve yourself. If not, call the service company shown in the “Guarantee.” on page 8-6. Fax Problems Problem The machine is not working, there is no... -
Page 87: Print Quality Problems
Print Quality Problems Problem Light or blurred characters. Smudged or dark characters. Characters with white lines. Improperly formed or misaligned characters. Abnormal black horizontal lines Paper Feeding Problems Problem Paper is jammed during printing. Paper sticks together. Paper fails to feed. Multiple sheets of paper feed. -
Page 88: Clearing Jams
Care and Maintenance Clearing Document Jams During Transmission Jams If a document jams during transmission or copying, ‘DOCUMENT JAM’ appears in the display. DO NOT pull the document out of the slot. Doing so could harm your machine. To clear document jam: 7-16 Open the Control Panel. -
Page 89: Paper Jams During Printing
Paper Jams Dur- If the fax paper jams while you are receiving or printing, ‘CHECK PAPER’ appears in the message. DO NOT pull it ing Printing out. Doing so could harm the fax machine. If the paper is jammed in the Received Paper Output Area Remove the jammed paper by pulling it out smoothly in the direction of the arrow as shown. - Page 90 Care and Maintenance 7-18...
-
Page 91: Chapter 8. Appendix
Appendix PPENDIX... -
Page 92: Specifications
Appendix Specifications Type of unit Communication System Public Switched Telephone Network (PSTN) and PABX Compatibility Compression scheme Modem speed Scanning method Input document size Effective scanning width 8.27 inches (210 millimeters) Effective recording width 8 inches (203 millimeters) Power consumption Temperature range Humidity range Dimension (WxDxH) -
Page 93: Paper Type And Sizes (For The Asf)
Paper Type and Sizes (for the ASF Satisfactory print and receive quality can be obtained with many types of plain paper. Since the quality of plain paper varies widely, test the print quality before buying large quantities of paper. Your machine uses a variety of papers including: •... -
Page 94: Acceptable Documents (For Adf)
Appendix Acceptable Documents (for ADF Document Size Effective Scanning Width Number of sheets which can be loaded at a time Thickness of document Paper Quality For multiple sheets, all pages of the document must be the same size and paper type. DO NOT try to send documents that are: •... -
Page 95: A Sample Of Itu 4% Chart (Reduced To 60.5%)
Appendix A Sample of ITU 4% Chart (reduced to 60.5%) - Page 96 InkJet Facsimile Installation Guide SF-3100/SF-3100T Please read this guide before you use this equipment.
- Page 97 ELECTRONICS P/N : JB68-00227A Rev. 1.00...
-
Page 98: Important
Important Precautions and Safety Information When using this fax machine, these basic safety precautions should always be followed to reduce risk of fire, electric shock, and injury to persons: 1. Read and understand all instructions. 2. Use common sense whenever operating electrical appliances. 3. -
Page 100: Common Parts
Make Sure Everything Is in the Box Once you have unpacked your machine, check to make sure you have all the parts shown here. If any piece is missing or broken, contact your dealer. Common Parts Machine Handset Coiled Handset Cord Document Exit Tray Document Tray AC Power Cord... - Page 101 Installation Familiarizing Yourself with Your New Machine Take a moment to familiarize yourself with your new machine by looking at the pictures on the next few pages. Front View Document Exit Tray Control Panel Document Guide Document Tray Paper Tray...
- Page 102 Rear View AC Power Socket EXT. LINE Socket (SF-3100 only) Installation EXT.LINE TEL.LINE HANDSET TEL. LINE Socket Handset Cradle Handset...
-
Page 103: Guarantee
It is at least 4 inches away from other objects. • Its cords won’t get in the way. • It can’t be easily knocked off a table or dropped. • It is neither dusty nor dirty. Connection Diagram AC power cord EXT.LINE TEL.LINE HANDSET Extension phone (option) (SF-3100 only) -
Page 104: Document Tray
HandSet Plug one end of the coiled cord into the jack on the handset. Then plug the other end into the modular jack on the left side of the machine. Document Tray Insert the two tabs on the Document Tray into the slot on the top of your machine. -
Page 105: Document Exit Tray
Installation Document Exit Tray Insert both ends of the Document Exit Tray into the slots on the front of your machine. Telephone Line Plug one end of the telephone line cord into the TEL. LINE jack and the other end into a standard phone wall jack. -
Page 106: Ac Power Cord
Installation Extension Phone (Optional, SF-3100 only) Plug the cord of your extension phone into the TAM Lead and plug the TAM Lead into the socket marked on the back of the machine. EXT.LINE TEL.LINE HANDSET AC Power Cord Plug one end of the cord into the back of the machine and the other end into a standard, grounded AC socket. - Page 107 Installation Backup Battery (SF-3100T only) The battery maintains the setup configuration and messages when a power failure occurs or when power is accidentally disconnected. We recommend you use an alkaline battery because it lasts longer than a conventional battery. The battery can maintain the internal memory for about 20 hours. If the backup battery is weak or missing, the LCD displays a warning message.
-
Page 108: Loading Paper
Loading Paper To receive faxes or make copies, you should load the paper in the ASF (Automatic Sheet Feeder). You can load approximately 100 sheets of paper. Pull the Paper Support on the ASF all the way up. Before loading papers, push down the Failure to do so will result in paper jams while copying or receiving a fax. -
Page 109: Installing Print Cartridge
Installation Installing Print Cartridge When the machine is powered up without the print cartridge installed, the LCD displays ‘NO CARTRIDGE ’. Press Setup. The display shows ‘CHANGE CARTRIDGE’ Press (Start/Enter). Open the Control Panel ( ) and the Cartridge Compartment Cover ( ) with your hand. - Page 110 Insert the print cartridge in the carrier. Push the cartridge firmly in the direction of the arrow until it clicks into place. Close the cover and replace the Control Panel after installing the print cartridge. The display shows ‘NEW ’. Press ➛ or ❿ to make your selection. Press (Start/Enter) after selecting ‘NEW’...
-
Page 111: Making A Copy
Installation Making a Copy Copy a document to verify proper machine operation. You can copy single or multiple page documents. Turn the page face down and insert it into the document feeder. Adjust the document guide to match the width of the document. Feed the document into the machine.
Need help?
Do you have a question about the SF-3100 and is the answer not in the manual?
Questions and answers