Table of Contents
Advertisement
Advertisement
Table of Contents

Related Manuals for ELGA MEDICA-R200 - US


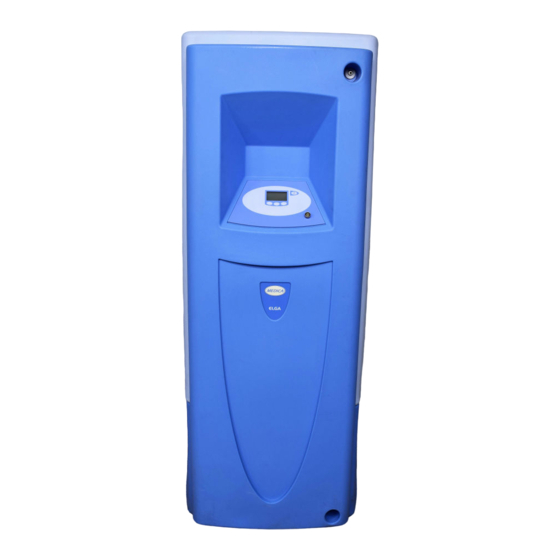
Summary of Contents for ELGA MEDICA-R200 - US
- Page 1 MEDICA-R200 - US Operator Manual...
- Page 3 MEDICA-R200 - US Operator Manual...
- Page 5 ELGA LabWater is a trading name of VWS (UK) Ltd. ELGA® is the global laboratory water brand name of Veolia Water. ELGA®, PURELAB®, MEDICA® and CENTRA® are trademarks of ELGA LabWater.
-
Page 6: Table Of Contents
TABLE OF CONTENTS INTRODUCTION ..............4 Product Range ............4 Use of this Manual ............4 Customer Support ............4 HEALTH AND SAFETY NOTES .......... 5 Electricity ..............5 Pressure ..............5 Sanitization Chemicals ..........5 Control of Substances Hazardous to Health (COSHH)5 PRODUCT AND PROCESS DESCRIPTION ...... - Page 7 10.3 RO sanitization (Process on) ........43 10.4 Recirculation sanitization .......... 44 EMERGENCY BY-PASS ............ 46 TROUBLE SHOOTING ............47 CONSUMABLES AND ACCESSORIES ......49 KEY TO CONTROL PANEL ..........50 14.1 Alarm Conditions ............52 14.2 Replacement Timers ..........53 WARRANTY/CONDITIONS OF SALE .......
-
Page 8: Introduction
INTRODUCTION Product Range This operator manual has been prepared for the product models: MEDICA - R200 US 115 V ac 60 Hz MEDICA - R200 US 230 V ac 50 Hz Use of this Manual This manual contains full details on installation, commissioning and operation of the MEDICA unit. -
Page 9: Health And Safety Notes
1% of Minncare Cold Sterilant has a pH of 3.5. Control of Substances Hazardous to Health (COSHH) Material safety data sheets covering the various replaceable components are available upon request. Contact your local ELGA LabWater distributor. MEDICA - R200 US Version 01 08/14 Page 5... -
Page 10: Product And Process Description
PRODUCT AND PROCESS DESCRIPTION Product Description The MEDICA range of water purification units has been specifically designed to distribute and maintain purified water for laboratory, medical and industrial applications. The supply of purified water is obtained from either an external source or internal technologies. Purified water may be distributed around the installation under pressure to single or multiple points of use. -
Page 11: Process Description
Process Description MEDICA - R200 US • Feed water enters through a control valve (V1), and through a particulate filter (FH1) into the inlet of the RO pump (P1). Pressure in the pipework of the pump inlet is monitored with a pressure switch (PSW1) to ensure that the pump cannot run without sufficient water. -
Page 12: Flow Diagram For Medica - R200 Us
• The purified water is then passed through the UV (UV1) chamber where it is exposed to intense UV radiation to provide continuous bacterial control and to promote the cleavage of organic molecules before passing through an absolute 0.2µm bacterial and particulate filter. The difference in pressure between PG3 and PG4 can be used to monitor the condition of the filter. -
Page 13: Technical Specification
If in doubt contact your local ELGA LabWater representative who will be able to provide guidance and support on the pretreatment requirements for specific water types. - Page 14 Dimensions Height 1820 mm (71.7") Width 730 mm (28.75") Depth 890 mm (35") Supply weight 180 kg (396 lb) Operational weight 530 kg (1,168 lb) Installation Floor Connections Inlet ¾" bsp Sanitization Drain ¾" bsp Reservoir drain ¾" bsp Ion-exchange cylinder inlet ¾"...
- Page 15 User Interface Display Continuous graphical quality display. Graphical flow schematic on screen with mimic display. Backlit display with Intuitive Icons. Adjustable settings Date / time Adjustable Display viewing Angle Adjustable electronically RO permeate water quality Selectable Alarm setpoints alarm Selectable (MΩ.cm or µS/cm) Product water quality unit Product water quality alarm Selectable Alarm setpoints...
- Page 16 Output to operate 24 V dc relay. Ion-exchange cylinder installed (Nuclear or Hypex grade). *** System to be regularly sanitized and installed following ELGA LabWater installation design guidelines. As part of our policy of continual improvement we reserve the right to alter the specifications given in this document.
-
Page 17: Permeate Flowrate Vs. Temperature
RO Permeate Flowrate vs. Temperature Nominal Permeate Flowrate vs Temperature Flow (L/Hr) MEDICA - R200 US Version 01 08/14 Page 13... -
Page 18: Installation Instructions
2 x Sanitization tubes. Note: Ion-exchange cylinders external pipe work and pre-treatment are not included with the MEDICA. Please contact your local ELGA LabWater representative to ensure that the correct water treatment technologies are selected for your application. Positioning the MEDICA Before installation and operation of the MEDICA unit, please read and observe the following points. - Page 19 The unit is in Installation Category II, Pollution Degree 2, as per IEC1010-1. Service Access It is recommended that sufficient allowance be made for accessing components on the rear of the product, which may require servicing or replacement during its life in the field.
-
Page 20: Connecting The Medica
FOLLOW the manufacturer recommendations for External hydraulic connections the selected pipework systems and install suitable adapters into the connection manifolds of the MEDICA. Refer to ‘Ringmain/Loop Installation Guide’ available from ELGA LabWater Technical Support examples of preferred pipework construction and assembly. Note: The connection size on the MEDICA is ¾"bspp in... - Page 21 Schematic of typical MEDICA - R200 US distribution loop MEDICA - R200 US Version 01 08/14 Page 17...
- Page 22 Step 2 - Electrical supply connection WARNING! FAILURE TO CORRECTLY INSTALL THE ELECTRICAL SUPPLY COULD RESULT IN DEATH. IF IN DOUBT CONTACT A QUALIFIED ELECTRICAN. ENSURE a suitable cable is available to connect the MEDICA to the electrical supply. Note: It is recommended that the unit is connected to a local isolator with a single phase industrial 32 amp plug.
- Page 23 CAUTION! The termination of cables should comply with local wiring regulations. All earth connections should be made using ring tags that are attached to the cable using the correct crimping tool. 14. CONNECT the supply earth to the central earthing point on the electrical back plate along with the earth wire from the electrical cover.
-
Page 24: Controls
CONTROLS The MEDICA operates with a tactile membrane control panel, which has a graphics display window and four-programmable function control buttons. Details of how to use the controls will be given in the appropriate sections. The MEDICA control panel has a range of control icons. General operational icons are as follows. -
Page 25: Passkeys
Note: The ELGA PASSkey does not prevent access to the PROCESS function in case of emergency. SWITCH on the main electrical supply to initialize the controller set-up sequence. This takes several Present the PASSkey seconds. - Page 26 Note: The system remains unlocked providing button presses are made within a fixed time period (5 seconds). A series of set-up screens will now be displayed. Various control icons are used to allow you to step through the set-up instruction process. These icons include: A “scroll”...
- Page 27 Step 5 - Water purity unit setting This screen allows preferred displayed units of water purity to be set, to either, MΩ.cm or µS/cm. This only affects the quality measurement in the recirculation loop. PRESS SCROLL to change mode (MΩ.cm or µS/cm) PRESS TICK ...
- Page 28 Ω Note: The alarm points are only displayed in M and do not change to µS/cm regardless of the water purity unit displayed setting. TICK to proceed to step 9. PRESS TICK . Step 9 - RO permeate temperature alarm settings TS1 This screen is used for selecting the value at which the RO permeate temperature alarm will activate.
- Page 29 Step 12 - Periods of operation To maximize efficiency and reduce the likelihood of heat build up the normal operational hours for the installation can be selected. During ‘OFF’ periods the unit will automatically enter recirculation for a period of 10 minutes every two hours to maintain water purity within the distribution loop.
- Page 30 Step 15 - Auto-restart This allows the selection of the AUTO/MANUAL restart option. If auto restart selected the unit will automatically restart after a power failure. In manual mode the unit will remain in standby. PRESS SCROLL to change mode ( = ON) PRESS TICK ...
- Page 31 ENSURE the RS485 network is correctly installed and terminated as described in ‘ELGA LabWater Installation Guide - RS485 Local area Network design considerations installation guide’ (Available from ELGA LabWater Technical Support). POWER ON remote control stations. PRESENT user PASSkey (any colour) at each remote display in the order that you wish them to be registered.
-
Page 32: Setting Up Replacement Timers / Reminders
Setting Up Replacement Timers / Reminders Step 1 - Enter consumable replacement timer set-up ENSURE process is off and the initiation screen is showing. PRESENT the Master PASSkey. PRESS to enter the replacement timers. Step 2 - CVF replacement date (if fitted) PRESS RESET button to reset CVF Filter Replacement Date PRESS TICK ... - Page 33 Step 6 - Sanitization reminder PRESS RESET button to reset 0.2µm Filter Replacement Date PRESS TICK to accept Replacement Date and complete settings. PRESS TICK confirm that resetting is required χ Sanitization reminder screen PRESS CROSS to abort reset. PRESS TICK .
-
Page 34: Commissioning
The initiation is complete when the display shows three lines of text. CONFIRM that the display states the correct unit type. If incorrect contact your local ELGA LabWater representative. Step 4 - Water supply The water supply to the MEDICA should be installed correctly as described in Section 4.3, Step 1. - Page 35 Step 5 - Initial rinse PRESS PROCESS. MEDICA will attempt to start the RO system. WARNING! THE MEDICA WILL AUTOMATICALLY GO INTO A RINSE PROCEDURE TO RINSE BACTERIOSTATIC AGENTS FROM THE UNIT. THIS RINSE MUST BE COMPLETED; PROCESS FUNCTION WILL INHIBITED UNTIL RINSE...
- Page 36 To adjust the pressure in the distribution loop requires specialist equipment and it is recommended that changes are made by an ELGA LabWater service Engineer. Step 8 - Sanitization SANITIZE the system as described in Section 10 - Sanitization Procedures.
-
Page 37: Operation
OPERATION MEDICA has the following modes of operation: • Continuous Recirculation (24/7). • Night service/Operational day. • Sanitization Cycle (See Section 10 - Sanitization Procedures). Night service/Operational day Refer to Section 5 - Step 12 and 13. MEDICA can be programmed to operate on specific days between selected times. -
Page 38: Monitoring
Reservoir volume Consumable dates The consumable dates and periods of reminder are adjustable to meet specific applications by a trained ELGA LabWater Service Engineer. Step 1 - View consumable dates ENSURE unit is in normal operation. PRESS to view consumable dates. -
Page 39: Maintenance
MAINTENANCE CVF filter (LC156) An approved supplier or distributor should carry out any maintenance work not detailed in this handbook. If further information is required on any aspect of maintenance please UV lamp contact Customer Service. (LC158) WARNING! ALWAYS CHECK THAT MAINS ELECTRICAL POWER AND FEED WATER... -
Page 40: Replacing Ro Particulate Filter Lc159
14. RESET the consumable reminder as described in Section 5.3, Step 2. Replacing RO particulate filter LC159 The RO particle filter protects the system against particles in the feed water and released from pre-treatment media and installation debris. The replacement of this filter is recommended in the following circumstances. -
Page 41: Replacing Bacterial And Particulate Filter Lc160
Replacing bacterial and particulate filter LC160 The bacterial and particulate filter should be replaced in the following circumstances: Depressurize button • When indicated by the consumable alarm or after a maximum of six months. • Water purity in the installation starts to deteriorate. •... -
Page 42: Replacement Of Uv Lamp Lc158
Replacement of UV lamp LC158 The UV lamp should be replaced in the following circumstances: • When indicated by the consumable alarm. • After a maximum of six months use. • Water purity in the installation starts to deteriorate. Step 1 - Replacement of UV lamp ENSURE process is OFF and ISOLATE power. -
Page 43: Installation / Replacement Of Ion-Exchange Cylinder
OPEN bypass valve (V7). REMOVE connections to ion-exchange cylinder making a note of the connection orientation. Ion-exchange cylinder REMOVE cylinder and contact you local ELGA LabWater representative to arrange for replacement. INSTALL new cylinder ensuring correct connection orientation. RINSE cylinder ensuring all air is bled from the system. -
Page 44: Sanitization Procedures
SANITIZATION PROCEDURES The unit is sanitized to destroy the bacteria within the pipework, and reservoir. Please read this entire section to become familiar with the procedure before you start. RO sanitization is recommended once a month to maintain low bacterial counts. Additionally, recirculation sanitization is recommended every 12 months. -
Page 45: Sanitization Selection (Process Off)
10.1 Sanitization selection (Process off) ENSURE the unit is in the process off mode. PRESENT sanitization PASSkey. PRESS TICK PRESS SCROLL to type of sanitization required. PRESS TICK 10.2 RO sanitization (Process off) SELECT RO sanitization - ‘insert sanitant’ icon will appear PRESS CROSS to escape. - Page 46 10. Once complete an alarm will sound (4 seconds). 11. REMOVE filter bowl. 12. Remove chemical tube (TUBE37548). 13. INSTALL new filter (FILT50011). 14. REFIT filter bowl (tighten with filter spanner). 15. PRESS TICK 16. PRESS TICK to accept next sanitization reminder PRESS SCROLL to delete reminder.
-
Page 47: Sanitization (Process On)
10.3 RO sanitization (Process on) Note: To enter this mode of sanitization the level in the reservoir must be >240litres. If sufficient water is not available the unit will not allow access the relevant menu. If the recirculation loop is stopped due to an alarm or manual intervention it is not possible to restart the loop without completing the RO sanitization. -
Page 48: Recirculation Sanitization
18. PRESS TICK 19. PRESS TICK to accept next sanitization reminder PRESS SCROLL to delete reminder. 10.4 Recirculation sanitization SELECT recirculation sanitization. AUTOMATIC level adjustment in the reservoir will occur (start point between 60 - 90 liters). The display will tell you if reservoir needs to be filled or drained, PRESS process. - Page 49 19. RECOMMISION cylinder - See section 9.5 - Installation/replacement of ion-exchange cylinder. 20. REFIT (LC160) 0.2µm filter - See section 9.3 - Replacing bacterial and particulate filter. 21. STORE sanitization tube (TUBE37548) in safe place. 22. PRESS TICK to complete process. ...
-
Page 50: Emergency By-Pass
EMERGENCY BY-PASS In the event of a system breakdown it is possible to maintain a purified water supply to critical applications. Operation of the emergency by-pass is only recommended under extreme circumstances (e.g. electrical supply failure, product breakdown, etc). The life of consumables will be greatly reduced and it is recommended that the ion-exchange cylinder and bacterial and particulate filter be replaced before and after use of the emergency by-pass. -
Page 51: Trouble Shooting
The audible alarm can be silenced by pressing the mute button. If the unit cannot be repaired using this manual, please call your local ELGA LabWater representative (See Section 16.0 - Useful addresses). - Page 52 PASSkey not valid. Request registration with recognized Master PASSkey holder. If problem persists call Customer Services. Master PASSkey not Contact ELGA LabWater recognized If problem persists call Customer Services. Pumps not running Check thermal overloads in electrical enclosure. but power on.
-
Page 53: Consumables And Accessories
CONSUMABLES AND ACCESSORIES Cat No Consumable Max. Max. Service Shelf Life* Life LC156 Composite vent filter 2 years months LC157 Bacterial vent filter 2 years months LC158 UV lamp 254nm 1 years 2 years (42 watt) LC159 RO particle pre- 2 years treatment filter months... -
Page 54: Key To Control Panel
KEY TO CONTROL PANEL ICON DESCRIPTION ICON DESCRIPTION Accept PASSkey Leak Auto restart detection Scroll back Locked Level sensor Step back disconnect Bell Menu Standby Mute alarm Bypass DI Night Calibration Node point Cancel Option OFF sample Cancel Option ON Rinse Output Clock... - Page 55 ICON DESCRIPTION ICON DESCRIPTION Fast timer Reset Feed Right Fill Sample Sanitization Filter PASSkey Insert filter Sanitization reminder Filter recirc. Sanitization loop rinse Add chemical Scroll Low pressure Transport switch mode Pressure Recirc Viewing angle MEDICA - R200 US Version 01 08/14 Page 51...
-
Page 56: Alarm Conditions
(PSV1 ) see Section 6 step sensor circuit). Poorly set pump by-pass. Warning! Adjustment of the pump by-pass should only be made by ELGA trained service engineers. Inlet pressure to RO pump low – check pre-treatment Low feed pressure... -
Page 57: Replacement Timers
14.2 Replacement Timers Screen Replacement Reference Vent filter replacement See section 5.3 - step 2. RO particle filter See section 5.3 - step 4. replacement 0.2µm filter replacement See section 5.3 - step 5. UV lamp replacement See section 5.3 - step 3. Sanitization reminder See section 5.3 - step 6. -
Page 58: Warranty/Conditions Of Sale
WARRANTY/CONDITIONS OF SALE ELGA Labwater is a trading name of VWS (UK) Ltd. General Limited Warranty VWS (UK) Ltd warrants the products manufactured by it against defects in materials and workmanship when used in accordance with applicable instructions for a period of one year from the date of shipment for the products. - Page 59 are not authorised and, if given, should not be relied upon. In the event of a breach of the foregoing warranty, VWS (UK) Ltd sole obligation shall be to repair or replace, at its option, any product or part thereof that proves to be defective in materials or workmanship within the warranty period, provided the customer notifies VWS (UK) Ltd promptly of any such defect.
-
Page 60: 16. Useful Contact Details
+44 (0) 203 567 7300 Fax: +44 (0) 203 567 7205 E-mail: techsupport@elgalabwater.com For the address of your nearest ELGA LabWater Sales and Service office visit the country list on our website http://www.elgalabwater.com or contact ELGA at the number above.
Need help?
Do you have a question about the MEDICA-R200 - US and is the answer not in the manual?
Questions and answers