Panasonic CZ-RTC6 Installation Instructions Manual
Wired remote controller
Hide thumbs
Also See for CZ-RTC6:
- Installation instructions manual (60 pages) ,
- Operating instructions manual (32 pages) ,
- Operating instructions manual (28 pages)
Table of Contents
Advertisement
Available languages
Available languages
Read through the Installation Instructions before you proceed with the installation.
In particular, please carefully read the "Safety Precautions".
This booklet mainly mentions the safety-related regulatory matters.
E
NGLISH
Regarding the contents of the installation, please scan the matrix two-dimensional (2D) barcode
3-9
and refer to the detailed manuals. Panasonic will accept no responsibility for any accident or damage
that occurs as a result of such improper installation in any way not described in the detailed manuals.
Also, malfunction caused by incorrect installation is not covered by the product warranty.
Lisez les instructions d'installation avant de commencer l'installation.
Vous devrez notamment lire les « Consignes de sécurité ».
Ce livret décrit principalement des questions réglementaires et de sécurité.
F
Pour des explications sur l'installation, veuillez scanner le code barres 2D de la matrice et vous
RANÇAIS
reporter aux manuels détaillés. Panasonic n'assume aucune responsabilité pour tout accident ou
10-16
dommage qui se produit à la suite d'une mauvaise installation eff ectuée d'une manière qui n'est
pas décrite dans les manuels détaillés. De plus, le dysfonctionnement provoqué par une installation
incorrecte n'est pas couvert par la garantie du produit.
Lea las Instrucciones de instalacion antes de proceder con la instalacion del equipo.
En concreto, deberá leer detenidamente la sección "Precauciones de seguridad".
En este folleto se describen principalmente las cuestiones relacionadas con la seguridad y reglamentarias.
E
Si desea consultar explicaciones relativas a la instalación, escanee el código de barras 2D de matriz
SPAÑOL
y consulte los manuales detallados. Panasonic no aceptará responsabilidad alguna derivada de
17-23
accidentes o daños resultantes de una instalación inadecuada realizada de formas no descritas en
los manuales detallados. Además, la garantía del producto no incluye los fallos de funcionamiento
ocasionados por una instalación incorrecta.
Lesen Sie die Installationsanleitung aufmerksam durch, bevor Sie mit der Installation beginnen.
Insbesondere müssen die „Sicherheitshinweise " gründlich durchgelesen werden.
Diese Broschüre beschreibt hauptsächlich sicherheitsrelevante und regulatorische Angelegenheiten.
D
Für Erläuterungen, die die Installation betreff en, scannen Sie bitte den Matrix-2D-Barcode und
EUTSCH
beziehen sich auf die detaillierten Handbücher. Panasonic übernimmt keinerlei Haftung für
24-30
irgendwelche Unfälle oder Schäden, die durch eine unsachgemäße Installation auf eine nicht in den
detaillierten Handbüchern beschriebene Weise verursacht werden. Auch Funktionsstörungen, die
durch eine falsche Installation verursacht werden, sind nicht von der Produktgarantie abgedeckt.
Leggere le Istruzioni di installazione prima di procedere con l'installazione.
È opportuno leggere soprattutto le "Precauzioni di Sicurezza".
Questo opuscolo descrive principalmente argomenti inerenti la sicurezza e normativi. Per le
I
TALIANO
spiegazioni riguardanti l'installazione, scansionare il codice a barre 2D a matrice e fare riferimento
31-37
ai manuali dettagliati. Panasonic declina ogni responsabilità per incidenti o danni derivanti da
un'installazione inadeguata, eseguita diversamente da come descritto nei manuali dettagliati.
I malfunzionamenti causarti da un'installazione errata inoltre non sono coperti dalla garanzia.
Panasonic Corporation
1006 Kadoma, Kadoma City, Osaka, Japan
https://eu.datanavi.ac.smartcloud.panasonic.com/documents/
Installation Instructions
Wired Remote Controller
CZ-RTC6
Model No.
ACXF60-38390
W0520-0
Advertisement
Chapters
Table of Contents

Related Manuals for Panasonic CZ-RTC6


Summary of Contents for Panasonic CZ-RTC6
- Page 1 Regarding the contents of the installation, please scan the matrix two-dimensional (2D) barcode and refer to the detailed manuals. Panasonic will accept no responsibility for any accident or damage that occurs as a result of such improper installation in any way not described in the detailed manuals.
- Page 2 59-65 Firma Panasonic nie ponosi odpowiedzialności za jakiekolwiek wypadki lub uszkodzenia powstałe w wyniku niewłaściwej instalacji przeprowadzonej w sposób nieopisany w szczegółowych instrukcjach obsługi. Ponadto, usterki spowodowana przez nieprawidłową instalację nie są objęte gwarancją produktu.
-
Page 3: Table Of Contents
Contents Page Page z Safety Precautions ……………………… 3 z Mounting …………………………………… 6 z Part Names (Control panel) ……………… 4 z Setting ……………………………………… 9 z Installation Precautions ………………… 5 z Specifications …………………………… 9 Safety Precautions Read before installation z Read the Installation Instructions carefully to install the remote controller correctly and safely. Be sure to read the “Safety Precautions”... -
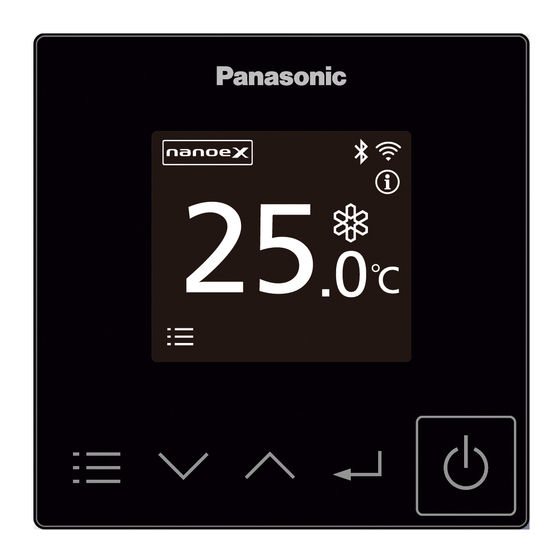
Page 4: Part Names (Control Panel)
CAUTION zDo not use the remote controller at the following locations. • Location where condensation occurs • Location where fl ammable gases, etc. may leak • Location where corrosive gases, etc. may leak • Location with lots of water or oil droplets (including machine oil) •... -
Page 5: Installation Precautions
Installation Precautions Installation location z Install at the height of 1 to 1.5 m from the floor (Location where average room temperature can be detected). 50 mm z Install vertically against a wall or suitable supporting structure. z Keep a space around the remote controller as detailed on 50 mm 50 mm the figure shown left. -
Page 6: Mounting
When setting both the main and sub remote controllers After installation, set one remote controller to [Main] and the other to [Sub] for [Main/sub] for “Setting”. When using the remote controllers* in combination, set the CZ-RTC6 unit to [Sub]. *CZ-RTC5B Note Remote controllers can be connected to any indoor unit for operation. - Page 7 Mount to the wall. There are 2 types of wall-mounting methods: Exposed type and Embedded type. Attention Mounting the bottom case z Tighten the screws securely until the screw heads touch the bottom case. (Otherwise, loose screw heads may hit the PCB and cause malfunction when mounting the top case.) z Do not over-tighten the screws.
- Page 8 Embedded type Mount the top case. Mount the bottom case to ● Align the claws of the top the wall. Pass the wire under the rib. case and then align the ● Pass the wire through the claws of the bottom case. wiring hole in the bottom case.
-
Page 9: Setting
(Press to finish.) DEUTSCH • Default setting : ENGLISH FRANÇAIS Specifications Model No. CZ-RTC6 Dimensions (H) 86 mm × (W) 86 mm × (D) 25 mm Weight 0.09 kg 0 ˚C to 40 ˚C / 20 % to 80 % Temperature/ Humidity range (no condensation)*Indoor use only. - Page 10 FRANÇAIS Table des Matieres Page Page z Consignes de sécurité ………………… 10 z Montage ………………………………… 13 z Vue générale (Panneau de commande) ………11 z Configuration …………………………… 16 z Précautions d’installation …………… 12 z Spécifications …………………………… 16 Consignes de sécurité Lire avant installation z Lisez attentivement les Instructions d’installation pour une installation correcte et en toute sécurité...
- Page 11 MISE EN GARDE zNe pas utiliser la télécommande dans les endroits suivants: • Lieu où de la condensation est générée • Lieu d’où des gaz infl ammables, etc. peuvent s’échapper • Lieu d’où des gaz corrosifs, etc. peuvent s’échapper • Lieu avec projection de gouttelettes d’eau ou d’huile (y compris l’huile de machine) •...
- Page 12 Précautions d’installation Installation de la télécommande z Installer la télécommande à une hauteur comprise en 1 et 1,5 m du sol (Dans un endroit où il est possible de détecter 50 mm la température ambiante moyenne). z Installez verticalement contre un mur ou une structure porteuse adaptée. z Conservez un espace autour de la télécommande comme le 50 mm 50 mm...
- Page 13 Lors du réglage des télécommandes princ./sec. Après l’installation, reglez une télécommande sur [princ.] et l’autre sur [sec.] pour [princ./sec.] pour « Configuration ». Lors de l’utilisation des télécommandes* en association, réglez l’unité CZ-RTC6 sur [sec.]. *CZ-RTC5B Remarque Il est possible de brancher les appareils sur n’importe quelle unité intérieure pour l’utilisation.
- Page 14 Montage mural de la télécommande. Il y a 2 types de méthodes de fi xation au mur : Le type exposé et le type intégré. Attention Eff ectuez le montage du boîtier inférieur z Serrez bien les vis jusqu’à ce que leur tête touche le boîtier inférieur. (Sinon, les têtes de vis lâches peuvent toucher la carte de circuit imprimé...
- Page 15 Montage encastré Eff ectuez le montage du Eff ectuez le montage mural du boîtier supérieur. boîtier inférieur. • Alignez les pattes du boîtier • Passer le fil à travers le trou de Vue agrandie supérieur, puis alignez les câblage du boitier inférieur. pattes du boîtier inférieur.
- Page 16 → (Appuyez pour quitter.) FRANÇAIS • Réglage par défaut:ENGLISH Spécifications Modèle n° CZ-RTC6 Dimensions (H) 86 mm × (L) 86 mm × (P) 25 mm Poids 0,09 kg 0 °C à 40 °C / 20% à 80% (pas de condensation) Plage de Température/Humidité...
-
Page 17: Precauciones De Seguridad
ESPAÑOL Contenido Página Página z Precauciones de seguridad ………… 17 z Instalación ……………………………… 20 z Ajuste …………………………………… 23 z Nombre de las piezas z Especificaciones ……………………… 23 (Sección de funcionamiento) …………… 18 z Precauciones para la instalación …… 19 Precauciones de seguridad Leer antes de la instalación z Lea detenidamente las Instrucciones de instalación para instalar el mando a distancia de forma correcta y segura. -
Page 18: Nombre De Las Piezas (Sección De Funcionamiento)
PRECAUCIÓN zNo utilice el mando a distancia en los lugares que fi guran a continuación: • Un lugar en el que se produzca condensación • Un lugar en el que puedan producirse fugas de gas infl amables, etc. • Un lugar en el que puedan producirse fugas de gas corrosivo, etc. •... -
Page 19: Precauciones Para La Instalación
Precauciones para la instalación Lugar de la instalación z Instale a una altura de entre 1 y 1,5 m del suelo (lugar donde se puede detectar la temperatura media de la habitación). 50 mm z Instale verticalmente contra una pared o una estructura de soporte adecuada. -
Page 20: Instalación
Tras la instalación, ajuste un mando a distancia en [Ppal] y el otro en [Secund] en [Ppal/secund] para “Ajuste”. Cuando utilice los mandos a distancia* en combinación, ajuste la unidad CZ-RTC6 en [Secund]. *CZ-RTC5B Nota Los mandos a distancia pueden conectarse a cualquier unidad interior para su funcionamiento. - Page 21 Instalación en pared. Hay 2 tipos de métodos de montaje en la pared: Tipo expuesto y tipo empotrado. Atención Instalación de la carcasa inferior z Atornille los tornillos hasta que la cabeza de los mismos toque la carcasa inferior. (Una cabeza de tornillo demasiado fl oja puede golpear la placa de circuitos impresos y provocar fallos de funcionamiento al instalar la carcasa superior.) z No apriete los tornillos excesivamente.
- Page 22 Tipo empotrado Instale la carcasa superior. Instale la carcasa inferior en • Alinee los cierres de la carcasa la pared. superior y, a continuación, haga lo • Pase el cable a través del Vista ampliada Retire el recubrimiento. Aprox. 9 mm mismo con la carcasa inferior.
-
Page 23: Ajuste
(Pulse para terminar.) DEUTSCH • Configuración por defecto:ENGLISH FRANÇAIS Especificaciones N.º de modelo CZ-RTC6 Dimensiones (Al.) 86 mm x (An.) 86 mm x (Prof.) 25 mm Peso 0,09 kg 0 °C a 40 °C / 20% a 80% (sin condensación) Temperatura/Rango de humedad * Solo para uso interior. -
Page 24: Sicherheitshinweise
DEUTSCH Inhalt Seite Seite z Sicherheitshinweise …………………… 24 z Montage ………………………………… 27 z Bedienelemente (Bedienfeld) ……… 25 z Einstellungen …………………………… 30 z Montagehinweise ……………………… 26 z Technische Daten ……………………… 30 Sicherheitshinweise Vor der Installation sorgfältig durchlesen z Lesen Sie die Installationsanleitung sorgfältig durch, um die Fernbedienung korrekt und sicher zu montieren. Bitte lesen Sie vor der Montage unbedingt die „Sicherheitshinweise“. -
Page 25: Bedienelemente (Bedienfeld)
ACHTUNG zDie Fernbedienung darf nicht an Orten verwendet werden, • an den sich Kondensat bilden kann, • an denen entzündliche Gase oder ähnliches vorkommen können, • an denen korrosive Gase oder ähnliches vorkommen können, • an denen Wasser- oder Öltropfen (einschließlich Maschinenöl) in größeren Mengen auftreten, •... -
Page 26: Montagehinweise
Montagehinweise Einbauort z Die Fernbedienung sollte in einer Höhe von 1 bis 1,5 m über dem Boden angebracht werden, wo die typische 50 mm Raumtemperatur gemessen wird. z Die Montage ist senkrecht an einer Wand oder einer geeigneten Tragfläche vorzunehmen. 50 mm 50 mm z Lassen Sie wie links dargestellt einen Bereich um die... -
Page 27: Montage
Einstellen von Haupt- und Neben-Fernbedienung Stellen Sie nach der Montage bei einer Fernbedienung die Einstellung [Haupt-/Neben-FB] auf [Haupt-FB] und bei der anderen auf [Neben-FB] ein. Wenn Fernbedienungen* in Kombination verwendet werden, stellen Sie das CZ-RTC6-Gerät als [Neben-FB] ein. *CZ-RTC5B Hinweis Die Fernbedienung kann an ein beliebiges Innengerät angeschlossen werden. - Page 28 Montage an der Wand. Es gibt 2 Arten der Wandmontage: Off ener Typ und integrierter Typ. Wichtig Montage des Gehäuseunterteils z Drehen Sie die Schrauben soweit ein, bis die Schraubenköpfe das Gehäuseunterteil berühren, da herausstehende Schraubenköpfe sonst beim Anbringen des Gehäuseoberteils auf die Platine drücken und zu Funktionsstörungen führen können.
- Page 29 Unter Putz verlegtes Anschlusskabel Montage des Gehäuseoberteils. Montage des • Rasten Sie das Oberteil zuerst oben, Gehäuseunterteils an der dann unten auf dem Unterteil ein. Wand. Vergrößerte Ansicht Isolieren Sie die Aderenden auf ca. • Wenn die Leitung schwer zu bewegen •...
-
Page 30: Einstellungen
→ (Zum Abschließen drücken.) DEUTSCH • Standardeinstellung:ENGLISH FRANÇAIS Technische Daten Modellbezeichnung CZ-RTC6 Abmessungen 86 mm × 86 mm × 25 mm (H x B x T) Gewicht 0,09 kg Einsatzgrenzwerte Temperatur / 0 bis 40 °C / 20 bis 80% r. F. (ohne Kondensation) Luftfeuchte * Nur für den Einsatz in Innenräumen vorgesehen. - Page 31 ITALIANO Contenuti Pagina Pagina z Precauzioni di Sicurezza ……………… 31 z Montaggio ……………………………… 34 z Nomenclatura parti (Pannello di controllo) … 32 z Impostazione …………………………… 37 z Precauzioni di Installazione ………… 33 z Specifiche ……………………………… 37 Precauzioni di Sicurezza Leggere prima dell’installazione z Leggere attentamente le istruzioni per l’installazione per installare il telecomando correttamente e in modo sicuro.
- Page 32 CAUTELA zNon utilizzare il telecomando nei seguenti siti. • Siti in cui si verifi ca condensa • Siti in cui potrebbero esserci perdite di gas infi ammabili, ecc. • Siti in cui potrebbero esserci perdite di gas corrosivi, ecc. • Siti con grosse perdite di acqua o olio (incluso olio di macchina) •...
- Page 33 Precauzioni di Installazione Sito di Installazione z Installare ad un’altezza da 1 a 1,5 m dal pavimento (posizione in cui può essere rilevata la temperatura media 50 mm della stanza). z Installare verticalmente contro una parete o una struttura di supporto adeguata.
- Page 34 Quando si impostano sia il telecomando principale che quello secondario Dopo l’installazione, impostare un telecomando su [Princ] e l’altro su [Second.] per [Princ/second.] in “Impostazione”. Quando si utilizzano i telecomandi* in combinazione, impostare l’unità CZ-RTC6 su [Second.]. *CZ-RTC5B Nota I telecomandi possono essere collegati a qualsiasi unità interna per l’operazione.
- Page 35 Montare sulla parete. Esistono 2 tipi di metodi di montaggio a parete: tipo esposto e tipo incorporato. Attenzione Montaggio della copertura del tasto z Stringere bene le viti fi nché le teste delle viti non toccano la copertura inferiore. (Altrimenti, le teste delle viti allentate potrebbero battere contro il PCB e causare malfunzionamenti al momento del montaggio della copertura superiore.) z Non stringere le viti eccessivamente.
- Page 36 Tipo a incastro Montare la copertura superiore. Montare la copertura inferiore • Allineare le griffe della copertura sulla parete. superiore e poi allineare le griffe • Far passare il filo attraverso il Rimuovere il rivestimento. Circa Vista ingrandita della copertura inferiore. foro di cablaggio nella cassa 9 mm •...
- Page 37 (Premere per confermare.) DEUTSCH Impostazione predefinita:ENGLISH FRANÇAIS Specifiche Modello N. CZ-RTC6 Dimensioni (H) 86 mm × (W) 86 mm × (D) 25 mm Peso 0,09 kg Da 0 °C a 40 °C / da 20% a 80% (Niente condensa) Intervallo temperatura/umidità...
- Page 38 NEDERLANDS Inhoud Pagina Pagina z Veiligheidsvoorschriften ……………… 38 z Montage ………………………………… 41 z VBenaming van de onderdelen z Instelling ………………………………… 44 (Besturingspaneel) ……………………… 39 z Specificaties …………………………… 44 z Voorzorgen bij installatie ……………… 40 Veiligheidsvoorschriften Lezen voordat u de afstandsbediening installeert z Lees de installatie-instructies zorgvuldig om de afstandsbediening correct en veilig te installeren.
- Page 39 OPGELET zGebruik de afstandsbediening niet in volgende locaties. • Locatie waar condensvorming kan ontstaan • Locatie waar brandbare gassen enz. kunnen lekken • Locatie waar corrosieve gassen enz. kunnen lekken • Locatie met veel water- of oliedruppels (waaronder machineolie) • Locatie waar dikwijls spanningsschommelingen zijn •...
- Page 40 Voorzorgen bij installatie Locatie van de installatie z Installeer op een hoogte van 1 tot 1,5 m vanaf de ondergrond (locatie waar gemiddelde kamertemperatuur 50 mm gemeten kan worden). z Installeer verticaal tegen de muur of een geschikte draagstructuur. 50 mm 50 mm z Houd ruimte rondom de afstandsbediening vrij zoals de afbeelding links toont.
- Page 41 Wanneer zowel de primaire als secundaire afstandsbedieningen worden ingesteld Zet na de installatie één afstandsbediening op [Main] (Primair) en de andere op [Sub] (Secundair) voor [Main/sub] (Primair/secundair) voor “Instelling”. Als de afstandsbedieningen* gecombineerd gebruikt worden, zet het apparaat CZ-RTC6 dan op [Sub] (Secundair). *CZ-RTC5B Opmerking Afstandsbedieningen kunnen voor de werking worden gekoppeld met elk binnenapparaat.
- Page 42 Monteer aan de wand. Er zijn 2 methodes van wandmontage: Zichtbare type en ingebouwde type. Opgelet De montageplaat monteren z Draai de schroeven goed vast tot ze de montageplaat raken. (Anders kan de kop van losse schroeven de printplaat raken en de oorzaak van storing zijn, wanneer de afdekplaat wordt gemonteerd) z Draai de schroeven niet te strak aan.
- Page 43 Type inbouw Monteer de afdekplaat. Monteer de achterplaat aan • Richt de klemmen van de de wand. afdekplaat en vervolgens die van • Voer de draad door het Verwijder de beschermlaag. Vergroot aanzicht de achterplaat. Ongeveer 9 mm draadgat in de achterplaat. •...
- Page 44 → DEUTSCH (Druk om te voltooien.) FRANÇAIS • Standaardinstelling:ENGLISH Specificaties Modelnummer. CZ-RTC6 Afmetingen (H) 86 mm × (B) 86 mm × (D) 25 mm Gewicht 0,09 kg 0 ˚C tot 40 ˚C / 20% tot 80% (niet condenserend) Temperatuur/vochtigheidsbereik * Uitsluitend voor gebruik binnenshuis.
- Page 45 PORTUGUÊS Índice Página Página z Precauções de segurança …………… 45 z Montagem ……………………………… 48 z Nomes das partes (Painel de control) ………… 46 z Configuração …………………………… 51 z Precauções de instalação …………… 47 z Precauções de instalação …………… 51 Precauções de segurança Ler antes da instalação z Leia atentamente as Instruções de instalação para instalar o telecomando de forma correta e com segurança.
- Page 46 CUIDADO zNão utilize o telecomando nos locais indicados em seguida. • Locais onde ocorra condensação • Locais onde possa ocorrer fuga de gases infl amáveis, entre outros • Locais onde possa ocorrer fuga de gases corrosivos, entre outros • Locais onde exista muita água ou gotas de óleo (incluindo óleo de máquina) •...
- Page 47 Precauções de instalação Local de instalação z Instale num local onde a altura ao solo seja de 1 a 1,5 m (um local onde seja possível detetar a temperatura 50 mm ambiente média). z Instale verticalmente numa parede ou estrutura de suporte adequada.
- Page 48 Quando configurar o telecomando principal e o telecomando secundário Depois de concluir a instalação, configure um telecomando como [Main] (Principal) e o outro como [Sub] (Secundário) na opção [Main/sub] (Principal/secundário) de “Configuração”. Quando usar os telecomandos* combinados, defina a unidade CZ-RTC6 para [Sub] (Secundário). *CZ-RTC5B Nota É...
- Page 49 Instale na parede. Existem 2 tipos de métodos de montagem na parede: Tipo exposto e tipo incorporado. Atenção Montar a placa inferior z Aperte fi rmemente os parafusos até que a cabeça dos parafusos toque na placa inferior. (Se não o fi zer, a cabeça de parafusos soltos pode tocar na placa de circuito impresso (PCB) e provocar uma avaria quando montar a placa superior.) z Não aperte demasiado os parafusos.
- Page 50 Tipo embutido Monte a placa superior. Instale a placa inferior na • Alinhe os grampos da placa parede. superior e, em seguida, alinhe • Passe o fio pelo orifício na Vista ampliada Retire o revestimento. Aprox. 9 mm os grampos da placa inferior. estrutura inferior.
- Page 51 (Prima para terminar.) DEUTSCH FRANÇAIS • Configuração padrão:ENGLISH Especificações N.º do modelo CZ-RTC6 Dimensões (A) 86 mm × (L) 86 mm × (P) 25 mm Peso 0,09 kg Intervalo da temperatura/ 0 ˚C a 40 ˚C / 20% a 80% (sem condensação) humidade * Apenas utilização interior.
- Page 52 TÜRKÇE İçindekiler Sayfa Sayfa z Güvenlik Önlemleri …………………… 52 z Monte Etme ……………………………… 55 z Parçaların Adları (Kontrol paneli) ……… 53 z Ayar ……………………………………… 58 z Kurulum Önlemleri …………………… 54 z Teknik Özellikler ………………………… 58 Güvenlik Önlemleri Kurulumdan önce okuyun z Uzaktan kumandayı...
- Page 53 DİKKAT zUzaktan kumandayı aşağıdaki konumlarda kullanmayın. • Yoğuşma oluşan konumlar • Tutuşabilir gazların sızabileceği konumlar • Aşındırıcı gazların sızabileceği konumlar • Çok fazla su veya yağ damlacıkları (makine yağı dâhil) içeren konumlar • Sıkça gerilim dalgalanması olan konumlar • Elektromanyetik ışıma üreten bir makinenin bulunduğu konumlar •...
- Page 54 Kurulum Önlemleri Kurulum konumu z Zeminden 1 ila 1,5 m yüksekliğe kurun (ortalama oda sıcaklığının algılanabileceği konum). 50 mm z Duvara veya uygun bir destekleyici yapıya dikey yerleştirerek kurun. z Uzaktan kumandanın etrafında, soldaki şekilde ayrıntıları 50 mm 50 mm verildiği gibi boşluk bırakın.
- Page 55 Hem ana hem de alt uzaktan kumandalar ayarlanırken Kurulumdan sonra, “Ayar” kısmında [Main/sub] (Ana/alt) için bir uzaktan kumandayı [Main] (Ana), diğerini [Sub] (Alt) olarak ayarlayın. Uzaktan kumandaları* birlikte kullanırken, CZ-RTC6 ünitesini [Sub] (Alt) olarak ayarlayın. *CZ-RTC5B Uzaktan kumandalar, çalıştırma için herhangi bir iç üniteye bağlanabilir.
- Page 56 Duvara monte edin. 2 tip duvara montaj yöntemi vardır: Sıva üstü ve Sıva altı tip. Dikkat Alt kasayı monte etme z Vidaları, vida kafaları alt kasaya ulaşana kadar iyice sıkın. (Aksi halde, üst kasa monte edilirken gevşek vida kafaları PCB’ye çarpabilir ve arızaya neden olabilir.) z Vidaları...
- Page 57 Gömülü tip Üst kasayı monte edin. Alt kasayı duvara monte edin. • Üst kasanın tırnaklarını, • Kabloyu alt kasadaki kablo ardından da alt kasanın deliğinden geçirin. Büyütülmüş görüntü Kaplamayı çıkarın. Yaklaşık. 9 mm tırnaklarını hizalayın. • Kabloyu hareket ettirmek zorsa, alt kasadaki vidayı gevşetin, kabloyu düzeltin ve •...
- Page 58 (Bitirmek için basın.) DEUTSCH • Varsayılan ayar:ENGLISH FRANÇAIS Teknik Özellikler Model No. CZ-RTC6 Boyutlar (Y) 86 mm × (G) 86 mm × (D) 25 mm Ağırlık 0,09 kg 0 °C ila 40 °C / %20 ila %80 (Yoğuşmasız) Sıcaklık/Nem aralığı...
- Page 59 POLSKI Spis treści Strona Strona z Środki ostrożności …………………… 59 z Mocowanie ……………………………… 62 z Nazwy elementów (Panel sterowania) …… 60 z Ustawienia ……………………………… 65 z Środki ostrożności dotyczące instalacji ……… 61 z Dane techniczne ……………………………… 65 Środki ostrożności Przeczytać przed instalacją z Przeczytaj uważnie instrukcję...
- Page 60 UWAGA zNie stosować urządzenia zdalnego sterowania w następujących lokalizacjach: • miejscach występowania zjawiska kondensacji; • miejscach możliwego wycieku gazów palnych itp.; • miejscach możliwego wycieku gazów korozyjnych itp.; • miejscach pojawiania się dużej ilości kropli wody lub oleju (włącznie z olejem maszynowym); •...
- Page 61 Środki ostrożności dotyczące instalacji Miejsce instalacji z Zainstalować na wysokości 1–1,5 m od podłogi (w miejscu, gdzie można zmierzyć średnią temperaturę w pomieszczeniu). 50 mm z Montować pionowo przy ścianie lub odpowiedniej konstrukcji nośnej. z Należy zachować odstęp wokół zdalnego sterownika, jak przedstawiono na rysunku po lewej stronie.
- Page 62 Podczas ustawiania zarówno głównego jak i zależnych urządzeń zdalnego sterowania Po instalacji ustawić jedno urządzenie zdalnego sterowania na [główne], a inne na [podrzędne] dla [główne/ podrzędne] przy „Ustawienia”. W przypadku korzystania ze zdalnych sterowników* w kombinacji, należy ustawić jednostkę CZ-RTC6 jako [podrzędne]. *CZ-RTC5B Uwaga Urządzenia zdalnego sterowania mogą...
- Page 63 Montaż do ściany. Istnieją 2 typy montażu ściennego: typ wystający i typ wbudowany. Ważne Montaż dolnej części obudowy z Dokręcić dokładnie śruby do momentu, gdy łby wkrętów zetkną się z dolną częścią obudowy. (niedokręcone łby śrub mogą zetknąć się z płytką PCB i spowodować usterkę...
- Page 64 Typ wbudowany Montaż górnej części obudowy. Montaż dolnej część obudowy • Zrównać zatrzaski górnej części do ściany. obudowy i dolnej części obudowy. • Przewód należy przeciągnąć Widok powiększony • Jeśli okablowanie trudno przez otwór na okablowanie w Usunąć izolację, ok. 9 mm przesunąć, należy poluzować...
- Page 65 (Naciśnij, aby zakończyć.) DEUTSCH FRANÇAIS • Ustawienie domyślne:ENGLISH Dane techniczne Nr modelu CZ-RTC6 Wymiary (WYS.) 86 mm × (SZER.) 86 mm × (GŁ.) 25 mm Masa 0,09 kg Temperatura / zakres 0 ˚C do 40 ˚C / 20% do 80% (bez skraplania) wilgotności...
-
Page 66: Важные Инструкции По Безопасности
РУССКИЙ Содержание Стр. Стр. z Важные инструкции по безопасности …… 66 z Установка ……………………………… 69 z Основные функции (Панель управления) z Настройка ……………………………… 72 z Предосторожности при установке ………… 68 z Технические характеристики ……… 72 Важные инструкции по безопасности Прочитайте перед установкой z Внимательно... -
Page 67: Основные Функции (Панель Управления)
ПРЕДОСТЕРЕЖЕНИЕ zНе используйте пульт дистанционного управления в следующих местах. • Места, где происходит конденсация • Места, где возможна утечка горючих газов и т. п. • Места, где возможна утечка коррозионных газов и т. п. • Места, где много капель воды или масла (включая машинное... -
Page 68: Предосторожности При Установке
Предосторожности при установке Место установки z Устанавливайте на высоте 1-1,5 метра от уровня пола (в таком месте, где можно определить среднюю температуру в помещении). 50 мм z Устанавливайте вертикально на стене или подходящей опорной конструкции. z Оставьте вокруг пульта дистанционного управления свободное 50 мм... -
Page 69: Установка
При использовании главного и подчиненного пультов дистанционного управления После установке настройте один пульт дистанционного управления как [Главный], а другой — как [Подчиненный] в пункте [Главный/подчиненный], как описано в разделе «Настройка». При использовании пультов дистанционного управления* в сочетании задайте для пульта CZ-RTC6 значение [Подчиненный]. *CZ-RTC5B Примечание... - Page 70 Установите на стену. Существует 2 типа настенной установки: наружный и встроенный Внимание Установка верхнего модуля z Плотно затяните винты, пока они не коснутся нижнего модуля. (В противном случае при установке верхнего модуля головки неплотно закрученных винтов могут удариться о печатную плату, что приведет к неисправности.) z Не...
- Page 71 Встроенная установка Установите верхний модуль. Установите нижний модуль • Выровняйте лапки верхнего на стене. Увеличенное Снимите покрытие. Прибл. 9 мм модуля, после чего выровняйте • Проденьте провод в изображение лапки нижнего модуля. отверстие для проводки в • Если проводку трудно переместить, нижнем...
-
Page 72: Настройка
DEUTSCH (Нажмите для завершения.) Настройка по умолчанию:ENGLISH FRANÇAIS Технические характеристики Название модели CZ-RTC6 Габариты (В) 86 мм x (Ш) 86 мм x (Г) 25 мм Вес 0,09 кг Диапазон эксплуатации от 0 ˚C до 40 ˚C / от 20% до 80% (без конденсата) температуры/влажности... - Page 73 УКРАЇНСЬКА Зміст Сторінка Сторінка z Запобіжні заходи ……………………… 73 z Монтаж …………………………………… 76 z Назви елементів (Панель керування) …… 74 z Налаштування ………………………… 79 z Запобіжні заходи при монтажі ………… 75 z Специфікація …………………………… 79 Запобіжні заходи Прочитайте перед установкою z Ретельно...
- Page 74 УВАГА zНе використовуйте пристрій дистанційного керування у наступних місцях: • у місцях, де утворюється конденсат; • у місцях, де може статися витік горючих газів і т.д.; • у місцях, де може статися витік агресивних газів і т.д.; • у місцях з великою кількістю крапель води або масла (включаючи...
- Page 75 Запобіжні заходи при монтажі Місце монтажу z Встановіть пристрій на висоті від 1 до 1,5 м від підлоги (місце, де можна визначити середню кімнатну температуру). 50 мм z Установлюйте пристрій вертикально відносно стіни або іншої придатної опорної конструкції. z Залиште вільний простір навколо пульта дистанційного 50 мм...
- Page 76 При установці основного і допоміжного пристрою дистанційного керування Після установки налаштуйте один пристрій дистанційного керування як [Main] (Головний), а інший — як [Sub] (Допоміжний) в розділі [Main/sub] (Головний/допоміжний пульт) меню «Налаштування». За використання кількох пультів дистанційного керування* установіть для пристрою CZ-RTC6 значення [Sub] (Допоміжний). *CZ-RTC5B Примітка...
- Page 77 Прикріпіть до стіни. Існують 2 типи настінного встановлення: зовнішній та вбудований. Увага Встановлення нижньої частини корпусу z Надійно затягніть гвинти, щоб їх головки торкнулися нижньої частини корпусу. (Незатягнуті гвинти при монтажі верхньої частини корпусу можуть пошкодити плату і викликати несправність.) z Не...
- Page 78 Прихований тип установки Встановіть верхню Прикріпіть нижню частину частину корпусу. корпусу до стіни. Збільшене • Порівняйте засувки верхньої • Проведіть дріт через отвір зображення Видаліть ізоляцію. Близько 9 мм частині корпусу, а потім порівняйте для електропроводки в нижній засувки нижньої частини корпусу. частині...
- Page 79 ( Натисніть, щоб завершити.) DEUTSCH FRANÇAIS Налаштування за замовчуванням:ENGLISH Специфікація № моделі CZ-RTC6 Розміри (В) 86 мм x (Ш) 86 мм x (Г) 25 мм Вага 0,09 кг Діапазон робочих температур/ від 0 ˚C до 40 ˚C / від 20% до 80% (Відсутність конденсату) вологості...
- Page 80 Authorized representative in EU Panasonic Testing Centre Panasonic Marketing Europe GmbH Winsbergring 15, 22525 Hamburg, Germany © Panasonic Corporation 2020 Printed in China Panasonic Corporation ACXF60-38390 http://www.panasonic.com W0520-0...