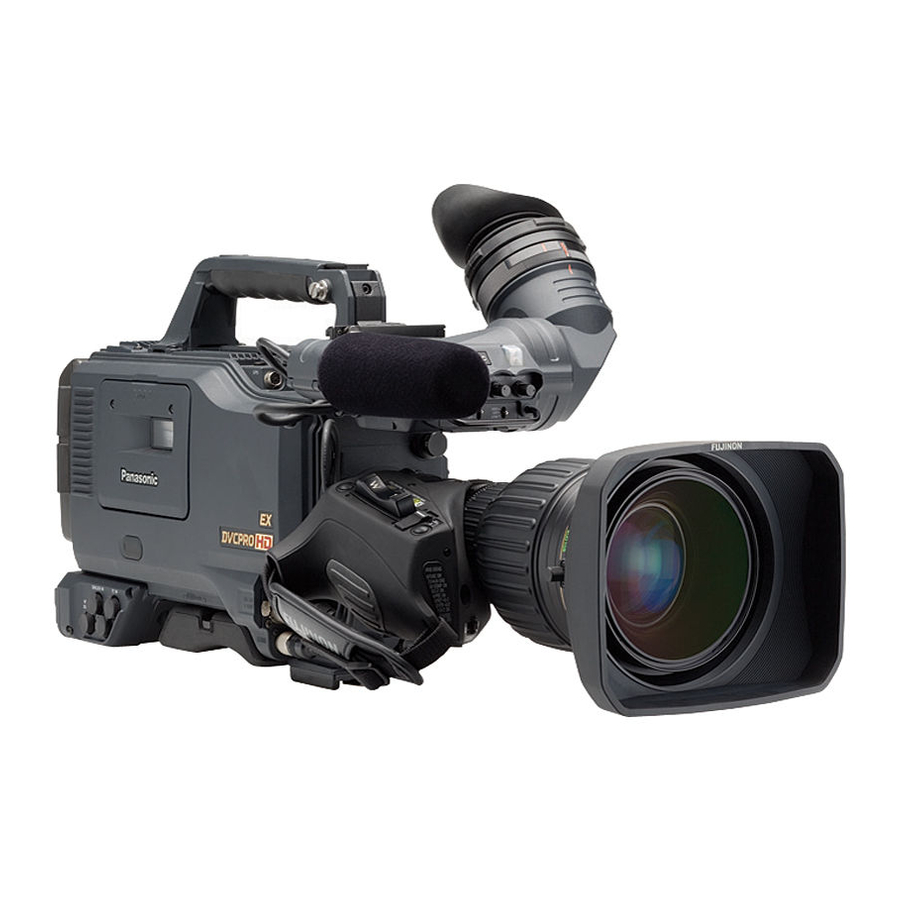
Panasonic AJ AJ-HDX900 Operating Instructions Manual
Camera-recorder
Hide thumbs
Also See for AJ AJ-HDX900:
- Specifications (8 pages) ,
- Operating instructions manual (134 pages)

Related Manuals for Panasonic AJ AJ-HDX900


Summary of Contents for Panasonic AJ AJ-HDX900
-
Page 1: Operating Instructions
Before operating this product, please read the instructions carefully and save this manual for future use. F0706W0 -F @ Printed in Japan Operating Instructions Camera-Recorder Model No. ENGLISH VQT0X86... - Page 2 Read this first! CAUTION RISK OF ELECTRIC SHOCK DO NOT OPEN CAUTION: TO REDUCE THE RISK OF ELECTRIC SHOCK, DO NOT REMOVE COVER (OR BACK). NO USER SERVICEABLE PARTS INSIDE. REFER TO SERVICING TO QUALIFIED SERVICE PERSONNEL. The lightning flash with arrowhead symbol, within an equilateral triangle, is intended to alert the user to the presence of uninsulated “dangerous voltage”...
- Page 3 Read this first! $ DO NOT REMOVE PANEL COVERS BY UNSCREWING THEM. To reduce the risk of electric shock, do not remove the covers. No user serviceable parts inside. Refer servicing to qualified service personnel. CAUTION: TO REDUCE THE RISK OF FIRE OR SHOCK HAZARD AND ANNOYING INTERFERENCE, USE THE RECOMMENDED ACCESSORIES ONLY.
-
Page 4: Read This First
Read this first! O Batteries are used for the main power source and memory back-up in the product. At the end of their useful life, you should not throw them away. Instead, hand them in as small chemical waste. O Voor de primaire voeding en het reservegeheugen van het apparaat wordt gebruikgemaakt van een batterij. -
Page 5: Table Of Contents
Contents Chapter 1 General ... 7 1-1 Features of the camera unit ... 7 1-2 Features of the VTR unit ... 8 1-3 Features of the Input/Output unit ... 8 1-4 Other featuresa ... 9 1-5 Dimensions drawing ... 9 1-6 System configuration ... - Page 6 Contents (continued) 5-4 Audio input signal preparations ... 86 5-4-1 When using the front microphone ... 86 5-4-2 When using a wireless receiver ... 86 5-4-3 When using an audio component ... 87 5-5 Mounting the unit on a tripod ... 87 5-6 Attaching the shoulder belt ...
-
Page 7: Chapter 1 General
Chapter 1 General The AJ-HDX900 is a video camera-recorder that integrates an HD camera part equipped with a progressive scan (full pixel reading) 3-CCD camera unit featuring a 2/3-inch on-chip lens with a VTR that in turn supports the DVCPRO HD EX format. The progressive scan CCD produces high quality pictures with superior image expression. -
Page 8: Features Of The Vtr Unit
Chapter 1 General (continued) 1-2 Features of the VTR unit O DVCPRO HD EX format system The VTR unit employs the DVCPRO HD EX recording format. Using the latest compression technology, it achieves two times the economy of the conventional DVCPRO HD format. -
Page 9: Other Featuresa
Chapter 1 General (continued) 1-4 Other features O Single action shoulder pad slide function It is now possible to adjust the position where the unit is optimally balanced for operation using a single-touch action. This means that the operator can easily optimize the unit’s balance when the lens, battery, and other peripheral camera devices have been installed on the unit. -
Page 10: System Configuration
Chapter 1 General (continued) 1-6 System configuration UniSlot wireless Microphone kit: microphone receiver: AJ-MC900G Sennheiser EK3041 2-inch electronic HD viewfinder: AJ-HVF21G (Mic holder provided) Microphone holder: AJ-MH800G Lens (Bayonet type): Fujinon, Canon GPS unit: AJ-GPS900G Camera-Recorder: (This unit is not AJ-HDX900 available in European region.) -
Page 11: Chapter 2 Parts And Their Functions
Chapter 2 Parts and their functions 2-1 Power supply and accessory mounting section 1 POWER switch This switch turns the power ON and OFF. 2 Battery mount This is for attaching the Anton/Bauer battery pack. 3 DC IN (external power input) socket (XLR, 4-pin) This unit is connected to an external DC power supply. -
Page 12: Audio Function Section
Chapter 2 Parts and their functions 2-2 Audio function section (input system) 1 MIC IN (microphone input) jack (XLR, 5-pin) Connect the microphone (optional accessory) here. The power for the microphone is supplied from this jack. <Note> Components of 150 Hz are removed from the signals input from this connector. - Page 13 Chapter 2 Parts and their functions 2-2 Audio function section (output system) 9 AUDIO OUT connector (XLR, 5-pin) The audio signals recorded on audio channels 1 and 2 or audio channels 3 and 4 are output from this connector. The signals to be output can be selected using the MONITOR SELECT CH1/2OCH3/4 selector switch :.
-
Page 14: Shooting And Recording/Playback Function Section
Chapter 2 Parts and their functions 2-3 Shooting and recording/playback function section < Shooting and recording (camera unit) 1 CC FILTER/ND FILTER (filter switching) controls These are used to select the filter in accordance with the subject’s brightness and color temperature. CC FILTER knob (outside, large diameter) A: Cross filter B: 3200 K... - Page 15 Chapter 2 Parts and their functions 6 OUTPUT/AUTO KNEE selector switch This switch selects the video signals which are to be output from the camera unit to the VTR unit, viewfinder and/or video monitor. CAM. AUTO KNEE ON: The images shot by the camera are output. The AUTO KNEE circuit operates.
- Page 16 Chapter 2 Parts and their functions = VIDEO OUT OUTPUT SEL (output signal selection) switch This is used to select the signals output from the VIDEO OUT connector. VTR : In the recording or other EE mode, the camera images are output from the connectors; in the playback mode, it is the VTR’s playback signals which are output.
-
Page 17: Menu Operation Section
Chapter 2 Parts and their functions J DVCPRO connector This is an output connector for video, voice, and data that comply with the IEEE1394 standard. <Notes> O It is impossible to input signals from external devices. O Power is not supplied from the unit. O Before proceeding to connect or disconnect the DV cable (IEEE1394), be absolutely sure to turn off the power of the units that are to be connected or... -
Page 18: Time Code Related Section
Chapter 2 Parts and their functions 2-5 Time code related section 1 GENLOCK IN connector (BNC) The HD Y reference signal is supplied to this connector when the camera unit is to be gen-locked or the time code is to be externally locked. It is also possible to supply composite video signals instead as the reference signal. -
Page 19: Warning/Status Display Section
Chapter 2 Parts and their functions 2-6 Warning/status display section 1 Back tally lamp When the back tally switch 2 is set to ON, this lamp serves the same function as the front tally lamp in the viewfinder. 2 Back tally switch This is used to control the unit’s back tally lamp 1 and rear tally lamp 6. - Page 20 Chapter 2 Parts and their functions Mode displays GPS: Lights when signals cannot be received during GPS operation. Lights when signals are being received during GPS operation. P-REC: Lights in pre-recording mode and flashes during the time set for pre-recording after the tally lamp for recording has turned off. iREC: Lights during recording when the interval recording mode is established;...
-
Page 21: Viewfinder Section
Chapter 2 Parts and their functions 2-8 Viewfinder section > 1 Viewfinder (optional accessory) While recording or playback is underway, pictures can be viewed through the viewfinder in black and white. The warning displays concerning the unit’s operation statuses and settings, messages, zebra patterns and markers (safety zone markers and center marker) can also be seen in the viewfinder. -
Page 22: Chapter 3 Recording And Playback
Chapter 3 Recording and playback 3-1 Cassette tapes Loading a cassette tape Set the POWER switch to ON. <Note> When condensation has formed inside the unit, the HUMID display lights. Wait until this display is cleared before proceeding with the intended operation. HUMID display POWER: ON Press the EJECT button. -
Page 23: Basic Procedures
Chapter 3 Recording and playback 3-2 Basic procedures This section describes the basic steps for shooting and recording. Before actually departing to shoot scenes, carry out inspections to ensure that the system is functioning properly. * For details on how to perform these inspections, refer to “6-1 Inspections prior to shooting.”... - Page 24 Chapter 3 Recording and playback Procedure for shooting From adjusting the white balance and black balance to stopping the recording Select the filter to match the lighting conditions. If the white balance has been stored in the memory ahead of time: Set the WHITE BAL switch to “A”...
-
Page 25: Scene-To-Scene Continuity
Chapter 3 Recording and playback 3-3 Scene-to-scene continuity Maintaining continuity from one scene to the next at an accuracy of +1 frame or less can be assured simply by pressing the REC START button or VTR button on the lens while the unit is in the rec-pause mode. -
Page 26: To Record Video Signals Of A Few Seconds Before Starting Recording (Pre-Recording Function)
Chapter 3 Recording and playback Transitions with the jump operation Recorded section D Section not recorded (B, C) Pause for Pause for replaying replaying No recorded section is available. O Time code regeneration O Rewinding for 5 seconds Pause for Pause for recording recording... -
Page 27: Recording In Intervals (Interval Rec Function)
Chapter 3 Recording and playback 3-5 Recording in intervals (INTERVAL REC function) This unit enables recording in intervals with a minimum recording time in increments of one frame, by using the built- in memory. In order to use this function, it is necessary to use the menu operations to open the <REC FUNCTION>... - Page 28 Chapter 3 Recording and playback Frame-by-frame shooting Procedure for shooting in the ONE SHOT mode The INTERVAL REC MODE item is set to ONE SHOT. (The PAUSE TIME item cannot be set.) After performing the basic operations for shooting and recording as set forth in “3-2 Basic procedures,”...
-
Page 29: To Take The Previous Cut Again (Retake Function)
Chapter 3 Recording and playback 3-6 To take the previous cut again (RETAKE function) The RETAKE function ensures continuity with the previous cut on the tape when shooting is resumed. It is set by opening the <REC FUNCTION> screen from the SYSTEM SETTING page and selecting ON as the setting for the RETAKE MODE item by performing menu operations. -
Page 30: Chapter 4 Adjustments And Settings For Recording
Chapter 4 Adjustments and settings for recording 4-1 Multi Format 4-1-1 Video system and Recording format The unit employs a progressive scan (full pixel reading) CCD system. It is possible to select 11 kinds of the recording formats by combinations of the SYSTEM MODE item and the CAMERA MODE item on the <SYSTEM MODE>... -
Page 31: Recording Format On Tapes And Signal Format At Output Connector
Chapter 4 Adjustments and settings for recording 4-1-2 Recording format on tapes and signal format at output connector The format for recording signals from CCD on tape and signal formats to be output from the respective connectors are shown below. Menu setting O Recording on tapes O HD SDI signal output (VIDEO OUT connector/MON OUT connector) -
Page 32: Adjusting The White Balance And Black Balance
Chapter 4 Adjustments and settings for recording In order to achieve images with a consistently high picture quality with this unit, it is necessary to adjust the black balance and white balance as the individual conditions demand. To achieve a higher picture quality, it is recommended that the adjustments be performed in the following sequence: AWB (white balance adjustment) >... - Page 33 Chapter 4 Adjustments and settings for recording When there is no time to adjust the white balance Set the WHITE BAL switch to PRST. The white balance for the filter is achieved in accordance with the setting position of the FILTER control (outer). When the white balance cannot be adjusted automatically When the white balance adjustment was not completed...
-
Page 34: Adjusting The Black Balance
Chapter 4 Adjustments and settings for recording 4-2-2 Adjusting the black balance The black balance needs to be adjusted in the following cases: ≥ When the unit is used for the first time ≥ When the unit is used after it has not been used for a prolonged period of time ≥... -
Page 35: Setting The Electronic Shutter
Chapter 4 Adjustments and settings for recording 4-3 Setting the electronic shutter This section describes the unit’s electronic shutter, its settings and operations. 4-3-1 Shutter modes The table below lists the shutter modes in which the unit’s electronic shutter can be used as well as the shutter speeds which can be selected. -
Page 36: Setting The Shutter Mode And Speed
Chapter 4 Adjustments and settings for recording 4-3-2 Setting the shutter mode and speed The shutter speeds used in the shutter mode are set by switching the SHUTTER switch. The shutter speeds in the SYNCHRO SCAN mode can easily be changed using the SYNCHRO SCAN (+ and –) buttons on the side panel. -
Page 37: Selecting The Audio Input Signals And Adjusting Their Recording Levels
Chapter 4 Adjustments and settings for recording 4-4 Selecting the audio input signals and adjusting their recording levels When the AUDIO SELECT CH1/CH2 switch is set to AUTO, the recording levels on audio tracks CH1 and CH2 are adjusted automatically. On the other hand, when it is set to MAN, the levels can be adjusted manually. -
Page 38: Ch3 And Ch4 Recording Levels
Chapter 4 Adjustments and settings for recording 4-4-3 CH3 and CH4 recording levels Audio signals can be recorded separately for four audio channels. Perform menu operations to open the <MIC/ AUDIO1> screen from the VTR MENU page to change the settings for the AUTO LEVEL CH3 and AUTO LEVEL CH4. - Page 39 Chapter 4 Adjustments and settings for recording O To record the user bits of LTC, open the <TC/UB> screen from the VTR MENU page by performing menu operations and select “USER” in the UB MODE item. (When the recording format is 720-50P or 720- 59.94P, set the OUTPUT/AUTO KNEE switch to the “BARS”...
- Page 40 Chapter 4 Adjustments and settings for recording How to store the camera shooting information into user bits SYSTEM MODE/ CAMERA MODE Select “FRM RATE” in the UB LTC UB MODE item. 1080-59.94i 24PA VITC UB Select “FRM RATE” in the UB LTC UB MODE item.
- Page 41 Chapter 4 Adjustments and settings for recording When the recording format is 720-50P or 720-59.94P LTC user bits O When the internal colour bar signals are being recorded User bits setting Frame frequency 4: 50.00 Hz 5: 59.94 Hz Tape management information OActive frame information OREC START/STOP mark 0 1 : 1 2 : 0 1 : 5 0...
-
Page 42: Setting The Internal Clock's Date And Time
Chapter 4 Adjustments and settings for recording 4-5-2 Setting the internal clock’s date and time Set the DISPLAY switch to UB. Press the HOLD button to cause DATE to be displayed in the display window. Set the TCG switch to SET. Set the date (year/month/day) using the SHIFT button, UP (+) button and DOWN (–) button. -
Page 43: Setting The Time Code
Chapter 4 Adjustments and settings for recording 4-5-3 Setting the time code Set the DISPLAY switch to TC. Set the TCG switch to SET. Open the <TC UB> screen from the VTR MENU page by performing menu operations, and select DF or NDF as the TC MODE item setting. - Page 44 Chapter 4 Adjustments and settings for recording Example 2: When connecting a multiple number of units and using one of them as the reference unit TC OUT MON OUT (HD-Y) VIDEO OUT (VBS) TC IN GENLOCK IN TC OUT MON OUT (HD-Y) VIDEO OUT (VBS) TC IN GENLOCK IN...
- Page 45 Chapter 4 Adjustments and settings for recording Example 4: When the unit and an external device are locked to the external time code generator, which is connected externally, and when several units of the camera are connected in a cascade configuration. Reference video signal External time code generator TC OUT...
- Page 46 Chapter 4 Adjustments and settings for recording Example 6: When an external device is locked to the time code generator of this unit, which is connected in a cascade configuration. Reference video signal To be connected if necessary TC OUT 1st unit AJ-HDX900 TC IN...
-
Page 47: Setting The Umid Information
Chapter 4 Adjustments and settings for recording When switching the power from the battery to an external power supply while the time code is externally locked In order to ensure the continuity of the time code generator’s power, connect the external power supply to the DC IN socket, and then remove the battery pack. -
Page 48: Menu Displays On The Viewfinder Screen
Chapter 4 Adjustments and settings for recording 4-6 Menu displays on the viewfinder screen 4-6-1 Menu configuration USER MENU: Although USER MENU is set at the factory, the user may perform menu operations to open the <USER MENU SELECT> screen from the MAIN MENU page, select the settings for its items in accordance with the purpose of operation and setting frequency and configure a menu tailored to individual needs. -
Page 49: Selecting The User Menus
Chapter 4 Adjustments and settings for recording Turn the JOG dial button to move the arrow (cursor) to the item which is to be set, and the sub menu screen appears when the JOG dial button is pressed. Turn the JOG dial button to move the arrow (cursor) to the item which is to be set, and the setting item menu screen appears when the JOG dial button is pressed. -
Page 50: Viewfinder Screen Status Displays
Chapter 4 Adjustments and settings for recording 4-7 Viewfinder screen status displays Not only the images but the lamps and characters indicating the unit’s settings and operation statuses as well as the messages, center and safety zone markers, camera ID and other information are displayed inside the viewfinder. - Page 51 Chapter 4 Adjustments and settings for recording Display item What is displayed 1 System mode 1080 2 Camera mode 24PA 3 Shutter 11/¢¢.¢ speed/mode 1/60 (1/100) - 1/2000, HALF 4 Total length of ¢¢¢min cassette tape 5 Remaining tape ¢¢¢min 6 Unit’s REC display REC 7 Battery type PROPAC14 to AC_ADPT...
- Page 52 Chapter 4 Adjustments and settings for recording Display item What is displayed (AUDIO: microphone FRONT: ON/OFF power status) REAR: ON/OFF (AUDIO: channel FRONT/W.L./REAR input signals and CH1/2/3/4 levels) AWB A ACTIVE : Camera warning AWB B ACTIVE and message display area AWB A OK ¢.¢K (Displays related to AWB B OK ¢.¢K...
- Page 53 Chapter 4 Adjustments and settings for recording Display item What is displayed ; Information allocated to USER S.GAIN ¢¢dB/OFF buttons DS.GAIN ¢¢:/OFF UM: USER MAIN LINE MIX ON/OFF U1: USER1 button S.IRIS ON/OFF U2: USER2 button I.OVR ON/OFF S.BLK –¢¢/OFF B.GAMMA ON/OFF AUDIO CH1 AUDIO CH2...
- Page 54 Chapter 4 Adjustments and settings for recording Display item What is displayed E AUDIO input ∫ system and level meter F Super black ON G Super iris ON H Iris override display (No display) – – – I Iris, f-value OPEN F1.7 to F16 CLOSE...
- Page 55 Chapter 4 Adjustments and settings for recording Viewfinder screen display selection Whether a display is to be shown or not can be selected on a 1 Systetm mode 2 Camera mode 3 Shutter speed/mode 4 Total length of cassette tape 5 Remaining tape 6 Unit’s REC display 7 Battery type...
-
Page 56: Display Modes And Setting Changes/Adjustment Result Messages
Chapter 4 Adjustments and settings for recording 4-7-4 Display modes and setting changes/adjustment result messages By setting the display mode item, it is possible to select various display methods for the changes made in the settings and for the messages advising the user of the adjustment results: for instance, the items displayed can be limited to a select number or not displayed at all. -
Page 57: Mode Check Screen Displays (Mode Check Button Function)
Chapter 4 Adjustments and settings for recording When the JOG dial button is pressed, the arrow (cursor) moves to the ID input area, and the input mode is established. Press the JOG dial button again and turn it until the character to be set is displayed. -
Page 58: Selection Of Video Output Signals
Chapter 4 Adjustments and settings for recording 4-8 Selection of video output signals The unit employs the VIDEO OUT connector and the MON OUT connector as connectors for outputting video signals. 4-8-1 Settings of signals output from VIDEO OUT connector The signal modes for outputting signals from the VIDEO OUT connector are switched with the VIDEO OUT switch. - Page 59 Chapter 4 Adjustments and settings for recording Set the marker and user boxes to superimpose on the output signals from the VIDEO OUT connector by using the respective items on the <VIDEO OUT SETTING> screen (SYSTEM SETTING page) of the menu. Variable Item range...
-
Page 60: Settings Of Signals Output From Mon Out Connector
Chapter 4 Adjustments and settings for recording 4-8-2 Settings of signals output from MON OUT connector Set the video signals output from the MON OUT connector by using the MONI OUT item on the menu (<OUTPUT SEL> screen on the SYSTEM SETTING page). The HD-Y signals can be used for applying GEN LOCK to other devices. -
Page 61: Menu-Driven Function Setup
Chapter 4 Adjustments and settings for recording 4-9 Menu-driven function setup The functions can be set up using the unit’s menus. 4-9-1 Setting the USER SW GAIN switching This unit allows three other modes to be used in addition to the L/M/H standard gain settings: the analog gain-up S.GAIN (super gain) mode to achieve a gain of 30 dB or more, the cumulative gain-up DS.GAIN (digital super gain) mode which... -
Page 62: Allocating Functions To The User Main, User1 And User2 Buttons
Chapter 4 Adjustments and settings for recording 4-9-3 Allocating functions to the USER MAIN, USER1 and USER2 buttons The desired functions can be allocated to the USER MAIN, USER1 and USER2 buttons. To select this function, perform menu operations to open the <USER SW>... -
Page 63: Setting The Color Temperature Manually
Chapter 4 Adjustments and settings for recording 4-9-4 Setting the color temperature manually The white balance can be adjusted manually using the color temperature settings. The manual color temperature settings can be set independently for PRST, A, and B with the WHITE BAL switch. -
Page 64: Set Data Handling
Chapter 4 Adjustments and settings for recording 4-10 Set data handling Set data file configuration The unit employs 5 sets for the file data area. FACTORY data: The area for storing factory settings Data cannot be revised with menu operations. USER data: The area for storing the data set by menu operations The FACTORY data is stored as the factory setting. -
Page 65: Handling The Setup Card
Chapter 4 Adjustments and settings for recording 4-10-1 Handling the setup card An SD memory card (optional accessory) can be used as a setup card that stores up to eight files of settings menu specifications. The setup card can be inserted or removed before or after the power is switched on. - Page 66 Chapter 4 Adjustments and settings for recording If one of the following messages appears when the JOG dial button is pressed, the card will not be formatted Error message CONFIG NG NO CARD Insert the card. (setup card has not been inserted) CONFIG NG ERROR The card may be defective.
- Page 67 Chapter 4 Adjustments and settings for recording Saving the data settings to the selected file When the title has been input, turn the JOG dial button to move the arrow (cursor) to the “:” position. When the JOG dial button is pressed, the arrow (cursor) returns to the TITLE: item.
- Page 68 Chapter 4 Adjustments and settings for recording Loading the data of the selected file Turn the JOG dial button to move the arrow (cursor) to the READ item. When the JOG dial button is pressed, the following message appears. Turn the JOG dial button to move the arrow (cursor) to YES, and press the JOG dial button.
-
Page 69: How To Use The User Data
Chapter 4 Adjustments and settings for recording 4-10-3 How to use the user data The setting data can be written in the user data area of the unit’s internal memory and data written in the memory can be read from this area. Use of this data speeds up the process of reproducing suitable setup statuses. -
Page 70: How To Use The Scene File Data
Chapter 4 Adjustments and settings for recording 4-10-4 How to use the scene file data The setting data can be written in the scene file area of the unit’s internal memory and the data written can be read from this area. Up to four scene files can be registered. By using this data, the appropriate setup statuses can be established speedily. - Page 71 Chapter 4 Adjustments and settings for recording Reading the setting data used for the scene files Perform a menu operation to open the <SCENE> screen. Turn the JOG dial button to move the arrow (cursor) to the SCENE SEL item. When the JOG dial button is pressed, the scene file number starts flashing.
- Page 72 Chapter 4 Adjustments and settings for recording Appending titles to the setting data used for the scene files Perform a menu operation to open the <SCENE> screen. Turn the JOG dial button to move the arrow (cursor) to the scene file TITLE1, 2, 3 or 4 item where the title is to be appended.
-
Page 73: Method For Returning To User Settings
Chapter 4 Adjustments and settings for recording 4-10-5 Method for returning to user settings It is possible to return the settings of the menu on the unit to the user settings that were registered previously in accordance with “4-10-3 How to use the user data.” There are two methods: one that reads out the USER DATA saved in accordance with “4-10-3 How to use the user data,”... -
Page 74: Lens File
Chapter 4 Adjustments and settings for recording 4-10-7 Lens file The built-in memory of the unit stores eight sets of lens files. On the SD memory card, eight titles for eight sets of lens files in a table (total 64 sets) can be written. The following data are recorded on the lens file. -
Page 75: To Save The Lens File Into The Built-In Memory
Chapter 4 Adjustments and settings for recording 4-10-9 To save the lens file into the built-in memory Select the file No. Using the menu operations, open the <LENS FILE> screen from the FILE page. Turn the JOG dial button to move the arrow (cursor) to the FILE SELECT item Press the JOG dial button and the file number will flash. - Page 76 Chapter 4 Adjustments and settings for recording When the JOG dial button is pressed, the arrow (cursor) returns to the TITLE: item. 222222222222 Turn the JOG dial button to move the arrow (cursor) to the WRITE position. 222222222222 When the JOG dial button is pressed, the following message appears.
-
Page 77: To Read The Lens File From The Built-In Memory
Chapter 4 Adjustments and settings for recording 4-10-10 To read the lens file from the built- in memory Using menu operations, open the <LENS FILE> screen from the FILE page. Turn the JOG dial button to move the arrow (cursor) to the FILE SELECT item Press the JOG dial button and the file number will flash. -
Page 78: To Write In And Read Out The Lens File To/From The Sd Memory Card
Chapter 4 Adjustments and settings for recording 4-10-11 To write in and read out the lens file to/from the SD memory card The contents of the eight lens files stored in the unit’s internal memory can be saved onto an SD memory card as card files under a single title. - Page 79 Chapter 4 Adjustments and settings for recording Loading lens files from the SD memory card Using menu operations, open the <LENS FILE CARD R/W> screen from the FILE page. Turn the JOG dial button to move the arrow (cursor) to the CARD FILE SELECT item Press the JOG dial button and the card file number will flash.
-
Page 80: Chapter 5 Preparation
Chapter 5 Preparation 5-1 Supplying the power A battery pack or an external DC power supply can be used as this unit’s power supply. To use the battery pack, there is the following choice of makes of batteries: ≥Anton/Bauer ≥IDX ≥PACO ≥Sony Types of battery can be confirmed and revised in the... - Page 81 Chapter 5 Preparation Using the NP-1 type battery pack CAUTION: These servicing instructions are for use by qualified service personel only. To reduce the risk of electric shock, do not perform any servicing other than that contained in the operaiting instructions unless you are qualified to do so.
-
Page 82: Use Of The External Dc Power Supply
Chapter 5 Preparation 5-1-2 Use of the external DC power supply Connect the external DC power supply to the DC IN socket on the unit. DC IN socket External DC power supply Turn “ON” the power switch of the external DC power supply. -
Page 83: Attaching The Lens And Adjusting The Flange Back
Chapter 5 Preparation 5-2 Attaching the lens and adjusting the flange back Attaching the lens Raise the lever for securing the lens, and detach the mount cap. Mount cap Align the center mark of the lens with the groove in the top center of the lens mount, and attach the lens. -
Page 84: Adjusting The White Shading Of The Lens
Chapter 5 Preparation 5-3 Adjusting the white shading of the lens Method to correct the waveform to be more flat by combining the sawtooth-shaped waveform and the parabola waveform when watching the respective waveforms of R, G and B of the video signals. White shading adjustment is disabled when the DS. - Page 85 Chapter 5 Preparation When the lens is provided with an extender, turn on the extender function, and repeat steps (Once the extender function is turned on, the set values shown on the menu screen change.) The adjustment values of the two resulting patterns–one when the lens extender is provided and the other when it is not provided–are stored in the unit as the data of one lens file.
-
Page 86: Audio Input Signal Preparations
Chapter 5 Preparation 5-4 Audio input signal preparations Prepare to connect the audio components which will supply the audio signals to the unit. 5-4-1 When using the front microphone The microphone of the AJ-MC900G mic kit (optional accessory) can be attached to the viewfinder. Open the mic holder. -
Page 87: When Using An Audio Component
Chapter 5 Preparation 5-4-3 When using an audio component Connect the AUDIO IN connectors on the camera with the audio component using the XLR cable. Set the AUDIO IN switch or switches for the channel or channels to which the audio component has been connected to “REAR.”... -
Page 88: Attaching The Shoulder Belt
Chapter 5 Preparation 5-6 Attaching the shoulder belt Shoulder belt The tab opens when it is pressed. To disengage the shoulder belt, press the tabs. <Note> Check that the shoulder belt is attached securely. 5-7 Adjusting the position of the shoulder pad The shoulder pad can be moved while the slide lever is held down. -
Page 89: Connection Of The Remote Control Unit (Aj-Rc10G)
Chapter 5 Preparation 5-10 Connection of the remote control unit (AJ-RC10G) It is possible to control some of the functions remotely by connecting the remote control unit AJ-RC10G (optional accessory). When AJ-RC10G is connected to the REMOTE connector on the unit and the power switches of both of the unit and AJ- RC10G are turned on, the unit automatically enters the remote control mode. -
Page 90: Chapter 6 Maintenance And Inspections
Chapter 6 Maintenance and inspections 6-1 Inspections prior to shooting Before setting off for a shooting session, perform the following inspections to verify that the system is functioning correctly. It is recommended that a color video monitor be used to check the images. 6-1-1 Preparation for inspections Insert a fully charged battery. -
Page 91: Inspecting The Vtr Unit
Chapter 6 Maintenance and inspections 6-1-3 Inspecting the VTR unit Perform all the steps outlined in section “1. Tape travel inspection” through section “4. Earphone and speaker inspection” one after the other. 1. Tape travel inspection Set the VTR SAVE/STBY switch to SAVE, and check that the SAVE lamp inside the viewfinder lights. -
Page 92: Self-Diagnosis Function
Chapter 6 Maintenance and inspections 5. Inspection using external microphones Connect external microphones to the AUDIO IN CH1 and CH2 jacks. Set the AUDIO IN CH1 and CH2 switches to REAR. Set the LINE/MIC/+48V selector switch on the back panel to MIC or +48V in accordance with the external mic’s power supply type. -
Page 93: Maintenance
Chapter 6 Maintenance and inspections 6-2 Maintenance 6-2-1 Condensation The water vapor in the air may form as tiny droplets on the head drum when the unit is moved from a cold location to a warm location or used in a very humid place. phenomenon is known as condensation, and running the tape under these conditions is liable to cause the tape to stick to the drum. -
Page 94: Connectors And Signals
Chapter 6 Maintenance and inspections 6-2-6 Connectors and signals DC IN +12V Matsushita part number K1AA104H0038 Maker part number HA16RX-4P (SW1) (Hirose Denki) <Note> Ensure that the polarities are used correctly for a power supply from an external source. FRONT MIC IN L CH IN(H) L CH IN(C) R CH IN(H) - Page 95 Chapter 6 Maintenance and inspections REMOTE CAM DATA (H) Data from the camera to the remote control (H) CAM DATA (C) Data from the camera to the remote control (C) CAM CONT (H) Control signals from the remote control to the camera (H) CAM CONT (C) Control signals from the remote control to the camera (C) RC-ON...
- Page 96 Chapter 6 Maintenance and inspections LENS RET-SW ON/OFF of the return video RETURN ON: GND RETURN OFF: OPEN REC-START/STOP Control for recording start/stop START STOP START IRIS-AUTO ON/OFF of the forced iris servo SERVO ON: +5 V ±0.5 V SERVO OFF: OPEN IRIS-CONT Control output for the lens iris F2.8: –6.2 V, F16: +3.4 V, CLOSE: +2.5 V...
- Page 97 Chapter 6 Maintenance and inspections Unislot Interface CH-1 SHIELD CH-1 HOT Audio input from the wireless receiver: HOT CH-1 COLD Audio input from the wireless receiver: COLD +12V UNREG Power supply to the wireless receiver RX ON Power supply remote output to the wireless receiver RF WARN RF warning input from the wireless receiver Not used...
-
Page 98: Warning System
Chapter 6 Maintenance and inspections 6-3 Warning system 6-3-1 Warning description tables When an error or a problem is detected immediately after the power is turned on or while an operation is underway, the WARNING lamp and lamps inside the viewfinder serve to alert the user. <Note>... - Page 99 Chapter 6 Maintenance and inspections 6. SERVO Indications on LCD “SERVO” display lights (during recording and screen playback). WARNING lamp Flashes four times a second (during recording and playback). Tally lamp Flashes four times a second (during recording and playback). Viewfinder “SERVO”...
-
Page 100: Error Codes
Chapter 6 Maintenance and inspections 6-3-2 Error codes One of the following error codes appears in the display window when an error has occurred in the unit for some reason. 6-3-3 Emergency eject If the cassette cannot be ejected by pressing the EJECT button, use a screwdriver or similar tool to press and turn the emergency eject screw. -
Page 101: Chapter 7 Menu Description Tables
Chapter 7 Menu description tables 7-1 Menu configuration MENU USER MENU MAIN MENU OPTION MENU OPTION How to open the menus USER MENU: Press MENU button to display. MAIN MENU: Hold down MENU button for 3 seconds or more to display. OPTION MENU: Press MENU... -
Page 102: System Setting
Chapter 7 Menu description tables 7-2 SYSTEM SETTING 7-2-1 SYSTEM MODE Variable Item range SYSTEM MODE For setting the system frequency and the For AJ-HDX900E 1080-50i recording format of the unit. For AJ-HDX900P 1080-59.94i When this item is switched, turn “OFF” the 720-50P POWER switch on the unit and then turn it 720-59.94P... -
Page 103: Output Sel
Chapter 7 Menu description tables 7-2-3 OUTPUT SEL Variable Item range OUTPUT ITEM For setting the characters superimposed on STATUS the output signals from the VIDEO OUT MENU connector. ONLY Time codes are superimposed (when the menu is accessed, the menu screen is superimposed.) STATUS: The characters that are the same as the... -
Page 104: Monitor Out Setting
Chapter 7 Menu description tables 7-2-5 MONITOR OUT SETTING Variable Item range MONI OUT CENTR For setting the center marker to be MARK superimposed on the HD SDI output signals of the MON OUT connector. OFF: The center marker is not displayed. + (large) Center blank (large) + (small) -
Page 105: Downcon Setting
Chapter 7 Menu description tables 7-2-7 DOWNCON SETTING Variable Item range DOWNCON MODE SQUEEZ For setting the mode of the down converter LT-BOX output signals. S-CROP C U F R DETAIL For setting the detail function for the down converter output signals ON/OFF. The down converter output signals contain detailed components that are set during HD signal processing. -
Page 106: Option Mode
Chapter 7 Menu description tables 7-2-9 OPTION MODE Variable Item range REC TALLY For selecting the method to access records GREEN on the unit when the unit is connected to CHAR peripheral devices and used remotely. RED: The red tally lamp lights. GREEN: The green tally lamp lights. -
Page 107: Paint
Chapter 7 Menu description tables 7-3 PAINT 7-3-1 RB GAIN CONTROL Variable Item range R GAIN AWB PRE –200 For setting the Rch gain when the WHITE BAL switch is in the PRST position. +000 O If the remote control unit is connected, +200 settings made from the menu are disabled. -
Page 108: Matrix
Chapter 7 Menu description tables 7-3-3 MATRIX Variable Item range ∫ MATRIX TABLE For selecting the color correction table for the linear matrix. S C U F R MATRIX R-G –63 For performing the linear matrix adjustment. (red/green) S C U F R MATRIX R-B –63 For performing the linear matrix adjustment. -
Page 109: Low Setting
Chapter 7 Menu description tables Variable Item range R (PHASE) –63 For performing the hue correction for red. S C U F R R-Mg (PHASE) –63 For performing the hue correction between red and magenta. S C U F R Mg (PHASE) –63 For performing the hue correction for... -
Page 110: Mid Setting
Chapter 7 Menu description tables 7-3-6 MID SETTING Variable Item range ∫ MASTER GAIN –3dB For setting the master gain to –3, 0, 3, 6, 9, 12, 15, 18, 21, 24, 27 or 30 dB. 30dB S C U F R H.DTL LEVEL performing correction level setting. -
Page 111: Addtional Dtl
Chapter 7 Menu description tables 7-3-8 ADDITIONAL DTL Variable Item range KNEE APE LVL For changing the detail level of the high brightness portion. S C U F R DTL GAIN(+) –31 For changing the + direction level of the detail. -
Page 112: Skin Tone Dtl
Chapter 7 Menu description tables 7-3-9 SKIN TONE DTL Variable Item range For selecting the skin color table for enabling ∫ SKIN TONE DTL the skin tone detail. The skin color table is provided in the SKIN TONE TABLE item. By enabling the skin tone detail, it is possible to shoot human skin more accurately. -
Page 113: Knee/Level
Chapter 7 Menu description tables 7-3-10 KNEE/LEVEL Variable Item range MASTER PED –200 For performing the MASTER PEDESTAL setting. +015 +200 S C U F R ∫ MANUAL KNEE For setting the mode which is to be established when the AUTO KNEE switch is at OFF. -
Page 114: Camera Setting
Chapter 7 Menu description tables 7-3-12 ∫ ∫ CAMERA SETTING Variable Item range DETAIL For switching ON/OFF of the detail signals. S C U F R HIGH COLOR For switching ON/OFF of the mode enlarging the color dynamic range. S C U F R GAMMA For switching ON/OFF of the gamma correction. -
Page 115: Vf Displays
Chapter 7 Menu description tables 7-4 VF 7-4-1 VF DISPLAY Variable Item range DISP CONDITION NORMAL NORMAL: HOLD The statuses are displayed at all times. HOLD: The statuses are displayed only when the C U F R MODE CHECK switch is pressed. DISP MODE For setting the display mode. -
Page 116: Vf Marker
Chapter 7 Menu description tables 7-4-2 VF MARKER Variable Item range TABLE For selecting the VF MARKER setting table. This item is used to set the current values of table A or B which have been selected using the menu items listed below. C U F R CENTER MARK For selecting the center marker. -
Page 117: Vf Indicator1
Chapter 7 Menu description tables 7-4-4 VF INDICATOR1 Variable Item range EXTENDER For selecting ON or OFF for the extender display. C U F R SHUTTER For selecting ON or OFF for the shutter speed display. C U F R FILTER For selecting ON or OFF for the filter No. -
Page 118: Mode Check Ind
Chapter 7 Menu description tables 7-4-6 MODE CHECK IND Variable Item range STATUS For the setting to display the status screen when the MODE CHECK button is pressed. C U F R !LED For the setting to indicate causes for turning on the lamp on the viewfinder is displayed when the MODE CHECK button is... -
Page 119: Operation
Chapter 7 Menu description tables 7-5 OPERATION 7-5-1 CAMERA ID Variable Item range ID1: ********** CAMERA ID setting 1 C U F ID2: ********** CAMERA ID setting 2 C U F ID3: ********** CAMERA ID setting 3 C U F <Note>... -
Page 120: User Sw
Chapter 7 Menu description tables Variable Item range POSITION4 SEL setting For 59.94 Hz 1/100 POSITION 4. 1/120 1/250 1/500 1/1000 1/2000 HALF For 50 Hz 1/60 1/120 1/250 1/500 1/1000 1/2000 HALF C U F R POSITION5 SEL setting For 59.94 Hz 1/100 POSITION 5. -
Page 121: Sw Mode
Chapter 7 Menu description tables 7-5-5 SW MODE Variable Item range RET SW R.REVIEW For setting the function when the USER CAM RET button on the unit, to which the RET button of the lens or the RET SW function is allocated, is pressed. -
Page 122: User Sw Gain
Chapter 7 Menu description tables 7-5-7 USER SW GAIN Variable Item range S.GAIN For selecting whether or not to enable a 30 dB setting of 30 dB for SUPER GAIN. 2 : The 30 dB setting is enabled. O : The 30 dB setting is disabled. C U F R 36 dB For selecting whether or not to enable a... -
Page 123: File
Chapter 7 Menu description tables 7-6 FILE 7-6-1 CARD READ/WRITE Variable Item range R.SELECT For selecting the number of the file whose data is to be read. READ For reading the data from the SD memory card. W.SELECT For selecting the number of the file in which the data is to be written. -
Page 124: Initialize
Chapter 7 Menu description tables 7-6-6 INITIALIZE Variable Item range READ FACTORY For returning the state of the unit to factory DATA settings. Data returned to factory settings O User data O Scene file Data not returned to factory settings O Lens file O Black shading O White shading... -
Page 125: Black Shading
Chapter 7 Menu description tables 7-7-4 BLACK SHADING Variable Item range CORRECT For selecting ON or OFF for the digital black shading compensation. C U F R DETECTION – For executing the digital black shading (DIG) compensation. 7-7-5 WHITE SHADING Variable Item range... -
Page 126: Vtr Menu
Chapter 7 Menu description tables 7-8 VTR MENU 7-8-1 VTR FUNCTION Variable Item range HUMID OPE For selecting whether or not to continue operation when HUMID alarm state has occurred. ON: Operation continues until tape slack is detected even when the HUMID alarm state has occurred during operation. -
Page 127: Battery Setting1
Chapter 7 Menu description tables 7-8-3 BATTERY SETTING1 Variable Item range PROPAC14 For enabling or disabling the selection made for the BATTERY SELECT item. 2 : The selection is enabled. / : The selection is disabled. AUTO For selecting how the voltage at which the MANUAL battery charge is considered nearly depleted is to be set. -
Page 128: Battery Setting2
Chapter 7 Menu description tables Variable Item range ENDURA10 For enabling or disabling the selection made for the BATTERY SELECT item. 2 : The selection is enabled. / : The selection is disabled. AUTO For selecting how the voltage at which the MANUAL battery charge is considered nearly depleted is to be set. -
Page 129: Mic/Audio1
Chapter 7 Menu description tables 7-8-5 MIC/AUDIO1 Variable Item range FRONT VR CH1 FRONT For setting whether or not to make the audio W.L. control operational for the input system REAR selected for CH1. C U F FRONT VR CH2 FRONT For setting whether or not to make the audio W.L. -
Page 130: Tc/Ub
Chapter 7 Menu description tables 7-8-7 TC/UB Variable Item range TC MODE For selecting the mode advancing the time code. Drop frame NDF: Non-drop frame <Note> When the system frequency is set to 50 Hz, the mode is the non-drop frame mode. C U F UB MODE USER... -
Page 131: Umid Set/Info
Chapter 7 Menu description tables 7-8-8 UMID SET/INFO Variable Item range COUNTRY NO-INFO For inputting the name of the user’s country. “NO-INFO” is displayed until this is input. C U F ORGANIZATION NO-INFO For inputting the name of the user’s organization or company. -
Page 132: Chapter 8 Specifications
Chapter 8 Specifications [GENERAL] Power supply: DC 12 V (DC 11.0 V - 17.0 V) Power consumption: 36 W indicates safety information. Ambient operating temperature: 0°C to +40°C (32°F to 104°F) Storage temperature: –20°C to +60°C (–4°F to 140°F) Ambient operating humidity: Within 10% to 85% (relative humidity) Continuous operation time: Approx. - Page 133 Chapter 8 Specifications Audio System Sampling frequency: 48 kHz (synchronized with video) Quantizing: 16 bits Frequency response: 20 Hz to 20 kHz ±1.0 dB (at 1 kHz, reference level) Dynamic range: Better than 85 dB (at 1 kHz, AWTD) Distortion: Less than 0.1% (at 1 kHz, reference level) Wow and flutter: Below measurable limits...
- Page 134 PANASONIC BROADCAST & TELEVISION SYSTEMS COMPANY UNIT COMPANY OF PANASONIC CORPORATION OF NORTH AMERICA Executive Office: One Panasonic Way 4E-7, Secaucus, NJ 07094 (201) 348-7000 EASTERN ZONE: One Panasonic Way 4E-7, Secaucus, NJ 07094 (201) 348-7196 Southeast Region: (201) 348-7162 WESTERN ZONE: 3330 Cahuenga Blvd W., Los Angeles, CA 90068 (323) 436-3500...