Table of Contents
Advertisement
Advertisement
Table of Contents
Troubleshooting

Related Manuals for Mio Mio 268


Summary of Contents for Mio Mio 268
- Page 1 Mio 268/Mio 269 User’s Manual...
- Page 2 Revision: R00 December 2004 Trademarks All brand and product names are trademarks or registered trademarks of their respective companies. Note The information in this manual is subject to change without notice.
-
Page 3: Table Of Contents
Home Screen...11 2.2 Operating Your Device ...12 Using Hardware Buttons...12 Using the Navigation Pad ...13 Using the Remote Control (For Mio 269 Only) ...13 Using the Volume Control...14 Using the Stylus...14 2.3 Using a SD/MMC Card ...15 System Settings ... 17 3.1 Using System Settings...17... - Page 4 Managing Your Play Lists ... 32 4.5 Equalizer ... 33 Mio Transfer ... 35 5.1 Installing Mio Transfer... 35 5.2 Starting Mio Transfer ... 36 5.3 Using MP3 Assistant... 37 Copying MP3 Files to Your Device ... 37 Managing Your MP3 Files... 39 5.4 Using ESync ...
- Page 5 Regulatory Information ... 53 A.1 Regulations Statements...53 Class B Regulations ...53 European Notice ...54 A.2 Safety Precautions...55 About Charging...55 About the AC Adapter...55 About the Battery ...55...
-
Page 7: Precautions And Notices
Precautions and Notices For your own safety, do not operate the controls of the product while driving. Use this product prudently. The product is intended to be used only as a navigation aid. It is not for precise measurement of direction, distance, location or topography. - Page 8 A car holder is needed when using the device in car. It is recommended that you place the device in the appropriate place and avoid the areas as the figure shows. Do not mount where the driver’s field of vision is blocked. Do not mount in front of airbag panels.
-
Page 9: Getting Started
1.1 Performing the Initial Start Up 1. For Mio 268 Only: Insert the Mio Map card supplied with your device before the initial start up. 2. Pull out the stylus and use it to slide the ON/OFF switch to the ON (right) position. - Page 10 3. The Switch Language screen pops up. For most countries, only one language is available. You can tap the left/right arrow to select a language only if your region of purchase is a country with multiple languages. Tap to continue. NOTE: If multiple languages are available, you can change the language later on by tapping Setting Switch Language.
- Page 11 NOTE: You can change the date, time and time zone later on by tapping Setting Date&Time. See Section 3.5 for more information. 5. For Mio 268 Only: Your device will install the navigation software from the Mio Map card to your device. Wait until the installation is completed.
-
Page 12: Connecting To Ac Power And Charging The Battery
1.2 Connecting to AC Power and Charging the Battery Fully charge the battery before starting to use your device for the first time. 1. Plug the converter to the AC adapter. 2. Connect the DC end of the AC adapter to the bottom of your device. ( ) 3. -
Page 13: Using Your Device In A Vehicle
1.3 Using Your Device in a Vehicle A car holder and a car charger are supplied with your device. Using the Car Holder CAUTION: Select an appropriate location for the car holder. Never place the holder where the driver’s field of vision is blocked. If the car’s windshield has window tint, it is recommended that you use a car antenna (optional) to route the antenna to the top of the car through the window. -
Page 14: Connecting The Car Charger
Connecting the Car Charger The car charger supplies power to your device when you are using the device in a car. CAUTION: To protect your device against sudden current, connect the car charger only after the car engine has been started. 1. -
Page 15: Understanding Hardware Features
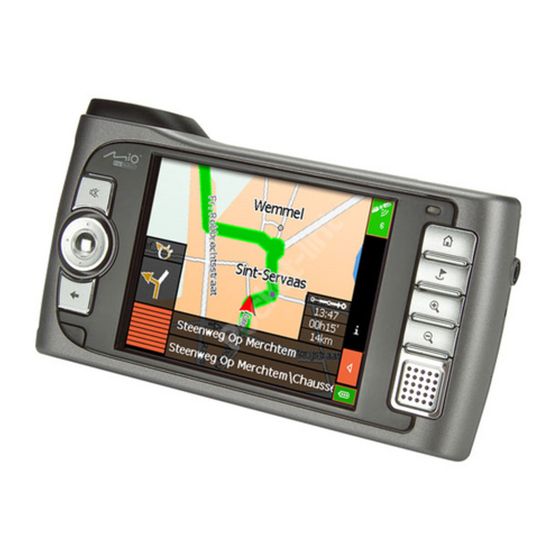
1.4 Understanding Hardware Features NOTE: Depending on the model you purchased, the color of the device might not be exactly the same as the pictures shown in this manual. Front Components Component Touch Screen Mute Button Navigation Pad Back Button Charge Indicator Hardware Buttons Speaker... -
Page 16: Back Components
Back Components Component ON/OFF Switch Controls the main power switch. Car Antenna Connector Description Inside the rubber cover is a connector for connecting a GPS car antenna (optional) so that the antenna can be positioned on top of the car for better signal reception. See Also Section 1.1... -
Page 17: Left-Side Components
Left-Side Components Ref Component Volume Adjusts the volume level of your device. Control Turns on and off the device. Power Button Right-Side Components Component Stylus Headphone Connector Reset Button Description Description Tap on the touch screen to make selections and enter information. Pull the stylus out of its slot to use and store it in the slot when not in use. -
Page 18: Top Components
Accepts a SD (Secure Digital) or MMC (MultiMediaCard) card for accessing data such as maps and MP3 music. NOTE: For Mio 268, the Mio Map card is required for GPS operation. Description Connects to your computer for data transfer. -
Page 19: Basic Skills
Basic Skills This chapter familiarizes you with the basic operations of your device such as using the stylus, navigation pad, and the volume control. 2.1 Turning On and Off Your Device The on and off of your device is controlled by the Power button on the left side of your device. -
Page 20: Operating Your Device
NOTE: For Mio 268, when using the Navigation program for the first time, you need to insert the storage card supplied with your device. Ref Button Name Navigator Music Tool Setting 2.2 Operating Your Device You use the hardware buttons and/or the stylus to operate your device. -
Page 21: Using The Navigation Pad
Using the Remote Control (For Mio 269 Only) For Mio 269, a remote control is supplied with your device. The buttons on the remote control correspond to the buttons on the device. Refer to the Hardware buttons chart mentioned earlier for the descriptions of each button. -
Page 22: Using The Volume Control
Using the Volume Control The system provides you with 0~10 volume levels (from mute to the maximum). When you use the volume control on the left side of the device to adjust volume, bar(s) will appear on the screen to indicate the current volume level. -
Page 23: Using A Sd/Mmc Card
Map is supplied to you for the purpose of initial startup and storing map and other data i.e. MP3 files. (For Mio 269, all the data have been stored on your device hard drive. Thus, you can operate your device without a card.) NOTE: Make sure that no foreign objects enter the slot. - Page 24 To remove a card, first make sure that no application is accessing the card, then slightly push the top edge of the card to release it and pull it out of the slot.
-
Page 25: System Settings
System Settings Your device initially has its default settings. You can customize the settings to suit your personal needs. Once you change the settings, the settings will remain till the next changes. 3.1 Using System Settings To open the Settings screen, tap the button on the Home screen. -
Page 26: Backlight
3.2 Backlight 1. Tap the button on the Home screen to open the Settings screen. Setting 2. Tap the button on the Settings screen. Backlight 3. Move the slider along the track bar for the adjustment. To darken the screen, move the slider to the left. To lighten the screen, move the slider to the right. -
Page 27: Volume
4. Tap the button to save the changes and go back to the Settings screen. 3.3 Volume 1. Tap the button on the Home screen. Setting 2. Tap the button on the Settings screen. Volume 3. Move the slider along the track bar for the adjustment. To turn down the volume, move the slider to the left. -
Page 28: Screen
4. Tap the button to save the changes and go back to the Settings screen. 3.4 Screen You can adjust the touch screen if it is not responding accurately to your stylus taps. 1. Tap the button on the Home screen. Setting 2. -
Page 29: Power
4. Tap and hold the center of the target. 5. When the target moves to another position, tap and hold again. Repeat the same step to complete the adjustment. 6. Once the calibration is complete, the message “Calibration succeeded!” will appear. Tap 3.5 Power To check the remaining power level of your battery: 1. - Page 30 3. The Power screen will appear showing the remaining power of your battery. You can also set up a timer for your device to automatically turn off the device when being idle for a set period of time. The options are Never, 30 minutes, 20 minutes, and 10 minutes.
-
Page 31: Date&Time
3.6 Date&Time To set the date and time: 1. Tap the button on the Home screen. Setting 2. Tap the Date&Time 3. Tap the Time Zone box and tap the left or right arrow to select your time zone. 4. Tap the down arrow next to the Date box to set the date. A calendar will pop up showing day, month and year. -
Page 32: Switch Language
You can also tap the left arrow and right arrow button on top of the calendar to change the month and year. Then tap the date on the calendar. 5. To set the time, tap the up arrow to increase the value and tap the down arrow to decrease the value. -
Page 33: Back
3. If your device supports multi-languages, tap the left or right arrow to select the system language. NOTE: The available language options depend on your region of purchase. 4. Tap the button to save changes and go back to the Settings screen. 3.8 Back button brings you back to the Home screen. -
Page 35: Mp3 Player
MP3 Player This chapter tells you how to play MP3 files on your device. 4.1 Starting and Exiting MP3 Player The MP3 Player program turns your device into an MP3 player. It features: Playback of MP3 and wav files Basic playback controls such as play, pause, stop, next and previous Equalizer settings with 17 presets Ways of playback including single playback, repeat, single repeat, sampling playback, normal sequence and random sequence. -
Page 36: Preparing The Mp3 Files For You Device
Before you can play MP3 files, you need to have the files ready on a storage card (for Mio 268/Mio 269) or the device hard drive (for Mio 269). A tool called “MP3 Assistant” is supplied for you to easily copy MP3 files from your computer to the correct location. -
Page 37: Mp3 Playback Control
2. The program will search for MP3 files in the storage card (Mio 268/Mio 269) or device hard drive (Mio 269). When MP3 files are detected, they will be added to the play list. NOTE: You can create your own play list for future playback. (See Section 4.4 for more information.) - Page 38 Volume Playback Mode* Switches among the following modes: Sequence* Open Play List Equalizer Help Close MP3 Player * Table Note: When you restart the MP3 Player, both playback mode and sequence will return to its default settings. Increases or decreases the volume. The indicator on the upper right corner of the panel will show the current volume level.
-
Page 39: Using The Play Lists
4.4 Using the Play Lists By default the system will automatically load all MP3 files in the play list. You can also create your own play lists for future use. Creating a Play List 1. After starting MP3 Player, tap 2. -
Page 40: Opening A Play List
4. To save the play list, tap the screen and then 5. To return to the control panel, tap Opening a Play List To open one of the play lists that you have created: 1. After starting MP3 Player, tap 2. -
Page 41: Equalizer
To delete a play list: Tap the button at the bottom of the screen. Tap the play list you Load wish to delete and then tap 4.5 Equalizer The MP3 Player provides 17 presets for various music effects. Tap the equalizer panel and tap the option list. -
Page 43: Mio Transfer
Mio Transfer This chapter tells you how to use Mio Transfer to transfer data such as MP3 files or Contacts information from your computer to your device and recover the map data and navigation software to your device. 5.1 Installing Mio Transfer Mio Transfer is an application to be installed on your computer. -
Page 44: Starting Mio Transfer
On Windows desktop, click screen appears. Mio Transfer provides five tabs, including: Function Explain provides you a brief introduction of this Mio Transfer. MP3 Assistant allows you to transfer the MP3 files between your device and your computer. (See Section 5.3 for details.) ESync allows you to transfer the contacts data from your computer to your device. -
Page 45: Using Mp3 Assistant
MP3 files. (For information on MP3 Player, see Chapter 4.) 1. For Mio 268: Insert a storage card into your device. For Mio 269: Insert a storage card only if you want to copy MP3 files to the card. Otherwise, files will be copied to the device hard drive. - Page 46 6. For Mio 269 Only: Select your target by clicking the hard drive) or 7. Select the folder where your MP3 files are stored from the left column. Select the MP3 file you want to copy and tap copied to the target device.
-
Page 47: Managing Your Mp3 Files
Managing Your MP3 Files On top of the MP3 Assistant screen, there are three buttons available for you to manage the MP3 files: Rename changes the name of the selected file. Delete removes the selected file. CAUTION: Be discrete when you delete files. Deleting files of which the function is unknown can cause programs or features to malfunction. - Page 48 3. Start Mio Transfer by clicking on your Start Programs Mio Transfer computer. The Mio Transfer screen appears. Click on the top menu bar. ESync 5. Then click Apply...
-
Page 49: Using Recover
5.5 Using Recover Recover allows you to recover map data and the navigation software if any on your storage card (Mio 269) or in the device hard drive (Mio 269) is lost or damaged. NOTE: As all the existing data will be erased from the storage card during the recovering process, back up the files on your storage card to your computer before starting the recovering. - Page 50 7. For Mio 269 only: Insert the next Mio Map CD when prompted. 8. When the recovering process is complete, reset your device. (Refer to Section 7.1 for more information.)
-
Page 51: Contacts: Tracking Friends And Colleagues
Contacts: Tracking Friends and Colleagues Contacts: Tracking Friends and Colleagues This chapter tells you how to use Contacts, an optional program for viewing and managing your contacts information. 6.1 Installing the Contacts Program You can install the Contacts program to your device if you want to view and manage contacts on your device. -
Page 52: Starting And Exiting Contacts
4. Click the button in the Install Contacts section. Install 5. Follow the onscreen instructions to complete the installation. 6. If you have created Microsoft Contacts information on your computer, you can copy the information to your device. This saves you the trouble of entering the information all over again. -
Page 53: Creating A Contact
Tap and hold to display a pop-up menu of actions. NOTE: To display the summary screen of a contact, you can also tap File (top toolbar) Open. To exit the program, tap toolbar) Exit 6.3 Creating a Contact 1. After starting Contacts, tap 2. -
Page 54: Displaying The Contacts Summary Screen
6.4 Displaying the Contacts Summary Screen There are two ways to display the summary screen of a contact. You can either: Double tap a contact in the contact list. Select a contact and tap screen. 6.5 Editing or Deleting a Contact To modify your contact details, you can select the appointment and then tap (top toolbar) to go to the editing screen. -
Page 55: Troubleshooting And Maintenance
Troubleshooting and Maintenance Troubleshooting and Maintenance This chapter gives solutions to common problems you may encounter. It also provides guidelines on taking care of your device. NOTE: If you encounter a problem you cannot solve, contact your dealer for assistance. 7.1 Resetting Your System Resetting your system is similar to restarting your computer. -
Page 56: Clearing The Memory
NOTE (for Mio 268 Only): Clearing the memory will cause the navigation software to lose. You must insert the Mio Map card to perform the automatic installation. In case the data in the Mio Map card is lost or damaged, perform the “Recover” procedure. (See Section 5.5 for information.) -
Page 57: Troubleshooting
7.3 Troubleshooting Power Problems Power does not turn on when using battery power The remaining battery power may be too low to run your device. Connect the AC adapter to your device and to external AC power. Then, turn on your device. -
Page 58: Connection Problems
GPS Problems When there are no valid signals available, you need to consider the following: Make sure that the GPS receiver is adjusted to the horizontal position and it has a clear view of the sky. Note that the GPS reception can be affected by: Bad weather. -
Page 59: Maintaining Your Device
7.4 Maintaining Your Device Taking good care of your device will ensure trouble-free operation and reduce the risk of damage to your device. Keep your device away from excessive moisture and extreme temperatures. Avoid exposing your device to direct sunlight or strong ultraviolet light for extended periods of time. -
Page 60: Support Information
In case of problems with navigation software, please call the following number: Service Hotline: +49 1805 605169 The Call Center is open from Monday-Friday from 8h00 till 20h00 (not on Saturday, Sunday). Questions may be mailed as well to: mionav@mio-tech.be... -
Page 61: A Regulatory Information
Regulatory Information NOTE: Marking labels located on the exterior of your device indicate the regulations that your model complies with. Please check the marking labels on your device and refer to the corresponding statements in this chapter. Some notices apply to specific models only. A.1 Regulations Statements Class B Regulations Federal Communications Commission Radio Frequency Interference Statement... -
Page 62: European Notice
Connect the equipment into an outlet on a circuit different from that to which the receiver is connected. Consult the dealer or an experienced radio/TV technician for help. Any changes or modifications not expressly approved by the manufacturer could void the user’s authority to operate the equipment. Please note: The use of a non-shielded interface cable with this equipment is prohibited. -
Page 63: Safety Precautions
About Charging Use only the AC adapter (PHIHONG, PSC05R-050) supplied with your Mio 268/Mio269. Use of another type of AC adapter will result in malfunction and/or danger. This product is intended to be supplied by a LISTED Power Unit marked with “LPS”, “Limited Power Source”... - Page 64 CAUTION: This unit contains a non-replaceable internal Lithium Ion battery. The battery can burst or explode, releasing hazardous chemicals. To reduce the risk of fire or burns, do not disassemble, crush, puncture, or dispose of in fire or water. Important instructions (for service personnel only) Caution: Risk of explosion if battery is replaced by an incorrect type.
Need help?
Do you have a question about the Mio 268 and is the answer not in the manual?
Questions and answers