Table of Contents
Advertisement
Quick Links
Advertisement
Table of Contents

Related Manuals for Mio DigiWalker A701


Summary of Contents for Mio DigiWalker A701
- Page 1 User’s Manual User’s Manual...
- Page 2 Revision: R00 (January 2006) Trademarks All brand and product names are trademarks or registered trademarks of their respective companies. Note The information in this manual is subject to change without notice.
-
Page 3: Table Of Contents
Turning On for the First Time ...1-9 Turning Off ...1-9 Entering the Suspend Mode...1-10 1.5 Installing Microsoft ActiveSync...1-11 1.6 Using Your A701 in a Vehicle ...1-13 Using the Car Holder...1-13 Connecting the Car Charger ...1-14 1.7 Expanding Your A701 ...1-15 Using a SD/MMC Card...1-15... - Page 4 Entering Text Using the Input Panel ...2-8 Writing on the Screen...2-10 Drawing on the Screen...2-13 Recording a Message ...2-15 Using My Text ...2-17 2.9 Securing Your A701 ...2-18 Locking the Keypad...2-18 Locking the Device...2-19 Locking the Phone ...2-20 Using the Phone ...3-1 3.1 About Your Phone...3-1...
- Page 5 Power Management ...4-2 Power-Saving Tips ...4-3 4.2 Managing Memory ...4-5 Storage and Program Memory...4-5 Additional Memory ...4-5 4.3 Customizing Your A701 ...4-6 4.4 Finding and Organizing Information ...4-9 4.5 Adding or Removing Programs ...4-10 Adding Programs ...4-10 Removing Programs ...4-12 Microsoft Pocket Outlook...5-1...
- Page 6 5.2 Contacts: Tracking Friends and Colleagues ...5-4 Creating a Contact ...5-5 Using the Contacts Summary Screen ...5-6 5.3 Tasks: Keeping a To Do List ...5-7 Creating a Task...5-8 Using the Tasks Summary Screen...5-9 5.4 Notes: Capturing Thoughts and Ideas ...5-10 Creating a Note ...5-11 5.5 Messaging: Sending and Receiving E-mail Messages ...
- Page 7 Bluetooth Partnership...7-7 7.3 Using Internet Explorer Mobile...7-9 Browsing the Internet ...7-10 Managing Favorites...7-10 Troubleshooting and Maintenance ...8-1 8.1 Resetting Your A701 ...8-1 8.2 Restoring Factory Default State ...8-2 8.3 Power Problems...8-3 8.4 Memory Problems ...8-3 8.5 Screen Problems...8-5 8.6 Connection Problems...8-6 Synchronization Problems ...8-6...
- Page 8 8.7 Taking Care of Your A701...8-8 General Guidelines ...8-8 Phone Guidelines...8-9 Travel Guidelines ...8-9 Regulatory Information... A-1 A.1 Regulations Statements ... A-1 European Notice ... A-1 A.2 Safety Precautions ... A-2 About the AC Adapter ... A-2 About the Battery ... A-2 About the Radio Frequency Exposure ...
-
Page 9: Preface
Microsoft Exchange Server with A701. Your A701 is more than a Pocket PC and mobile phone. It allows you to take pictures, record video clips, browse the Internet and WAP web pages, receive and send messages (such as e-mails, instant messages, and text and multimedia messages), listen to music, and lots more. -
Page 10: Where To Find Information
See this source A701 Quick Start Guide Chapter 3 of this manual A701 Application Manual on the Bonus CD Section 6.1 of this manual ActiveSync Help on your desktop computer Product web site: www.mio-tech.be Microsoft web site: www.microsoft.com... -
Page 11: Getting Started
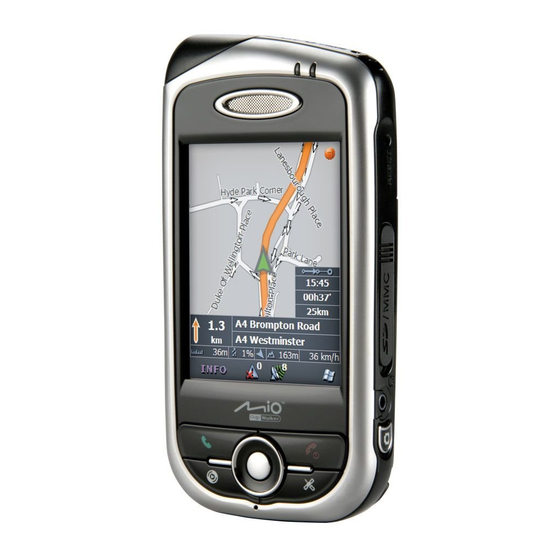
Getting Started This chapter introduces you to the external components of your A701, and guides you through the process of setting up your A701 for use. 1.1 Identifying Hardware Components The illustrations below introduce you to the various buttons, connectors, ports and features of your A701. - Page 12 Glowing in red indicates that battery charging is in progress. Glowing in green indicates that the battery is fully charged. Flashing in green indicates that A701 is inside the mobile phone network. Flashing in red informs you of scheduled appointments, alarms and reminders.
-
Page 13: Back Components
Sends out music, sounds and voice. Inside is the rechargeable battery that serves as the internal power source for your A701. You can recharge the battery by connecting to AC power. Allows you to adjust the distance and angle when taking a picture of yourself. -
Page 14: Left-Side Components
Left-Side Components Component Volume Control Car Holder Slot Getting Started Description Adjusts the volume by pressing the upper or lower button. Pressing the Volume control can immediately silence the ring of an incoming call. Pressing the Volume down button for 6 seconds enables you to send emergency text messages to your pre-defined recipients. -
Page 15: Right-Side Components
Headphone Connector Camera Button Getting Started Description Restarts your A701. Accepts an optional SD (Secure Digital) or MMC (MultiMediaCard) storage card for removable storage, or SD IO wireless network card for the network connection. Connects to a pair of stereo headphones. -
Page 16: Top Components
Top Components Component GPS Antenna Lanyard Eyelet Bottom Components Component Mini-USB Connector Stylus Getting Started Description Receives signals from the GPS satellites overhead. Lanyard attaches to this opening. Description Connects to the AC adapter or USB cable. Tap on the touch screen to make selections and enter information. -
Page 17: Installing The Sim Card And Battery
You must install a SIM card before you can use the phone feature. 1. Slide the back cover and remove it from A701. 2. Insert the SIM card with the contact area facing downward (the angled corner is in the top-left position). -
Page 18: Charging The Battery
Whenever possible, keep your A701 connected to the AC adapter and a power source. Doing so keeps the battery charged. NOTE: Your A701 can also be charged when it is connected to a desktop computer via the USB cable. CAUTION: For optimal performance of the lithium battery, take note of the following: The environment temperature for charging should be 0~40°C. -
Page 19: Turning A701 On And Off
The on and off of A701 is controlled by the Turning On for the First Time 1. Make sure that A701 is connected to AC power or the battery has power. 2. Press the End button for 3 seconds to turn on A701. -
Page 20: Entering The Suspend Mode
(or vibrate, depending on your setting) and display the caller’s phone number and name on the screen. To avoid waking up A701 from the suspend mode, you can enable the keypad auto-lock function by tapping... -
Page 21: Installing Microsoft Activesync
7. Connect A701 to the desktop computer. Connect the mini-USB end of the USB cable to the bottom of your A701, and the other end to a USB port on your desktop computer. - Page 22 11. Click After your first synchronization, the data you have stored on your desktop computer such as Calendar, Contacts and Tasks is copied to your A701. You are now ready to take it along with you when you go. NOTE: If you have set a device password, you will need to enter this password on the desktop computer for the ActiveSync connection.
-
Page 23: Using Your A701 In A Vehicle
After the suction cup is secured to the windshield, never try to pull or wriggle the arm. Always adjust A701 and the arm of the car holder for the best viewing angle BEFORE driving. Avoid adjusting A701 with one hand while driving. -
Page 24: Connecting The Car Charger
CAUTION: To protect your device against sudden surges in current, connect the car charger only after the car engine has been started. The car charger supplies power to your A701. Connect one end of the car charger to the power connector of your A701 and the other end to the cigarette lighter in the car. -
Page 25: Expanding Your A701
1.7 Expanding Your A701 Using a SD/MMC Card Your A701 has a SD/MMC slot where you can insert an optional SD or MMC storage card, or SD IO wireless network card. With the removable memory, you can store or backup your data and exchange data with other devices. -
Page 26: Basic Skills
Basic Skills This chapter familiarizes you with the basic operations of your A701 such as using the stylus, navigation pad, Today screen, menus, and programs. You will also know how to enter information and lock your A701. 2.1 Using the Stylus Use the stylus to navigate and select objects on the screen. -
Page 27: Using The Navigation Pad
To activate the selected item, press the center button. 2.3 Today Screen When you turn on your A701 for the first time each day, you will see the Today screen. The Today screen is accessible from anywhere by tapping Today The Today screen shows your upcoming appointments, active tasks, and information about e-mail messages. -
Page 28: Quick Launch Bar
Pictures & Videos (See section 6.8.) Notes (See section 5.4.) Call History (See section 3.5.) Internet Explorer (The program will access the Mio-tech Online web site by default. See section 7.1 for information on connections.) On the Quick Launch Bar, Mio Menu is not an adjustable item. -
Page 29: Mio Menu
Selected program Left soft key The central area on the Mio Menu displays the program icons. The selected program icon is highlighted by a white cloud underneath, and its program name is displayed at the top of the screen. When tapping an icon, you can start a program, or open a folder to access its content. -
Page 30: Landscape View
Landscape View You can use your A701 in a landscape manner. To change the screen view, do one of the following: Settings Landscape (left-handed) On the Today screen or the Mio Menu, tap the corner. 2.4 Navigation Bar and Toolbar The Navigation bar is located at the top of the screen. -
Page 31: Running Programs
To access additional programs, tap icon. You can press a program button on the front of your A701. The icons on the buttons identify the default programs they are associated with. From the Quick Launch Bar on the Today screen or the Mio Menu, tap the program icon. -
Page 32: Shortcut Menus
2.7 Notifications Your A701 reminds you in a variety of ways when you have something to do. For example, if you have set up an appointment in Calendar, a task with a due date in Tasks or an alarm in Clock, you will be notified in any of the following ways: A message appears on the screen. -
Page 33: Entering Information
When you use the Input panel, your A701 anticipates the word you are typing or writing and displays it above the Input panel. When you tap the displayed word, it is inserted into your text at the insertion point. The more you use your A701, the more words it learns to anticipate. - Page 34 NOTE: To change word suggestion options, such as the number of words suggested at one time, tap Block Recognizer With Block Recognizer, you can use the stylus to input characters using strokes that are similar to the Palm™ Graffiti® method. To type with Block Recognizer: 1.
-
Page 35: Writing On The Screen
Letter Recognizer With Letter Recognizer, you can write letters using the stylus just as you would use a pen on paper. To type with Letter Recognizer: Letter Recognizer 1. Tap the arrow next to the Input panel button and then tap 2. - Page 36 Writing To write on the screen, tap action displays lines on the screen to help you write. NOTE: Not all programs support the drawing mode. Editing Your Writing If you want to edit or format writing, you must first select the writing and then edit it.
- Page 37 Converting Your Writing to Text 1. If you want to convert only certain words, select them before going to the next step. 2. To convert writing to text, tap selected words and then tap turned into text. If a word is not recognized, it is left as writing. Select the text you want to convert and tap Recognize on the shortcut menu.
-
Page 38: Drawing On The Screen
Some tips for getting good recognition are listed below: Write neatly. Write on the lines and draw descenders below the line. Write the cross of the “t” and apostrophes below the top line so that they are not confused with the word above. -
Page 39: Creating A Drawing
Creating a Drawing Menu Draw 1. Tap to enable drawing mode. A check (√) appears before the command. 2. To create a drawing, cross three ruled lines on your first stroke. A drawing box appears. 3. Subsequent strokes in or touching the drawing box become part of the drawing. -
Page 40: Recording A Message
In the Messaging program, you can add a recording to an e-mail message. To create a recording: 1. Hold A701’s microphone near your mouth or other source of sound. 2. Tap the Record button on the Recording toolbar to start recording. If the speaker is not muted, a beep indicates that your A701 is recording. - Page 41 Recording Formats Your A701 supports several formats for voice notes. The formats vary in both the quality of the recording and the size of the sound file. When selecting a recording format, you should consider the quality you need as well as how much storage memory the recording will use on your A701.
-
Page 42: Using My Text
Using My Text When using Messaging or MSN Messenger, use My Text to quickly insert preset or frequently used messages into the text entry area. To insert a message, Menu My Text and then tap a message. NOTE: After inserting a My Text message, you can add text to it before you send the message. -
Page 43: Securing Your A701
2.9 Securing Your A701 You can customize the level of security you want to have on A701 by locking the keypad, the entire device, or the phone. Locking the Keypad The keypad lock turns off the keypad functionality. This is a helpful feature if, for example, A701 is turned on and in your pocket, and you want to prevent accidental keypresses and unintentional phone calls. -
Page 44: Locking The Device
Locking the Device Locking your A701 prevents access to personal data. You can help keep your data more secure by requiring a password every time A701 is turned on. Settings 1. Tap Prompt if device unused for 2. Tap to select in the box to the right select a desired period of time. -
Page 45: Locking The Phone
Locking the Phone You can protect your phone from unauthorized use by assigning a type of password called a PIN (personal identification number). Your first PIN will be given to you by your mobile phone service provider. Phone Menu Options 1. -
Page 46: Using The Phone
Your A701 includes an integrated GSM (Global System for Mobile Communications) / GPRS (general packet radio service) phone. The integrated phone in A701 can also be used to connect your A701 to an ISP or work network so you can browse the Web and read e-mail. You can connect to the Internet or work network over GPRS, using Cellular Line, or using the modem specified by your mobile phone service provider. -
Page 47: Phone Features
Phone Features Your A701 includes an application program called Microsoft Phone. This program provides an on-screen phone keypad where you can perform all the phone operations. The phone features of your A701 are identified as below. Earpiece Talk Button Mouthpiece 3.2 Turning On and Off the Phone Function... -
Page 48: Turning On The Phone
The Phone keypad appears on the screen. From this keypad, you can make calls, access Call History, Speed Dial and Phone Settings. You can use other programs on you A701 during a call. To quickly switch back to the Phone keypad, tap... -
Page 49: Basic Phone Operations
A701 to make the call. 3. You can also tap the first 2 or 3 letters of the contact’s name on the Phone keypad. A701 searches through the contact list and displays the name(s) on the screen. -
Page 50: Making A Call Using A Recently Connected Number
When you see the name of the person to call listed on the screen, tap it to access the contact information, tap the number to call, and then press the Talk button on your A701 to make the call. Matching contacts... - Page 51 Making a Call from Contacts Microsoft Contacts displays your contact information stored both in A701’s memory and your SIM card. Contacts 1. Tap 2. Do one of the following to call someone from the contact list: Tap the contact to call. Then tap the number to call;...
- Page 52 The Call History list displays the calls you made, received, and missed. 1. Access the Phone keypad by tapping Phone or pressing the A701. Call History 2. Tap on the Phone keypad. 4. Do one of the following to call someone from...
- Page 53 Tap and hold the contact to call, and then Call on the shortcut menu. NOTE: SIM Manager can also display the text messages stored on your SIM card. Making a Call from a Hyperlink When you see an underlined phone number presented as a hyperlink in an e-mail message, you can use the hyperlink to make a call.
-
Page 54: Answering A Call
To answer an incoming call, tap pop-up window or press the You can use other programs on A701 during a call. To quickly switch back to Phone, press the Talk button or tap... -
Page 55: Ending A Call
NOTE: You may need to register for the “call waiting” service with your service provider and set your A701 accordingly. The exact number of people you can talk at the same time depends on your service provider. - Page 56 3. To end the second call and go back to the first, or press the Rejecting the Second Call To reject the second call and keep your current call in progress, tap not to press the End button; doing so will end the current call. Holding a Call to Make a Second Call 1.
- Page 57 3. Dial a second number and tap press the Talk button to connect. Wait for it to be picked up. 4. To end the second call and go back to the first, or press the Swapping between Calls When you have put a call on hold and made or taken another call as described earlier, you can swap between the two calls by tapping Setting up a Conference Call...
-
Page 58: Adjusting The Phone Volume
To adjust the volume during a call, tap the on the navigation bar to select a volume level, or use the Volume control on the side of A701. CAUTION: Never raise the sound volume level too high when using earphones. An excessive sound volume level could cause damage to your hearing. -
Page 59: Muting A Call
On the Phone keypad, tap mute function. The upper-right corner. To turn off the mute function, tap Using Speakerphone You can turn on the speakerphone to use A701 as a hands-free solution. On the Phone keypad, tap speakerphone function. The the navigation bar. -
Page 60: In-Call Options
In-call Options While a call is in progress, you can tap the soft key to access menu commands for common tasks. The following table shows the commands available when a call is in progress. Some of these commands are available only when multiple calls are in progress or during a conference call. -
Page 61: Taking A Note During A Call
2. Enter your note and tap To access a note you created during a call: 1. Access the Phone keypad by tapping Phone or pressing the A701. Call History 2. Tap on the Phone keypad. 3. The icon indicates that the phone call entry contains a note. -
Page 62: Using Call History
) displays only calls made to A701. By Caller displays a list of all contacts on your A701 who have a phone number assigned to them. NOTE: To quickly see the time, date, and duration of a call, tap the white area of the call’s entry. -
Page 63: Managing Call History
Managing Call History Menu You can tap the soft key manage Call History. All Calls displays the statistics, including total number of calls and total time. The All Calls counter cannot be reset. Recent Calls displays the total number of calls and total time since last time the call history was reset. -
Page 64: Using Speed Dial
Speed dials can only be created for numbers stored in Contacts. Your A701 has incorporated the photo ID feature into the speed dial function. You can easily locate the speed dial entry of the desired contact by the assigned picture. -
Page 65: Editing A Speed Dial Entry
4. When the editing is completed, tap the key. Deleting a Speed Dial Entry 1. Access the Phone keypad by tapping button on your A701. 2. Tap the button on the Phone keypad. 3. Tap and hold the entry you wish to delete, and tap menu. -
Page 66: Sending Text Messages From Phone
3.7 Sending Text Messages from Phone Using Speed Dial 1. Access the Phone keypad by tapping Phone or pressing the A701. 2. Tap on the Phone keypad. 3. Tap and hold the entry you wish to send a text Send Text Message message, and tap shortcut menu. -
Page 67: Managing Phone Numbers
3.8 Managing Phone Numbers Phone numbers can be stored in various places on your A701. Therefore, you can add, access and transfer phone numbers in a number of ways. Microsoft Contacts: Transferring Contacts Contacts 1. Tap 2. Tap the desired entry in the contact list. - Page 68 Adding an Entry Programs 1. Tap your SIM card contents to be loaded. 2. Tap the soft key. 3. Enter the name and phone number of the new entry. When finished, tap NOTE: To edit a SIM card entry, on the contact list, tap the Menu soft key To delete the selected SIM card entry, tap the Menu soft key SIM card entries, tap the Menu soft key Using the Phone...
-
Page 69: Customizing Your Phone
To use custom .mp3, .wav, .mmf or .mid files as ring tones, use ActiveSync on your desktop computer to copy the files to the \Windows\Rings folder on your A701. Then, select the sound from the Ring Tone list. (For information on copying files to your A701, see ActiveSync Help on your desktop computer.) Emergency calls can be placed at any time without requiring a PIN. -
Page 70: Changing Services Settings
Changing Services Settings You can access and configure settings for the phone services you subscribed to through your mobile phone service provider. For example, you may want to block certain types of incoming and/or outgoing calls, forward incoming calls to a different phone number based on your situation, be notified of incoming calls when you are already in a call, or let others know your identity... - Page 71 Cell Broadcast Cell Broadcast is an add-on service provided by your service provider, allowing you to receive a variety of information such as weather forecast, stock, and traffic. For available topic numbers, consult your service provider. Settings 1. Tap Enable Cell Broadcast 2.
-
Page 72: Changing Network Settings
Current network displays the currently registered network. Preferred networks You can set your preferred networks in the order you want A701 to access them. For example, if your first preferred network is unavailable, A701 will try to access your second preferred network. Tap Networks and follow the on-screen instructions. -
Page 73: Additional Phone Operations
Tap and hold the number Making an Emergency Call You can use A701 to dial the international emergency number 112. This number can normally be used to make an emergency call in any country with or without a SIM card inserted, as long as you are within a mobile phone service network. -
Page 74: Managing Your A701
When you charge the battery upon a warning of low power, you should charge for at least 30 minutes before unplugging the AC adapter. A701 may not be able to turn on during the first few minutes of the charging until the battery power reaches the protection point of the system. -
Page 75: Power Management
Power Management Supplied with your A701 is a tool called “eUtility.” This tool helps you effectively manage power to prolong the battery’s operating time. Settings Performance Power System This page displays the program information. It does not contain any adjustable items. -
Page 76: Power-Saving Tips
Press the End button for 3 seconds until the Quick List appears and then Power off to turn off your A701 when it is not in use, even for a short time. Turn off functions not needed or adjust settings. - Page 77 Avoid power-consuming situations such as: When connecting A701 to your desktop computer (Your A701 will not auto-suspend while it is connected.) When using a SD/MMC card When monitoring Bluetooth transfers (Although you can set your A701 to constantly monitor the Bluetooth transfers sent from other Bluetooth devices, doing so will quickly drain your battery.)
-
Page 78: Managing Memory
4.2 Managing Memory Storage and Program Memory Files, settings and data that you add to your A701 are stored in the memory of A701. The memory on your A701 is shared between storage memory and program memory. Storage memory Storage memory is used to store the data you create and additional programs you install. -
Page 79: Customizing Your A701
CAUTION: Incorrect settings may cause your system to malfunction. Make sure that you fully understand the function of a certain item before any adjustment. You can customize the settings of A701 to your own preferences. Tap Settings . You can tap any of the icons on the for the options. - Page 80 To show the remaining battery power and to set the time for A701 to enter the suspend mode automatically. To enable or disable the keypad auto-lock function in the suspend mode.
- Page 81 Screen Connections Beam Bluetooth Connections Network Cards To configure the network card, if installed. (See Managing Your A701 Description To set the orientation of the screen to portrait or landscape. To adjust the touch screen for accurate screen taps. To enable the ClearType feature for easier reading of text in programs that support ClearType.
-
Page 82: Finding And Organizing Information
NOTE: To quickly find information that is taking up storage space on your A701, select Larger than 64 KB under Type. You can also use the File Explorer to find files on your A701 and to organize these files into folders. Tap... -
Page 83: Adding Or Removing Programs
ROM contents. All other programs and data files added to your A701 after factory installations are stored in the memory. You can install any program created for your A701 as long as your A701 has enough memory. The most popular place to find software for your A701 is on the Pocket PC web site (http://www.pocketpc.com). - Page 84 You will need to move this file to your A701. If you cannot find any installation instructions for the program in the Read Me file or documentation, use ActiveSync Explore to copy the program file to the Program Files folder on your A701.
-
Page 85: Removing Programs
2. Select the program in the list, and then tap If the program does not appear in the list of installed programs, use File Explorer on your A701 to locate the program, tap and hold the program, and Delete then tap on the shortcut menu. -
Page 86: Microsoft Pocket Outlook
Microsoft Pocket Outlook This chapter tells you how to use Microsoft Pocket Outlook that includes Calendar, Contacts, Tasks, Notes, and Messaging. You can use these programs individually or together. For example, e-mail addresses stored in Contacts can be used to address e-mail messages in Messaging. 5.1 Calendar: Scheduling Appointments and Meetings Use Calendar to schedule appointments, including meetings and other events. -
Page 87: Creating An Appointment
NOTE: You can customize the Calendar display (for example, change the first day of the week), by tapping the Menu soft key Creating an Appointment 1. In Day or Week view, tap the desired date and time for the appointment. Menu 2. -
Page 88: Using The Calendar Summary Screen
Using the Calendar Summary Screen When you tap an appointment in Calendar, a summary screen is displayed. To change the appointment, tap the Microsoft Pocket Outlook Edit soft key. View appointment details. View notes. -
Page 89: Contacts: Tracking Friends And Colleagues
5.2 Contacts: Tracking Friends and Colleagues Contacts maintains a list of your friends and colleagues so that you can easily find the information you are looking for, whether you are at home or on the road. Contacts , or tap the to the program. -
Page 90: Creating A Contact
Creating a Contact 1. In Contacts, tap the 2. Using the Input panel, enter a name and other contact information. You will need to scroll down to see all available fields. (See section 2.8 for information on entering text.) 3. Tap to save and return to the contact list. -
Page 91: Using The Contacts Summary Screen
Using the Contacts Summary Screen When you tap a contact in the contact list, a summary screen is displayed. To change the contact information, tap the Microsoft Pocket Outlook Menu Edit soft key Assigned picture for the contact View contact details. -
Page 92: Tasks: Keeping A To Do List
5.3 Tasks: Keeping a To Do List Use Tasks to keep track of what you have to do. Programs Microsoft Pocket Outlook Tasks to switch to the program. Tap to create a new task. Tap to display or edit the task details. -
Page 93: Creating A Task
Creating a Task 1. In Tasks, tap the 2. Using the Input panel, enter a description. (See section 2.8 for information on entering text.) 3. You can enter a start date and due date or enter other information by first tapping the field. -
Page 94: Using The Tasks Summary Screen
Using the Tasks Summary Screen When you tap a task in the task list, a summary screen is displayed. To change Edit the task, tap the soft key. Microsoft Pocket Outlook Tap to show and hide additional summary information. View notes. -
Page 95: Notes: Capturing Thoughts And Ideas
5.4 Notes: Capturing Thoughts and Ideas Quickly capture thoughts, reminders, ideas, drawings and phone numbers with Notes. You can create a written note or a recording. You can also include a recording in a note. Programs Microsoft Pocket Outlook Notes to switch to the program. -
Page 96: Creating A Note
Creating a Note 1. In Notes, tap the 2. Create your note by writing, drawing, typing, or recording. For more information about using the Input panel, writing, and drawing on the screen and creating recordings, see section 2.8. 3. Tap to save and return to the note list. -
Page 97: Messaging: Sending And Receiving E-Mail Messages
NOTE: By default, messages you send are saved in the Sent folder on A701 to help conserve memory. If you want to conserve memory and do not want to keep copies of sent messages, in the messaging list, tap the Menu soft key Message, and cancel the Keep copies of sent items in Sent folder check box. - Page 98 NOTE: You can also specify that subfolders of the Inbox folder are synchronized. SMS messages are not received via synchronization. Instead, they are sent to A701 via your service provider. Downloading Messages from the Server To send and receive e-mail messages for an e-mail account that you have with...
- Page 99 To send and receive messages automatically, tap Connect and check for messages and enter a time interval. Connecting automatically may result in higher connection charges. To save memory, limit the number of e-mails that are downloaded to your A701 by lowering the number of days to display. Microsoft Pocket Outlook...
-
Page 100: Setting Up An E-Mail Account
Setting up an E-mail Account You need to set up an e-mail account that you have with an Internet service provider (ISP) or an account that you access using a VPN server connection (typically a work account) before you can send and receive mail. Messaging 1. - Page 101 5. Enter your message and subject. To quickly add common messages, tap the Menu My Text soft key 6. To add an attachment to the E-mail message, tap the and tap the item you want to attach: the file you want to attach or record a voice note. Embedded objects cannot be attached to messages.
-
Page 102: Composing And Sending A Mms Message
Composing and Sending a MMS Message NOTE: You need to subscribe to the GPRS and MMS services with your service provider before you can send and receive MMS messages. (See section 7.1 for information on the GPRS connection.) Depending on the service that you subscribe to, you may not be able to send and receive MMS messages to users using a different mobile phone network. - Page 103 6. Enter the subject. 7. To add a picture, tap Picture . Then select the desired picture. 8. To add an audio file, tap Audio . Then select the desired audio file. 9. To add a recording, tap the Record soft key to start recording.
- Page 104 You can add only one recording on each slide of a message. A second recording replaces the first recording. The recordings will be saved in the My Device\My Documents\My Music folder on your A701. To delete the selected picture/audio/text message, move to the selection, and tap the...
-
Page 105: Receiving And Viewing A Mms Message
For a message that contains several slides, you can set the minimum duration for playing back each slide. 1. On the message screen, tap the 2. Enter the desired duration for each slide. The range is 5~600 seconds. If you wish to apply the setting to all MMS messages, tap the Apply All 3. -
Page 106: Replying To Or Forwarding A Message
\My Device\My Documents\ My Pictures folder on A701; the audio will be saved in the \My Device\My Documents\ My Music folder. to return to the message. -
Page 107: Moving A Message
NOTE: If you use a POP3 account and you move e-mail messages to a folder you created, the link is broken between the messages on A701 and their copies on the e-mail server. The next time you connect, the e-mail server will see that the messages are missing from the A701 Inbox folder and delete them from the server. -
Page 108: Creating Or Changing A Message Signature
Creating or Changing a Message Signature Messaging 1. Tap Menu 2. Tap the soft key Accounts Signatures 3. Tap 4. Select the account for which you want to create or change a signature. Use signature with this account 5. Select the selected. -
Page 109: Managing Folders
An embedded message can be viewed as an attachment when using IMAP4 to receive e-mail. However, this feature does not work if TNEF is enabled so that you can receive meeting requests. To store attachments on a storage card rather than on A701, tap the Menu soft key Tools Options check box. - Page 110 All messages and folders that are linked to the selected account are cleared, and memory is expanded on A701 without deleting messages on the server. The next time you connect, the messages and folders are downloaded again. NOTE: You cannot clear messages and folders from the Outlook E-mail account.
-
Page 111: More Programs
A701. This chapter tells you how to use these programs. 6.1 ActiveSync NOTE: ActiveSync is already installed on your A701. You need to install ActiveSync on your desktop computer. (See section 1.5 for installation procedures.) When you have established the connection between your A701 and your desktop computer, you can synchronize the information between the two with ActiveSync. -
Page 112: Synchronizing Data
Synchronizing Data Once you have created a synchronization relationship and completed the first synchronization, you can initiate synchronization from your A701. 1. Connect your A701 to your desktop computer. (See Step 7 of section 1.5 for connection procedures.) Programs ActiveSync 2. -
Page 113: Word Mobile
Microsoft Word Mobile works with Microsoft Word on your desktop computer to give you easy access to copies of your documents. You can create new documents on your A701 or you can copy documents from your desktop computer. Programs Creating a Document 1. -
Page 114: Opening A Document
Opening a Document Whenever you switch to Word Mobile, you will see the document list. Tap the desired document to open it. You can open only one document at a time; when you open a second document, the first will be saved and closed automatically. Help For more information, tap More Programs... -
Page 115: Excel Mobile
Microsoft Excel Mobile works with Microsoft Excel on your desktop computer to give you easy access to copies of your workbooks. You can create new workbooks on your A701 or you can copy workbooks from your desktop computer to your A701. -
Page 116: Opening A Workbook
Opening a Workbook Whenever you switch to Excel Mobile, you will see the workbook list. Tap the desired workbook to open it. You can open only one workbook at a time; when you open a second workbook, you will be asked to save the first. Help For more information, tap More Programs... -
Page 117: Powerpoint Mobile
6.4 PowerPoint Mobile With PowerPoint Mobile, you can open and view slide show presentations created on your desktop computer. Slide shows created in *.ppt and *.pps format with PowerPoint ’97 and later can be viewed on your A701. Programs 1. Tap 2. -
Page 118: Pocket Msn
6.5 Pocket MSN Pocket MSN on your A701 provides practically instant access to your up-to-date MSN Hotmail Inbox, your MSN Messenger contact list, and options for customizing your Pocket MSN experience. With Pocket MSN, you get: MSN Hotmail. Read, write, and send e-mail. Delete e-mail and manage your Hotmail folders. -
Page 119: Signing In To Pocket Msn
4. The Pocket MSN items will display on the Today screen after you have signed in to Pocket MSN. Using Pocket MSN Messenger Pocket MSN Messenger on your A701 provides the same chat environment as MSN Messenger on your desktop computer. After you have signed in to Pocket MSN, tap the the Today screen to sign in to MSN Messenger. -
Page 120: Using Msn Hotmail
Using MSN Hotmail With MSN Hotmail on your A701, you have access to your Hotmail Inbox even when you are mobile. Read, send, and reply to e-mail, and manage your folders. Mark e-mail attachments for downloading so that you can view them. -
Page 121: Windows Media Player
Use Microsoft Windows Media Player to play digital audio and video files that are stored on your A701 or on a network, such as on a web site. You can play files in either Windows Media or MP3 format (including files with the extensions .asf, .wma, .wmv and .mp3). -
Page 122: Camera
2. By default, the camera is in the Still mode. If you are not in this mode, tap Menu soft key 3. Frame your target in the viewing window. You can rotate your A701 if necessary. 4. To adjust the brightness of the image or zoom in/out: Press the Left/Right button to adjust the brightness of the image. - Page 123 Enter or Camera button) and shooting the picture. When you press the button to shoot, the timer will start to count down and you should keep A701 steady until the time is up and the picture is shot. 6. After shooting, you can do the following: Press the Camera button to save the picture and return to the previous screen.
-
Page 124: Taking Continuous Pictures
Taking Continuous Pictures Menu Mode Burst While in the Still mode, you can tap the soft key to take 4 continuous pictures. The icon will appear on the lower-right corner of the screen. Take pictures according to the instructions described in the “Taking Pictures”... -
Page 125: Recording Video Clips
2. By default, the camera is in the Still mode. Tap the change the mode. The screen. 3. Frame your target in the viewing window. You can rotate your A701 if necessary. 4. Press the Left/Right button to adjust the brightness of the image. The adjustable range is –3 ~ +3. -
Page 126: Camera Settings
Allows the full-screen display when playing the slide show in the portrait or landscape mode. Sets if you want the A701 to enter the screensaver mode after 2 minutes of inactivity when connected to the desktop computer. Sets if you wish to store pictures on A701 or a SD/MMC card. -
Page 127: Pictures & Videos
With Pictures & Videos, you can: Take, view, and edit pictures. Record and launch video clips stored on A701 or on a SD/MMC card. Send pictures and video clips to others. Set a picture as the background on the Today screen. - Page 128 Select the sort order for the list. Tap to open the file. Tap to switch to the Camera program. Help For more information, tap 6-18 More Programs...
-
Page 129: Calculator
NOTE: You can also use the eConvertor program on the Bonus CD to perform basic arithmetic. eConvertor also allows you to operate in the Currency and Metrology modes. For information on eConvertor, see the A701 Application Manual on the Bonus CD. More Programs... -
Page 130: Modem Link
6.10 Modem Link Using Modem Link, you can use your A701 as an external modem for another device or computer via the USB connection. NOTE: A701 does not support the COM and infrared connection. When using the modem link connection, A701 supports Windows 2000/XP only. -
Page 131: Terminal Services Client
Terminal Services or Remote Desktop, and use all of the programs available on that computer from your A701. For example, instead of running Word Mobile, you can run the desktop computer version of Word and access all of the .doc files on that computer from A701. -
Page 132: Additional Programs
Depending on the continuing developments of the product, the software supplied with your A701 may be changed or updated. If there is any difference between the information in this manual and your product, the operation should be based on the product you have. - Page 133 1. Make sure that you have defined the recipient for the emergency message. 2. Press and hold the Volume down button on the side of A701 for 6 seconds to activate the program. (If you have not defined the recipient, the program will display a notification message.)
-
Page 134: Quick Position
If A701 has received the GPS data (within 120 seconds), the message will contain the longitude and latitude information. If A701 fails to receive the GPS data, then the message will only show that you need help. Quick Position Updating the ephemeris file is helpful for quick GPS positioning when using the navigation program. -
Page 135: Tmc
Automatic Download arrives, select 8. Tap Your A701 supports the Traffic Message Channel (TMC) function. The TMC function provides the latest traffic information and enables dynamic route calculation in order to evade traffic jams and other obstructions. More Programs... -
Page 136: K-Lite Codec Pack
3. Tap to save the setting. K-Lite Codec Pack To play back the *.3gp video clips that you recorded using A701 on your desktop computer, you need to install K-Lite Codec Pack on the desktop computer. Before the installation, make sure that the desktop computer meets the... - Page 137 4. Follow the on-screen instructions for installation. Take note of the following: On the “Select Components” screen, select Profile 1: Default. 6-27 More Programs...
- Page 138 5. When the installation is completed, click Finish. Before playback, you need to copy the *.3gp files from the \My Device\My Documents\My Pictures folder of A701 to the desktop computer using ActiveSync Explorer. Then you are ready to play back the *.3gp files on your desktop computer using either Media Player Classic or Windows Media Player.
-
Page 139: Getting Connected
Getting Connected To take full advantage of your A701, you will want to get connected. This chapter tells you how you can get your A701 connected through a variety of ways including general packet radio services (GPRS), modem, wireless network card, and Bluetooth. -
Page 140: Modem Connection
Starting and Ending a GPRS Connection To start the connection, simply use the desired program. For example, switch to Internet Explorer Mobile and browse to a web page. Your A701 will automatically connect. To end the connection, tap the Disconnect Modem Connection With a modem, you can dial in to your ISP or corporate network. -
Page 141: Wireless Network Connection
Use a wireless network card to connect to a wireless network without physical cables. Before creating the connection, you need to: Have a wireless network card (SD IO card) that is compatible with A701. (For driver and installation procedures, see the documentation that came with the SD IO card.) If necessary, obtain the authentication information from your network administrator. - Page 142 A701 will automatically connect, and the bar. To end the connection, remove the card from your A701. NOTE: When you have finished using the wireless network, complete the actions for ending the connection. Leaving the wireless network module active will consume more power.
-
Page 143: Using Bluetooth
Beam information, such as files, appointments, tasks, and contact cards, between devices that have Bluetooth capabilities. Create a connection between your A701 and a Bluetooth phone to use the phone as a modem. Use a Bluetooth service. Once you connect to another device or computer using Bluetooth, you can locate and use any of the services available on that device. -
Page 144: Transferring Files Via Bluetooth
NOTE: By default, Bluetooth is turned off. If you turn it on, and then turn off your A701, Bluetooth also turns off. When you turn on your A701 again, Bluetooth turns on automatically. When you have finished using Bluetooth, complete the actions for turning it off. Leaving the Bluetooth capability active will consume more power. -
Page 145: Bluetooth Partnership
Bluetooth Partnership A partnership is a relationship that you create between your A701 and another device with Bluetooth capabilities to help exchange information in a secure manner. Creating a partnership involves entering the same Bluetooth passkey on both devices. - Page 146 Accepting a Bluetooth Partnership 1. Make sure that the two devices are turned on, discoverable, and within close range. (For information on turning on Bluetooth on A701, see “Turning On and Off Bluetooth” previously in this chapter.) 2. When prompted to accept a Bluetooth partnership with another device, tap Passkey 3.
-
Page 147: Using Internet Explorer Mobile
7.3 Using Internet Explorer Mobile Use Internet Explorer Mobile to view web pages in either of these ways: Connect to an ISP or network and browse the web. During synchronization with your desktop computer, download your favorite links that are stored in the Mobile Favorites subfolder in Internet Explorer on the desktop computer. -
Page 148: Browsing The Internet
Browsing the Internet Internet Explorer 1. Tap Favorites 2. Tap the soft key to display the Favorites list. 3. Tap the page that you want to view. NOTE: If a favorite link is dimmed or you receive a message that the page is not available, you must download the page to your device through synchronization or connect to the Internet. - Page 149 Synchronize a Favorite Link You can synchronize the Internet Explorer favorites on your desktop computer with your A701 so you can use them with Internet Explorer Mobile as well. 1. In ActiveSync on your desktop computer, click Tools Favorite, and click OK. For more information on using ActiveSync, see ActiveSync Help.
-
Page 150: Troubleshooting And Maintenance
8.1 Resetting Your A701 CAUTION: Resetting will cause unsaved data to be lost. Resetting your A701 is similar to restarting your desktop computer. It restarts the operating system, but you will lose any unsaved data. Occasionally, you may need to reset your A701;... -
Page 151: Restoring Factory Default State
8.2 Restoring Factory Default State In some cases, you may need to restore your A701 to the factory default state by clearing the memory from your A701. For example, you should clear the memory: When your A701 does not respond after being reset. -
Page 152: Power Problems
8.3 Power Problems Power does not turn on when using battery power The remaining battery power may be too low to run your A701. Connect the AC adapter to your A701 and to external AC power. Then, turn on your A701. - Page 153 Then, stop the program by tapping Reset your A701 as described in section 8.1 and 8.2. If you have a storage card, move data to the storage card as described below.
-
Page 154: Screen Problems
8.5 Screen Problems Screen is off If the screen does not respond even after you turn on A701, try the following in order until the problem is solved: Connect the AC adapter to your A701 and to external AC power. -
Page 155: Connection Problems
ActiveSync 4.0; if the number is “2,” then you need to use ActiveSync 4.1. Cable Connection Problems Make sure that your A701 and your desktop computer are both turned on before establishing the connection. Make sure that the cable is securely plugged into the USB port on your desktop computer. -
Page 156: Network Connection Problems
Also, if synchronization does not start right away, the network is probably busy, and it may take a minute for your A701 to connect to the network. Verify with your network administrator that your user name and password are correct. -
Page 157: Taking Care Of Your A701
A701. In the event of moisture condensation, allow your A701 to dry out completely. Take care not to sit on your A701 when it is located in the back pocket of trousers, etc. The screen surface is easily scratched. Use only the stylus to tap on the screen. -
Page 158: Phone Guidelines
Phone Guidelines Use a phone headset or pull over your car first if using your A701 when driving. Your A701 is a low-power RF (radio frequency) device. It receives and sends out RF signals when the phone feature is turned on. Therefore, be careful of the following: -... - Page 159 If you plan to travel abroad with your A701, consult your dealer for the appropriate AC adapter for use in your country of destination. If you plan to make modem connections abroad, make sure that you have the correct modem and cable for your country of destination.
-
Page 160: Regulatory Information
Regulatory Information NOTE: Marking labels located on the exterior of your device indicate the regulations that your model complies with. Please check the marking labels on your device and refer to the corresponding statements in this chapter. Some notices apply to specific models only. A.1 Regulations Statements European Notice Products with the CE marking comply with Radio &... -
Page 161: Safety Precautions
A.2 Safety Precautions About the AC Adapter CAUTION: Use only the AC adapter (PHIHONG, PSC05R-050) supplied with your device. Use of another type of AC adapter will result in malfunction and/or danger. This product is intended to be supplied by a LISTED Power Unit marked with “LPS,”... -
Page 162: About The Radio Frequency Exposure
About the Radio Frequency Exposure This product is a low-power radio transmitter and receiver. When it is turned on, it receives and also sends out radio frequency (RF) signals. Specific Absorption Rate (SAR) is the unit of measurement for the amount of radio frequency energy absorbed by the body.
Need help?
Do you have a question about the DigiWalker A701 and is the answer not in the manual?
Questions and answers