
Related Manuals for Roborock S7 MaxV Plus


Summary of Contents for Roborock S7 MaxV Plus
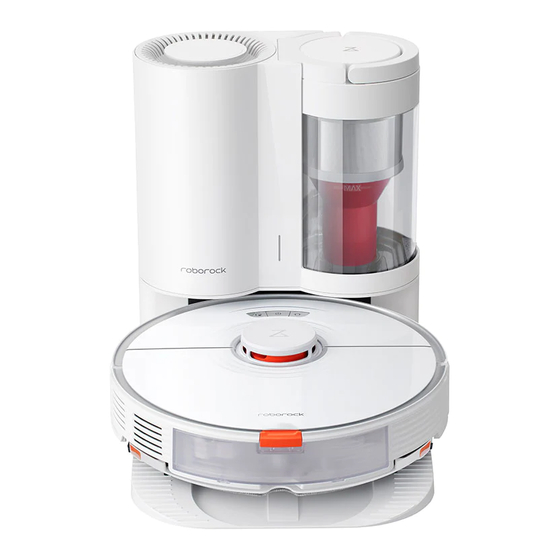
- Page 1 Roborock S7 MaxV Plus Robotic Vacuum Cleaner User Manual Read this user manual with diagrams carefully before using this product and store it properly for future reference.
- Page 3 English Français Deutsch Italiano Español Polski Norsk Svenska...
- Page 4 English Contents 005 Safety Information 006 International Symbols Explanation 007 Product Overview 008 Installation 009 Connecting to the App 010 Instructions 012 Routine Maintenance 014 Basic Parameters 015 Errors 016 Common Issues...
-
Page 5: Safety Information
Safety Information Restrictions • Use the product according to the manual. Any loss or damage caused from improper use will be borne by the user. • Do not use this product on elevated surfaces without barriers such as the floor of a loft, an open-ended terrace, or on top of furniture. •... -
Page 6: Battery And Charging
Battery and Charging WARNING • For the purposes of recharging the battery, only use the detachable supply unit roborock CDZ11RR, CDZ12RR, AED01HRR, AED02HRR, EWFD01HRR or EWFD02HRR provided with this product. • If placing the robot into storage, charge it fully and turn it off before placing it in a cool dry place. Recharge it at least every three months to prevent the battery over discharging. -
Page 7: Product Overview
Dust Bag Holder A1-2—Microphone A3-2—Reset Button • For use with Video Calls Disposable Dust Bag A3-3—Air Inlet Note: Only available in the Roborock app. A3-4—LiDAR Sensor Screwdriver A1-3—Status Indicator Light A3-5—Mop Wash Sensor • White: Vacuuming A3-6—Water Tank Latch • Blue: Vacuuming and Mopping A3-7—Positioning Button... -
Page 8: Installation
Installation Auto-Empty Dock 1. Tidy cables and loose items from the ground and move any unstable, fragile, A12-1—Filter Cover Important Information precious, or dangerous items to prevent A12-2—Rear HEPA Filter personal injury or property damage due A12-3—Front Filter to items becoming tangled in, struck by, A12-4—... -
Page 9: Connecting To The App
• Place the dock on a flat floor away from fire, heat, and Notes: water. Avoid narrow spaces or locations where the robot • To prevent corrosion or damage, only use the Roborock This robot supports both Roborock and may be suspended in the air. - Page 10 Press the button to start cleaning. The hotspot and camera for network configuration. The camera is used for QR Code scanning purposes in the Roborock robot will plan its cleaning route according app. Information obtained by the camera will neither be Press the button to start spot cleaning.
- Page 11 Charging Using the Disposable To add water or clean the VibraRise mop cloth, press any button to stop the robot Dust Bag After cleaning, the robot will automatically and remove the mopping module. After return to the dock to charge. Note: The disposable dust bag uses a one-time seal design adding water or cleaning the VibraRise mop to effectively prevent dust from spreading outward during...
-
Page 12: Routine Maintenance
• Video Call Note: To prevent blockage, only use clean water without any clean the main brush. cleaning liquid. Note: Only available in the Roborock app. Side Brush C5-4— Leave the dustbin and the washable • Volume Adjustment • Language Selection filter to dry. - Page 13 Washable Filter Robot Sensors C11-1— Remove the dustbin vertically as shown. * Clean every 2 weeks and replace every 6-12 months. * Clean monthly. C6-1— Open the filter cover and remove the Use a soft, dry cloth to wipe and clean all C11-2—...
-
Page 14: Filter Cleaning
Basic Parameters Filter Cleaning Dust Bag Replacement * Clean as required. * Clean as required. Robot Notes: Notes: • Do not wash the filter in a dishwasher or washing machine, • Replace the disposable dust bag when full. or dry using a cylinder dryer, oven, microwave, hot air or •... - Page 15 If the problem persists after using the recommendations in the table above, Error 8: Robot trapped. Clear obstacles surrounding robot. please email our after-sales service team: Europe Support: support@roborock-eu.com Error 9: No dustbin. Install dustbin and filter. Australia Support: service@roborock.com.au Error 12: Low battery.
-
Page 16: Common Issues
• Abnormal WiFi connection. Reset the WiFi, download the latest mobile app, and retry. connect to WiFi • The current Roborock robot is not supported. You can find supported models in the app. • Unable to connect to WiFi abruptly. There may be an error with your router settings. Contact Roborock customer service for additional support. - Page 17 Common Issues Problem Solution Scheduled cleaning • Keep the robot charged. Scheduled cleaning can only begin when the battery level is above is not working 20%. Is power always being drawn when the • The robot will draw power while it is docked to maintain battery performance, but power robot is on the charging dock? consumption is minimal.
- Page 18 Common Issues Problem Solution • The main brush or main brush cover is not properly installed. Check and correct installation. The LED status indicator light on • The dustbin, filter, air duct, suction inlet or air inlets are blocked. Clean to remove blockages. the dock is red, unusual noise •...
- Page 20 Address of Manufacturer: Floor 6, Suite 6016, 6017, 6018, Building C, Kangjian Baosheng Plaza, No.8 Heiquan Road, Haidian District, Beijing, P.R. CHINA For more product information, visit our website: www.roborock.com For after-sales support, email our after-sales service team: Europe Support: support@roborock-eu.com...
Need help?
Do you have a question about the S7 MaxV Plus and is the answer not in the manual?
Questions and answers