Advertisement
Quick Links
Mallet of Luck : Assembly Instructions
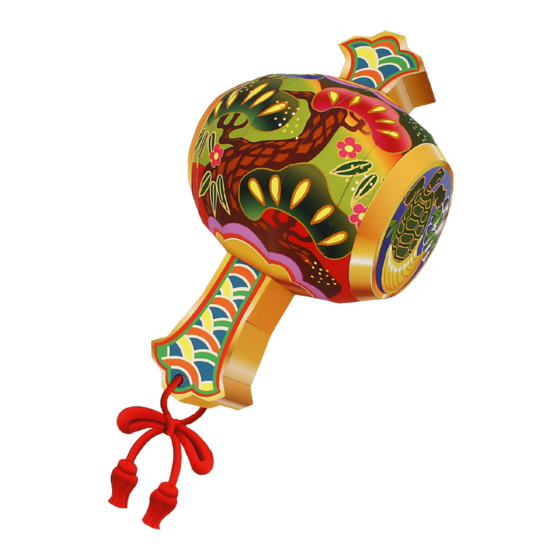
Mallet of Luck
The mallet of luck is well known in Japan as the
item that Daikoku, one of the Seven Lucky
Gods, carries with him. Daikoku is the god of
fortune and relationships. It is said that hitting
the mallet of luck will cause any kind of wish to
come true, and that Daikoku granted many
wishes with it. It is also featured in many
Japanese fairy tales.
Assembly Instructions
1) Carefully cut out the parts.
2) Fold along the dotted lines, making mountain or valley folds as indicated.
3) Follow the order indicated in the instructional diagrams, and attach the
parts to assemble.
(Read the Explanation of Symbols for more information.)
4) Your paper craft model is finished!
Tools
Scissors, glue (We recommend craft glue.)
Caution
Keep glue away from small children.
Be careful not to cut your fingers when using scissors.
Paper craft Mini-book/Assembly Instructions
Explanation of Symbols
Mountain fold
glue tabs
Glue tabs used to assemble each part.
glue tabs
Glue tabs used to join different parts together.
Glue tabs with alphabet letters
When joining two parts together, attach
these glue tabs first.
Cut line
Valley fold
Attach so that the
comes between the
.
Advertisement

Summary of Contents for Canon Creative Park Mallet of Luck
- Page 1 Mallet of Luck : Assembly Instructions Paper craft Mini-book/Assembly Instructions Mallet of Luck The mallet of luck is well known in Japan as the item that Daikoku, one of the Seven Lucky Gods, carries with him. Daikoku is the god of fortune and relationships.
- Page 2 Mallet of Luck : Assembly Instructions Head(1/2/3/4/5/6/7/8) Assemble the head Glue the head(1/2/3) Head HEAD b HEAD 1 HEAD a HEAD 2 HEAD 3 Attach first. Attach first. HEAD HEAD a *Attach parts 4, 5 and 6 of the head in the same way (head b). Head 7 Glue the head 7 and the head 8 to the head HEAD...
- Page 3 Mallet of Luck : Assembly Instructions Assemble the top part/handle/mallet 1 Assemble the top part/handle/mallet Top part 1 Handle 1 HANDLE 1 TOP PART 1 Glue the top part 1 and the top part 2 TOP PART TOP PART 2 TOP PART 1 *The rim(1/2) in the same.
- Page 4 Mallet of Luck : Assembly Instructions Assemble the rim(1/2)/crane/turtle/mallet 2 Assemble the rim/crane/turtle/mallet Rim(1/2) RIM 1 *The rim2 in the same. Attach the crane and the rim 1 RIM 1 CRANE *The turtle and the rim2 in the same. Attach first. Glue the crane side and the turtle side to the mallet TURTLE SIDE Attach first.
- Page 5 Mallet of Luck : Assembly Instructions String/Complete! Assemble the string String Glue the string to the mallet MALLET STRING COMPLETE Fold in half and glue together before cutting out. STRING Complete!


