Advertisement
Quick Links
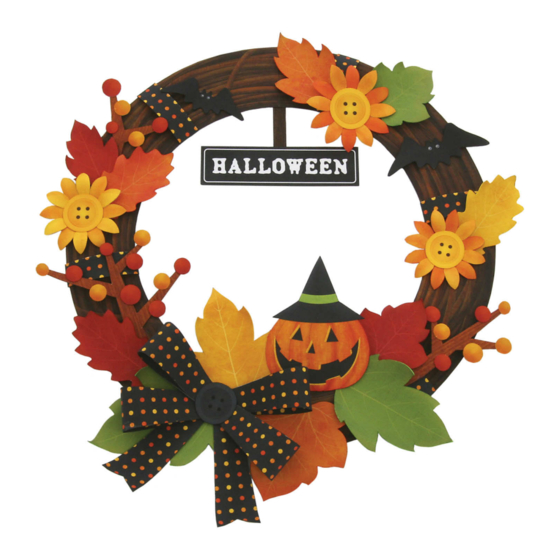
Halloween Wreath: Assembly Instructions
Pattern: 19 sheets
Assembly Instructions: 3 sheets
You will need:
Scissors, Glue, Pencil, Ruler, Used ball-point pen
Mountain fold
Scissors line
Caution: Glue, scissors and other tools may be dangerous to young children so be sure to keep
them out of the reach of young children.
PAGE 01
1
Number of parts: 83
Glue spot
Cut out
© Canon Inc.
© e r i c o
Trace along the folds with a ruler and a used pen (no ink) to get a sharper, easier fold.
Before gluing the items (leaves, flowers, lanterns, etc) to the base, try arranging them in a
few different ways to decide on your preferred layout. You can follow the example layout in
the completed picture and assembly instructions, but it can also be fun to design your own
original wreath.
When attaching the items to the base, dab a small amount of glue to the edges of the leaves
and twigs, and the center of the flowers, rather than putting glue on the item's entire base.
After attaching the items to the base, use your hands or a pencil to add curves to them or
bend them forward slightly, keeping a nice overall balance and creating a 3D effect.
A
1
B
3
B
2
A
2
B
1
Completed base.
Advertisement

Related Manuals for Canon Creative Park Halloween Wreath


Summary of Contents for Canon Creative Park Halloween Wreath
- Page 1 Halloween Wreath: Assembly Instructions © Canon Inc. © e r i c o Trace along the folds with a ruler and a used pen (no ink) to get a sharper, easier fold. Before gluing the items (leaves, flowers, lanterns, etc) to the base, try arranging them in a few different ways to decide on your preferred layout.
- Page 2 Halloween Wreath: Assembly Instructions © Canon Inc. © e r i c o Attach to the twigs however you like. (You do not need to use all the berries.) Align the marks. (For part , there are 30 parts in 3 colors.) Align the marks.
- Page 3 Halloween Wreath: Assembly Instructions © Canon Inc. © e r i c o Align the marks Arrange them to your liking, using Attach using the mark as a guide for the center. and colors. the diagram as a guide. (You do not need to use all the flowers.)