Table of Contents
Advertisement
Quick Links
Advertisement
Table of Contents

Related Manuals for JVC KD-X155


Summary of Contents for JVC KD-X155
- Page 1 РУCCKИЙ KD-X155 / KD-X153 ЦИФРОВОЙ МУЛЬТИМЕДИЙНЫЙ РЕСИВЕР ИHCTPУKЦИЯ ПO ЭKCПЛУATAЦИИ B5A-2130-00 [Q] JS_JVC_KD_X155_Q_C00.indd 1 JS_JVC_KD_X155_Q_C00.indd 1 10/7/2017 10:39:36 AM 10/7/2017 10:39:36 AM Data Size: B6L (182 mm x 128 mm) Book Size: B6L (182 mm x 128 mm)
- Page 2 материалов, упомянутых в предыдущих двух пунктах, не затрагивает никаких других прав disponible à l’adresse Internet suivante : O texto integral da declaração de conformidade da UE потребителя, в частности, гарантийного обслуживания JVC, которое он может получить в http://www.jvc.net/cs/car/eudoc/ está disponível no seguinte endereço de internet: соответствии...
- Page 3 JVCKENWOOD настоящим заявляет, что S tem JVCKENWOOD izjavlja, da je radijska KD-X153“ raadiovarustus on vastavuses 2014/53/EU. радиооборудование «KD-X155/KD-X153» oprema »KD-X155/KD-X153« v skladu z Direktivo direktiiviga 2014/53/EL. Cjeloviti tekst deklaracije Europske unije o соответствует Директиве 2014/53/EU. 2014/53/EU. ELi vastavusdeklaratsiooni terviktekst on usklađenosti dostupan je na sljedećoj internet...
-
Page 4: Table Of Contents
CONNECTION SPECIFICATIONS How to read this manual • Operations are explained mainly using buttons on the faceplate of KD-X155. • English indications are used for the purpose of explanation. You can select the display language from the menu. ( 4) •... -
Page 5: Basics
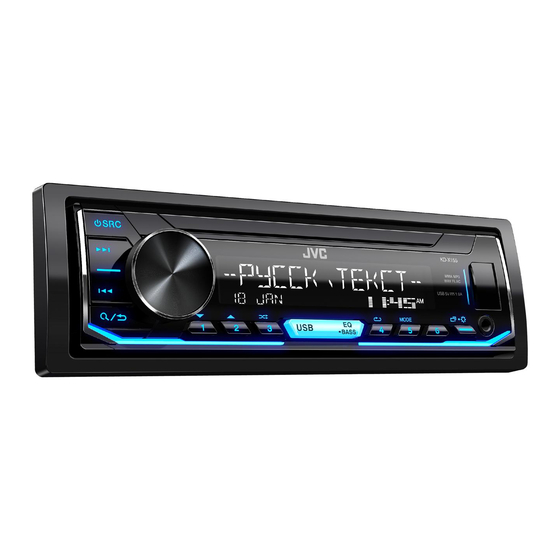
BASICS Faceplate Attach Volume knob Display window Detach How to reset Your preset adjustments will be erased except stored radio stations. Detach button On the faceplate Turn on the power Press • Press and hold to turn off the power. Adjust the volume Turn the volume knob. -
Page 6: Getting Started
To adjust the clock activated). Turn the volume knob to select [CLOCK ADJUST], then press the For details on how to update the firmware, see: <http://www.jvc.net/cs/car/>. knob. Turn the volume knob to make the settings, then press the knob. CLOCK Hour ... -
Page 7: Usb/Android
Do not leave the cable inside the car when not using. When connecting an Android device, “Press [VIEW] to install JVC MUSIC PLAY APP” is shown. Follow the instructions to install the application. You can also install the latest version of JVC MUSIC PLAY application on your Android device before connecting. - Page 8 For ANDROID, applicable only when [AUTO MODE] is selected. AUTO MODE: Control Android device from this unit via JVC MUSIC PLAY Press application installed in the Android device. Turn the volume knob to select a folder/list, then press the knob.
-
Page 9: Radio
RADIO Select a stored station Press one of the number buttons (1 to 6). (or) Press Turn the volume knob to select a preset number, then press the knob. Other settings “ST” or “STEREO” lights up when receiving an FM stereo broadcast with sufficient signal strength. -
Page 10: Aux
RADIO Use a portable audio player LOCAL SEEK ON: Searches only FM/FM-LO stations with good reception. ; OFF: Cancels. • Settings made are applicable only to the selected source/station. Once Connect a portable audio player (commercially available). you change the source/station, you need to make the settings again. 3.5 mm stereo mini plug with “L”... -
Page 11: Audio Settings
AUDIO SETTINGS Default: XX EQ SETTING PRESET EQ Select a preset equalizer suitable to the music genre. • Select [USER] to use the settings made in [EASY EQ] or [PRO EQ]. FLAT/DRVN 3/DRVN 2/DRVN 1/HARD ROCK/HIP HOP/JAZZ/POP/R&B/TALK/ USER/VOCAL BOOST/BASS BOOST/CLASSICAL/DANCE EASY EQ Adjust your own sound settings. - Page 12 AUDIO SETTINGS LOUDNESS LEVEL 01/LEVEL 02: Boosts low or high frequencies to produce a well- D.T.EXPANDER ON: Creates realistic sound by compensating the high-frequency balanced sound at low volume. ; OFF: Cancels. (Digital Track components and restoring the rise-time of the waveform that are lost in Expander) audio data compression. ;...
-
Page 13: Display Settings
1 Turn the volume knob to adjust the [ON] time, then press the knob. 2 Turn the volume knob to adjust the [OFF] time, then press the knob. Zone identification for color setting (for KD-X155) (Default: [ON]: 18:00 ; [OFF]: 6:00) DIMMER AUTO: Dimmer turns on and off automatically when you turn off or on the car... -
Page 14: References
(eg. station name) appears or display will be blank. Cleaning the connector Detach the faceplate and clean the connector Source name Display information (for KD-X155) gently with a cotton swab, being careful not to FM or AM Frequency (Date/Clock) damage the connector. -
Page 15: Troubleshooting
TROUBLESHOOTING REFERENCES Source name Display information (for KD-X153) Symptom Remedy FM or AM Frequency Clock (back to the beginning) Sound cannot be heard. • Adjust the volume to the optimum level. • Check the cords and connections. (For FM Radio Data System stations only) Station name (PS)/Program type (PTY) Radio text Radio... -
Page 16: Installation/Connection
( 12) Caution Cannot playback at • Make sure JVC MUSIC PLAY APP is installed on the [AUTO MODE]. Android device. ( 5) • For safety’s sake, leave wiring and mounting to professionals. Consult the car audio dealer. - Page 17 INSTALLATION/CONNECTION Part list for installation Installing the unit (in-dash mounting) (A) Faceplate (B) Trim plate Do the required wiring. ( 16) Hook on the top side Orientate the trim plate as (C) Mounting sleeve (D) Wiring harness Dashboard of your car illustrated before fitting.
- Page 18 INSTALLATION/CONNECTION Wiring connection Rear/subwoofer output When connecting to an external amplifier, connect its ground wire to the car’s chassis to avoid damaging the unit. Fuse (10 A) Antenna terminal Connecting the ISO connectors on some VW/ Yellow (Battery wire) Audi or Opel (Vauxhall) automobiles Light blue/yellow To the steering wheel remote control adapter You may need to modify the wiring of the supplied...
-
Page 19: Specifications
SPECIFICATIONS Frequency Range FM: 87.5 MHz — 108.0 MHz (50 kHz step) Frequency Response (±3 dB) 20 Hz — 20 kHz FM-LO: 65.0 MHz — 74.0 MHz (30 kHz step) Input Maximum Voltage 1 000 mV Usable Sensitivity (S/N = 26 dB) 0.71 μV/75 Ω Input Impedance 30 kΩ Quieting Sensitivity 2.0 μV/75 Ω (DIN S/N = 46 dB) Maximum Output Power 50 W × 4 or 50 W × 2 + 50 W × 1 (Subwoofer = 4 Ω) Frequency Response (±3 dB) 30 Hz —... - Page 20 HOWEVER CAUSED AND ON ANY THEORY OF LIABILITY, WHETHER IN CONTRACT, STRICT LIABILITY, OR TORT (INCLUDING NEGLIGENCE OR OTHERWISE) ARISING IN ANY WAY OUT OF THE USE OF THIS SOFTWARE, EVEN IF ADVISED OF THE POSSIBILITY OF SUCH DAMAGE. © 2017 JVC KENWOOD Corporation 0817DTSMDTJEIN JS_JVC_KD_X155_Q_C00.indd iii JS_JVC_KD_X155_Q_C00.indd iii...
Need help?
Do you have a question about the KD-X155 and is the answer not in the manual?
Questions and answers