
Related Manuals for Korg D8


Summary of Contents for Korg D8
-
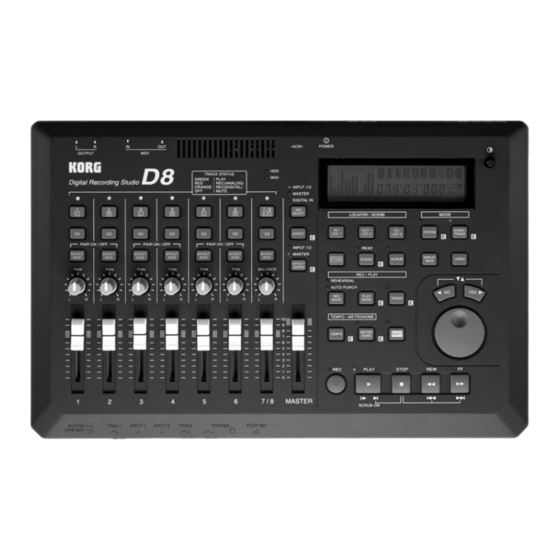
Page 1: Front And Rear Panel
Thank you for purchasing the Korg Digital Recording Studio D8 . In order to enjoy many years of trouble-free use, please read this manual carefully and use the unit correctly. -
Page 2: Table Of Contents
Chapter 3 Reference This chapter explains the parameters which appear in the display when you press each of the D8’s keys, and the operation of the keys and faders. Chapter 4 Appendices This chapter contains information such as the D8’s specifications, error messages, block diagrams, and... - Page 3 STEP11 Synchronization and control with a MIDI sequencer ... 36 1. Using MIDI Clock to synchronize a MIDI sequencer to the D8... 36 2. Using MTC to synchronize a MIDI sequencer to the D8... 36 3. Using MMC to control the D8 from a MIDI sequencer ...
-
Page 4: Chapter 2 Operation
Chapter 2 Operation This chapter explains the operation of each of the D8’s functions, in logical order. Connec- tions, Power-on, Demo... -
Page 5: About The Display
If you wish to synchronize a MIDI sequencer etc. to the D8, use a MIDI cable to connect the MIDI OUT of the D8 to the MIDI IN of your sequencer. If you will be using MMC, connect the MIDI OUT of your MIDI sequencer. -
Page 6: Connections To Your Audio System Etc
Turn on the power of your input devices and mas- ter recorder (DAT etc.). Press the [POWER] switch of the D8 to turn on the power. POWER The display will shown an opening message for a brief time, and then the song which was last selected when the power was turned off will appear. -
Page 7: Step2 Creating And Selecting Songs
Creating and selecting songs STEP2 To record a new song, you must first cre- ate a new song. This section explains how to create and name a song, and how to select songs in EDIT SONG/TRACK 1. Creating a new song After selecting the last-numbered song, hold down the [STOP] key and press the [FF] key. -
Page 8: Step3 Recording
Connecting the input device and adjusting the level Turn down the [MASTER] fader of the D8, and connect your instrument to the INPUT 1 jack. If you are recording a single track, you must use the INPUT 1 jack for connections. The INPUT 2 jack is active only when two tracks are being recorded simultaneously. -
Page 9: Recording (Analog Recording)
CD or DAT player. Since the digital input of the D8 provides a sampling rate converter, 48 kHz and 32 kHz sources will be con- verted to 44.1 kHz as they are recorded. -
Page 10: Recording (Digital Recording)
0. 4. Applying an effect to the input sound as you record You can apply the internal effect of the D8 to the instrument connected to the INPUT 1/2 jack, and record the sound that has been processed by the effect. -
Page 11: Applying An Effect To The Input Sound As You Record
5. Applying an effect to the input sound and record- ing only the input sound Here’s how you can apply the D8’s internal effect to the sound of an instrument or other sound source connected to the INPUT 1 jack or INPUT 2 jack. -
Page 12: Applying An Effect To The Input Sound And Recording Only The Input Sound
Applying an effect to the input sound as you record” and “5. Applying an effect to the input sound and recording only the input sound”, the D8 provides a “monitor delay” that can be applied only to the input sound. When you are recording vocals or guitar, applying this delay will give the sound a sense of spaciousness. -
Page 13: Listening To Recorded Tracks While You Record Another Track (Overdubbing)
“Manual Punch In/Out” is when you perform the Punch In and Punch Out manually. On the D8, you can Punch In during playback either by pressing the [REC] key or by pressing a foot switch <sold separately>. You can Punch Out by pressing either the [REC] key or the [PLAY] key, or by pressing a foot switch. -
Page 14: Canceling A Recording Or Editing Operation (Undo/Redo)
D8 will enter record mode. Now you will hear the external input sound. Begin playing, and your playing will be recorded. When you wish to stop recording, you can either press the [REC] key once again or press the [PLAY] key to change from recording back to playback. - Page 15 Connecting the input device and adjusting the level As explained in “ Connecting the input device and adjusting the level” (p.11, p.12), connect the input device and adjust the level. At this time, make adjustments so that there is no difference between the volume of the instrument that is being input and the volume of the track.
-
Page 16: Combining Multiple Tracks Into One Or Two Tracks (Bounce)
recorded, without passing through the fader or EQ. 10. Combining multiple tracks into one or two tracks (Bounce) The performance of multiple tracks can be com- bined into one or two tracks, freeing the original tracks for additional recording. This operation is called “track bouncing”... - Page 17 Adjusting the playback level and recording level Press the [PLAY] key to begin playback. Raise [CHANNEL] faders 1–5 to adjust the play- back level of each track. (Refer to p.27) Raise the [MASTER] fader to adjust the recording level to track 6. The master level meter R will show the recording level to track 6.
-
Page 18: Listening To The Metronome While You Record
11. Listening to the metro- nome while you record The D8 contains a wide variety of metronome pat- terns for each time signature. (Refer to “Metro- nome pattern list”) If you have an idea for a song, you can record immediately using the built-in met- ronome without having to connect a rhythm machine etc. -
Page 19: Trigger Recording
12. Trigger recording You can use the input sound as a trigger that will start recording. The D8 will begin recording at the moment that sound is input. Connecting the input device and adjusting the level As explained in “ Connecting the input device and adjusting the level”... -
Page 20: Applying An Effect To The Playback Sound
D8’s AUX IN jacks. If the external effect has stereo output, connect its OUT L/R jacks to the D8’s AUX IN L/R jacks. Press the [EFFECT ASSIGN] key several times to select MASTER (Send Type) (indicator lit). -
Page 21: Program Playback Of Songs
5. Program playback of songs You can enable two or more songs to playback in a specified order. This can be used to playback a medley of songs, or when you wish to record con- secutive mixdowns of songs to DAT or MD. Pro- gram Play can be performed even across multiple drives. -
Page 22: Finding A Precise Time Location
Play From/Play To functions to find and select time locations more accurately. The Scrub function On the D8 you can perform Scrubbing just as on an open reel tape recorder. By rotating the [VALUE] dial you can playback the song to accurately find a desired moment in time. -
Page 23: Mark Points
4. Mark points You can store a desired time location and move instantly to that time. Up to one hundred Mark points can be stored in each song. Storing a Mark point Here’s how to use the Mark function to store the current time. -
Page 24: Step6 Adjusting And Storing Mixer Settings
Adjusting and storing mixer settings STEP6 This section explains how you can adjust the volume, tone and pan etc. of the input/recording/playback for each channel, to create the desired overall balance of sound. This process is known as “mixdown”. Mixer settings can also be registered as a “scene”. Scenes can be selected as time passes during playback, or recalled as general-purpose settings. -
Page 25: Adjusting The Stereo Location
3. Adjusting the stereo location You can adjust the stereo location of the sound of each channel. Normally, vocals and bass etc. are placed in the middle, guitar at either left or right, and piano at the opposite side from the guitar. Rotate the [PAN] knob or [BALANCE] knob to adjust the stereo location of each channel. -
Page 26: Scene
6. Scene Mixer settings can be stored as a “scene”, and scenes can be recalled automatically as playback progresses, or recalled whenever desired as gen- eral-purpose mixer setups. Up to 20 scenes can be stored in each song. Storing a scene For each channel, the volume level specified by the [CHANNEL] fader, the stereo location set by the [PAN] knob or [BALANCE] knob, the high EQ... -
Page 27: Step7 Mixdown
TAL OUT connector of the D8. DAT / MD recorder etc. DIGITAL IN Playback the D8, and adjust the recording level on your cassette tape recorder, DAT recorder or MD recorder etc. Then return the D8 to the beginning of the song, and record the mixdown on your recorder. -
Page 28: Step8 Track Editing
Track editing STEP8 This section explains the editing operations (copy, insert blank, delete, exchange etc.) that can be performed on tracks. 1. Storing IN, OUT and TO times In order to edit track data, you must store the time locations at which editing will be performed. As explained in “3. - Page 29 Move to the TO location, and playback to check that the copy was performed correctly. If the data was copied to the wrong location, press the [UNDO] key to return the data to the previous con- dition, and then perform the copy operation once again.
-
Page 30: Inserting A Blank Space Into The Track Data (Insert Track)
3. Inserting a blank space into the track data (Insert Track) This operation inserts a blank space into the speci- fied area (IN–OUT) of a recorded track. When the blank is inserted, the original data will be moved toward the end of the song to make room for the blank. -
Page 31: Deleting Data From A Track (Delete Track)
5. Deleting data from a track (Delete Track) This operation deletes data from a specified area (IN–OUT) of a recorded track. Data can be deleted from single tracks or multiple tracks simulta- neously. If recorded data exists following the deleted area, it will be moved forward to fill the gap left by the deleted IN–OUT area. -
Page 32: Step9 Song Editing
Song editing STEP9 This section explains song-related editing operations (copy, delete, move). 1. Copying a song This operation copies the currently selected song from the currently selected drive to a specified song number in any drive. Select the song that you wish to copy (and the drive which contains that song). -
Page 33: Step10 Tempo Settings
Tempo data from a song that was created on a MIDI sequencer can be recorded on the D8, so that this data can be used to manage the D8’s tempo. This is convenient when you wish to synchronize... -
Page 34: Recording Tap Tempo
Trigger Recording. (Refer to “Trigger recording”, p.22) If the data contains irregular time signatures, cre- ate tempo maps on the D8 to specify the appropri- ate time signatures. If you fail to do this, the data will be detected as an incorrect tempo. -
Page 35: Sequencer
“slave”. The D8 can be used as the master. It is also possible to con- trol recording or playback on the D8 by transmitting MMC messages from a MIDI sequencer etc. -
Page 36: Using Mmc To Control The D8 From A Midi Sequencer
Turn off the power of the D8 and of the external drive. You must turn off the power of the D8 and of the drive before connecting or disconnecting SCSI SYSTEM cables or changing the SCSI ID number of a drive. -
Page 37: Turning The Power On/Off When An External Drive Is Connected
D8. Turning the power off When turning the power off, first turn off the power of the D8, and then turn off the power of the external drives. However if the currently selected song is on a remov-... -
Page 38: Saving A Song On A Removable Disk Drive (Backup)
For the procedure of backing up to a DAT recorder, refer to “1. Saving a song to a DAT recorder (Backup)” (p.43). Korg will accept no responsibility for any loss of data which may result from failure to backup/ restore correctly. -
Page 39: Loading A Song That Was Backed Up On A Removable Disk Drive (Restore)
If the backup extends across multiple disks, the first disk will be ejected when it is full, and the dis- play will indicate “InsNextDsk”, asking you to insert the second disk. Remove the first disk and insert the second, and the operation will continue. InsNextDsk 10 When backup is completed, the display will indi- cate “Completed”. -
Page 40: Step13 Saving To And Loading From Dat
This section explains how song data can be backed up to a DAT recorder, and then restored from the DAT recorder. Korg will take no responsibility for any loss of data which may result from the inability to backup/ restore correctly. -
Page 41: Loading A Backed-Up Song From A Dat Recorder (Restore)
Loading a backed-up song from a DAT recorder (Restore) Connect the DIGITAL IN connector of the D8 to the DIGITAL OUT connector of your DAT recorder. Press the [EDIT] key, and then press the [SYSTEM] key several times to make the display read “Dis-... -
Page 42: Chapter 3 Reference
Chapter 3 Reference This chapter explains the parameters that appear in the display when you press the various keys of the D8, and the func- tion of each key and fader. The numbers shown in the following diagram correspond to the references numbered below. -
Page 43: Song/Track
1. SONG/TRACK Song number/name display 01:SngName P1-1 Song number display ...(01...50) This indicates the number of the song in the currently selected drive. A drive can contain up to 50 songs (memory permitting). The only songs that can be selected are those which already exist, and 01 (New empty song). - Page 44 Renam (Rename Song [ Dest Drive, Dest Song, Dest Song Name 16 characters]): This operation changes the name of the specified song in the specified drive. (Refer to “2. Naming a song”, p.9) Renam:A01œ SngName Del (Delete Song [ Current Song]): This operation deletes the currently-selected song.
-
Page 45: P3 Edit Track
Edit Track The area that will be affected by the editing operation can be specified in “15. IN/LOC1, OUT/LOC2, TO/ LOC3”. (Refer to p.55) EditTrackœ CpyTr 1 ø øTr P3-1 Select the type of track editing ... [CpyTr, Ins, Ers, Del, SwpTr] Selects the track editing operation that you wish to execute. -
Page 46: System
3. SYSTEM Channel level meter display selection ChMtr:Pre P1-1 Channel level meter display selection ..[Pre, Post] Selects the location at which the channel level meter will display the volume level. These are the levels for channels 1–8. Pre: The volume level before the EQ and fader of each channel will be displayed. -
Page 47: Edit System
4. EDIT SYSTEM Deleting a mark Mark œ DeløAll P1-1 Select the mark to be deleted... [All, 001...100] Selects the mark that you wish to delete. After making your selection, hold down the [ mately 1 second to delete the selected mark. All: All marks will be deleted. -
Page 48: P5 Drive Information/Song Backup/ Restore/Initialize/ Format
Drive information/song backup/ restore/ initialize/format DiskUtil œ DriveInfoœ A:RM 100 œ FMT:Play œ P5-1 Disk utility menu... [DriveInfo, Backup, Restore, Initial, Format] DriveInfo: Displaies format information for the speci- fied drive. Backup: Backs up (saves) a song to external media. Restore: Restores (recall) a song from external media. -
Page 49: Song Restore
Perform this operation for a newly-purchased drive. You must perform this operation on a drive which was previously used by another device before that drive can be used with the D8, or on a drive which fre- quently produces Disk Error indications during play- back, etc. -
Page 50: Display Mode
5. DISPLAY MODE Counter display selection P1 Location counter display selection ... [MBT, MSM, MSF, FreeTime] Selects the way in which the location counter will be displayed. The display will change each time you press the [DIS- PLAY MODE] key. MBT (Measure/Beat/Tick [1/96th of a beat]/Mark*): The location will be displayed in units of a measure from the beginning of the song. -
Page 51: Edit Play Mode
8. EDIT PLAY MODE Pre roll time setting Here you can specify the pre roll time that is added to the IN time of Auto Play On when Auto Punch In/Out is performed. When Auto Play On or Auto Repeat On is used in con- junction with Auto Punch In/Out, you will be able to listen for the pre roll time before punch in occurs, allowing you to prepare to start recording. -
Page 52: Edit Trigger
10. EDIT TRIGGER Threshold level adjustment ThrLev:050 P1-1 Threshold level adjustment ... [001...100] When trigger recording is used, this parameter speci- fies the audio input level that will initiate recording. When in record ready mode, recording will begin when this level is exceeded. Since the appropriate level will depend on the source that is being input, try various threshold level settings to find the best setting. -
Page 53: Edit Tempo
If you wish to record the sound of the metronome on the D8, use an audio cable to connect the output of the OUTPUT L/R jacks to the INPUT 1/2 jacks, and record as usual. At this time, set the [MASTER] fader... -
Page 54: Edit Metronome
14. EDIT METRONOME Metronome volume setting If the metronome is on (refer to METRONOME), the metronome will sound when you enter this page. You can adjust the volume while listening to the metro- nome. MetVol:050 P1-1 Metronome volume setting... [001...100] Adjusts the volume of the metronome. -
Page 55: Scene
16. SCENE Mixer settings can be stored at a desired location in a song. A set of mixer settings that has been stored in this way is called a “scene”. Up to twenty scenes can be stored in each song. The following mixer settings are included in a scene: high EQ “HEQ”, low EQ “LEQ”, effect send “Snd”, AUX send “Aux”, pan (the [PAN], [BALANCE] knob) -
Page 56: Store
P2-1 Select the scene number for deletion...[S01...20, All] Selects the number of the scene that you wish to delete. S01...20: The selected scene will be deleted. All: All scenes in the currently selected song will be deleted. It is not possible to delete an empty scene “– –”. P2-2 Scene start location display ... -
Page 57: Track Status
21. TRACK STATUS Track status select ... [PLAY, REC (ANALOG), REC (DIGITAL), Mute] Selects the status of each track. Each time you press the [TRACK STATUS] key, the function will change and the indicator color will change to show this. PLAY (indicator lit green): The selected track can be played back. -
Page 58: Pan/Balance
P1-1 Channel number display... [1, 2, 3, 4, 5, 6, 1-2, 3-4, 5-6, 7-8] This shows the currently selected channel number. 1-2, 3-4 and 5-6 will appear when Pairing is On (refer to PAIR On/Off). P1-2 Effect send level settings ... -
Page 59: Pair On/Off
26. PAIR On/Off P1-1 Pairing on/off ... [On, Off] Turns pairing on/off for the mixer channels. Mixer settings of adjacent odd and even numbered channels (1-2, 3-4 and 5-6) can be linked so that changes to the setting of one channel will be simulta- neously reflected by the setting of other channel. -
Page 60: Effect
This screen shows a selection of Electric Guitar, num- ber 4, Clean Guitar (mono in/stereo out). Each effect program of the D8 belongs to one of 11 dif- ferent categories to distinguish the instrument or func- tion for which they are intended. -
Page 61: P1 Monitor Delay Settings
<Mono-in/mono-out> 2 channels Use these effects when you wish to apply the same effect simultaneously to two channels. For example you would select this if you are inputting a piano sound from your keyboard in stereo, and would like to apply a compressor to each channel independently to process the sound that is being recorded. -
Page 62: Edit Effect
29. EDIT EFFECT Editing and saving an effect You can edit the effect program that you selected in EFFECT P1. Each program consists of up to four effects. 4BEQ :oœ LoG:-15dBœ All Eff:o RenøRoom WriteøU01? In EDIT EFFECT, repeatedly pressing the [EFFECT] key will cycle the display through the various effects which make up the chain, and will then display All Effects On/Off (P1-5) -
Page 63: Effect Assign
30. EFFECT ASSIGN Effect insert location select[... INPUT 1/2, MASTER (Send Type), MASTER (Global Type), OFF] Selects the location at which the internal effect will be inserted. INPUT 1/2: The internal effect will be inserted between the EQ and the fader of mixer channels whose [TRACK STATUS] is set to REC (ANALOG). -
Page 64: Chapter 4 Appendices
HDD access indicator is completely dark, and then turn the power off and back on again. The D8 will automatically erase the previously recorded data (A–B), thus increasing the remaining disk capacity. - Page 65 (i.e., selected in EDIT SONG/TRACK P1), removing the disk while operation is in progress may cause data to be lost, so the D8 locks the disk in place. If p.64) you simply turn off the power, it will not be possible to remove the disk until the power is turned on again.
-
Page 66: Various Messages
Check the power of the digital device, and its connec- tion to the D8. Some digital devices do not output a dig- ital audio signal unless they are actually playing. In this case, put the digital device in pause mode. -
Page 67: Midi Implementation Chart
*5: Received when MIDIclk is selected for TempoRec and tempo is being recorded. Mode 1:OMNI ON, POLY Consult your local Korg distributor for more infomation on MIDI IMPLEMENTATION. Mode 3:OMNI OFF, POLY Consult your local Korg distributor for more infomation on MIDI IMPLEMENTATION. -
Page 68: Block Diagram
4. Block Diagram Effect Assign = Master (Send Type) Effect Assign = Master (Global Type) - Page 69 Effect Assign = Input 1/2...
-
Page 70: Effect Program List
5. Effect Program List CATEGORY DISPLAY No. PROGRAM NAME No. NAME Reverb/Delay 1 ROOM REVERB RD1: ROOM œ 2 HALL REVERB RD2: HALL œ 3 PLATE REVERB RD3: PLATE œ 4 EARLY REFLECTION RD4: œ 5 DELAY RD5: DELAY 6 STEREO DELAY RD6: œ... -
Page 71: Effect Parameter List
6. Effect Parameter List Effect type name as displayed _ (Unabbreviated effect type name) _ Remark Parameter name as displayed _ (Unabbreviated parameter name) _ Setting range _ Remark 4BEQ (4 Band Equalizer) This is a equalizer that allows you to adjust the tone in four fre- quency bands. - Page 72 DualDLY (Dual Delay) This is a delay in which the L/R channel parameters can be set independently. LT (L Time) 1ms...1s L channel delay time RT (R Time) 1ms...1s R channel delay time LFBack (L Feedback) 0...50 L channel feedback amount RFBack (R Feedback) 0...50 R channel feedback amount LHDamp (L HiDamp) 0...50...
- Page 73 PHONO (Turntable SIM) This simulates a record player. Scratch noise can also be added. RPM (Rpm) 33,45,78 Rotational speed WOW (Wow&Flutter) 0...50 Pitch instability caused by variation in rotational speed HiCUT (High Cut) 0...50 High frequency cut filter NOISE (Scratch noise)0...50 Scratch noise PITCH (Pitch Shifter) This effect changes the pitch of the input signal.
-
Page 74: Metronm Type List
© 1996 Remark Music 02 : Moonlit sea written by Yuko Asai Yuko Asai – All instruments and voices song copyright © 1997 Yuko Asai ©1997 KORG Inc. all rights reserved Time No. Name Time 4/ 4 33 Jungle1... -
Page 75: D8 Specifications
9. D8 Specifications Specifications < Recorder section > Tracks : 8 tracks (50 songs 8 tracks) : 8 tracks simultaneous playback, 2 tracks simultaneous recording, 6 tracks playback + 2 tracks recording Recording format : 16 bit uncompressed, 44.1 kHz... -
Page 76: Functions Added To The D8
Functions added to the D8 Bouncing tracks 1–8 Now you can bounce a performance which was recorded on all eight tracks. Here’s how to bounce the sound of tracks 1–8 to tracks 7 and 8 in stereo. (Refer to p.17)
Need help?
Do you have a question about the D8 and is the answer not in the manual?
Questions and answers