Table of Contents
Advertisement
Quick Links
Advertisement
Table of Contents

Related Manuals for Korg D16


Summary of Contents for Korg D16
- Page 2 • Be careful not to let metal objects get into the equip- ment. If something does slip into the equipment, unplug the AC/AC power supply from the wall outlet. Then contact your nearest Korg dealer or the store where the equipment was purchased. THE FCC REGULATION WARNING (for U.S.A.)
-
Page 3: Table Of Contents
Undo...10 Basic operation... 11 Step 1. Making connections, and turning the power on/off ... 11 Connecting audio devices to the D16, and turning the power on ... 11 1. Connections...11 2. Turning the power on/off...12 Listening to the demo songs ... 13 Step 2. - Page 4 Using a MIDI sequencer to control stop/play/ fast-forward/rewind/record/locate on the D16 (Control by MMC) ...46 P3 Sync: Synchronization settings ... 46 Synchronizing a MIDI sequencer to the D16...47 P4 DiskUtil: Initializing/formatting/checking a drive... 47 Connecting an external drive...48 Turning the external drive power on/off ...48 Initializing and formatting a disk ...48...
- Page 5 23. TRACK STATUS... 86 24. PAN/BALANCE ... 86 25. FADER ... 86 26. TRANSPORT KEYS ... 87 Effect Parameter List... 89 Insert (2in2outx2)/Master/Final Effect... 89 Reverb RV1 – RV7 Category: Reverb-type effects ... 89 1: RV1: Reverb Hall ...89 2: RV2: Smooth Hall ...89 3: RV3: Reverb Wet Plate...89 4: RV4: Reverb Dry Plate ...89 5: RV5: Reverb Room ...89...
- Page 6 Do not repeatedly turn the power on/off. This may damage not only the D16, but also any SCSI devices that are connected. This device begins to access the hard disk immedi- ately after the power is turned on.
-
Page 7: Introduction
192 user areas. An expression pedal (separately sold option) can be connected to con- trol an insert effect in realtime. • The effects built into the D16 make it easy for you to use detailed and powerful modeling sounds pro- duced by Korg’s “... -
Page 8: Printing Conventions In This Manual
LCD screen, making cursor movements easy. A four- directional cursor key is also provided to allow tra- ditional operation. • The D16 is compact and lightweight, and can be eas- ily carried into the studio or anywhere else. What is (Resonant structure and Electronic circuit Modeling System) is KORG’s proprietary sound... -
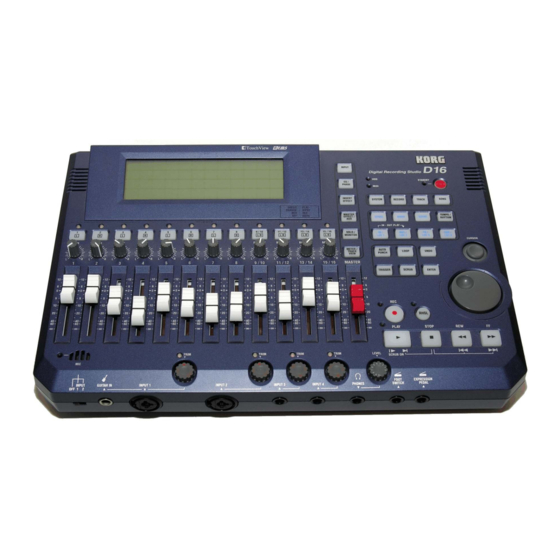
Page 9: Panel Overview Of The D16
* For the mic and trim controls etc., refer to the “Front panel” section. 1 LCD screen The D16 uses a TouchView system based on a touch panel screen. By pressing objects that are shown in the LCD screen, you can select pages, tabs, and parameters, and set their values. - Page 10 sent. It is also used to specify EQ (for recording) for the analog inputs. You will also select this key when using the tuner. ( p.26, 75) 7 [EQ/PHASE] key This key is used to specify the EQ (for track play- back) and phase of each channel.
-
Page 11: Front Panel
restores the state prior to Undo. The previous 99 recording or editing operations can be undone. ( p.73) This key will light when the Undo function is available. 24 [TRIGGER] key This is the on/off key for the Trigger Recording function, which causes recording to begin auto- matically in response to an audio input. - Page 12 If both your hands are occupied with playing an instrument etc., you can use a foot switch to per- form basic operations of the D16’s recorder. The foot switch can be used to play/stop, start/ end manual punch recording, register a mark, and register tap tempo etc.
-
Page 13: Rear Panel
MIDI device from the D16. ( p.46) 3 [MIDI IN] connector MIDI messages are received at this connector. Use this when you wish to control the D16 from a con- nected external MIDI device. ( p.46) 4 [LCD CONTRAST] knob This knob adjusts the contrast of the LCD screen. -
Page 14: Objects In The Lcd Screen And Their Functions
Objects in the LCD screen and their Objects in the LCD screen The LCD screen of the D16 features a TouchView sys- tem that uses a touch panel. By pressing objects that appear in the LCD screen, you can select pages, set parameter values, move the cursor, modify settings, and perform other operations. -
Page 15: Basic Operations In The Lcd Screen
Basic operations in the LCD screen 1. Select the mode When you wish to access a function in the D16’s LCD screen, you must first press the appropriate key to select the Mode that contains that function. For details on the functions of each mode, refer to “Ref- erence”... -
Page 16: Undo
Undo After recording or editing a track, you can execute Undo to return to the state before the data was recorded or edited. You can undo up to 99 previous operations. You can also use Redo to return the data to the state in which it was before you performed Undo. -
Page 17: Basic Operation
1. Connections The diagram below shows a basic example of connec- tions when using the D16 to record. Make the appropri- ate connections for your system, substituting your own equipment as necessary for the equipment shown here. Be sure than the power is turned off while you are making connections. -
Page 18: Turning The Power On/Off
D16. If an external drive is connected, turn on the power of the external drive. 3 Press the [POWER] key of the D16 to turn on the power. The LCD screen will show the opening message, and then the [SONG] “SelSong” tab page will appear. -
Page 19: Listening To The Demo Songs
2 Lower the [MASTER] fader of the D16 to the – position. Then turn the volumes of all connected external devices to the minimum position. 3 Turn off the power of devices to which the D16 is sending audio, such as your monitor system or MD recorder. -
Page 20: Step 2. Creating Or Selecting A Song
Creating or selecting a song In order to record a new song, you must first create a new song on the D16. Here’s how to create a new song, assign a name to the song, and select a song. 1. Creating a new song 1 Select the [SONG] “SelSong”... - Page 21 Move the cursor to the song number, and rotate the [VALUE] dial Use this method to select a different song in the same drive. 1 Select the [SONG] “SelSong” tab page. Press the [SONG] key, and then the “SelSong” tab. 2 Press “SongNumber”...
-
Page 22: Step 3. Recording
1. Selecting the input/record track The D16 has both analog and digital input jacks. In order to record an external audio source, the audio must be assigned to a mixer channel. This section explains how input sources are assigned to mixer channels so that you can audition them. - Page 23 Assign the built-in mic from [INPUT 2] to mixer channel 2 1 Turn on the built-in mic. Lower the [MASTER] fader of the D16, and set the [MIC] switch to INPUT 2 (refer to the diagram on the previous page).
-
Page 24: Digital Input
Digital input The D16 allows digital input and recording via its S/P DIF connector. As an example, we will explain how audio from a CD player connected to the [S/P DIF IN] jack can be input to mixer channels 1 and 2. -
Page 25: Recording On A Virtual Track
When the performance ends, press the [STOP] key. (The [PLAY] LED will go dark.) Recording on a virtual track The D16 has sixteen tracks, and each of these tracks has eight virtual tracks. When recording solo parts etc., you can record each take on a different virtual track, and choose the best performance later. -
Page 26: Auto Punch-In/Out
“Auto Punch” button to turn it “On.” The [AUTO PUNCH] key will light. 6 Begin recording. • When you press the [REC] key, the D16 will automatically locate to a point earlier (by the pre-roll time) than the location where recording will start, and will enter record-ready mode (LED blinking). -
Page 27: Bouncing - Combining Multiple Tracks Into One Or Two Tracks
This process is called bouncing. You will use this process when you need to playback more than 16 tracks. Broadly speaking, tracks can be bounced on the D16 in the following ways. • 14 tracks of audio and two external audio input sources can be recorded on the remaining two tracks. -
Page 28: Unselected Virtual Tracks
15–16 to virtual track “a.” Other recording methods In addition to the recording methods described earlier, the D16 lets you use the following types of recording. For details refer to the appropriate pages. • Applying EQ to the audio being recorded. ( p.26) •... -
Page 29: Step 4. Playback
Step 4. Playback This section explains basic playback on the D16, and also how to use program playback. Playback 1 Select the track(s) for playback. Press the [TRACK STATUS] keys for the tracks that you wish to play, to put them in PLAY mode (LED lit green). -
Page 30: Step 5. Changing The Time Location
[TRACK STATUS] to REC for the track to be recorded, and press the [REC] key to put the D16 in record-ready mode. At this time, the remaining recording time will be displayed for the number of tracks that are set to REC. -
Page 31: Step 6. Using The Mixer
Step 6. Using the mixer Mixer settings such as volume, tone, and pan can be adjusted to control the volume, tone and panning of the input, recording, or playback of each channel, in order to create the desired overall mix. For details on adjusting the effects, refer to p.29 Adjusting the volume The input or recording/playback volume is adjusted... -
Page 32: Applying Input Eq To The Analog Inputs/Recording With Input Eq
High EQ, Low EG • For the channel that you wish to adjust, select “High EQ Gain (H)” or “Low EQ Gain (L),” and rotate the [VALUE] dial to set the amount of gain. The value is displayed in the upper left of the screen. -
Page 33: Monitoring Adjustments
[MONITOR OUT L/R] jacks or [PHONES] jack. Adjusting the cue level Since the [CHANNEL] faders of the D16 control both the recording level of each track and the volume level of each channel, the level being recorded and the vol- ume level being monitored will be the same. -
Page 34: Registering/Recalling A Scene
Registering/recalling a scene The mixer settings you adjust can be registered as a scene, and scenes can be automatically recalled as time passes during playback. Scenes can also be recalled as general-purpose settings, and mixer settings you recalled can be copied to a dif- ferent time location, or re-adjusted and then overwrit- ten elsewhere. -
Page 35: Step 7. Using Effects
Step 7. Using effects Overview of the effects The D16 provides a maximum of eight insert effects that can be inserted into an analog input or mixer chan- nel, two master effects that are applied to a send signal from each channel, and one final effect that is applied to the master LR output. -
Page 36: Applying The Insert Effects While You Record (Analog/Rhythm Only)
1in1outx4 (mono-in/mono-out • While recording four vocals simultaneously, you could apply Exciter-Comp to voices that lack impact, and apply Limiter-P4EQ to loud voices as you record. Other examples are shown below. 1in1outx8 (mono-in/mono-out • When you have set up eight mics to simultaneously record each instrument of a drum set, you could apply separate effect programs to each;... -
Page 37: Applying An Insert Effect To A Track During Playback
You can also select effect programs while you listen to the playback. Master effects The D16 contains two master effects (MstEff1 and MstEff2) which can be used simultaneously. You can adjust the send amount from each channel to change the depth of the effect ( diagram on following page). -
Page 38: Final Effect
Final effect One stereo-in stereo-out effect is provided as the final effect. It applies to the master LR output. How the final effect can be used The final effect is used mainly for dynamics processing (compression etc.) to make the overall level more con- sistent. -
Page 39: Controlling An Effect From An External Device
• After you have assigned a name, press the “OK” button. 8 Store the effect program. • If the D16 is playing, press the [STOP] key to stop playback. • Playback “Store” button to access the “StoreEf- fect” dialog box. -
Page 40: Using An External Effect
[INPUT 7] and [INPUT 8] jacks. 1 Connect your external effect processor. Connect the [AUX OUT] jack of the D16 to the INPUT jack of your external effect processor, and connect the OUTPUT jacks of the external effect processor to the [INPUT 7] and [INPUT 8] jacks of the D16. -
Page 41: Step 8. Mixdown
2 Connect your external recording device. Refer to “Connections for mixdown” ( p.12). 3 Record on your external recording device. • Playback the D16 song, and adjust the recording level on your external recorder. Then return the D16 song to the beginning. -
Page 42: Step 9. Track Editing
Step 9. Track editing On the D16, tracks can be edited in the following ways. For the procedures, refer to p.37, 53 and p.56. If there is little remaining free space on the hard disk, it may not be possible to perform track edit- ing. -
Page 43: Track Editing Procedure
Copying an entire track/Copying to a V-track: Copy Whole Track This command copies an entire recorded track (from beginning to end) to a different entire track. • You can copy not only one track, but multiple tracks simultaneously. • The currently selected V-track can be copied to mul- tiple unselected V-tracks. -
Page 44: Step 10. Song Editing
Step 10. Song editing On the D16, songs can be edited in the following ways. Undo is not available for song editing. Copying a song: Copy Song This command copies the currently selected song to a song number in any drive. -
Page 45: Step 11. Rhythm/Tempo Settings
Step 11. Rhythm/tempo settings The D16 contains numerous rhythm patterns for a vari- ety of time signatures ( p.114 “Rhythm Pattern List”). When you have a sudden idea for a song, you can record your performance immediately, using the built- in rhythms as a guide. -
Page 46: Setting The Tempo
• Tempo track (MIDI clock or tap tempo) You can select one of these sources, and use it to man- age the tempo of the D16 song. At the same time, this also controls the tempo at which an external MIDI device will synchronize to the D16. -
Page 47: Tempo Track
Here’s how MIDI clock tempo data from an external MIDI sequencer can be recorded on the tempo track. Use this when you wish to synchronize the D16 song with song data created on a MIDI sequencer in which the tempo changes continuously. -
Page 48: Recording Tap Tempo
“MeasTap” (tap at the beginning of each measure), or “BeatTap” (tap at each beat). 5 Record the tap data. • Press the “RecStart” button to put the D16 in record-ready mode. • Press either the [PLAY] key or the foot switch, and playback and recording will begin simulta- neously. -
Page 49: Step 12. Song Saving
Step 12. Song saving A word about data There is always a remote possibility that the D16 will malfunction, causing errors in the data or loss of data. If the D16 malfunctions, recorded data or other types of data may be lost. Please copy or back up your important data on an external drive such as a hard disk or removable disk. - Page 50 Restore The Restore command will recall the backed-up data so that it can be used on the D16. When restoring data of all songs (“BackupAllSongs”) or one song (“Backup1Song”), you can select whether or not you wish to overwrite the current user effect data.
-
Page 51: Reference
3. Device(CtrlChgDevice)... [Pedal, A.Touch, PitchBend, Velocity, NoteNum, CC#000…119] Select the external device that will control the inter- nal effects of the D16. The effect selected by “Ass” (P1-4) can be controlled in realtime. Pedal: An expression pedal can be used to control the effect. -
Page 52: P2 Midi: Midi Settings
If the effect program that you are using does not provide control capability, it cannot be controlled. ( p.89) P2 MIDI: MIDI settings On the D16, you can use MIDI to do the following things: • Control effects ( p.33) • Synchronize with MIDI devices such as sequencers •... -
Page 53: Synchronizing A Midi Sequencer To The D16
first time. • Format should be performed before a disk that had been used on another device is used on the D16, or if “DiskError” messages appear frequently during playback. Initialize/Format are not required for a removable disk that is used for backup/restore. -
Page 54: Connecting An External Drive
• Connector: 25 pin SCSI cable • Number of drives that can be connected: up to 7 drives 1 Turn off the power of the D16 and of the external drive. Before connecting/disconnecting a SCSI cable or changing the SCSI ID of a drive, make sure that the power of the D16 and of the drive is turned off. -
Page 55: P5 B-U/Rst: Backing-Up And Restoring Data To Removable Disk
Be aware that some types of removable disk drive are not suitable for recording/playback. Exchanging removable disks If the currently selected song is on a removable disk, use the following procedure to exchange disks. 1 Select the [SYSTEM] “DiskUtil” tab page. 2 Use “SelOperation”... -
Page 56: Backup Procedure
: For “Backup1Song” or “BackupAllSongs” (“B– U/RstType”), this displays the backup destina- tion drive, drive information (“RMD----”), and the number of media volumes required (“x1”– “x99”). : For “BackupUserData” (“B–U/RstType”), this displays the backup destination drive and user effect “---”. : For “Restore”... -
Page 57: Restore Procedure
Restore procedure 1 Use the [SONG] “SelSong” tab page or the [SYS- TEM] “DiskUtil” tab page to select the restore desti- nation drive. 2 Select the restore operation. In the [SYSTEM] “B–U/Rst” tab page, select “Restore” for “B–U/RstType.” 3 Select the restore source drive (“Source”). Press the “Drive”... -
Page 58: Track
16Tr 2Tr: Select this when recording 16 tracks of playback onto two tracks or one track. The track playback will be valid for the channel(s) whose [TRACK STATUS] key is set to REC (LED lit red), and will be recorded together with the other playback tracks. -
Page 59: P3 Edittrk: Track Editing
P3 EditTrk: Track editing Editing will apply to currently selected tracks 1–16 ( ”Vtr1–8,” “Vtr9–16”). Virtual tracks that are not selected will not be affected by editing. (However, “CopyWholeTrk” and “SwapWholeTrk” are exceptions.) The range (area of time) that will be edited is deter- mined by the time locations that are registered in the [IN/LOC1], [OUT/LOC2], [TO/LOC3], and [END/LOC4] keys. - Page 60 ReverseTrk: This operation copies the track data of the IN–OUT range of the reverse source track (“SourceTrack”) to the TO location of the reverse destination track (“DestTrack”) in reverse (flipped front-to-back). You can specify the number of times that the data will be copied. When this is executed (“Exec”), the copied data will be reversed, so that the playback will be backward.
- Page 61 SourceTrack DestVTrack (a...h) SourceTrack DestVTrack (a...h) 2. SourceTrack ...[1…16, 1–2…15–16, 1–4…13–16, 1–8, 9–16, 1–16, Clip# [1…16, 1–2…15–16] Select the source track for the editing operation. : “Clip#” can be selected only for “CopyTrk.” # is the number of tracks(=1, 2, 4, 8, 16) in the clip- board.
-
Page 62: Examples Of Track Editing
For “ExpCmpTrk” (“EditType”), this will appear when you press the “Mode” button. 8a. SelectExpCmpMode...[Fast, Mid, Best] Select the conversion mode for expansion/com- pression. Fast: Emphasize processing speed Mid: Between “Fast” and “Best” Best: Emphasize audio quality If “SelectPitch” (8b) is “Variable,” this setting will have no effect. - Page 63 4 Execute the erase operation. Press the “Exec.” button. The display will ask “Are YouSure?” Press the “Yes” button to erase the data. When the data has been erased, the display will- indicate “Completed.” Press the “OK” button. 5 Press the [IN/LOC1] key to move to the IN loca- tion, and check that the data was erased correctly.
- Page 64 4 Select the expansion/compression source track number. Set “SourceTrack” to track “1.” 5 Select the expansion/compression destination track number. Set “DestTrack” to track “2.” 6 Specify the number of times that the data will be copied. Set “Times” to “3.” 7 Execute the expansion/compression operation.
-
Page 65: Song
5. SONG P1 SelSong: Selecting a song 1. SongNumber ... [I…G/001…100] Select the song. The display shows the drive, song number, and song name. If 24 bit recording is selected, the display will indi- cate “ .” If the song is protected, the display will indicate “... - Page 66 1. EditType... [CopySong, MoveSong, DeleteSong, ProtectSong, CopyAllSongs] Select the song editing operation. Press the “ ” button, and you will be able to select an editing operation from the following dialog box. CopySong: The currently selected song will be cop- ied to the drive and song number you specify.
-
Page 67: Examples Of Song Editing
For “DeleteSong” (“EditType”), this executes the delete operation. When this is executed, the “DestSong” will be deleted, and subsequent songs will be renumbered downward by one. For “ProtectSong” (“EditType”), this protects the song. Each time you press the “Exec.” button, the setting will alternate on/off. -
Page 68: P3 Prgplay: Program Playback Of Songs
DA: The disc has been detected as an audio CD. This corresponds to the following cases. • A CD-R with TOC that was created on the D16 • A CD-RW with TOC that was created on the D16 • An audio CD 3. -
Page 69: Procedure For Creating An Audio Cd
Set the SCSI ID of the CD-R/RW drive to 6. 2 Turn on the power first for the CD-R/RW drive, and then for the D16. Then insert a disc into the CD- R/RW drive. 3 Select the song that will be written to the CD-R/RW disc. -
Page 70: Store
6. STORE You can store a time location for registration to a locate memory, scene, or mark. The time at which you pressed the [STORE] key is remembered, and can be registered by pressing one of the registration destination keys. If you press the [STORE] key once again instead of pressing a registra- tion destination key, the store operation will be can- celled. -
Page 71: Scene
8. SCENE The mixer settings that you adjust can be registered at a desired time location as a Scene, and used to automati- cally change the mixer settings as the song plays (when Scene Read is turned “On”). Scenes can also be used as general-purpose settings, and recalled and used when desired. -
Page 72: Procedure For Registering A Scene
You can either directly press the time value that you wish to modify, or use the cursor to select it. Then use the [VALUE] dial to modify the time. Press the “OK” button to finalize the change, or press “Cancel” button to cancel the change. 6. -
Page 73: Deleting A Scene
(program change) is received, the correspond- ingly-numbered scene will be selected. When “SceneRead” is “On,” this message will be ignored regardless of whether the D16 is playing or recording. 1 Connect an external MIDI device. ( p.12) 2 Set the MIDI channels to match. -
Page 74: Tempo/Rhythm
9. TEMPO/RHYTHM Here you can make tempo, time signature, and rhythm (metronome) settings for a song. When the counter is displaying “MBT” (measures, beats, and 1/96th of a beat) ( p.45), it will operate according to the specified tempo. Tempo/rhythm can also be viewed in the [SONG] “SelSong”... -
Page 75: P3 Tmptrk: Create A Tempo Track
The tempo track can be recorded in two ways. • By recording MIDI Clock • By recording tap tempo The first method is used to synchronize the D16 to data created on an external sequencer. The second method is used when you do not know the... -
Page 76: In/Loc1, Out/Loc2, To/Loc3, End/Loc4
10. IN/LOC1, OUT/LOC2, TO/LOC3, END/LOC4 If locations in the song have been registered to the [IN/ LOC1], [OUT/LOC2], [TO/LOC3], and [END/LOC4] keys, you can use them to perform the following func- tions. • Locate point (press a key to move to the registered time location) •... -
Page 77: Auto Punch
11. AUTO PUNCH P1 AtPunch: Settings for auto punch-in/out recording Auto punch-in/out recording is a function that auto- matically starts recording (punch-in) and stops record- ing (punch-out) at the time locations you specify beforehand. If you record when “AutoPunch” is “On,” punch-in/ out recording will occur automatically. -
Page 78: Loop
6 In the [LOOP] tab page, set “Loop” “On.” 7 Begin recording. • When you press the [REC] key, the D16 will locate to a point earlier than the specified IN (record start) time as specified by the pre-roll time, and will enter record-ready mode. -
Page 79: Undo
Please use caution. The hard disk recorder of the D16 preserves a his- tory of up to the last 99 recordings, edits, or opera- tions so that you can use the Undo function to return to an earlier state of your work. -
Page 80: Procedure For Trigger Recording
This setting is not valid for the beginning of the song. Also, if you use trigger recording to continue recording after the end of a previously-recorded track, setting other than “000 ms” will cause a cor- responding length of the previously-recorded sound to be lost. -
Page 81: Using The Scrub Function
( p.35) After completing a song on the D16, you can syn- chronize a sequencer to the D16 and use sub inputs to mix the sequenced sounds with the track play-... -
Page 82: P2 Ch9-16: Select The Inputs For Mixer Channels 9-16
These inputs are sent via the stereo/mono switch through the balance and fader settings, and then to the master LR bus. Use the [AUX OUT] jack to transmit the effect send to your external effect processor. ( p.82 [MASTER EFFECT/AUX] “AuxSend” tab page) 3a. -
Page 83: P4 Ineq5-8: Eq Settings For Inputs 5-8
P4 InEq5–8: EQ settings for inputs 5–8 Here you can apply EQ (equalizer) to the analog inputs from the [INPUT 5]–[INPUT 8] jacks. Refer to “P3 InEq1–4: EQ settings for inputs 1–4.” P5 Tuner: Tuner You can use the built-in tuner to tune an instrument connected to the [INPUT 1/GUITAR IN] jack or input from the built-in mic. -
Page 84: Eq/Phase
18. EQ/PHASE P1 Eq1–4: EQ settings for mixer channels 1–4 Here you can apply EQ (equalizer) to the playback of tracks 1–4. Use these settings when you wish to apply EQ to the playback. The EQ has three bands. High EQ and low EQ are shelving type, and the mid EQ is a peaking type with adjustable cutoff frequency. -
Page 85: Insert Effect
19. INSERT EFFECT The insert effects can be applied to the analog inputs during recording, or to track playback. The D16 lets you use up to eight different insert effects simultaneously. Insert effects cannot be used if “DigiIn” is turned “On”... -
Page 86: P2 Inseff1: Selection And Settings For Insert Effect 1
6. Store ... The effect program whose name or parameters you modified can be stored in user areas “U001”– ”U128.” The D16 provides 128 user areas for insert effects. In the “StoreEffect” dialog box, specify the “user area number” and press the “Exec.” button to store the effect. -
Page 87: P3 Inseff2: Selection And Settings For Insert Effect 2
D16 provides two master effects. The final effect is used to adjust the final stage of the master LR bus. The D16 provides one stereo final effect. The AUX send is used when you wish to apply an external effect to the sound. -
Page 88: P2 Msteff2: Selection And Settings For Master Effect
8. Store ... The effect program whose name or parameters you modified can be stored in user areas “u001”– ”u032.” The D16 provides 32 user areas for master effects. In the “StoreEffect” dialog box, specify the “user area number” and press the “Exec.” button to store the effect. -
Page 89: P6 Finaleff: Selection And Settings For The Final Effect
6. Store ... The effect program whose name or parameters you modified can be stored in user areas “u033”– ”u064.” The D16 provides 32 user areas for final effects. In the “StoreEffect” dialog box, specify the “user area number” and press the “Exec.” button to store the effect. -
Page 90: Solo/Monitor
21. SOLO/MONITOR P1 Solo: Solo select 1. SelectSolo ...[1…8, 9–10…15–16, S1, S2, A1, R1, R2/On, Off] Switch the solo function on/off. Only the audio for which the “Solo” button is “On” will be sent to the monitor bus. Use this function when you wish to hear only a specific channel (or channels) out of multiple audio sources, or to check the send etc. -
Page 91: Meter/Track View
3. RhythmLevel ...[000…100] Adjust the level at which the rhythm will be moni- tored. It will be output directly at this volume. 4. AutoIn ...[On, Off] For mixer channels whose [TRACK STATUS] is set to REC, you can specify whether to monitor the external input ([INPUT 1/GUITAR IN]–[INPUT8], [S/P DIF IN] jacks) or to monitor the track playback sound. -
Page 92: Track Status
This setting applies to the level meters of this page. Press the “PkHold” button to access the dialog box, and make the desired setting. Press the “OK” but- ton to activate your selection, or press the “Cancel” button to cancel. 0…8s: 0–8 seconds : The peak hold indicator will be held forever. -
Page 93: Transport Keys
Play To. ( p.74) 5. [REC] key When you press this key, the D16 will enter record- ready mode (the LED will blink). In order to enter record-ready mode, [TRACK STATUS] must be set to REC for at least one track. -
Page 95: Effect Parameter List
Effect Parameter List Example Algorithm number: Category number: Algorithm name 1: RV1: Reverb Hall Parameter name shown on screen... Range of parameter (parameter name) *Time (Reverb Time [sec]) ...01...10.0s Sets the reverberation time * Parameters marked by an “*” in front of the screen parame- ter name can be controlled by an external device such as an expression pedal. -
Page 96: Dl2: St/Cross Delay
HiDamp (High Damp [%]) ... 0...100 Sets the damping amount in the high range LoDamp (Low Damp [%]) ... 0...100 Sets the damping amount in the low range Spread (Spread) ... 0...50 Sets the width of the stereo image of the effect sound Mix (Wet/Dry)... -
Page 97: Dl6: St.auto Panning Delay
The “Attack” and “Release” parameters specify attack time and release time of delay level control. 13: DL6: St.Auto Panning Delay (Stereo Auto Panning Delay) This stereo delay effect pans the delay sound left and right using the LFO. LTime (L Delay Time [msec])... 0...680ms Sets the delay time for the left channel LFback (L Feedback)... -
Page 98: Mo5: St.tremolo
18: MO5: St.Tremolo (Stereo Tremolo) This effect modulates the volume level of the input signal. The effect is stereo, and offsetting the LFO of the left and right phases from each other produces a tremolo effect between left and right. LFO (LFO Waveform) ... -
Page 99: Dy3: Multiband Limiter
If “L Only” (or “R Only”) is selected, the left and right channels are linked, and the Limiter is controlled via only the left (or right) channel. With “indivi”, the left and right channels control the Limiter indi- vidually. : Ratio, : Threshold [dB], : Gain Adjust [dB] This parameter sets the signal compression “Ratio”. -
Page 100: Dy7: St.paramtrc 4Band Eq
If you set the “Sampling Frequency” to about “3kHz” and set “Pre LPF” to “Off,” you can create a sound like a ring modulator. : Resolution, : Output Level If you set a smaller value for the “Resolution” parameter, the sound may be distorted. -
Page 101: Insert (2In2Outx2), Final
Insert (2in2outx2), Final These algorithms can be selected for an insert effect if “2in2outx2” is selected for “Select Eff Type”. They can also be selected for a final effect. Large size LS1 – LS7 Category: Large size effects 32: LS1: St.Graphic 7band EQ (Stereo Graphic 7band EQ) This is a stereo 7-band graphic equalizer. -
Page 102: Ls6: Rotary Speaker
EQTrim (EQ Trim) ... 0...100 Sets the input level of EQ applied to the effect sound LEQG (Pre LEQ Gain [dB]) ...–15.0...+15.0 Sets the gain of Low EQ HEQG (Pre HEQ Gain [dB]) ...–15.0...+15.0 Sets the gain of High EQ Mix (Wet/Dry)... -
Page 103: Pa1 Category: Pre-Amp Simulator
Category: Pre-amp simulator 48: PA1: Pre Amp Simulator [Dist, NR, Tone, AmpSim] EB1 – EB3 Category: Bass multi 49: EB1: Bass Multi1 [Comp, Exctr, P4EQ, Cho/Fl, S.Dly] 50: EB2: Bass Multi2 [Dist, NR, Filter, Delay] 51: EB3: Bass Multi3 [Comp, P4EQ, Gate] Category: Mic multi 52: MS1: Mic Multi [CabRes, MicSim, Comp]... -
Page 104: Ampsim
AmpSim (AmpSimulator) This effect simulates the acoustical characteristics of a guitar amp. Even if you are recording your instrument via a direct line, you can produce a realistic sound as though a guitar amp were actually being used. Type (Amplifier Type) ... AMP1...5 Selects the type of guitar amplifier CabRes (CabinetResonator) This effect simulates the acoustical characteristics and cabinet... -
Page 105: Micsim
: Feedback Position Select, : Feedback When “Feedback Position Select” is set to “Pre,” the output of the pitch shifter will be once again sent back to the pitch shifter. This means that if “Feedback” is raised, the pitch will continue step- ping up (or down) each time feedback is repeated. -
Page 106: Mm14: Exciter – Limiter
68: MM14: Exciter – Limiter [Excit2, Limitr] 69: MM15: Exciter – Cho/Flng [Excit2, ChFl1] 70: MM16: Exciter – Phaser [Excit2, Phaser] 71: MM17: Exciter – Mt.Delay [Excit2, Mt.Dly] 72: MM18: Limiter – P4EQ [Limitr, P4EQ] 73: MM19: Limiter – Cho/Flng [Limitr, ChFl2] 74: MM20: Limiter –... -
Page 107: Limitr
Trim (EQ Trim) ... 0...100 Sets the EQ input level HEQG (Pre LEQ Gain [dB])...–15...+15dB Sets the gain of Low EQ LEQG (Pre HEQ Gain [dB])...–15...+15dB Sets the gain of High EQ Limitr (Limiter) Ratio (Ratio) ... 1.0:1...50.0:1, Inf:1 Sets the signal compression ratio Thrsh (Threshold [dB]) ...–40...0dB Sets the level above which the com- pressor is applied Attck (Attack) ... -
Page 108: Insert (1In1Outx8)
Insert (1in1outx8) These algorithms can be selected as an insert effect if “1in1outx8” is selected for “SelectEffType.” Different insert effects can be used on each of eight channels/ tracks. Effects MN1–MN11 are monaural type effects. “1in1outx8” effects cannot be controlled by an expression pedal etc. -
Page 109: Appendices
Troubleshooting No sound Is the power of the D16 or connected equipment turned off? ( p.12) Can’t hear the playback Have the [MASTER] fader or [PHONES] knob been lowered? Have the channel volume levels been lowered? When pairing has been switched off after it had been on, or after using Scene Read, the actual volume lev- els may not match the positions of the faders. -
Page 110: Effects Do Not Apply
Is the [CHANNEL] fader of the D16 lowered? (When the [RECORD] “RecMode” tab page item “Select Rec- Mode” is set to “Input”) Is the [MASTER] fader of the D16 lowered? (When the [RECORD] “RecMode” tab page item “Select Rec- Mode” is set to “Bounce”) - Page 111 Is the MIDI cable connected correctly? ( p.12, 47) Is the MIDI cable broken? Can’t synchronize using MTC or MIDI Clock Has the D16 been set as the master and the MIDI sequencer as the slave? ( p.47) Does the synchronization signal transmitted by the D16...
-
Page 112: Messages
Did you turn on the power of the CD-R/RW drive before turning on the power of the D16? Turn off the power of both the CD-R/RW drive and the D16, and then turn the power on again in the order of CD-R/RW drive D16. -
Page 113: Updating The System Software
If you are recording tap tempo, please tap at a slightly faster tempo. Updating the system software The system software of the D16 can be updated by installing the new version from a disk that contains the new D16 system file. The latest system file can be downloaded from the Korg website (http://www.korg.co.jp). -
Page 114: D16 Specifications
D16 specifications Operating temperature +5 — +40 degrees C (do not allow range: condensation) I Specifications <Recorder section> Number of tracks: 128 tracks (including virtual tracks) 16 tracks simultaneous playback, 8 tracks simultaneous recording @ 16 bits 8 tracks simultaneous playback, 4... - Page 115 <SCSI> Connector: D-sub 25 pin female Format: SCSI-2 compatible <MIDI IN/OUT> Connectors: DIN 5 pin 2 <FOOT SW> Connector: 1/4" phone jack (use separately sold PS-1) <EXPRESSION PEDAL> Connector: 1/4" stereo phone jack (use separately sold XVP-10 or EXP-2) <AC9V IN> Connector: DIN 4 pin I Accessories...
-
Page 116: Midi Implementation Chart
*6: Received when selected by [SYSTEM] “Control.” Mode 1: OMNI ON, POLY Mode 2: OMNI ON, MONO Mode 3: OMNI OFF, POLY Mode 4: OMNI OFF, MONO Consult your local Korg distributor for more information on MIDI IMPLEMENTATION. Transmitted Recognized × ×... -
Page 117: Block Diagram
Block diagram... -
Page 118: Effect Program List
INSERT EFFECT Preset128 User128 ProgNo Categ ProgramName Algorithm EFF1 Reverb 7 I001 RV1 ReverbHall Reverb Hall HALL I002 RV2 SmoothHall Smooth Hall SmtHall I003 RV3 WetPlate Reverb Wet Plate WPlate I004 RV4 DryPlate Reverb Dry Plate DPlate I005 RV5 ReverbRoom Reverb Room ROOM I006 RV6... - Page 119 MASTER EFFECT Preset32 User32 ProgNo Categ ProgramName Algorithm EFF 1 Reverb 15 M001 RV1 ReverbHall Reverb Hall HALL M002 RV2 SmoothHall Smooth Hall SmtHall M003 RV3 WetPlate Reverb Wet Plate WPlate M004 RV4 DryPlate Reverb Dry Plate DPlate M005 RV5 ReverbRoom Reverb Room ROOM M006 RV6 BrightRoom...
-
Page 120: Rhythm Name List (215Patterns)
Rhythm Name List (215patterns) For Beat settings other than 3/4, 4/4 or 6/8, only (Blank), Metro, or Hihat can be selected. For Beat settings of 3/4, 4/4 or 6/8, the following rhythm patterns can be selected in addition to (Blank), Metro, or Hihat. -
Page 121: Demo Song List
Demo Song List 1. Alone 2. Clarity 3. Someday All songs written and performed by Michael Blake Drums by Paul Roraback ©1999 Michael Blake -all rights reserved. -
Page 122: Index
Index Numerics 16Bit/16Track 59 1in1outx4 29, 79 1in1outx8 29, 79 1in2outx2 29, 79 24Bit/8Track 59 2in2outx2 29, 79 Analog 16, 75 Applying an insert effect to a track during playback 31 Applying the insert effects while you record 30 Assign a name to the effect program 33, 80, 82, 83 Audio CD 21 Audio events 85... - Page 123 Pair 26, 76, 86 PAN 25, 86 Peak hold 85 Phase 78 Pingpong recording 51 Pitch 56 PLAY 86 Play 74 Play From 74 PLAY key 87 Play To 74 Polarity of the foot switch 45 Popup button 8, 9 Post-fader level 85 Post-fader level meter 85 Post-roll 71...
Need help?
Do you have a question about the D16 and is the answer not in the manual?
Questions and answers