Table of Contents
Advertisement
Available languages
Available languages
Advertisement
Table of Contents

Related Manuals for Zephir ZUW9000


Summary of Contents for Zephir ZUW9000
- Page 1 CONDIZIONATORE D’ARIA SPLIT A PARETE MODELLO: ZUW9000-ZUW12000-ZUW18000- ZUW24000...
-
Page 2: Manuale D'istruzioni
MANUALE D’ISTRUZIONI Vi ringraziamo per la fiducia accordata avendo scelto un prodotto ZEPHIR. Vi preghiamo di leggere attentamente le informazioni contenute in questo manuale, in quanto Vi aiuteranno a sfruttare al meglio le caratteristiche di questo apparato. Nel caso sia necessario rivolgersi al Servizio d'Assistenza Tecnica ZEPHIR, indicate... -
Page 3: Misure Di Sicurezza
Leggere attentamente il manuale prima dell'uso e conservarlo come riferimento. Questo manuale è solo per riferimento, si prega di avere cura dell'apparecchio scelto MISURE DI SICUREZZA ATTENZIONE: Seguendo queste precauzioni di base si riduce il rischio di incendi, scosse elettriche, lesioni o morte durante l'uso del condizionatore d'aria 1. Prima di collegare il condizionatore d’aria, assicurarsi che impianto elettrico e presa di corrente utilizzata siano conformi alle specifiche tecniche riportate sulla targhetta posteriore e sul presente manuale d’istruzioni. -
Page 4: Istruzioni Per L'uso
Se il cavo di alimentazione dell'unità è scollegato, bruciato, scheggiato o scollegato dal terminale, per effettuare riparazioni, contattare il centro di assistenza più vicino o personale qualificato ed esperto per evitare rischi elettrici. ATTENZIONE Specifiche di alimentazione Accertarsi che sezione, capacità e dimensione di tubi e fili siano corretti, che la tensione sia corretta e che la presa o l'interruttore abbiano la messa a terra. - Page 5 5. Il livello di impermeabilità dell'unità interna è IPX0. Non usarlo in lavanderia o in bagno. 6. L'unità esterna non può essere installata in un'area chiusa. 7. Fusibile: corrente nominale: 3,15 A. Suggerimenti Installare l'unità sul lato nord, che normalmente è il lato ombreggiato. Ciò migliorerà il funzionamento dell'unità. ...
- Page 6 Utilizzare una presa di corrente Utilizzare il cavo di alimentazione Non inserire dita o oggetti affilati conforme alle specifiche. Si prega di spicifico; non sostiuirlo. nell'ingresso o nell'uscita dell'unità fare riferimento alla targhetta per i esterna; il movimento della ventola dettagli può...
-
Page 7: Guida All'uso
ATTENZIONE L'apparecchio non è destinato all'uso da parte di bambini piccoli o persone inferme senza supervisione. I bambini piccoli devono essere sorvegliati per assicurarsi che non giochino con l'apparecchio. Se il cavo di alimentazione è danneggiato, deve essere sostituito dal produttore o da un suo rappresentante o da una persona qualificata per evitare pericoli. - Page 8 Osservazioni: Ci vorrà 1 minuto affinché il compressore funzioni dopo che l'unità è stata collegata alla rete elettrica per la prima volta. Prevenzione al gelo Per evitare il congelamento dello scambiatore di calore interno durante l'operazione di raffreddamento e deumidificazione, il compressore o la ventola esterna potrebbero smettere di funzionare; la velocità della ventola interna verrà...
-
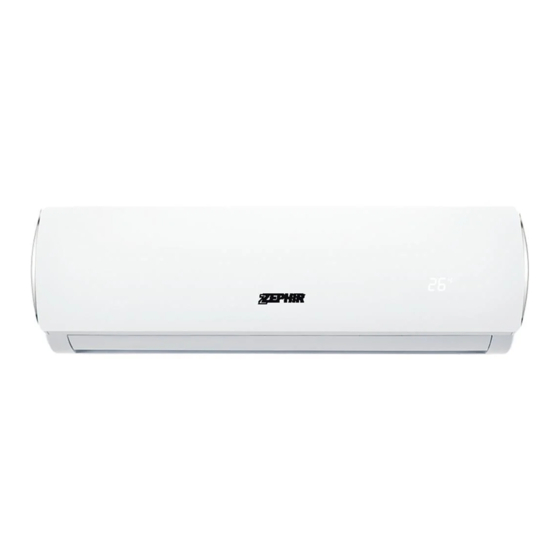
Page 9: Descrizione Dei Componenti
DESCRIZIONE DEI COMPONENTI Vista dell'unità Osservazioni: Il condizionatore d'aria è composto da un'unità interna, un'unità esterna e da un telecomando. Il design e la forma sono diversi per i diversi modelli. Le figure sopra sono solo schematiche e potrebbero essere leggermente diverse dagli apparecchi reali acquistati. - Page 10 Display Indicatore RUN: questa spia luminosa è accesa quando l'unità è nello stato “RUNNING”. Durante lo sbrinamento o il raffreddamento a prova di flusso d'aria, l'indicatore lampeggia. Indicatore TIMER: questa spia luminosa è accesa quando l'unità è in modalità Timer. Spia WIFI: lampeggiante per ricerca di segnale, illuminazione per connessione WIFI completata, il che significa che la funzione WIFI può...
- Page 11 Telecomando Osservazioni: Le modalità HEAT (RISCALDAMENTO) e AUTO, e i relativi indicatori nel display non sono disponibili per il solo modello a raffreddamento. Se l'utente desidera raffreddare o riscaldare rapidamente l’ambiente, può premere il pulsante "TURBO" in modalità raffreddamento o riscaldamento, il condizionatore d'aria attiverà...
- Page 12 Display del telecomando Istruzioni per il telecomando Il telecomando utilizza due batterie alcaline AAA, in condizioni normali le batterie durano per circa 6 mesi. Utilizzare due nuove batterie di tipo simile (prestare attenzione ai poli durante l'installazione). Quando si utilizza il telecomando, puntare l'emettitore del segnale verso il ricevitore dell'unità interna; Non devono esserci ostacoli tra il telecomando e l'unità...
-
Page 13: Pulizia E Manutenzione
PULIZIA E MANUTENZIONE Un'attenta manutenzione e revisione anticipata possono prolungare la durata del condizionatore d'aria e risparmiare spese di elettricità. Attenzione: 1. Spegnere il condizionatore d'aria tramite il telecomando ed estrarre la spina prima di eseguire interventi di pulizia e manutenzione. 2. Non sostare su oggetti instabili quando si pulisce o si esegue la manutenzione del condizionatore d'aria, altrimenti si potrebbero causare lesioni personali. - Page 14 In caso di inutilizzo prolungato 1. Far funzionare il condizionatore in 2. Interrompere funzionamento 3. Estrarre filtro dell’aria modalità ventilazione per 3-4 ore tramite telecomando, conservarlo pulito. per asciugare le parti. scollegare il cavo dalla presa di corrente. 4. Estrarre le batterie. Raccomandazioni per il risparmio energetico Imposta la temperatura Evitare la luce solare diretta Evitare fonti di calore...
-
Page 15: Risoluzione Dei Problemi
RISOLUZIONE DEI PROBLEMI Il condizionatore d'aria è in stato di errore Verifica prima dell'assistenza. FENOMENO CONTROLLO ARTICOLI 1. Controllare se il cavo di alimentazione è collegato alla presa di corrente. 2. Controllare se l’interruttore è acceso o c’è un fusibile danneggiato. Il condizionatore non funziona in alcun modo 3. - Page 16 FENOMENI NORMALI Durante riscaldamento Se l'umidità è troppo elevata, E' possible che si verifichi un leggero raffreddamento, plastiche potrebbero formarsi gocce d'acqua "fruscio" all'avvio all'arresto potrebbero emettere un suono a sulla griglia anteriore dell'unità dell'unità. E' il normale suono del causa cambiamento interna.
- Page 17 INSTALLAZIONE MANUALE I condizionatori d'aria sono unità che dovrebbero essere installate per te solo da tecnici professionisti. Questo Manuale di istruzioni è la versione generale per i modelli di condizionatori d'aria a parete prodotti dalla nostra Co. L'aspetto delle unità acquistate potrebbe essere leggermente diverso da quelli presenti nel Manuale, ma non influisce sul corretto funzionamento e utilizzo.
- Page 18 15. Al termine dell'installazione, verificare la presenza di perdite di gas refrigerante. È possibile che venga prodotto gas tossico se il gas refrigerante fuoriesce nella stanza e viene a contatto con una fonte di calore, come un termoventilatore, una stufa o una cucina. 16.
- Page 19 Montato su una parete in grado di sopportare il peso del condizionatore d'aria e che non produrrà rumore durante il funzionamento dell'unità. La distanza tra l'unità interna e il pavimento deve essere superiore a 2,3 m. La spina deve essere facilmente raggiungibile dopo l'installazione dell'apparecchio. ...
- Page 20 φ6(1/4'') φ9.52(3/8'') φ6(1/4'') φ6(1/4'') φ12(1/2'') φ15.88(5/8'') φ1 φ1 φ6(1/4'') φ9.52(3/8'') φ15.88(5/8'') φ9.52(3/8'') φ15.88(5/8'') 9.05(3/4'') Fissaggio del Pannello di Installazione Smontare la staffa metallica per l'installazione dell'unità interna. Regolare il pannello di montaggio in posizione orizzontale. Praticare i fori e inserire i tubi di espansione in plastica nelle posizioni appropriate sulla parete e fissare la staffa di installazione sulla parete con viti e rondelle M5x30 6.
-
Page 21: Installazione Dell'unità Interna
Installazione dell'unità interna Il tubo può essere collegato in diversi modi come mostrato nelle fìgure che seguono. 1. Collegamento del tubo posteriore destro (simile al tubo inferiore destro) (Opzionale, fare riferimento alla Fig.7) Estrarre il tubo dalla parte inferiore del telaio; collegare il tubo di scarico. Fasciare in maniera affidabile il giunto del tubo. -
Page 22: Collegamento Dei Tubi
Fissare l'unità esterna con 4 bulloni sulle staffe di installazione. I raccordi devono essere ben avvitati; Il collegamento deve essere serrato e affidabile. Durante l'installazione dell'unità esterna, il corpo deve essere appeso con delle corde per evitare che cada. ... - Page 25 Note: Occorre una vite speciale per collegare il cavo di messa a terra (viti in acciaio inox inossidabile o viti di rame M4) Accertarsi che tutti i cavi siano collegati saldamente, non si allentino o si separino. Accertarsi che i collegamenti dei cavi siano eseguiti secondo lo schema elettrico del condizionatore d'aria.
- Page 26 2. Tipo di pompaggio Accertarsi che tutti i tubi dell'unità interna ed esterna siano collegati correttamente. Rimuovere i cappucci dalle valvole a due e tre vie mediante una chiave inglese; collegare la pompa a vuoto e il manometro all'attacco della valvola di servizio. ...
- Page 27 Drenaggio 1. Non è necessario alcun trattamento di drenaggio Nelle regioni in cui gela in inverno, non installare la pipetta di scarico per evitare il congelamento dell'acqua di drenaggio e il danneggiamento della ventola. Questo trattamento di drenaggio non è necessario per i condizionatori solo freddo.
- Page 28 WIFI MANUALE Istruzioni Il condizionatore d'aria “smart” è un dispositivo con sistema di controllo remoto Wi-Fi. Potrebbe essere controllato dal tuo smartphone con rete 2.4G Wi ‐ Fi, 2G, 3G, 4G. Scaricare l’app Suggerimenti: è possibile scaricare e installare "Smart Life" cercando negli App Store di Apple e Google. Registrazione dell’account Quando apri l'app per la prima volta, avvia la registrazione.
- Page 29 2. Aprire l'app, toccare [Aggiungi dispositivo], selezionare la propria rete Wi ‐ Fi, digitare la propria password del router Wi‐Fi e toccare [Avanti]. Quindi si avvierà la configurazione della rete. 3. Quando la configurazione ha esito positivo, è possibile visualizzare l'interfaccia dell'app come mostrato nella schermata seguente.
- Page 30 Se la connessione fallisce Quando la connessione non è riuscita, potresti vedere l'interfaccia dell'app come mostrato nella schermata qui sotto. Prova a configurare nuovamente la rete o passa alla modalità AP. E’ possibile collegarsi utilizzando un’altra modalità di connessione. 1. Toccare [Modalità AP], configurare la rete tramite la modalità AP con le seguenti procedure. 2.
- Page 31 Precauzioni Wi-Fi E’ seriamente consigliato di osservare le seguenti precauzioni: Non utilizzare il Wi‐Fi in luoghi ove non è consentito, ad esempio in aeroporti, strutture mediche o ospedaliere, ecc. Non accendere lo smartphone in luoghi pericolosi, come distributori di benzina, strutture di stoccaggio di carburanti oppure prodotti chimici, ecc.
-
Page 32: Register Account
WIFI MANUAL Instructions Smart air conditioner is an air conditioner with Wi‐Fi remote control system. It could e controlled by your smartphone with 2.4G Wi‐Fi, 2G, 3G ,4G network. App download link Tips: You can download and install ”Smart Life” by searching the Apple and Google App Stores. Register account When you open the App for the first time, start your registration. - Page 33 4. Tap on [Done], you could see the interface of a device list as shown in the screenshot below.
- Page 34 What if connection failed When the connection failed, you could see the the App interface as shown in the screenshot below. Please try to configure network again or switch to AP mode. Continue to connect by switching other connection mode. 1.
- Page 35 WIFI Attentions To prevent unnecessary harm, please keep in mind of the following notifications: Please don’t Wi‐Fi where wireless device allowed, such airport, medical places and etc. Please don’t turn on your smartphone in dangerous places, such as gas station, fuel or chemicals manufactures, and etc.
- Page 36 Please refer to the user manual for the detailed connection methods, please don’t randomly use mismatched devices. The App control quality is affected by your smartphone, Wi‐Fi network, distance with router, and internet status. Sometime it is not very smooth. It has nothing to do with air conditioner itself. ...
- Page 37 è opportuno rivolgersi a un Centro Assistenza ZEPHIR. Per assistenza contattare la Westim, 0516467045. La sicurezza degli apparecchi elettrici ZEPHIR corrisponde alle norme in vigore e alle disposizioni di legge per la sicurezza degli apparecchi elettrici. Gli apparecchi elettrici ZEPHIR rispondono alla norma 2004/108/EC in materia di antidisturbi radio.
- Page 38 Italiano Trattamento dell'unità elettrico od elettronico a fine vita (Applicabile in tutti i paesi dell'Unione Europea e in quelli con sistema di raccolta differenziata) Questo simbolo sul prodotto o sulla confezione indica che il prodotto non deve essere considerato come un normale rifiuto domestico, ma deve invece essere consegnato ad un punto di raccolta appropriato per il riciclo di apparecchi elettrici ed elettronici.
-
Page 39: Safety Precautions
Westim S.p.A. Via Roberto Bracco,42 Roma, Italia Prodotto in Cina Read the manual carefully before operation and keep it for reference. This manual is only for reference, please comply with actual appliance you selected SAFETY PRECAUTIONS WARNING: Following these basic precautions will reduce the risk of fire, electrical shock, injury or death when using your air conditioner 1. Air conditioner must be connected to proper electrical outlet or breaker with the correct electrical supply. And only the specified power can be used. -
Page 40: Installation Instructions
Installation instructions WARNING Never install by yourself. Split type air conditioner will work for you for a long period of time if it is correctly installed. Improper installation could cause problems such as leakage of water or refrigerant, electric shock or fire. If the power cable to the unit is disconnected, burnt, chipped, or detached from the terminal , to make reparations, please contact the nearest service center, or repaired by people who have the same qualifications or experience to avoid electrical hazards. -
Page 41: Operating Conditions
Operating conditions 1. Temperature: T1 instance: -7°C~45 (16°C~45°C in cooling-only type) T3 instance: -7°C~52°C (16°C~52°C in cooling-only type) If the unit runs beyond the temperature for a long time, it may cause cooling capacity to decrease or protector to work. 2. - Page 42 Only single-phase a.c. power can Use the specified power cord; do Do not put fingers or sticks into be used. Please refer to nameplate inlet outlet for details change it. conditioner; the running fan may cause injuries. Do not put anything on the outdoor Do not switch on or off the unit by Keep indoor ventilated, especially unit.
- Page 43 WARNING The appliance is not intend for use by young children or infirm persons without supervision. Young children should be supervised to ensure that they do not play with the appliance. If the supply cord is damaged, it must be replaced by the manufacturer or its service agent or a similarly qualified person in order to avoid a hazard. Do not connect the earth line to Do not pull off the power plug or Switch off the unit;...
-
Page 44: Product Introduction
PRODUCT INTRODUCTION Protect Functions Protect functions can prolong the air conditioner’ s service life and provide more comfortable airflow. Delay-starting protection for the compressor The compressor will restart working at least 3 minutes (5 minutes in heating mode) after being turned off to keep the pressure balance of the cooling system. -
Page 45: Description Of Components
DESCRIPTION OF COMPONENTS View of unit Remarks: The air conditioner is consisting of indoor unit, outdoor unit and remote controller. The design and shape are different for different models. The above figures are only schematic, and they may be slightly different from the actual appliances you selected. -
Page 46: Indicator Light
Display Screen RUN indicator: This signal light is on when the unit is is in “RUNNING” status. When in Defrosting or Cooling airflow proof, the indicator is flashing TIMER indicator: This signal light is on when the unit is in Timer. WIFI indicator light: Flashing on behalf of searching, lighting on behalf of WIFI completed connection, Which means WIFI function can be operation and application. -
Page 47: Remote Controller
Remote Controller Remarks: HEAT,AUTO function and display are not available for cooling-only type air conditioner. If user want to make the room air cool or warm quickly ,user can press “turbo” button incooling or heating mode,air conditioner will run in power function.If press “turbo” button again, air conditioner will exit power function. ... -
Page 48: Remote Controller Display
Remote Controller Display Instruction for remote controller The remote controller uses two AAA alkaline batteries under normal condition, the batteries lastmfor about 6 months. Please use two new batteries of similar type (pay attention to the poles in installing). When using remote controller, please point the signal emitter towards indoor unit receiver; There should be no obstacle between remote controller and indoor unit. -
Page 49: Service And Maintenance
SERVICE AND MAINTENANCE Careful maintenance and overhaul in advance can prolong the air conditioner’ s service life and save electricity charges. Caution: 1. Stop air conditioner by remote controller and pull off the plug before service and maintenance. 2. Do not stand on unstable objects when you clean or service air conditioner, or it may cause personnel injury. - Page 50 No use for long time 1. Swing 3-4 hours to dry internal Stop operation remote 3. Maintain air filter net air conditioner. controller, then air conditioner. cut off the power source of air conditioner. 4. Take out batteries. Recommendations for Energy Savings Appropriate Temp Setting Avoid Direct Sunlight Avoid Heat Sources It is harmful to health if the room When it is cooling, please use...
-
Page 51: Troubleshooting
TROUBLESHOOTING Air Conditioner is in error Checking before service. PHENOMENON CHECKING ITEMS 1. Check whether the power is disconnected. Air Conditioner Does 2. Check whether the breaker is switched on or the fuse is burnt. Not Operate At All 3. Check the remote controller batteries. 4. -
Page 52: Normal Phenomenons
NORMAL PHENOMENONS When it is heating or cooling, If the indoor humidity is too high, There may be gentle “rustle” plastic water drops may form on the front sound when the unit starts or substance may give out a sound grill of indoor unit. This is a normal stops. - Page 53 INSTALLATION MANUAL Air conditioners are units that should have the professional technicians do the installation for you. This Instruction Guide is the universal-purpose version for the models of split wall-mounted air conditioners manufactured by our Co. The appearance of the units that you purchase might be slightly different from the ones described in the Guide, but it does not affect your proper operations and usage.
-
Page 54: Installation Of Accessories
17. When installing or relocating the air conditioner, be sure to bleed the refrigerant circuit to ensure it is free of air, and use only the specified refrigerant (R32).The presence of air or other foreign matter in the refrigerant circuit causes abnormal pressure rise,which may result in equipment damage and even injury. - Page 55 Position for Outdoor Unit Avoid direct sunlight. Away from heat source, steam source, leakage of flammable gas, smoke and dust. Select a place that is away from rain (snow) and has good ventilation. Neighbors will not be affected by the blown wind and noise, or discharged water. ...
-
Page 56: Indoor Unit Installation
Fixing installation panel Dismantle the metal installation board of the indoor unit. Adjust the mounting panel to horizontal position. Drill holes and insert plastic expansion tubes at the appropriate locations on the wall and fix the installation board on the wall with M5x30 screws and washer 6. Ensure that there must be at least 4 fixed points in the wall. Ensure installation board to horizontal position. -
Page 57: Outdoor Unit Installation
Outdoor unit installation If installation brackets for installing outdoor unit are needed, user could buy the brackets from our company or agents (Fig.10). Assemble the mounting frame and supports with the attached 6 screws , plain washers, spring washers, and nuts. ... - Page 58 ф6 (1/4'') 15~20 ф9.52(3/8'') 35~40 ф12(1/2'') 50~55 ф15.88(5/8'') 60~75 ф19.05(3/4'') 80~95 Connection of wires 1. Indoor unit Open upward the inlet grid to the greatest extends. Remove the electric cover from the unit. Loose the screw at connection lid. (Fig.12) ...
- Page 60 Notes: Earthing screw must use special screw (stainless machining screws or copper screws M4) Ensure that all wires are securely connected, will not loose or separate. Ensure that wire connections are carried out according to the wiring diagram of the air conditioner. ...
- Page 61 2. Pumping type Make sure that all the tubes of indoor and outdoor unit are connecting well. Take off valve bonnet from two-way and three-way valves by spanner; connect vacuum pump and compound valve to the service valve bonnet. ...
- Page 62 Installation for the cover of valve (Optional): For the whole unit that individual cover of valve is available (refer to packing list), the installing method is as follow: After connecting the connection pipes between indoor and outdoor units followed by the installing method mentioned above, take out the cover of valve from the accessory bag, and fix it on the side of outdoor unit with three corresponding screws (inside the accessory bag).
- Page 63 è opportuno rivolgersi a un Centro Assistenza ZEPHIR. Per assistenza contattare la Westim, 06 8720311. La sicurezza degli apparecchi elettrici ZEPHIR corrisponde alle norme in vigore e alle disposizioni di legge per la sicurezza degli apparecchi elettrici.
- Page 64 Italiano Trattamento del unità elettrico od elettronico a fine vita (Applicabile in tutti i paesi dell'Unione Europea e in quelli con sistema di raccolta differenziata) Questo simbolo sul prodotto o sulla confezione indica che il prodotto non deve essere considerato come un normale rifiuto domestico, ma deve invece essere consegnato ad un punto di raccolta appropriato per il riciclo di apparecchi elettrici ed elettronici.
Need help?
Do you have a question about the ZUW9000 and is the answer not in the manual?
Questions and answers