Table of Contents
Advertisement
Quick Links
Advertisement
Table of Contents

Related Manuals for BikeYoke DIVINE SL


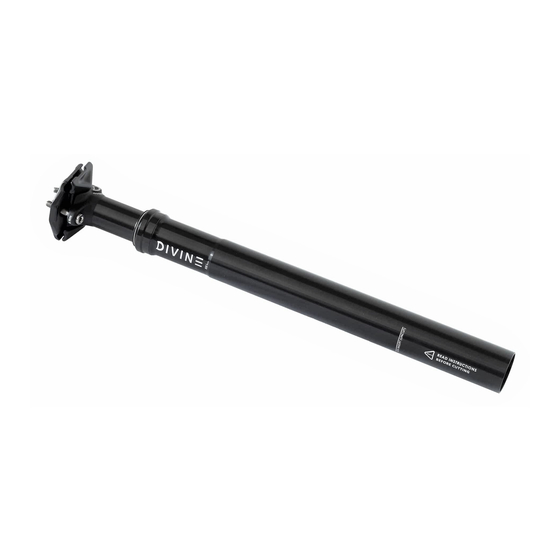
Summary of Contents for BikeYoke DIVINE SL
- Page 2 READ THESE INSTRUCTIONS BEFORE USE! REGISTER FOR MORE BENEFITS DIGITAL MANUAL ON & OFF THE TRAIL ASSEMBLY VIDEOS TIPPS & TRICKS SERVICE ... & MORE...
-
Page 3: Table Of Contents
Inner cable adjusting Minimum insertion depth Shortening lower tube Inserting seatpost Seatpost orientation Saddle installation USING YOUR SEATPOST Return speed 17-18 Drop and extend SERVICE Maintenance instructions Maintenance plan 22-23 TROUBLESHOOTING *service app Copyright © 2021 BikeYoke All rights reserved... - Page 4 Thank you for choosing a BikeYoke dropper seatpost. To ensure maximum and enduring performance with your DIVINE SL or SL RASCAL, please read and follow this manual carefully and keep it for future reference. If you purchased your seatpost separately, you will find instructions on how to install it.
- Page 5 DANGER: Any modification to your frame may cause the frame to fail, which could lead to injury or death. If you are unsure if your DIVINE SL is compatible with your frame, contact your frame manufacturer or BikeYoke directly. You can find all contact informations on our website...
-
Page 6: Before Installation
BEFORE INSTALLATION WARNING: You must ensure that your frame is designed to fit your DIVINE SL. Incorrect fit may result in slippage, faulty performance, injury, or death and may void your warranty. CAUTION: BikeYoke does not recommend modifying or altering your frame in any way. -
Page 7: Installation
INSTALLATION STEP 1: INSTALLING REMOTE LEVER (2X) 1. Loosen and remove the clamping bolt on the 2X remote with a 3 mm Allen key. Open the hinged clamp, install the lever in the desired position and tighten the bolt. Maximum torque: 1,5 Nm OPEN 2. - Page 8 Use a maximum torque of 1,5 Nm on the pinch bolt on the BikeYoke splits clamp. Triggy remotes can only be installed on the left side of the handlebar. I-Spec adapter installation scheme parts...
- Page 9 INSTALLATION STEP 2: CONNECTING CABLE TO SEATPOST 1. Feed the cable housing (#5) through your frame. 2. Install the special endcap (# 4) onto the housing. Push the housing endcap all the way onto the housing. 3. Slide the connector nut (#2) onto the inner cable (#1) and then feed the inner cable all the way through the housing.
- Page 10 INSTALLATION STEP 2: CONNECTING CABLE TO SEATPOST 7. Keep a little tension on the inner cable too, to avoid accidental disconnection of endcap (#4) and housing (#5). Secure the post in position 8. Hold the outer housing to the access point of your remote and rotate your handlebar at least 90°...
-
Page 11: Inner Cable Adjusting
INSTALLATION STEP 3: INNER CABLE ADJUSTING 1. Insert the inner cable through the remote lever and insert the cable housing into its seat. Make sure that there is no slack in the inner cable. Tighten the pinch bolt (Triggy) or the barrel nut (2X remote) with 2 Nm. -
Page 12: Minimum Insertion Depth
INSTALLATION STEP 4: MINIMUM INSERTION DEPTH All seatpost models must be inserted into the bicycle’s seat tube while covering the minimum insertion line indicated on the seat- post. If your seatpost is shortened, the minimum insertion depth is 80 mm. WARNING: Insufficient seatpost insertion into the bicycle frame‘s seat tube could result in damage to the seatpost and/or bicycle, causing loss of control,... -
Page 13: Shortening Lower Tube
MONTAGE SHORTENING LOWER TUBE The DIVINE SL (not DIVINE SL RASCAL!) allows you to shorten the lower tube unit by up to: • 0-115 mm for 80 mm travel version cutting range • 0-95 mm for 100 mm travel version •... -
Page 14: Inserting Seatpost
INSTALLATION STEP 4: INSERTING SEATPOST Insert the seatpost into your seat tube. When inserting or extending, make sure you do not pull too hard on the outer housing, while guiding it through the internals of your frame. Insert slowly and carefully! When inserting, make sure there are no such things as pivot points, bent tubes, ... -
Page 15: Seatpost Orientation
INSTALLATION STEP 4: SEATPOST ORIENTATION There is only one position for seatpost direction, saddle and saddle clamp orientation. rear of bike front of bike... -
Page 16: Saddle Installation
INSTALLATION STEP 5: SADDLE INSTALLATION Remove the saddle clamp bolts, barrel nuts, and upper and lower saddle clamps with a T25 Torx wrench (4 mm Allen key on older models). barrel nut upper saddle clamp To install the saddle, replace the two lower saddle saddle clamp bolts, barrel nuts, upper clamp... -
Page 17: Drop And Extend
For this initial „break-away“ just push the remote and then gently push or pull the saddle until the post starts moving. Dissimilar to posts of other manufacturers it is acceptable for BikeYoke droppers to carefully pull on the saddle or lift the bike on the saddle. - Page 18 USAGE ADJUSTING RETURN SPEED / TECH CLIMB FEATURE DIVINE SL is designed with the tech climb feature, that allows the post to act like a spring after hard impacts on the saddle. This serves for extra comfort on technical climbs with partially dropped saddle and to protect the post from peak loads.
- Page 19 USAGE ADJUSTING RETURN SPEED / TECH CLIMB FEATURE 1. Extend the post completely. 2. Remove saddle clamps and remove valve cap. 3. Attach the air valve adapter and then attach the shock pump onto the adapter. Make sure not to overtight the shock connection.
-
Page 20: Service
SERVICE MAINTENANCE You can expect reliable service from this high-performance product if properly installed and regularly maintained by an authorized BikeYoke service center or a qualified service technician. For assistance locating a qualified service technician, visit www.bikeyoke.com. WARNING: Do not disassemble your seatpost... -
Page 21: Maintenance Plan
Depending on the amount of use and riding conditions, a shorter maintenance interval may be necessary in order to ensure a smooth function of your BikeYoke seatpost! -
Page 22: Faq
To provide full return speed and smooth drop feel, your remote should have a least 10 mm of cable pull for REVIVE, REVIVE MAX and DIVINE, and at least 5 mm of cable pull for DIVINE SL and SL RASCAL. - Page 23 IMPORTANT: Do not grease the saddle clamp bolts. Can I lift my bike on the saddle? It is acceptable for BikeYoke droppers to carefully lift the bike on the saddle. Is it okay to use t-bar lifts with my BikeYoke seatpost? Bikeyoke generally advises against using t-bar lifts.
-
Page 24: Service App
BIKEYOKE SERVICE APP EVERYTHING YOU NEED TO KNOW! ASSEMBLY VIDEOS TIPPS & TRICKS SERVICE & MORE...
Need help?
Do you have a question about the DIVINE SL and is the answer not in the manual?
Questions and answers