Table of Contents
Advertisement
Quick Links
Advertisement
Table of Contents

Related Manuals for LifeSpan TR650 Slim


Summary of Contents for LifeSpan TR650 Slim
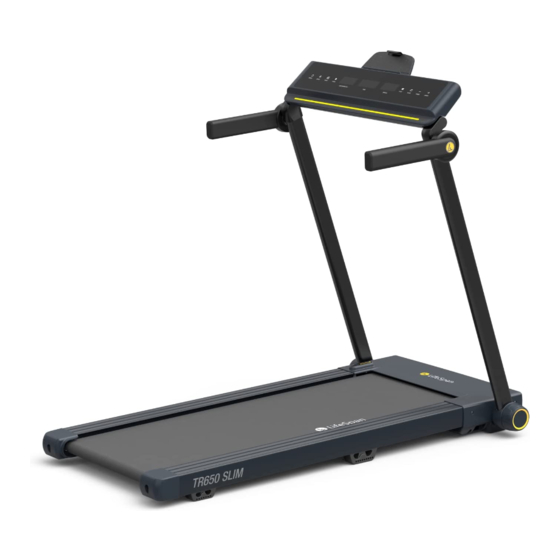
- Page 1 Life’s short. Live longer. Treadmill Owner’s Manual for TR650 Slim...
- Page 2 Welcome Congratulations on Purchasing Your LifeSpan Treadmill! At LifeSpan we take pride in the quality, safety, and reliability of our products as well as the professionalism of our sales support and customer service teams. Making it our number one priority that you have an exceptional experience using our products.
-
Page 3: Table Of Contents
Contents About Your Treadmill ....................Specifications Warranty, Registration Safety First ......................... Safety Tips Safety Key Proper Grounding Assembling Your Treadmill ................. Exploded View & Hardware Assembly Instructions Storing The Treadmill ..................... Folding the Treadmill Up Unfolding the Treadmill Console Basics ...................... -
Page 4: About Your Treadmill
About Your Treadmill Specifications Console Unfolded Size 56.3” x 37.7” x 48.9” inches (1430 x 807 x 1241mm) Folded Size 9.8” x 37.7” x 56.3” inches ( 250 x 807 x 1430 mm) Running Surface 17.7 x 47.25” inches (450 x 1200 mm) Net Weight 94.8 lbs (43 kg) Power... - Page 5 In order to insure our product warranty and to ensure the safe and efficient operation of your LifeSpan product, only authorized parts can be used. The warranty is void if any parts other than those provided by LifeSpan are used.
- Page 6 • This warranty is non-transferable from the original owner. Registration You must register your LifeSpan product before a warranty claim can be processed. To complete your registration online go to www.lifespanfitness.com/ support/registration. Registration must be completed within 60 days of delivery to activate the product warranty.
-
Page 7: Safety First
• The power cord is for treadmill use only. In case the power cord is damaged, please purchase power cord from your local distributor or LifeSpan Fitness. • If the treadmill should suddenly increase in speed due to an electronics failure or the speed being inadvertently increased, pull the safety key from the console. - Page 8 Safety First • When the treadmill is power off for long time period, please un-plug the power cord. Please hold the connector to unplug from wall power socket, do not pull the wire to remove it from wall socket, it might cause power cord damaged.
-
Page 9: Safety Key
Safety First Safety Key The safety key is required to operate this treadmill. With the safety key engaged (pushed in) the treadmill is operational. With the safety key pulled, power is turned off to the motor making the treadmill inoperable. Securely attach safety key clip in case of a fall... -
Page 10: Proper Grounding
Power Cord Options This treadmill should only be used with the proper power cord and power outlet. Several power cord options (shown below) are available from LifeSpan. We do our best do include the correct power cord with the treadmill for your area. -
Page 11: Assembling Your Treadmill
Assembling Your Treadmill 6mm Allen 5mm Allen Wrench Wrench... -
Page 12: Exploded View & Hardware
Assembling Your Treadmill Exploded View Prior to starting the assembly process take all of the parts out of the box. Remove plastic bags and lay them out on the floor to become familiar with the components. Since your treadmill is a heavy piece of equipment it is recommended you use two people during assembly and follow these assembly instructions to reduce any problems that could occur. - Page 13 Assembling Your Treadmill Step 1: Unpacking the Treadmill Open the box. Remove small parts and packaging material and unwrap parts. Place the Main Frame(1) onto a level surface for assembly.
- Page 14 Assembling Your Treadmill Step 2: Securing the Uprights Lift the uprights as shown in image above. Support the upright with one hand to prevent it from falling down causing possible injury. Screw on the Rotary Knob(2) to lock the right upright to the main frame. Repeat for the other side.
- Page 15 Assembling Your Treadmill 6mm Allen Wrench Wave Washer Nylon Pad M10 x 55 (x4) (x2) (x2) Step 3: Attaching the Hand Bars Place two Wave Washers(9) on the inside post of the Right Hand Bar(4). Then slide the Hand Bar onto the treadmill upright. Place one Nylon Isolation Pad(10) onto a Bolt(11) and slide the Bolt into the Hand Bar.
- Page 16 Assembling Your Treadmill Step 4: Console Roll the console upward until it is completely upright.
- Page 17 Assembling Your Treadmill Step 5: Final Attachments Insert the Safety Key(6) into the Console. Insert the Smart Phone Rack(7) into the top of the Console.
- Page 18 Assembling Your Treadmill Step 6: Attach Power Cord Plug the Power Cord(8) into the treadmill base. The connection is in front of the upright post on the right side. Please review your work to confirm that assembly Note: is complete. Read instructions on operation before using treadmill.
-
Page 19: Storing The Treadmill
Storing the Treadmill Folding the Treadmill Up Turn the Console backward so it lies against the uprights. Turn the Hand Bars up like the uprights. Hold the upright up and unscrew the Rotary Knob Set until the upright can be folded down as shown in picture (B). Then retighten the Rotary Knob Set. -
Page 20: Unfolding The Treadmill
Storing the Treadmill Unfolding the Treadmill Push forward the treadmill a little, use one foot to press down the Base Frame(13), then gently put down the treadmill until hearing the sound that the Base Frame is locked into the Main Frame, as the picture (B). Unscrew the Rotary Knob Set until the upright can be pulled up, then pull up the upright tube and screw the Rotary Knob Set tightly as in picture (C). -
Page 21: Console Basics
Console Basics Display Window A touchscreen display provides all the information you need to monitor your exercise results and get the most out of your exercise program. LCD Windows Distance - Displays running distance. Calories - Show calories. When the CALORIES indicator is lit, the window displays calories. - Page 22 Console Basics Button Function Prog. - Press this button to choose manual programs P1 – P15. Start - Press this button to start the machine, the machine will run at the lowest speed or at the speed of default program after 3 seconds time count down.
-
Page 23: Operations
Operations Turning On the Treadmill Confirm that the Safety Key is inserted into the console. Turn on the power switch on the front of base of treadmill. The screen window will light up, the machine will enter into standby state. Basic Functions Manual Mode: Press the START button, the treadmill will run at the lowest speed in 3 seconds. - Page 24 Operations operations are locked until the Safety Key is put back into the console Oil Reminder Function: Every 100 miles, in standby or shutdown state, the word OIL will flash three times in the Time Window with three beeps. It will repeat this reminder three times when you turn on the treadmill.
-
Page 25: Window Data Display Range Settings
Operations Window Data Display Range Settings SHOW DEFAULT DEFAULT SET RANGE RANGE MODE PROGRAM SPEED 0.6 - 10 MPH -------- -------- -------- TIME 0:00 - 99:59 30:00 30:00 5:00 – 99:00 DISTANCE 0.00 - 99.9 0.5 – 99.9 1.00 Mile -------- Miles Miles... - Page 26 Operations Setting time/20= Time For Each Interval Segment...
-
Page 27: Maintenance And Tips
At least once a year remove the motor cover and vacuum under the motor cover. Repairs Any needed repairs will require a professional technician. Pleae contact LifeSpan Fitness. Turning the power off for 10 minutes after using for 2 hours will help extend the... -
Page 28: Belt Lubrication
The belt/ deck friction may play a major role in the function and life of your treadmill, thus requiring periodic lubrication. We recommend a periodic inspection of the deck. You need to contact LifeSpan customer service if you find damage to the deck. -
Page 29: Belt Tensioning
DO NOT tighten more than 2 full turns on each side. If slippage still occurs, contact LifeSpan Customer Service. Adjusting one side more than the other will cause the belt to drift to the side of the treadmill and will require belt alignment. -
Page 30: Belt Alignment
Maintenance and Tips Belt Alignment Press Start, then increase the treadmill speed to 3 mph (5 kph). Stand at the rear of the treadmill to see which way the belt is drifting. If the belt drifts to the left, turn the left adjustment bolt one-quarter turn clockwise and the right adjustment bolt one-quarter turn counter- clockwise. -
Page 31: Troubleshooting
Maintenance and Tips Troubleshooting If you have a question that isn’t answered in this Owner’s Manual, visit our website at www.LifeSpanFitness.com or call us at 877.654.3837 x4. The treadmill is designed and manufactured to be reliable and easy-to-use. However, if you have a problem, these troubleshooting steps may help you find the cause. - Page 32 TR650 Slim Treadmill LifeSpan Fitness 785 West 1700 South Suite 1 Salt Lake City, UT. 84104 Phone: 877.654.3837 www.LifeSpanFitness.com 2021 Version 1.0...
Need help?
Do you have a question about the TR650 Slim and is the answer not in the manual?
Questions and answers