
Related Manuals for Centrodyne S610


Summary of Contents for Centrodyne S610
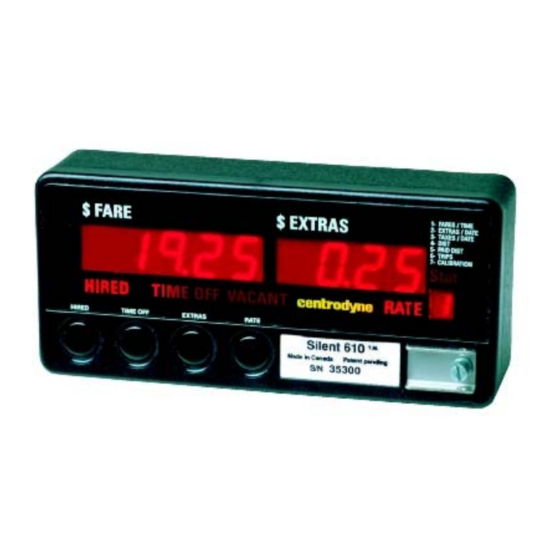
- Page 1 ® S610/620 TAXIMETERS Installation, Operation & Programming Manual Revision Date: April 2009...
- Page 2 No part of this manual may be reproduced in any form without written permission This manual represents the CENTRODYNE S610/S620 Taximeters as manufactured at the time of publication. Every effort has been made to ensure that the information included here is complete and accurate.
-
Page 3: Table Of Contents
Table of Contents Appendices Taximeter Programming Programming Mode General Programming Instructions: Group 0 Calibration Groups 1-4 Rate Programming (And Optional Rates 5-8) Group 5 Control Options Group 6 Specialty Options Group 7 Clock/Calendar Group 8 Printer Text Printable Character Table For S620 Strings Silent 620 String Programming Sheet Group 9 Password Entry/Edit Resetting Statistics... -
Page 5: Programming Mode
Switch Config: SW1 Select Group SW2 Select Item & Move Character left SW3 Change Character Value SW4 Enter SW5 Programming Switch Programming Mode The Silent 610/620 taximeters are programmed using the four push button switches on the front of the taximeter. - Page 6 5. Drive the vehicle over a measured mile (km) and the Fare display will show the speed signal calibration as you drive. If the taximeter does not count the speed signal pulses, the meter is not connected properly. 6. At the end of the mile (km), stop the vehicle, press SW4 to record the displayed calibration. 7.
-
Page 7: Groups 1-4 Rate Programming (And Optional Rates 5-8)
Switch Config: SW1 Select Group SW2 Select Item & Move Character left SW3 Change Character Value SW4 Enter SW5 Programming Switch Groups 1-4 Rate Programming (and optional Rates 5-8) When in Groups 1 to 4, the RATE legend is illuminated and flashes on and off. Taximeters with the optional 8 RATE feature will illuminate and flash the RATE legend when stepping through all 8 rates. -
Page 8: Group 5 Control Options
Switch Config: SW1 Select Group SW2 Select Item & Move Character left SW3 Change Character Value SW4 Enter SW5 Programming Switch Group 5 Control Options Control Options are factory set and, in most cases, do not require additional programming. P r o g r a m Item 1 Description Automatically print receipt upon going “Vacant”... -
Page 9: Group 6 Specialty Options
Group 6 Specialty Options Specialty Options are factory set and, in most cases, do not require additional programming. ITEM Tax Rate Enter a tax value to 2 decimal places. For example: for 5% tax, enter 5.00 In tax method A, the tax amount adjusts the time and distance rates accordingly when going “Hired”. -
Page 10: Group 7 Clock/Calendar
Group 7 Clock/Calendar To edit the time and date (Clock option): 1. Slide SW5 to the left. 2. Press SW1 until a “7” shows in the Rate window on the right. 3. Press SW2 to select item 1, 2 or 3. 4. -
Page 11: Group 8 Printer Text
SW1 Select Group SW2 Select Item / Move Digit Left SW3 Select Character Position / Change Character Value SW4 Confirm / Save Group 8 Printer Text Eight text lines may be programmed for the customer receipt and statistics printouts. Items 1, 2, 3 and 4 are printed at the top of the receipt while items 5, 6, 7 and 8 are printed as the last 4 lines of the receipt. -
Page 12: Printable Character Table For S620 Strings
Printable Character Table For S620 Strings ASCII Table Char Char Char SPACE " & < > LINE 1 character value 42 42 42 67 65 66 32 character position line number... -
Page 13: Silent 620 String Programming Sheet
Silent 620 String Programming Sheet C H A R A C T E R P O S I T I O N Character Decimal Sample of Line 1 Printer Text... -
Page 14: Group 9 Password Entry/Edit
Group 9 Password Entry/Edit When this option is enabled, no editing of data is allowed until the correct password is entered (however, viewing the data is permitted). Enter the password as follows: 1. Slide SW5 to the left, press SW1 until a "9" is shown in the Rate display on the right. 2. -
Page 15: Resetting Statistics
RESETTING STATISTICS There are two different versions of the statistics reset function in use; 1 older style meter with a 32K EPROM and 2 newer meters with a 64K EPROM. Newer Meters (64K) Old Style Meters (32K) Taximeter Totals or Statistics: Meter Totals or Statistics: The option to reset Meter Totals must be turned on and 1. -
Page 16: Silent 610/620/150 Installation
13 for Speed Signal Jumper Selection. Note 2. When using a Centrodyne transducer (part # Y014-1) connect ground and signal wires as per above, and connect the red or pink wire to vehicle +12 volts (meter does not supply transducer power). -
Page 17: Speed Signal Jumper Selection
SILENT 610/620 SPEED SIGNAL JUMPER SELECTION Speed signals will generally be of two types, 1) digital or 2) analog. 1. Digital speed signals provide an on/off, high/low signal. Mechanical transducers on speedo cables usually provide a digital signal, and in general, speed signals provided by the vehicle computer (ECM) are also digital (Example –... -
Page 18: Operating Instructions
THE "SILENT 610/620/150"* TAXIMETER & PRINTER OPERATING INSTRUCTIONS Operation of the taximeter is controlled by the 4 push buttons on the face of the unit. HIRED EXTRAS displayed in the rate window. To differentiate between rates 1-9 and When taximeter If EXTRAS are programmed into “VACANT”, you may hire the meter your meter, ensure the meter is... -
Page 19: Silent 150 Remote Printer Paper Roll And Ribbon Installation
SILENT 620 PRINTING METER PAPER ROLL INSTALLATION To replace the paper roll in the “Silent 620” High Speed Printing Meter, 1. First open the hinged paper door on top of the taximeter and remove the old paper core (and any unused paper). -
Page 20: Credit Card Operation & Receipts Without Wireless Communications
CREDIT CARD OPERATION & RECEIPTS WITHOUT WIRELESS COMMUNICATIONS Follow normal taximeter operation until end of trip (do not go VACANT). YELLOW CAB CAB # 1234 When you arrive at destination, place taximeter in TIME-OFF (switch # 2). 12/01/95 09:00 12/01/95 09:12 Place the passengers credit card into the top of the card reader, with the TRIP #... -
Page 21: Daily Driver Statistics
DAILY DRIVER STATISTICS (Option) Perform the following to reset DAILY STATS if the DAILY STATISTICS taximeter has Password protection; In addition to the TOTAL STATS included with 1) after performing the above three steps, the Fare every “Silent 610” and “Silent 620” Taximeter, window will display 00000 and the Extras the meters may also display DAILY STATS (and window will display 00. -
Page 22: Wireless Credit Card Programming
Wireless Credit Card Programming Following are instructions for programming the taximeter for wireless credit card approval. The taximeter is capable of processing credit card sales, returns and pre-authorizations. However, not all these features are available depending on your jurisdiction, governing authority and credit card processor. Please contact us for more specifics. -
Page 23: Wireless Credit Card Operating Instructions
WIRELESS CREDIT CARD OPERATING INSTRUCTIONS CREDIT CARD SALE 1. Press SW1 “HIRED” to HIRE the meter. 2. Press SW3 “EXTRAS” to enter EXTRAS, if any. 3. Press SW2 “TIME-OFF” to go TIME-OFF. 4. Swipe credit card through card reader in the direction of the arrow imprinted on the card reader. TIME-OFF light flashes, indicating card read successfully. -
Page 24: Wireless Credit Card Operating Instructions With Transaction Credits
WIRELESS CREDIT CARD OPERATING INSTRUCTIONS with TRANSACTION CREDITS CREDIT CARD SALE CREDIT CARD RETURN 1. Press SW1 “HIRED” to HIRE the meter. If an error was made on a completed (approved) transaction, 2. Press SW3 “EXTRAS” to enter EXTRAS, if any. such as an incorrect $Tip amount being charged, a Credit 3. -
Page 26: Appendices
APPENDICES... -
Page 27: Silent 610 Configuration Data
APPENDIX I SILENT 610 CONFIGURATION DATA Configuration:_________________________ Customer/Country: _______________ Date: __________ CONFIGURATION REQUIREMENTS - SWITCH DATA STATISTICS VACANT HIRED TIME OFF OPTIONS 0 = No Operation 5 = Go to STATS A = Increment Rate 1 = Go to HIRED 6 = Print STATS B = Increment Extras 2 = Go to VACANT... -
Page 28: S600 Error Codes
APPENDIX II S600 ERROR CODES 0001 .PROGRAMMING When programming internal memory via serial communication and self- test verification fails. 0002 .INTERNAL MEMORY When microprocessor self-test (internal memory) fails. 0003 .EXTERNAL MEMORY When external memory self-test fails. 0004 .PRINTER When printer and/or printer board self-test fails. 0005 .ROM When ROM self-test fails.
Need help?
Do you have a question about the S610 and is the answer not in the manual?
Questions and answers
My meter running very slow how can i fix it
A Centrodyne S610 meter running very slow may be caused by incorrect speed signal settings or wiring issues. Try the following steps:
1. Check Speed Signal Connection: Ensure the white wire (CB1) is correctly connected to the vehicle’s speed signal output or the Centrodyne transducer.
2. Verify Internal Speed Signal Jumper: Confirm that the taximeter's internal speed signal jumper is set correctly for the vehicle's speed sensor type (electronic or transducer).
3. Inspect Wiring and Grounding: Ensure all connections, especially the black wire (CB2) to vehicle ground, are secure and properly connected.
4. Check Critical Speed Setting: If the Critical Speed value is set too low, the meter may stop accumulating charges. Adjust it as needed (range: 0-255).
5. Reset and Reprogram the Meter: If necessary, enter programming mode and verify the meter’s speed and rate settings.
If the issue persists, consult the installation manual or contact Centrodyne for further support.
This answer is automatically generated