
Related Manuals for FLIR BHS Series


Summary of Contents for FLIR BHS Series
- Page 1 BHS-Series Bi-Ocular Thermal Night Vision Camera Operator’s Manual Document Number: 431-BHS0-00-10 Revision: 110 March 2012 GlobalTestSupply www. .com nd Quality Products Online at: sales@GlobalTestSupply.com...
- Page 2 This product is protected by patents, design patents, patents pending, or design patents pending. If you have questions that are not covered in this manual, or need service, contact FLIR Commercial Vision Systems, Inc. customer support at 805.964.9797 for additional information prior to returning a camera.
- Page 3 BHS-Series Bi-Ocular Operator’s Manual Important Instructions and Notices to the User: Modification of this device without the express authorization of FLIR Commercial Systems, Inc. may void the user’s authority under FCC rules to operate this device. Note 1: This equipment has been tested and found to comply with the limits for a Class B digital device, pursuant to Part 15 of the FCC rules.
- Page 4 BHS-Series Bi-Ocular Operator’s Manual March 2012 GlobalTestSupply www. .com nd Quality Products Online at: sales@GlobalTestSupply.com...
-
Page 5: Table Of Contents
Table of Contents Introduction........... 1 BHS-Series Bi-Ocular Camera Features . - Page 6 BHS-Series Bi-Ocular Operator’s Manual March 2012 GlobalTestSupply www. .com nd Quality Products Online at: sales@GlobalTestSupply.com...
-
Page 7: Introduction
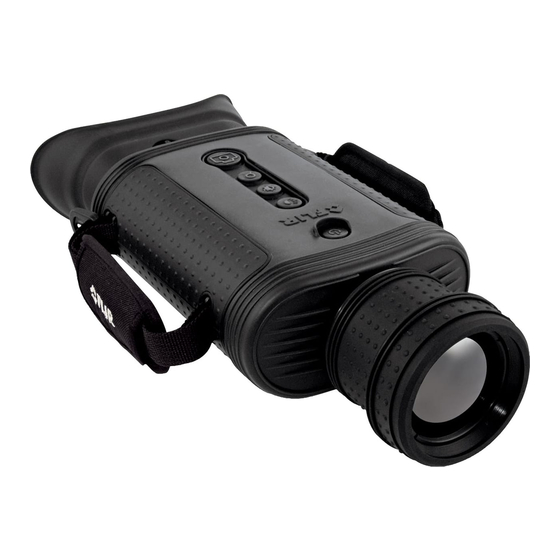
1 Introduction The BHS-Series Bi-Ocular handheld thermal imaging camera lets law enforcement officers see clearly in total darkness, giving them the information they need while making quick decisions, enhancing mission effectiveness, maximizing operational capabilities, and improving officer safety. The Vanadium Oxide (VOx) microbolometer employed in the BHS- Series Bi-Ocular camera provides high-fidelity thermal imagery with the detail necessary for cutting edge performance. -
Page 8: Bhs-Series Bi-Ocular Camera Features
1—Introduction BHS-Series Bi-Ocular Operator’s Manual 1–1 BHS-Series Bi-Ocular Camera Features • Micro bolometer sensor for excellent image quality and clarity • Quick Connect Hot Shoe—Provides convenient power input and video output. • Choose from interchangeable 35 mm, 65 mm, or 100 mm quick-disconnect lenses (purchased separately). -
Page 9: Cautions
BHS-Series Bi-Ocular Operator’s Manual 1—Introduction 1–2 Cautions Do not disassemble the camera enclosure. Disassembly can cause permanent damage and will void the warranty. Keep the compartment covers closed to avoid exposing the cameras electronics to water or debris. Do not point the camera directly at extremely high-intensity radiation sources, such as the sun, lasers, arc welders, etc. - Page 10 1—Introduction BHS-Series Bi-Ocular Operator’s Manual March 2012 GlobalTestSupply www. .com nd Quality Products Online at: sales@GlobalTestSupply.com...
-
Page 11: Getting Started
2 Getting Started The BHS-Series Bi-Ocular camera with accessories is shown packed in its Hard Carrying Case. The available lenses are shown in “Lens Options” on page 7. Refer to the packing list enclosed with your camera shipment to determine the actual contents of your camera package and lens or lenses you have purchased. -
Page 12: Bhs-Series Bi-Ocular Camera Accessories
2—Getting Started BHS-Series Bi-Ocular Operator’s Manual 2–1 BHS-Series Bi-Ocular Camera Accessories In addition to the camera and Hard Carrying Case, Quick Start card, Operator’s manual, and Documentation/Training CD or DVD; the following items are included in the camera package: Neck Lanyard AC Power Adaptor USB Cable Video Jack... -
Page 13: Lens Options
BHS-Series Bi-Ocular Operator’s Manual 2—Getting Started 2–2 Lens Options The QD35, QD65, and QD100 manual focus lenses (as selected at purchase) include a lens cap, rear lens cover, and lens cloth. Each lens has a dedicated storage location in the Hard Carrying Case, or the case can be adjusted to store the lens while still attached to the camera. - Page 14 2—Getting Started BHS-Series Bi-Ocular Operator’s Manual March 2012 GlobalTestSupply www. .com nd Quality Products Online at: sales@GlobalTestSupply.com...
-
Page 15: Operating Your Camera
3 Operating Your Camera 3–1 Camera Features and Controls Power Display White hot/ Zoom Capture Brightness Black hot Eyepiece Manual Focus Ring Interocular (Option lenses) Adjustment SD Card Battery door door Hot Shoe contacts Tripod mount 431-BHS0-00-10, Revision 110 GlobalTestSupply www. -
Page 16: Installing The Sd Card
3—Operating Your Camera BHS-Series Bi-Ocular Operator’s Manual 3–2 Installing the SD Card Install the SD card included with your camera package as follows: 1. Remove the small SD card door. No tools are required. Grasp spring loaded buttons on SD card door edges and pull 2. -
Page 17: Installing The Batteries
BHS-Series Bi-Ocular Operator’s Manual 3—Operating Your Camera 3–3 Installing the Batteries The batteries must be installed and charged before using your camera. 1. Pull off the battery cover by lifting the latch as shown at the right. Battery cover latch 2. -
Page 18: Charging The Camera
3—Operating Your Camera BHS-Series Bi-Ocular Operator’s Manual 3–4 Charging the Camera The batteries in the camera must be fully charged prior to use. If not fully charged or if the recommended batteries are not installed, the battery status indicator may not accurately reflect the remaining battery life. -
Page 19: Bhs-Series Bi-Ocular Power Management
BHS-Series Bi-Ocular Operator’s Manual 3—Operating Your Camera 3–5 BHS-Series Bi-Ocular Power Management Your BHS-Series Bi-Ocular camera is equipped with a power management system that provides up to five hours of continuous operation and up to five days of standby time between battery charges. - Page 20 3—Operating Your Camera BHS-Series Bi-Ocular Operator’s Manual Power States • There are three power states: Off, On, and Standby • The initial power-on Bootup process between the Off state and the On state takes about 90 seconds (fast flashing red state LED).
-
Page 21: Buttons And Controls
BHS-Series Bi-Ocular Operator’s Manual 3—Operating Your Camera 3–6 Buttons and Controls Power Button Changing between the Off, On, and Standby power states is controlled by the Power button. The table below describes how the camera moves between states. From Method State State Press the Power button for 1 second. - Page 22 Use this button to capture snapshots (in JPEG format) or video clips (in AVI format). The files are stored on the integrated SD card. AVI files are viewable via the FLIR Viewer Utility included on the BHS-Series Bi-Ocular resource CD.
- Page 23 BHS-Series Bi-Ocular Operator’s Manual 3—Operating Your Camera Still Frame Capture and Store—To capture and store a single still image of what is currently being shown in the display, momentarily press the Capture button. The thermal image will momentarily freeze and the following icons will appear in the display: The SD Card Memory Gauge indicates how much memory is left on the SD card.
- Page 24 3—Operating Your Camera BHS-Series Bi-Ocular Operator’s Manual White/Black Hot Button Use this button to toggle between the two video options. In the default White Hot mode, hotter objects appear as white or light grey. In the Black Hot mode, hotter objects appear as black or dark grey.
-
Page 25: Batteries
NiMh batteries that were supplied with your camera. It is recommended that you use these batteries in all but emergency situations. Note Replacement batteries are available online from FLIR Commercial Systems, Inc. Battery Status Indicator–While the camera full charge is On, a battery status indicator is always shown in the corner of the display image. -
Page 26: Sd Card Door
3—Operating Your Camera BHS-Series Bi-Ocular Operator’s Manual 3–8 SD Card Door The SD Card door is located on the bottom of the camera in front of the battery compartment. The SD card, the USB connector, and the Auto-Standby Enable switch is located under the door. Auto-Standby Enable mini-USB switch... - Page 27 BHS-Series Bi-Ocular Operator’s Manual 3—Operating Your Camera SD Card Capacity and Type The BHS-Series Bi-Ocular camera supports storing images and video on standard 1-Gb and 2-Gb SD cards or up to 32-Gb on SDHC cards. Installing an SD Card To install an SD card, insert the card into the slot and press on the SD card until its edge is nearly flush with the surface and release.
-
Page 28: Auto-Standby Operation
3—Operating Your Camera BHS-Series Bi-Ocular Operator’s Manual 3–9 Auto-Standby Operation Auto-Standby is a feature of the BHS-Series Bi-Ocular camera that helps to guard against draining the batteries prematurely by inadvertently leaving the camera on. Auto-Standby puts the camera into the Standby state if the following three conditions are met: •... -
Page 29: The Hot Shoe
BHS-Series Bi-Ocular Operator’s Manual 3—Operating Your Camera 3–10 The Hot Shoe Note The Hot Shoe is not waterproof and should not be used in wet environments. The Hot Shoe provides the connections to power the camera for continuous operation or charging the batteries; and for accessing the analog video output. -
Page 30: Bayonet Lens Mounting System
3—Operating Your Camera BHS-Series Bi-Ocular Operator’s Manual 3–11 Bayonet Lens Mounting System The BHS-Series Bi-Ocular camera is equipped with a robust bayonet mounting system to allow for field-interchangeable optics options and future accessories. As shipped, the BHS-Series Bi-Ocular camera comes with a lens-cover assembly mounted on the bayonet mount. Caution! Always keep the camera window covered. -
Page 31: Installing Software Upgrades
Your BHS-Series Bi-Ocular camera may require software upgrades during it’s lifetime. The upgrade process requires an SD card loaded with the upgrade file. After receiving the upgrade file from FLIR Commercial Systems, Inc., load it onto your SD card. Caution! During a software installation, the camera must remain powered on. - Page 32 3—Operating Your Camera BHS-Series Bi-Ocular Operator’s Manual 7. To check the current installed version of software, place the camera in standby, then turn on while looking in the upper right corner of the display for the software version number, as shown below.
-
Page 33: Technical Data
<1.5 seconds Thermal Sensitivity, Waveband <50 mK @ f/1.0, 7.5 - 13.5 m Detector Type VOx Microbolometer Image Processing FLIR Proprietary Digital Detail Enhancement Focus, Zoom Manual focus with option lenses QD35, QD65, × and QD100; 2 electronic zoom ×, ×... -
Page 34: Physical
4—Technical Data BHS-Series Bi-Ocular Operator’s Manual 4–4 Physical Weight (without lens) 2.20 lb. (1 kg) with batteries × × × × × × Size (L 11.0” 6.5” 2.63” (28 16.5 6.7 cm) 4–5 Additional Features Still Image Storage, SD, SDHC card, Format JPEG Video Storage,... -
Page 35: Range Detection
BHS-Series Bi-Ocular Operator’s Manual 4—Technical Data 4–7 Range Detection Actual range may vary depending on camera set-up, environmental conditions, and user experience. QD35 × 2,559’ (780 m) BHS-X Pro 13° 10° Detect Man × (1.8 m × 0.5 m) 18° 13°... - Page 36 4—Technical Data BHS-Series Bi-Ocular Operator’s Manual March 2012 GlobalTestSupply www. .com nd Quality Products Online at: sales@GlobalTestSupply.com...
- Page 37 GlobalTestSupply www. .com nd Quality Products Online at: sales@GlobalTestSupply.com...
- Page 38 Santa Barbara Portland FLIR Commercial Systems, Inc. FLIR Corporate Headquarters World Headquarters FLIR Systems, Inc. FLIR Systems, Inc. 27700A SW Parkway Ave. 70 Castilian Dr. Wilsonville, OR 97070 Goleta, CA 93117 PH: +1.888.747.FLIR (+1.888.747.3547) Europe CVS Eurasian Headquarters FLIR Commercial Systems B.V.
Need help?
Do you have a question about the BHS Series and is the answer not in the manual?
Questions and answers