Advertisement
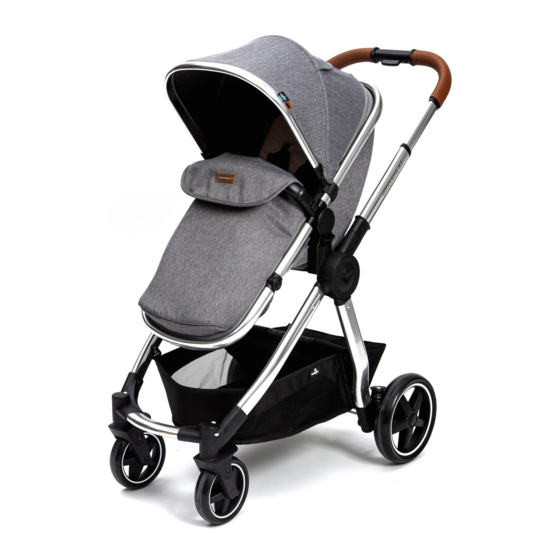
Supplied by Babylo International,
Supplied by Babylo International,
A3/ 3Fl, West Wing TST Center,
79/ 80 Furze Road,
66 Mody Road,
Sandyford Business Estate,
TST East, Kowloon,
Dublin 18.
Hong Kong
Ireland.
reachout@euroactiveproducts.com
Panorama XT
Travel System
Instruction Manual
IMPORTANT:
RETAIN FOR FUTURE REFERENCE
READ CAREFULLY
111219
Advertisement
Table of Contents

Related Manuals for Babylo Panorama XT


Summary of Contents for Babylo Panorama XT
- Page 1 Panorama XT Travel System Instruction Manual IMPORTANT: RETAIN FOR FUTURE REFERENCE Supplied by Babylo International, Supplied by Babylo International, A3/ 3Fl, West Wing TST Center, 79/ 80 Furze Road, READ CAREFULLY 66 Mody Road, Sandyford Business Estate, TST East, Kowloon, Dublin 18.
-
Page 2: Parts List
Parts List Care Maintenance: • The product requires regular maintenance to ensure correct and safe • performance. • Regularly inspect the wheels, locks, brakes, harness, catches, seat adjusters, • joints and xings to ensure they are clean, operating correctly and in full •... -
Page 3: Chassis Assembly
Safety Chassis Assembly WARNING! Use the most reclined position for new born babies. Unpack all contents and check that all parts are present before starting WARNING! Do not add an additional mattress to the pram/pushchair. assembly. Please refer to the parts list. 1a. - Page 4 Chassis Assembly Safety 2. Attach the rear wheel axle (D) to the rear of the chassis. Push down until IMPORTANT: you see the silver locking pins lock into place and you hear a “click”. RETAIN FOR FUTURE REFERENCE READ CAREFULLY WARNING! Read these instructions carefully before assembly and use and keep for future reference.
- Page 5 Folding Chassis Assembly 4a. Insert each of the front wheel (B) pins into the center of the socket until you 3. Push the handle downwards. hear a “click”. Give each wheel a rm tug to ensure they’re securely attached. 4b. To remove the front wheels, simply press the grey button on the side of the wheel socket and pull.
- Page 6 Folding Pram Mode 1a. Remove the seat unit or the car seat to fold the chassis. 1. Press the buttons either side of the seat unit (F) footrest and pull up WARNING! Never attempt to fold the chassis with the seat unit or car seat the footrest so it is in line with the rest of the frame.
-
Page 7: Travel System
Pram Mode Travel System 3a. Attach the seat unit to the chassis. Line up the seat connectors with the 2a. Press the button located on the side of the car seat and pull upwards to chassis housing and press downwards. Listen for a “click” to signal correct remove. - Page 8 Travel System Pram Mode A car seat (L) and set of adaptors (M) are included to complete the travel Insert the seat liner (J) into the seat unit to add extra comfort for baby. system. 1a. Remove the seat unit from the chassis to t the adaptors. Line up the adaptors with the chassis housing and press downwards.
- Page 9 Pram Mode Raincover Locate the raincover (K). Pull the raincover down over the pram starting at the 6. Fasten the apron (H), secure the zip around the side and attach Velcro® over top of the canopy and pulling down towards the footrest. the bumper bar.
- Page 10 Seat Liner Pram Mode Suitable from birth in pram mode up to a maximum weight of 9kg or until the There is a seat liner (J) included for the seat unit. child can sit up unaided, roll over or push itself up on its hands and knees. To use the liner in pushchair mode, undo the harness and remove the chest WARNING! Never use in pram mode with seat unit forward facing.
- Page 11 Pushchair Mode Brakes 1. Lift lever both sides of the seat connectors to remove the seat unit from Press down on the brake pedal to engage the brake. Listen for the “click” the chassis. signalling that the brake is locked. Push the brake pedal upwards to disengage the brake.
- Page 12 Wheel Suspension Pushchair Mode Locate lever underneath the rear wheel axle. Move lever towards the back for Attach the harness (G) to the seat unit. Thread the shoulder strap retainers under the webbing holders and out softer suspension. For harder suspension, move lever towards the front. WARNING! Ensure that lever is adjusted to the same position on both through the horizontal slots in the seat unit backrest.
-
Page 13: Swivel Wheels
Pushchair Mode Swivel Wheels When travelling along straight surfaces or uneven terrain, the front wheels Re-attach the seat unit to the chassis. may spin. Locate the backrest adjustment mechanism at the rear of the seat unit. Squeeze the clip on the reclining harness and gently pull up the backrest. To lock the front swivel wheels into place, press down on the grey buttons on the top of the wheel sockets. -
Page 14: Handle Adjustment
Handle Adjustment Pushchair Mode 5a. The seat unit is reversible in pushchair mode. It can be forward or rearward Push the button in the middle of the handle bar and pull or push the handle facing. to your desired height. The handle will “click” into place. There are 3 handle positions. -
Page 15: Footrest Adjustment
Harness Footrest Adjustment Press both footrest buttons simultaneously and adjust the footrest to the 1. Slide the shoulder strap buckle onto the housing of the waist strap buckle. desired position. Listen for the “click” signalling that the footrest is locked into Repeat for the other side. - Page 16 Canopy Adjustment Harness 4. To adjust the shoulder straps, move the slides as shown. 1. The canopy can be opened or closed by pulling forward or backward on the WARNING! Always adjust the harness to fit your child correctly for their canopy rim.
Need help?
Do you have a question about the Panorama XT and is the answer not in the manual?
Questions and answers
We have lost one the clips that hold the wheel on to the pram do you now where we can replacement clips or what the part number is as can’t find the right size
Replacement parts for the Babylo Panorama XT pram wheel, such as clips, can be found on eBay under listings like "Panorama XT Front Wheel X1 Replacement." However, a specific part number for the replacement clips is not provided in the available information.
This answer is automatically generated