Panasonic EH-HV52 Operating Instructions Manual
Multi-styling straightener
Hide thumbs
Also See for EH-HV52:
- Operating instructions manual (48 pages) ,
- Operating instructions manual (64 pages)
Table of Contents
Advertisement
Available languages
Available languages
Quick Links
Operating Instructions
Multi-Styling Straightener
(Household)
EH-HV52
Model No.
English ��������������������������������������������� 3
������������������������������������������������� 17
�������������������������������������������������� 31
Tiếng Việt �������������������������������������� 45
Bahasa Indonesia ������������������������� 59
Advertisement
Chapters
Table of Contents

Related Manuals for Panasonic EH-HV52


Summary of Contents for Panasonic EH-HV52
- Page 1 Operating Instructions Multi-Styling Straightener (Household) EH-HV52 Model No. English ��������������������������������������������� 3 ������������������������������������������������� 17 �������������������������������������������������� 31 Tiếng Việt �������������������������������������� 45 Bahasa Indonesia ������������������������� 59...
-
Page 3: Table Of Contents
Tips for best styling results �������������� 10 Specifications ������������������������������������15 Before Use������������������������������������������ 11 Troubleshooting ��������������������������������16 Using the straightener ����������������������12 Thank you for purchasing this Panasonic product. Before operating this unit, please read these instructions completely and save them for future use. -
Page 4: Safety Precautions
Safety precautions WARNING To reduce the risk of injury, loss of life, electric shock, fire, and damage to property, always observe the following safety Do not store within the reach of children or infants. precautions. Do not let them use the appliance. - Doing so may cause burn, electric shock, or injury. - Page 5 WARNING Do not immerse the appliance in water. Do not use the appliance near water. Do not use the appliance near bathtubs, showers, Never use the appliance if the plug fits loosely in a basins or other vessels containing water. household outlet.
- Page 6 WARNING CAUTION Regularly clean the plug to prevent dust from Do not store or use the cord in a twisted state. - Doing so may cause the wire in the cord to break with accumulating. - Failure to do so may cause fire due to insulation failure the load, leading to electric shock or fire due to a short caused by humidity.
- Page 7 CAUTION Always place the appliance on a heat-resistant, stable flat surface. - Failure to do so may cause fire, burns or discoloration Do not use the appliance on the same bundle of hair or deformation of surrounding objects. for more than 2 times. - Doing so may cause burn or damage your hair.
-
Page 8: Parts Identification
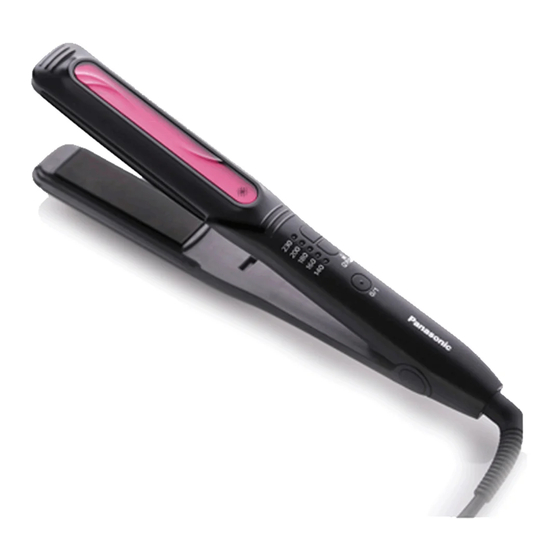
Parts identification A Holding Tip B Illumination Lamp C Temperature Level Adjustment Switches D Power Switch [0/1] E Grip F Cord G Plug (The shape of the plug differs depending on the area.) H Push Button I LED Temperature Level Display J Press Plate K Iron Plate The Iron Plate (Grip side) moves down slightly by pressing. - Page 9 Setting the temperature and Display indication ■ Setting the temperature When the selected temperature Situation Turn on the switch Select the temperature is reached • Press the Temperature Level Adjustment Switch. • The temperature is raised using “+” Action Press the Power Switch. and lowered using “-”...
-
Page 10: Tips For Best Styling Results
About hair-straightening products Tips for best styling results • Do not use the straightener immediately after a home Brush your hair to ensure it is lying in the same straight perm liquid is used. Doing so may damage your hair. (The straightener may be used 3-4 days after a direction. -
Page 11: Before Use
Before Use Heating the Iron Plate Insert the plug into the household outlet. Attaching and removing attachments ■ Attaching Press and hold the Power Switch to turn on the straightener. (see page 9) Hold the attachment at the • The Illumination Lamp glows. tip as illustrated. -
Page 12: Using The Straightener
Using the straightener Curling • Select the attachment you want to use and attach it to the Before use, confirm that the LED Temperature Level Display main body. has stopped blinking and glows. Straightening Hold a bundle of hair with a width of • Use the straightener without an attachment. - Page 13 After clamping a bundle of hair, rotate the main Keeping the straightener in the half-rotated body through an angle amounting to slightly position, slide it straight down towards the hair more than a half-rotation (180°). ends while clamping the bundle of hair. • For an inward curl, rotate the main body towards your face.
- Page 14 Adding volume While rotating the main body, move it towards the top of the head approximately 10 cm and • Attach the Volumizer. release. (Do not move the straightener to the hair ends.) Clamp a bundle of hair in the area where you want to add volume.
-
Page 15: After Use
After Use Maintenance Clean the straightener or attachments after they have cooled Press and hold the Power Switch for and with the plug removed from the household outlet. approximately 1 second to turn off the • When the straightener has become dirty or styling product, straightener. -
Page 16: Troubleshooting
100 - 130 V: about 45 seconds 220 - 240 V: about 15 seconds If problems still cannot be solved, contact the store where you purchased the unit or a service center authorized by Panasonic for repair. - Page 17 使用說明書 多功能美髮造型器 (家用) EH-HV52 型號 目錄 安全須知........18 使用後 ..........29 部件說明 ..........22 保養 .............29 最佳造型效果的技巧 ......24 規格 .............29 使用前 ..........25 疑難排解 ..........30 使用直髮器 ...........26 感謝您購買 Panasonic 產品。 使用本產品前,請仔細閱讀本說明書,並妥善保存以備未來使用。...
-
Page 18: 安全須知
安全須知 警告 為減低受傷、死亡、觸電、火災及財物損失的風險,請務必留 意以下安全須知。 切勿將產品存放於兒童或幼童可觸及的地方。 請勿讓兒童或幼童使用本產品。 符號說明 - 否則可能會造成灼傷、觸電或受傷。 以下符號用於為危險、傷害及財物損失的級別分類並作出解 切勿改裝、拆卸或自行維修本產品。 釋。若忽視此等符號,不當使用本產品可能會導致所述的危 - 否則可能會導致著火,或因異常操作而造成傷害。 險、人身傷害及財物損失。 請聯絡 Panasonic 直屬服務站進行維修。 切勿超出家用插座或線路的額定功率。 警告 表示潛在的危險可能會導致嚴重受傷或 - 將過多插頭連接至一個家用插座會超出額定功率,從而 死亡事故。 可能因過熱而引起火災。 切勿損壞電源線或插頭。 注意 切勿損壞、改裝、用力彎折、拉扯或纏繞電源線。 表示危險可導致輕傷或財物損失。 此外,切勿將重物放在電源線上或夾緊電源線。 - 否則可能因短路而導致觸電、灼傷或火災。 以下符號用於分類和解釋必須留意的指示類型。 切勿在使用時將電源線綑綁在一起。 此符號用於提示使用者,不得執行某項特定的操作程 - 否則可能引起火災或觸電。 序。 儲藏時,切勿將電源線纏繞住本機主 此符號用於提示使用者,必須遵從某項特定的操作程... - Page 19 - 否則可能會因短路而導致觸電或火災。 位於產品上的這個帶紅色禁止標識的符號表示「切勿在近水 處使用本產品」。 當本產品仍連接電源或者在使用後燙板仍有較高溫度 時,請勿讓本產品處於無人看管狀態。 如果出現任何異常或故障,請立即停止使用並拔除電源 - 否則可能造成火災、灼傷或褪色或導致附近物體變形。 插頭。 切勿將本產品放置在浴室或濕度很高的地方。另外,請 - 否則可能會造成火災、觸電或受傷。 不要將其放置在可能會潑濺到水的地方(例如,洗手間 <異常或故障情況> 台頂部)。 • 產品主體有時停止運轉,或者電源線或插頭異常高溫。 - 否則可能造成觸電或火災。 • 產品主體變形或發出燒焦味。 - 請立即將產品帶往 Panasonic 直屬服務站,以要求檢查 切勿在有易燃物質(例如,酒精、揮發油、稀釋劑、噴 或維修。 霧、護髮產品、洗甲水)附近使用。 - 否則可能造成爆炸或火災。 請完全插入電源插頭。 使用本產品時,切勿將髮膠或易燃性髮用製品塗抹在主 請務必確保在符合本產品上指定的額定電壓的電源上操 作本產品。 體或頭髮上。 - 否則可能造成火災或觸電。 - 否則可能造成火災、觸電或灼傷。...
- Page 20 險。 切勿對嬰兒使用。 - 否則可能導致意外或受傷。 - 否則可能造成灼傷。 為了保護您的安全,建議您在浴室的供電電路中安裝一 正在使用時或剛剛使用後,切勿接觸陰影區域,因為這 個額定漏電動作電流不超過 30 mA 的漏電保護開關 些區域溫度極高。 (RCD)。請諮詢安裝者以獲得建議。 - 否則可能造成灼傷。 - 否則可能導致意外或受傷。 體能、感官或智力減退,或缺乏經歷和知識之人士(含 小孩),在無人監護或未獲告知如何使用的情況下不得 使用本產品。 請勿讓兒童使用本產品。 - 否則可能導致意外或受傷。 切勿讓加熱部分接觸皮膚(耳朵、前額、領口等)。 如果本機的電源線已經損壞,務必立即停止使用,並送 - 否則可能造成灼傷。 交 Panasonic 直屬服務站進行更換。 切勿在頭髮上塗有永久性燙髮液時使用本產品。 - 否則可能導致意外或受傷。 - 否則可能導致頭髮或皮膚問題。 切勿將本產品用於除護理頭髮以外的任何其他用途。 (切勿對寵物等使用。) - 否則可能造成灼傷。...
- Page 21 注意 請務必將本產品放在耐熱及穩定的平面上 - 否則可能造成火災、灼傷或褪色或周圍物體變形。 切勿在同一束頭髮上使用本產品 2 次以上。 ►注意 - 否則可能會造成灼傷或損傷您的頭髮。 ● 造型僅能持續 1 天。 使用後請從家用插座上拔除插頭。 用洗髮劑洗髮後,頭髮會恢復正常狀態。 - 否則可能會因絕緣層老化漏電而導致觸電或火災。 ● 直髮效果可能因人而異。 ● 某些類型的假髮和接髮會因受熱而受損,並可能變形或變 使用過程中,注意不要將手或手指夾在陰影區域中。 - 否則可能導致受傷。 質。切勿在這些物品上使用本產品。 拔除電源插頭時,請握住插頭,不要拉扯電源線。 - 否則可能造成電源線內的電線斷裂,並導致灼傷、觸電 或因短路而導致火警。 將本產品順著頭髮向下滑動到底,中間不要停頓。 僅在乾淨、乾燥、無纏結的頭髮上使用本產品。 建議使用溫度視頭髮類型和狀況而異。(請參閱第 25 頁) - 否則可能會造成灼傷或損傷您的頭髮。 使用時或使用後請注意附件的高溫。 - 否則可能造成灼傷。...
-
Page 22: 部件說明
部件說明 A 夾板梢端 B 指示燈 C 溫度調節開關 D 電源開關 [0/1] E 握柄 F 電源線 G 插頭 (電源插頭的形狀視地區而異。) H 按鈕 I LED 溫度指示燈 J 夾板 K 燙板 按壓後燙板(握柄側)會略上下移動。 附件 L 中等捲曲造型 M 較大捲曲造型 N 超大捲曲造型 O 蓬鬆造型 P 直髮造型... - Page 23 設定溫度和顯示器指示 ■ 設定溫度 狀況 開啟開關 選擇溫度 達到所選溫度時 • 按下溫度調節開關。 • 使用溫度調節開關的「+」調高溫 操作 按下電源開關。 度,使用「-」調低溫度。 140 的 LED 溫度 所選溫度的 LED 指 所選溫度的 LED 指 + + + 指示燈閃爍。 示燈會閃爍。 示燈常亮。 顯示 - - - (2 PUSH) (2 PUSH) (2 PUSH) ■ 自動溫度鎖定 為避免不小心變更溫度,若超過 5 秒鐘未按溫度調節開關,溫度調節開關將自動鎖定。 狀況...
-
Page 24: 最佳造型效果的技巧
關於直髮產品 最佳造型效果的技巧 • 使用家用直髮燙髮液後,切勿立即使用直髮造型器。否則 沿同一方向梳理頭髮。 可能會損傷您的頭髮。(使用直髮燙髮液後 3-4 天,可使 用本直髮造型器。也可在美容院護髮造型 3-4 天後使用本 直髮造型器。) 按圖例所示的順序綁成髮束並固 定頭髮。 關於染髮產品 • 如果您的頭髮較濃密,可將頭髮分 • 染髮會對頭髮造成很大壓力。染髮後,請等待 2-3 天後再 成更多部分以方便造型。 使用本直髮造型器。如果您使用的是暫時性染髮劑,請在 使用前將染髮劑洗淨並弄乾頭髮。 • 染髮後需要一段時間才能穩定著色。使用暫時性染髮劑 時,若染髮劑未完全洗淨,會弄髒直髮造型器。此外,濕 在電源關閉的情況下練習。 髮無法燙直。 • 請在電源關閉的情況下練習,直到習慣使用本產品。 造型順序 按 1 至 2 和 3 至 4 的順序,從頭後 側開始造型。 頭髮類型及造型指引... -
Page 25: 使用前
使用前 加熱燙板 將插頭插入家用插座。 安裝和移除附件 ■ 安裝 按住電源開關不放以開啟直髮造型器。(參閱第 23 頁) 如圖所示,將附件固定在燙板 • 指示燈會亮起。 梢端。 根據頭髮的類型和狀況,使用溫度調節開關設定溫 度。 • 首次使用直髮造型器時,請務必將溫度設定為 140。 指示燈 溫度 頭髮類型 頭髮狀況 沿按鈕上的凹槽推入附件,直 至聽到咔嗒聲。 約 230 °C 濃密 輕微受損 約 200 °C 約 180 °C 約 160 °C ■ 移除 約 140 °C 良好 受損... -
Page 26: 使用直髮器
使用直髮造型器 捲曲 • 選擇要使用的附件並將其安裝到主體上。 使用前,請確認 LED 溫度指示燈已停止閃爍並亮起。 燙直 取一束寬約 3 厘米的頭髮。 • 使用不帶附件的直髮造型器。 • 切勿取過多頭髮,否則可能很難進行造型。 • 如果想要進一步向髮尾方向拉直頭髮,請使用隨附的直髮造型 如要向內捲曲,請夾住頭髮, 配件。 將附件朝內。 取一束寬約 5 厘米的頭髮。 • 切勿取過多頭髮,否則可能很難燙直頭髮。 用夾板夾緊該束頭髮。 • 將該束頭髮夾在燙板中間。 如要向外捲曲,請夾住頭髮, 將附件朝外。 夾住頭髮後,將直髮造型器一直移動到髮尾。 • (以慢於平常梳髮的速度)緩慢移動直髮造型器。 • 用雙手按壓夾板梢端以燙直捲 • 將該束頭髮夾在燙板中間。 髮。 • 在您想要捲曲的位置上方夾住頭髮。 切勿用力過度,否則可能會對髮 尾造成壓力。 • 燙直後,使用髮膏、髮蠟等為頭髮造型。... - Page 27 夾緊一束頭髮後,將主體旋轉一個略大於半圈 使直髮造型器保持在旋轉半圈的位置,夾住該束頭 (180°)的角度。 髮向下滑至髮尾。 • 若要向內捲曲,請將主體向您的臉部旋轉。 • (以慢於平常梳髮的速度)緩慢移 動直髮造型器。 ■ 推薦速度(從頭皮到髮尾) 頭髮長度/溫度 140 - 200 • 為了向外捲曲,請向外旋轉主體。 中長髮 約 3 秒 約 2 秒 約 4 - 5 秒 約 3 - 4 秒 半長髮 約 7 - 8 秒 約 5 - 6 秒 長髮...
- Page 28 增加蓬鬆感 旋轉主體時,使其向頭頂移動約 10 厘米,然後鬆 開。(切勿將直髮造型器移到髮尾。) • 安裝蓬鬆造型配件。 在要增加蓬鬆感的區域夾住一束 頭髮。 • 每束頭髮應約 2 厘米(厚)× 5 厘 米(寬)。 確保髮束正確排列,沿垂直於頭 皮的方向拉動髮束。 將頭髮夾在髮根處。 指示燈側 附件側...
-
Page 29: 使用後
使用後 保養 冷卻後將直髮造型器或附件清潔乾淨,並將插頭從家用插座上 按住電源開關不放約 1 秒以關閉直髮造型器。 取下。 • 當直髮造型器髒污或沾上造型產品等時,請將一塊浸有肥皂水 從家用插座上拔除插頭。 的抹布將其擰乾,然後擦拭乾淨。 ►注意 ►注意 ● 切勿使用酒精、洗甲水或清潔劑(洗手液等)。 ● 自開始使用起達到 60 分鐘後,本產品會自動關閉。即 否則可能導致直髮造型器表面破裂或褪色。 使您正在使用本產品,電源也會關閉,因此在這種情況 ● 切勿讓護髮產品或化妝品黏附在本產品上。 下,請再次打開電源。 否則可能導致部件破裂故障或塑料劣化導致的褪色。 使用本產品後,即使忘記關閉電源,經過 60 分鐘後, 也會自動關閉。 規格 100 - 130 V 220 - 240 V 電源 50 - 60 Hz 50 - 60 Hz 功耗... -
Page 30: 疑難排解
導致故障原因 操作 按住電源開關不放約 1 秒鐘以 按下電源開關後,LED 溫度指示燈不閃爍。 按壓電源開關的時間不夠長。 開啟直髮器。 即使按下溫度調節開關,溫度也不變化。 溫度調節開關已鎖定。 按下溫度調節開關「-」2 次。 使用過程中,本產品發出燒焦味。 有灰塵等附著在燙板上。 清潔燙板以清除任何附著物。 如果電源線彎折或扭曲,有時電源會關閉。 立即停用。 所有 LED 溫度指示燈閃爍。 達到操作溫度(約 100°C)所需的時間 視地區而異。 達到操作溫度需要花費一段時間。 100 - 130 V:約 45 秒 220 - 240 V:約 15 秒 如果仍然無法解決問題,請與您購買本機的商店聯繫,或聯絡 Panasonic 直屬服務站進行維修。... - Page 31 การใช้ เ ครื ่ อ งหนี บ ผม ..........40 ขอขอบคุ ณ ที ่ ส ั ่ ง ซื ้ อ ผลิ ต ภั ณ ฑ์ ข อง Panasonic ก่ อ นใช้ ง านอุ ป กรณ์ น ี ้ โปรดอ่ า นคู ่ ม ื อ การใช้ ง านโดยละเอี ย ดและเก็ บ รั ก ษาคู ่ ม ื อ นี ้ ไ ว้ เ พื ่ อ ใช้ ง านในอนาคต...
-
Page 32: ข้ อ ควรระวั ง ด้ า นความปลอดภั ย
ข้ อ ควรระวั ง ด้ า นความปลอดภั ย ค� า เตื อ น เพื ่ อ ลดความเสี ่ ย งจากการบาดเจ็ บ การเสี ย ชี ว ิ ต ไฟฟ้ า ช็ อ ต ไฟไหม้ และ อย่ า เก็ บ ไว้ ใ กล้ ม ื อ เด็ ก หรื อ ทารก ความเสี... - Page 33 ค� า เตื อ น อย่ า จุ ่ ม อุ ป กรณ์ น ี ้ ใ นน� ้ า อย่ า ใช้ อ ุ ป กรณ์ น ี ้ ใ กล้ ก ั บ น� ้ า อย่ า ใช้ อ ุ ป กรณ์ น ี ้ ใ กล้ อ ่ า งอาบน� ้ า ฝั ก บั ว อ่ า งล้ า งหน้ า หรื อ ภาชนะ อย่...
- Page 34 ค� า เตื อ น ข้ อ ควรระวั ง ท� า ความสะอาดปลั ๊ ก อย่ า งสม� ่ า เสมอเพื ่ อ ป้ อ งกั น ฝุ ่ น ผงสะสม อย่ า เก็ บ สายไฟโดยการม้ ว นหรื อ บิ ด หรื อ ใช้ ง านโดยที ่ ส ายม้ ว น หรื...
- Page 35 ข้ อ ควรระวั ง ให้ ว างอุ ป กรณ์ บ นพื ้ น ราบที ่ ม ั ่ น คง หรื อ พื ้ น ผิ ว ที ่ ท นความร้ อ นได้ การไม่ ป ฏิ บ ั ต ิ ต าม อาจก่ อ ให้ เ กิ ด ไฟไหม้ ไฟลวก หรื อ ท� า ให้ ว ั ต ถุ ท ี ่ อ ยู ่ ใกล้...
-
Page 36: ส่ ว นต่ า งๆ ของอุ ป กรณ
ส่ ว นต่ า งๆ ของอุ ป กรณ์ ปลายแถบรี ด ไฟส่ อ งสว่ า ง สวิ ต ช์ ป รั บ ระดั บ อุ ณ หภู ม ิ สวิ ต ช์ เ ปิ ด /ปิ ด [0/1] ด้ า มจั บ สายไฟ... - Page 37 การตั ้ ง อุ ณ หภู ม ิ แ ละการแสดงผล การปรั บ ตั ้ ง อุ ณ หภู ม ิ ■ เมื ่ อ ความร้ อ นเพิ ่ ม ขึ ้ น จนถึ ง อุ ณ หภู ม ิ สถานการณ์ เปิ...
-
Page 38: ข้ อ แนะน� า ส� า หรั บ การจั ด แต่ ง ทรงผมที ่ ด ี ท ี ่ ส ุ ด
ข้ อ แนะน� า ส� า หรั บ การจั ด แต่ ง ทรงผมที ่ ด ี ท ี ่ ส ุ ด เกี ่ ย วกั บ ผลิ ต ภั ณ ฑ์ ย ื ด ผม อย่ า ใช้ เ ครื ่ อ งหนี บ ผมทั น ที หลั ง จากที ่ เ พิ ่ ง ใช้ น � ้ า ยายื ด ผม การกระท� า ดั ง กล่ า ว •... -
Page 39: ก่ อ นการใช้ ง านอุ ป กรณ
ก่ อ นการใช้ ง านอุ ป กรณ์ การให้ ค วามร้ อ นแผ่ น เหล็ ก หนี บ ผม เสี ย บปลั ๊ ก ที ่ เ ต้ า รั บ การติ ด และถอดอุ ป กรณ์ เ สริ ม การใส่ ■ กดสวิ... -
Page 40: การใช้ เ ครื ่ อ งหนี บ ผม
การใช้ เ ครื ่ อ งหนี บ ผม การท� า ลอน เลื อ กอุ ป กรณ์ เ สริ ม ที ่ ค ุ ณ ต้ อ งการ แล้ ว ติ ด เข้ า กั บ เครื ่ อ งหนี บ ผม ก่... - Page 41 หลั ง จากหนี บ ช่ อ ผมแล้ ว ให้ ห มุ น เครื ่ อ งหนี บ ผมเข้ า หาตั ว จั บ เครื ่ อ งหนี บ ผมค้ า งอยู ่ ใ นต� า แหน่ ง หมุ น ครึ ่ ง รอบ เลื ่ อ นลง ให้...
- Page 42 การท� า ผมหนา ขณะหมุ น เครื ่ อ งหนี บ ผม ให้ เ ลื ่ อ นไปยั ง ส่ ว นบนสุ ด ของหั ว ประมาณ 10 ซม. แล้ ว ปล่ อ ย (อย่ า เลื ่ อ นเครื ่ อ งหนี บ ผมไปยั ง ติ...
-
Page 43: หลั ง การใช้ ง านอุ ป กรณ
หลั ง การใช้ ง านอุ ป กรณ์ การบ� า รุ ง รั ก ษา ท� า ความสะอาดเครื ่ อ งหนี บ ผมหรื อ อุ ป กรณ์ เ สริ ม หลั ง จากที ่ เ ครื ่ อ งเย็ น ลงแล้ ว กดสวิ... -
Page 44: วิ ธ ี ก ารแก้ ป ั ญ หา
หากไม่ ส ามารถแก้ ไ ขปั ญ หาได้ ให้ ต ิ ด ต่ อ ร้ า นค้ า ที ่ ค ุ ณ ซื ้ อ ผลิ ต ภั ณ ฑ์ ช ิ ้ น นี ้ หรื อ ศู น ย์... - Page 45 Cách sử dụng máy duỗi tóc .....54 Cảm ơn bạn đã mua sản phẩm này của Panasonic. Trước khi sử dụng thiết bị, xin vui lòng đọc toàn bộ hướng dẫn này và lưu lại để tham khảo về sau.
-
Page 46: Biện Pháp Phòng Ngừa An Toàn
Biện pháp phòng ngừa an toàn CẢNH BÁO Để giảm nguy cơ chấn thương, thiệt mạng, điện giật, hỏa hoạn và hư hỏng tài sản, hãy luôn tuân thủ các biện pháp Không cất giữ trong tầm với của trẻ em hoặc trẻ sơ phòng ngừa an toàn sau đây. - Page 47 CẢNH BÁO Không nhúng thiết bị này vào nước. Không sử dụng thiết bị này gần nước. Không sử dụng thiết bị này gần bồn tắm, vòi hoa Không được sử dụng thiết bị này nếu phích cắm sen, chậu rửa hoặc các thùng đựng nước khác. lỏng ở...
- Page 48 CẢNH BÁO THẬN TRỌNG Không được quấn bó lại khi cất giữ hoặc sử dụng Vệ sinh phích cắm thường xuyên để ngăn ngừa bụi dây điện. bặm tích tụ. - Làm như vậy có thể khiến lõi dây bên trong dây điện - Không làm như...
- Page 49 THẬN TRỌNG Luôn đặt thiết bị trên bề mặt phẳng ổn đinh, chịu nhiệt. - Không làm như vậy có thể gây ra hỏa hoạn, bỏng Không sử dụng dụng cụ cho cùng một lọn tóc quá hoặc đổi màu hoặc biến dạng của các vật thể xung 2 lần.
-
Page 50: Nhận Biết Các Bộ Phận
Nhận biết các bộ phận A Đđầu thanh kẹp B Đèn báo C Công tắc điều chỉnh mức nhiệt độ D Công tắc nguồn [0/1] E Tay cầm F Dây điện G Phích cắm (Hình dạng phích cắm khác nhau tùy theo khu vực.) H Nút ấn I Màn hình LED mức nhiệt độ... - Page 51 Đặt nhiệt độ và chỉ báo màn hình ■ Đặt nhiệt độ Tình huống Bật công tắc Chọn nhiệt độ Khi đạt đến nhiệt độ đã chọn • Nhấn công tắc điều chỉnh mức nhiệt độ. Hành động Nhấn công tắc nguồn. •...
-
Page 52: Mẹo Tạo Kiểu Tóc Đẹp
Đối với các sản phẩm làm thẳng tóc Mẹo tạo kiểu tóc đẹp • Không sử dụng máy duỗi tóc ngay sau khi sử dụng thuốc làm thẳng tại nhà. Làm như vậy có thể gây tổn thương Chải tóc để đảm bảo rằng tóc buông theo cùng tóc. -
Page 53: Trước Khi Sử Dụng
Trước khi sử dụng Làm nóng bản là Cắm phích điện vào ổ cắm điện gia dụng. Lắp và tháo các phụ kiện Nhấn và giữ Công tắc nguồn để bật máy duỗi ■ Lắp tóc. (xem trang 51) Giữ phụ kiện ở đầu như hình •... -
Page 54: Cách Sử Dụng Máy Duỗi Tóc
Cách sử dụng máy duỗi tóc Làm xoăn • Chọn phụ kiện bạn muốn dùng và lắp vào thân máy chính. Trước khi sử dụng, hãy đảm bảo rằng Màn hình LED mức nhiệt độ đã dừng nhấp nháy và sáng lên. Giữ... - Page 55 Sau khi kẹp lọn tóc, xoay phần thân máy chính Giữ máy duỗi tóc ở vị trí xoay một nửa, trượt qua một góc khoảng hơn nửa vòng (180°). máy thẳng xuống ngọn tóc trong khi vẫn kẹp • Đối với tóc uốn vào trong, hãy xoay thân máy chính hướng lọn tóc.
- Page 56 Làm phồng Trong khi xoay thân máy chính, hãy di chuyển lên đỉnh đầu khoảng 10 cm rồi thả ra. (Không di • Lắp phụ kiện làm phồng. chuyển máy duỗi tóc đến ngọn tóc.) Kẹp một lọn tóc ở nơi bạn muốn làm phồng.
-
Page 57: Sau Khi Sử Dụng
Sau khi sử dụng Bảo quản Lau sạch máy duỗi tóc hoặc phụ kiện sau khi đã làm mát và Nhấn và giữ Công tắc nguồn khoảng 1 giây để tháo phích cắm khỏi ổ điện gia dụng. tắt máy duỗi tóc. •... -
Page 58: Xử Lý Sự Cố
100 - 130 V: khoảng 45 giây 220 - 240 V: khoảng 15 giây Nếu không khắc phục được sự cố, hãy liên hệ với cửa hàng nơi bạn mua thiết bị đó hoặc trung tâm dịch vụ được Panasonic ủy quyền để sửa chữa. - Page 59 Kiat untuk mendapatkan hasil Spesifikasi ..........71 penataan terbaik ........66 Pemecahan masalah ......72 Sebelum Penggunaan .......67 Menggunakan pelurus rambut ..68 Terima kasih telah membeli produk Panasonic ini. Sebelum mengoperasikan unit ini, harap baca seluruh petunjuk dan simpan petunjuk ini untuk digunakan kembali sewaktu-waktu.
-
Page 60: Petunjuk Keselamatan
Petunjuk keselamatan PERINGATAN Untuk mencegah kecelakaan yang mengakibatkan cedera badan, meninggal dunia, sengatan listrik, kebakaran, dan Jangan simpan dalam jangkauan anak-anak atau balita. kerusakan pada harta benda, selalu patuhi peringatan untuk Jangan biarkan mereka menggunakan alat ini. keselamatan berikut. - Jika diabaikan dapat menyebabkan luka bakar, sengatan listrik, atau cedera. - Page 61 Jangan rendam alat ke dalam air. PERINGATAN Jangan gunakan alat ini di dekat air. Jangan gunakan alat ini di dekat bak mandi, Jangan gunakan alat jika konektornya terpasang pancuran, bak cuci, atau wadah berisi air lainnya. longgar di dalam stopkontak. - Tindakan demikian dapat mengakibatkan sengatan - Jika diabaikan dapat mengakibatkan luka bakar, listrik atau kebakaran.
- Page 62 PERINGATAN PERHATIAN Bersihkan konektor secara teratur untuk mencegah Jangan simpan atau gunakan kabel dalam kondisi akumulasi debu. terpilin. - Jika diabaikan dapat mengakibatkan kebakaran - Jika dilakukan dapat menyebabkan kawat di dalam karena kerusakan insulasi oleh kelembapan. kabel terputus ketika dialiri arus listrik, dan akan terjadi Cabut steker dan seka dengan kain kering.
- Page 63 Selalu tempatkan alat pada permukaan yang tahan PERHATIAN panas, stabil, dan datar. - Jika diabaikan dapat mengakibatkan kebakaran, luka Jangan menggunakan perangkat pada bundel bakar, atau merusak warna atau bentuk benda di rambut yang sama lebih dari 2 kali. sekitarnya. - Melakukan ini bisa membakar atau merusak rambut Anda.
-
Page 64: Pengenalan Alat
Pengenalan alat A Ujung Pegangan B Lampu Penerang C Sakelar Penyesuai Tingkat Suhu D Sakelar Daya [0/1] E Pegangan F Kabel G Steker (Bentuk konektor berbeda-beda tergantung negara.) H Tombol Tekan I Tampilan Tingkat Suhu LED J Plat Pres K Plat Besi Plat Besi (sisi Pegangan) bergerak ke bawah sedikit dengan ditekan. - Page 65 Mengatur suhu dan indikasi Tampilan ■ Menetapkan suhu Ketika suhu yang dipilih Situasi Hidupkan sakelar Pilih suhu tercapai • Tekan Sakelar Penyesuai Tingkat Suhu. • Suhu dinaikkan dengan Tindakan Tekan Sakelar Daya. menggunakan “+” dan diturunkan dengan menggunakan “-” pada Sakelar Penyesuaian Tingkat Suhu. Tampilan Tampilan Tingkat Tampilan Tingkat...
-
Page 66: Kiat Untuk Mendapatkan Hasil Penataan Terbaik
Produk pelurus rambut Kiat untuk mendapatkan hasil penataan terbaik • Jangan gunakan pelurus rambut pada rambut yang baru dipakaikan cairan pelurus tahan lama. Jika diabaikan Sisir rambut Anda untuk memastikannya jatuh dapat merusak rambut. (Pelurus rambut dapat digunakan ke arah yang sama. 3-4 hari setelah pemakaian cairan pelurus tahan lama. -
Page 67: Sebelum Penggunaan
Sebelum Penggunaan Memanaskan Plat Besi Colokkan steker ke stopkontak. Memasang dan melepas alat pelengkap ■ Memasang Tekan dan tahan Sakelar Daya untuk menghidupkan pelurus rambut. (lihat halaman Pegang alat tambahan di ujung seperti pada gambar. • Lampu Penerang menyala. Tetapkan suhu dengan menggunakan Sakelar Penyesuai Tingkat Suhu sesuai dengan jenis dan kondisi rambut Anda. -
Page 68: Menggunakan Pelurus Rambut
Menggunakan pelurus rambut Mengeriting • Pilih alat pelengkap yang ingin Anda gunakan dan pasang Sebelum menggunakan, pastikan bahwa Tampilan Tingkat Suhu LED telah berhenti berkedip dan telah menyala. pada bodi utama. Pelurusan rambut Pegang segelung rambut dengan lebar sekitar • Gunakan pelurus rambut tanpa alat pelengkap. 3 cm. - Page 69 Setelah menjepit gelungan rambut, putar bodi Dengan menjaga pelurus rambut dalam posisi setengah-terputar, geser pelurus rambut lurus utama alat dengan membentuk sudut hingga ke bawah ke arah ujung rambut sambil mencapai sedikit lebih dari separuh putaran menjepit bundel rambut. (180°). • Gerakkan pelurus rambut dengan • Untuk keriting ke dalam, putar bodi utama ke arah perlahan...
- Page 70 Menambahkan volume Sementara memutar bodi utama, gerakkan pelurus rambut ke arah bagian atas kepala • Pasang Volumizer. sekitar 10 cm dan lepaskan. (Jangan gerakkan Jepit segelung rambut di pelurus rambut ke ujung rambut.) bagian tempat Anda ingin menambah volume. • Setiap gelung rambut harus sekitar 2 cm (tebal) x 5 cm (lebar).
-
Page 71: Setelah Penggunaan
Setelah Penggunaan Perawatan Bersihkan pelurus rambut atau alat pelengkap setelah menjadi Tekan dan tahan Sakelar Daya selama sekitar dingin dan dengan steker dicabut dari stopkontak rumah. 1 detik untuk mematikan pelurus rambut. • Bila pelurus rambut ini menjadi kotor atau produk penataan Cabut steker dari stopkontak. -
Page 72: Pemecahan Masalah
Dibutuhkan waktu untuk mencapai suhu berbeda-beda tergantung areanya. pengoperasian. 100 - 130 V: sekitar 45 detik 220 - 240 V: sekitar 15 detik Jika masalah tidak teratasi, hubungi toko tempat Anda membeli unit atau pusat servis resmi Panasonic untuk perbaikan. - Page 73 MEMO...
- Page 74 MEMO...
- Page 75 MEMO...
- Page 76 Panasonic Corporation http://www.panasonic.com © Panasonic Corporation 2019 Printed in Thailand EN, HK, TH, VN, IND EH9210HV526051 E0619-0...