
Related Manuals for CompAir L07RS


Summary of Contents for CompAir L07RS
- Page 1 Original Operating and Service Manual Screw Air Compressor L07 - L11, L07RS - L11RS L07FS - L11FS, L07RS FS - L11RS FS ● ● ● Id. no. ZS1066273 / 03 - December 2011...
- Page 3 Gardner Denver Company or Distributor can provide a number of optional maintenance agreements to suit your requirements. These agreements provide the user with the expertise of our factory trained technicians and the guarantee that only Genuine CompAir parts will be used. Warranty The conditions of the Gardner Denver Warranty are set out in the Company’s standard Conditions of Sale available from...
- Page 4 Data sheet for users Fig. 1 *) The values on the type plate are maximum values. Your CompAir distributor Name: Address: ______________________________________________________________________________________ ______________________________________________________________________________________ ______________________________________________________________________________________ Telephone: Fax: Contact: Spare Parts: Service:...
-
Page 5: Foreword
Maintenance Notes on the compressor Carefully performed maintenance is imperative, this CompAir screw compressors are the result of many ensures that your screw compressor can meet all the years of research and development. These requirements placed upon it. It is therefore imperative to... - Page 6 Operating errors • Incorrect maintenance • Wrong auxiliary materials • Use of spare parts other than CompAir genuine • spare parts Modifications and changes to the installation • The warranty and liability conditions of the general terms and conditions of Gardner Denver will not be extended by the notes above.
-
Page 7: Table Of Contents
4.2 Schematic diagram ..............................20 4.3 Oil circuit..................................21 4.4 Air circuit..................................21 4.5 System control ................................21 4.5.1 System control L07-L11 / L07FS-L11FS......................21 4.5.2 System control L07RS-L11RS and AirStation L07RS FS-L11RS FS............22 4.6 Hood (opening/closing)...............................23 5 Transport and installation ..............................24 5.1 Transport ..................................24 5.2 Installation ...................................25 6 Preparations for commissioning ............................26... - Page 8 8.8 Emergency off button..............................37 8.9 Acknowledging warning / fault messages .........................38 8.9.1 Warning messages ............................38 8.9.2 Fault messages...............................38 8.10 Menu structure (apart from L07RS-L11RS) (values are examples).................39 8.11 Menu structure (only L07RS-L11RS) (values are examples)...................40 9 Service and maintenance..............................41 9.1 Maintenance recommendations..........................41 9.2 Maintenance electric motor ............................41...
-
Page 9: Safety Regulations
3. Safety regulations Safet y r eg ula tio ns General safety instructions Identification of safety guidelines Organizational measures Gardner Denver is not liable for any damage or injury resulting from the non-observance of these safety The operating instructions must always be at hand at instructions or negligence of the usual care and the place of operation of the machine/unit! attention required during handling, operation,... -
Page 10: Changes And Modifications To The Machine
3. Safety regulations For the execution of maintenance work, tools and The manufacturer is not liable for damage resulting workshop equipment adapted to the task on hand are from the use of non-original parts or special accessories. This applies also to the installation and absolutely indispensable. - Page 11 3. Safety regulations If a remote control is used, the system must carry a If the room temperature can fall below zero, the clearly visible sign with the following note: Attention! condensation drain system must be protected from This installation is operated by remote control and can freezing, e.g.
-
Page 12: Special Work/Maintenance
3. Safety regulations Before blowing through a hose or an air pipe ensure Maintenance and repair work may only be carried out that the open end is positively held. A free end whips under the supervision of a person who is qualified for and can cause injuries. - Page 13 3. Safety regulations Avoid damage to the safety valves and other pressure Maintenance/rectification of faults reducing components. Check in particular for clogging The employer has to inform the employee of the caused by paint, oil carbon or the accumulation of dust, dangers possibly arising during the repair and which could deteriorate the effectiveness of these maintenance of the machine/unit as well as on how to...
-
Page 14: Warning Of Special Dangers
3. Safety regulations If the set-up, maintenance or repair require the Before carrying out welding, flame-cutting and grinding demounting of safety equipment, this equipment has to operations, clean the machine/unit and its surroundings be remounted and checked immediately after these from dust and other inflammable substances and make activities. -
Page 15: Storage Of Compressors
3. Safety regulations Oils, greases and other chemical substances When handling oils, greases and other chemical substances, observe the safety regulations for this product! Be careful when handling hot fuels and consumables (danger of burning or scalding)! Rooms subject to explosion hazards Danger Compressor units must never be operated in areas subject to explosion hazards! -
Page 16: Symbols And Explanations
3. Safety regulations Symbols and explanations Carefully read the operating manual before commissioning or servicing this compressor. Never breathe in compressed air from this system. Never operate the unit with open doors or loose access panels. - Page 17 3. Safety regulations Warning: Hot surface Warning: Pressurized part or system Warning: This system can start up by means of a remote control or automatically after a power failure.
- Page 18 3. Safety regulations Warning: The system continues to run for 30 seconds after pressing the O-key Warning: Danger of electric shock Attention: Lifting point...
- Page 19 3. Safety regulations Attention: Check and, if required, re-tighten connection terminals. For further details, see the operating instructions. Attention: Electric motor fasteners Electric motor fasteners used for securing the unit during transportation have to be removed prior to commissioning (see also chapter 6.4).
-
Page 20: Design And Functioning
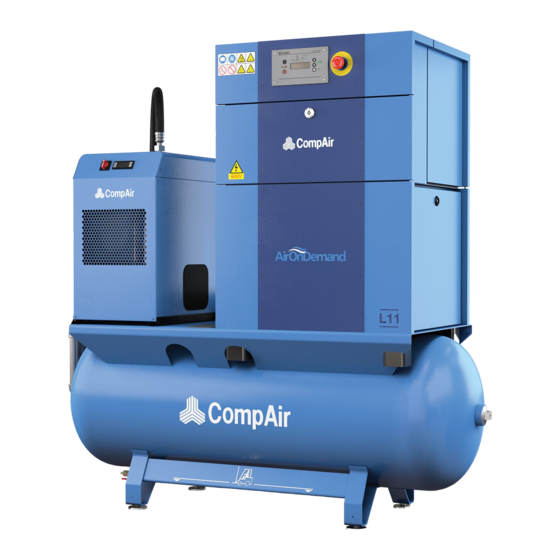
4. Design and functioning Desig n a n d f un cti oni ng Design of the unit 4.1.1 Design of the unit - L07-L11 (RS) a L07-L11 Fig. 2 1 Intake filter 12 Oil cooler 24 EMERGENCY OFF push-button 2 Intake regulator 13 Safety valve 25 Control cabinet... -
Page 21: Design Of The Unit - Airstation L07Fs-L11Fs (Rs)
4. Design and functioning 4.1.2 Design of the unit - AirStation L07FS-L11FS (RS) Fig. 2 b AirStation L07FS-L11FS 1 Compressor L07-L11 5 Opening for fork lift 9 Manometer 2 Pressure vessel 270 L 6 Operating panel controller 10 Compressor hood 3 Dryer 7 EMERGENCY-Stop button 11 Stands... -
Page 22: Schematic Diagram
Opening temperature 55 °C Fig. 3 1 Intake filter 11 Oil filter 21 Frequency converter 2 Intake regulator 12 Oil cooler (only L07RS-L11RS) 2.1 Actuator 13 Safety valve R1 Motor temperature 2.2 Intake valve 14 Pressure holding and check R2 Final compression temperature 2.3 Check valve... -
Page 23: Oil Circuit
4. Design and functioning Oil circuit System control The oil flows from the pressure reservoir (- 6 - Fig. 3) into the oil thermostat (- 17 - Fig. 3). With oil tempera- tures < 55 °C/131 °F the oil flows via the by-pass of the oil cooler directly into the oil filter (- 11 - Fig. -
Page 24: System Control L07Rs-L11Rs And Airstation L07Rs Fs-L11Rs Fs
4. Design and functioning Automatic operation (open-close operation) 4.5.2 System control L07RS-L11RS and AirStation L07RS FS-L11RS FS When the pressure reaches the upper switching point • set on the network pressure sensor (-7 - Fig. 4), (See also operating instructions for the compressor solenoid valve (Y1 Fig. -
Page 25: Hood (Opening/Closing)
4. Design and functioning Speed control operation Hood (opening/closing) Speed is controlled using a software-implemented PI The compressor is provided with a detachable plastic regulator that adapts the RPMs according to the need hood that allows easy access to all parts that are for compressed air. -
Page 26: Transport And Installation
AirStation L07FS-L11FS: AirStation L07FS 356 kg AirStation L11FS 371 kg AirStation L07RS FS 373 kg AirStation L11RS FS 383 kg Fig. 6 b Danger The compressor must be lifted using a suitable forklift truck which complies with the local safety regulations. -
Page 27: Installation
5. Transport and installation Installation A = 0.5m B = 0.8m Fig. 7 Danger The weight carrying capacity of the foundation • has to be taken into account when installing the compressor. Provide for a solid and plane base. • The system may not be operated on the transport •... -
Page 28: Preparations For Commissioning
6. Preparations for commissioning Pr epar ati on s f or com m iss io nin g CompAir screw compressors are rated for ambient Cooling air volume/minimum cross temperatures and cooling temperatures of +1°C/ 33.8°F to +45°C/113°F. In the case of temperatures other than the above limiting values, please consult your technical adviser. -
Page 29: Compressed Air Connection
6. Preparations for commissioning Compressed air connection Note After-coolers, separators, collecting reservoirs and the compressed air lines must be equipped with drain facilities at their lowest points to drain collected liquids. These facilities have to be fitted to allow the observance of the draining of such liquids. -
Page 30: Electrical Connection
Compressor type Supply voltage motor power (slow-blow fuse) at 30°C [kW] [AgG] 50-Hz-Compressors L07, L07FS 4G2.5 4G10 L11, L11FS L07RS, L07RS FS L11RS, L11RS FS 60-Hz-Compressors L07, L07FS 4G2.5 4G2.5 4G10 4G10 L11, L11FS L07RS L11RS Notes on the table:... - Page 31 Work on the control cabinet may only be carried out by electrotechnical specialist personnel. Only L07RS-L11RS and L07RS FS-L11RS FS: Danger of electric shock from loaded condensers! Please always first disconnect the system from the power supply and wait another 10 minutes before touching the electrical components.
-
Page 32: Electrical Connection (Usa/Canada-Version Only)
L07, L07FS 460V 575V 200V 230V L11, L11FS 460V 575V L07RS 460V L11RS 460V An adequate electrical power supply of the correct Danger voltage must be provided. All control enclosure wiring The power supply to the compressor side has to be has been completed at the factory. -
Page 33: Electric Motor Fasteners For Secure Transportation
Work on the control cabinet may only be carried out by electrotechnical specialist personnel. Only L07RS-L11RS and L07RS FS-L11RS FS: Fig. 12 Danger of electric shock from loaded condensers! Please always first disconnect the system from the power supply and wait another 10 minutes before touching the electrical components. -
Page 34: Oil Level Check
50 Hz compressors dB(A) 60 Hz compressors dB(A) Speed-controlled compressors dB(A) 50 Hz/ 60 Hz L07RS L11RS Subject to technical revision. Fig. 14 1 Oil filler cap R1" 2 Oil-level indicator 3 Maximum oil level 4 Minimum oil level Important Do not mix oils of different specifications. -
Page 35: Commissioning
The access panels may temporarily be opened for Important checking the direction of rotation (wear ear protectors). Although every CompAir screw compressor has been subjected to a test run at the factory and has Danger again been thoroughly inspected before shipment, damage during shipment cannot be excluded. -
Page 36: Routine Commissioning
7. Commissioning Temperature start-up protection Commissioning after malfunction The screw compressor unit will not start up if the Important ambient temperature is lower than + 1 °C/33.8 °F. Do not switch the screw compressor on repeatedly without having rectified the malfunction, since this may cause considerable damage to the machine. -
Page 37: Control System
8. Control system Contr ol s yst em Status indicator (display / light General signals) This chapter is used to quickly commission the unit. The control system is explained in detail in the separate The control system is fitted with a three-row display. DELCOS Pro operating instructions. -
Page 38: Displaying / Changing Values
[MAINTENANCE SCHED.] [ CONTROL MENU ] 8.5.2 Setting network pressure [ FAULT MEMORY ] (apart from L07RS-L11RS) [ TIMER CONTROL ] [ LIMIT VALUES ] Max. network pressure: [OPTIONAL IN-/OUTPUTS] The network pressure is set in the [ CONTROL MENU ] ... -
Page 39: Setting Line Pressure (Only L07Rs-L11Rs)
8. Control system 8.5.3 Setting line pressure 8.5.4 Setting time/date (timer) (only L07RS-L11RS) The DELCOS Pro accumulator can bridge a loss of Speed is controlled with the aid of a PI controller power lasting between around two to three weeks. If... -
Page 40: Acknowledging Warning / Fault Messages
8. Control system Acknowledging warning / fault messages Warning and fault messages are shown in the third row of the display. The red light signal flashes at the same time. You will find a table containing messages and suggested ways of remedying problems in the separate DELCOS Pro operating instructions. -
Page 41: Menu Structure (Apart From L07Rs-L11Rs) (Values Are Examples)
8. Control system 8.10 Menu structure (apart from L07RS-L11RS) (values are examples) + TOTAL RUNNING 12345h [MAINTENANCE SCHED.] LOADED HOURS 10987h + AIR FILTER IN 2000h OIL FILTER IN 2000h ... -
Page 42: Menu Structure (Only L07Rs-L11Rs) (Values Are Examples)
8. Control system 8.11 Menu structure (only L07RS-L11RS) (values are examples) + TOTAL RUNNING 12345h [MAINTENANCE SCHED.] LOADED HOURS 10987h + AIR FILTER IN 2000h OIL FILTER IN 2000h ... -
Page 43: Service And Maintenance
In order to facilitate this task, the scope of supply of the screw compressor unit comprises the “Maintenance and Checks and maintenance work may only be carried inspection manual for CompAir compressors”, in which out when the following points are observed: you can list your performed maintenance work at the Press the STOP button on the control panel and •... - Page 44 General maintenance/cleaning Oil change when using CompAir - 4000 hours oil (only European version) Oil change when using SSL-50 or SSL-35-F Food Grade (only USA version) ...
- Page 45 9. Service and maintenance ...
-
Page 46: Oil Change
9. Service and maintenance transported through the air intake filter into the oil circuit Oil change of the compressor unit. Also a high content of humidity in the intake air and the formation of condensate within the machine affect the service life of the lubricant oil so that a reduction in the oil change intervals may become necessary. -
Page 47: Change Of Oil Filter Cartridge
9. Service and maintenance In this case the oil must be analyzed to check the Unscrew the oil filter cartridge ( - 1 - Fig. 18) using • permissible length of time that the oil can be used (see an appropriate tool also chapter 9.15). -
Page 48: Change Of The Fine Separator Cartridge
9. Service and maintenance Check for leakage • Change of the fine separator Check oil level (see chapter 6.5) cartridge • If required, top up oil. • Changing intervals for oil fine separator cartridge The operating conditions (e.g. coolant temperatures), the operating modes and the quality of the intake air (e.g. -
Page 49: Safety Valve
9. Service and maintenance Safety valve Fig. 20 1 Air filter Fig. 21 2 Fixing clip 1 Safety valve Change the air filter as follows: Fig. 2b shows the safety valve of the L07FS-L11FS series. Loosen screw at fixing clip ( - 2 - Fig. 20) •... -
Page 50: Changing V-Belts/Automatic Tensioning System
9. Service and maintenance Changing the V-belt is carried out as follows: Changing V-belts/automatic tensioning system Open front panel • Lift the motor by turning the motion screw • Danger (- 2 - Fig. 22) counterclockwise until the V-belts are released Only perform checks and carry out work when the screw compressor unit is out of operation and... -
Page 51: General Maintenance And Cleaning
9.12 General maintenance and cleaning 2 Mounting bolt 3 Bottom access panel Important 4 Inlet filter (only L07RS-L11RS) 5 Outlet filter (only L07RS-L11RS) Remove oil residues and other deposits from unit parts and from the coolers of compressors, which Danger are exposed to hot compressed air, according to the operating instructions. -
Page 52: Inspection Intervals For Pressure Vessels And Electrical Installations
SSL-50 b) SSL-35-F Food Grade (Optional) c) SSL-46 (Optional) d) CompLube “10“ (Optional) For further information, please contact your local CompAir Distributor or Gardner Denver-USA at (937) 498-2500. CANADA-Version: a) CS6000XL b) CSS20 Food Grade (Optional) For further information, please contact your local CompAir Distributor or Gardner Denver-Canada at (905) 847-0688. -
Page 53: Trouble-Shooting
10. Trouble-shooting Tr ou ble -s ho oti ng Malfunction Possible cause Remedy Unit cannot be started No operating or control voltage Check fuses, main switch and supply line Malfunction not acknowledged Acknowledge fault message Pressure reservoir not depressurized Wait until depressurized Electric motor defective Check connections, winding, etc. - Page 54 10. Trouble-shooting Malfunction Possible cause Remedy Unit switches off Ambient temperature too high Ventilate compressor room Electric motor defective Check electric motor and thermistor Fan defective Check/replace fan Cross section of the electric supply Measure power requirement, lines too small if necessary, replace lines Power requirement too high Oil fine separator clogged,...
-
Page 55: Annex
11. Annex Ann ex 11.1 Technical data EUROPE version L07-L11 50 Hz Technical data L07-L11 ; 50 Hz Maximum operating pressure Minimum operating pressure Ambient temperature °C + 1 / + 45 Flow /min 1.30 1.06 0.85 1.82 1.61 1.32 Final compression temperature above ambient temp. -
Page 56: Technical Data Europe Version L07-L11 60 Hz
11. Annex 11.2 Technical data EUROPE version L07-L11 60 Hz Technical data L07-L11 ; 60 Hz Maximum operating pressure Minimum operating pressure Ambient temperature °C + 1 / + 45 Flow /min 1.27 1.12 0.77 1.84 1.67 1.29 Final compression temperature above ambient temp. °C Sound pressure level (to ISO 2151) dB(A) -
Page 57: Technical Data Europe Version L07Rs
11. Annex 11.3 Technical data EUROPE version L07RS Technical data 50Hz / 60Hz L07RS Maximum operating pressure 13.0 Minimum operating pressure Ambient temperature °C + 1 / + 45 Operating pressure 7.5 bar 9 bar 10 bar 13 bar min. -
Page 58: Technical Data Europe Version L11Rs
11. Annex 11.4 Technical data EUROPE version L11RS Technical data 50Hz / 60Hz L11RS Maximum operating pressure 13.0 Minimum operating pressure Ambient temperature °C + 1 / + 45 Operating pressure 7.5 bar 9 bar 10 bar 13 bar min. max. -
Page 59: Technical Data Usa/Canada Version L07-L11 60 Hz
11. Annex 11.5 Technical data USA/Canada version L07-L11 60 Hz Technical Data L07-L11 ; 60 Hz Maximum operating pressure psi g Minimum operating pressure psi g Ambient temperature °F + 34 / + 113 Flow 44.8 39.5 27.2 65.0 59.0 45.5 After-cooler outlet temperature above ambient temp. -
Page 60: Technical Data Usa/Canada Version L07Rs
11. Annex 11.6 Technical data USA/Canada version L07RS Technical data 50Hz / 60Hz L07RS Maximum operating pressure psi g Minimum operating pressure psi g Ambient temperature °F + 34 / + 113 Operating pressure psi g min. max. min. max. -
Page 61: Technical Data Usa/Canada Version L11Rs
11. Annex 11.7 Technical data USA/Canada version L11RS Technical data 50Hz / 60Hz L11RS Maximum operating pressure psi g Minimum operating pressure psi g Ambient temperature °F + 34 / + 113 Operating pressure psi g min. max. min. max. min. -
Page 62: Layout Plan L07-L11 And L07Rs-L11Rs
A = Compressed air connection G 3/4“ B = Cooling air inlet C = Cooling-air outlet D = Cable entry E = Cooling-air outlet of control cabinet (L07RS-L11RS only) F = Cooling-air inlet of control cabinet (L07RS-L11RS only) G = Center of gravity... -
Page 63: Layout Plan Airstation L07Fs-L11Fs And L07Rs Fs-L11Rs Fs
11. Annex 11.9 Layout plan AirStation L07FS-L11FS and L07RS FS-L11RS FS PLUG 2” (all dimensions in mm) Fig. 25 A = Compressed air connection G 3/4“ B = Cooling air inlet dryer C = Cooling-air outlet dryer D = Cooling-air outlet compressor E = Condensate drain G 3/8“... -
Page 64: Declaration Of Conformity
Kompressor type: L07; L11; L15; L18; L22; L23; L26; L29; L30; L37; L45; L50; L55; L75; L80; L90; L110; L132; L160; L200; L250; L07RS; L11RS; L15RS; L18RS; L22RS; L23R; L26R; L29R; L30RS; L37RS; L45RS; L55RS; L75RS; L90RS; L110RS; L132RS; L160RS; L200RS; L250RS; L07FS; L11FS; L15FS; L18FS;... - Page 68 Gardner Denver Deutschland GmbH Argenthaler Str. 11 55469 Simmern Deutschland Tel. ++49 (0)6761 832-0 ++49 (0)6761 832-409 w w w.compair.com e-mail: sales@compair.com...
Need help?
Do you have a question about the L07RS and is the answer not in the manual?
Questions and answers