Advertisement
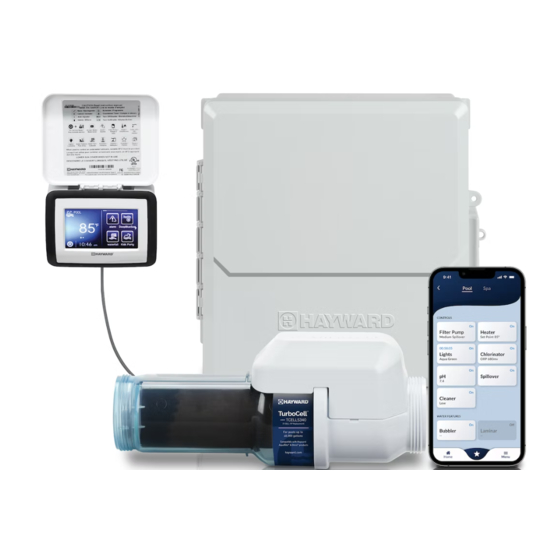
AQR S3 Omni Series
Pool Chlorinator and Automation Control
Installation Manual
\.
USE ONLY HAYWARD GENUINE REPLACEMENT PARTS
AQRS340OMNI
AQRS325OMNI
Certified to
NSF/ANSI Standard 50
Hayward Industries
400 Connell Drive, Suite 6100
Berkeley Heights, NJ 07922
Phone: (908) 355-7995
www.hayward.com
®
Contents
Before You Begin...........................2
Overview.......................................4
Mounting the Equipment...............7
Plumbing......................................8
Electrical.................................,,...9
Preparing Water...........................19
Configuration..............................22
Warranty......................................54
092781 RevA
Advertisement

Related Manuals for Hayward AQR S3 Omni Series


Summary of Contents for Hayward AQR S3 Omni Series
-
Page 1: Table Of Contents
Before You Begin......2 Overview........4 Mounting the Equipment....7 Plumbing........8 Electrical.........,,...9 Preparing Water......19 Configuration......22 Warranty........54 AQRS340OMNI AQRS325OMNI Certified to NSF/ANSI Standard 50 Hayward Industries 400 Connell Drive, Suite 6100 Berkeley Heights, NJ 07922 Phone: (908) 355-7995 www.hayward.com USE ONLY HAYWARD GENUINE REPLACEMENT PARTS... - Page 2 • Hayward salt systems are designed, tested and sold as systems and are certified by several agencies around the globe --- with each component of the systems meeting all required certi- fications and attendant legal requirements. The use of an untested, uncertified generic cells (or generic circuit boards) with Genuine Hayward salt chlorination products could lead to premature product failure.
-
Page 3: Before You Begin
(1) This device may not cause harmful interference, and (2) this device must accept any interference received, including interference that may cause undesired operation. Changes or modifications not expressly approved by Hayward could void the user’s authority to oper- ate this equipment. - Page 4 Wire/conduit for filter pump • Wire for remote heater control • Hayward Smart Relay - a single Smart Relay can be added for additional high voltage pool equipment • Mounting hardware (screws, bolts, etc.) for mounting AQR S3 Omni •...
-
Page 5: Overview
Overview The functions and features described in this manual assume that the AQR S3 Omni is using the latest firmware version available from Hayward. For instructions on how to upgrade firmware, refer to AQR S3 Omni Operation manual. Although the AQR S3 Omni is easy to use, it is important to completely read through this manual before attempting to install, configure and operate the unit. - Page 6 Controller Heater 2 High Voltage Solar Temperature Sensor Relays RS-485 for VSPs, Smart Relays and additional chlorination USB for Firmware Upgrades Temperature and Pool Cover Sensors Heater 1 Input Power Connector TurboCell Flow Switch USE ONLY HAYWARD GENUINE REPLACEMENT PARTS...
- Page 7 USE ONLY HAYWARD GENUINE REPLACEMENT PARTS...
-
Page 8: Mounting The Equipment
The Controller has two keyhole cutouts on the back of its enclosure. A mounting template can be found on page 53. To mount, screw the two provided fasteners into the mounting surface at the USE ONLY HAYWARD GENUINE REPLACEMENT PARTS... -
Page 9: Plumbing
(downstream) all the pool equipment (filter, heater, solar, etc.). The electrolytic cell and flow switch tee fitting are designed to be plumbed into 2” (51mm) PVC pipe. Adapters (not included) can be used for systems with 1½” (38mm) plumbing. USE ONLY HAYWARD GENUINE REPLACEMENT PARTS... -
Page 10: Electrical
Follow all local and NEC (CEC if applicable) codes • Use copper conductors only • Always remove power to the AQR S3 Omni before removing the front panel Bottom View Low Voltage Wiring Channel High Voltage knockouts USE ONLY HAYWARD GENUINE REPLACEMENT PARTS... - Page 11 For Canadian installations, the AQR S3 Omni shall be connected to a circuit protected by a class A ground fault interrupter. Relay 2 Relay 1 115 VAC (L1 and N) Ground 230 VAC (L1 and L2) USE ONLY HAYWARD GENUINE REPLACEMENT PARTS...
- Page 12 S3 Omni after installation is complete. Temperature Sensors SENS1 POOL SENS2 AIR SENS3 COVER SENS4 SOLAR Optional Smart Relay Purchased Separately HVR2 VLV1 VLV2 HVR1 LVR2 (Heater2) SENS4 (Solar) SENS3 (Cover) SENS2 (Air) SENS1 (Pool) LVR1 (Heater1) USE ONLY HAYWARD GENUINE REPLACEMENT PARTS...
- Page 13 The AQR S3 Omni can control a two speed filter pump using both internal relays. Refer to the wiring diagram below. For proper wiring, observe the relay markings. Relays are labeled “1” and “2” and are shown on the diagram on page 11. Relay 1 Relay 2 240 Volt from Electrical Panel USE ONLY HAYWARD GENUINE REPLACEMENT PARTS...
- Page 14 Load 2 out Neutral Line 1 in Line 1 in Load 1 out Load 1 out Neutral Line 2 in Load 2 out Black/White Black/White Black Black Gray Red/White Red/White Gray 115 VAC 230 VAC USE ONLY HAYWARD GENUINE REPLACEMENT PARTS...
- Page 15 Hayward Variable Speed Pump (VSP) Wiring The Hayward TriStar 950, TriStar 900, Super Pump 700 and MaxFlo 500 pumps wire directly to one of the RS-485 connectors and will be fully controlled by the AQR S3 Omni (schedules and speeds).
- Page 16 USE ONLY HAYWARD GENUINE REPLACEMENT PARTS...
- Page 17 Sensors Temperature Sensors The AQR S3 Omni utilizes Hayward 10K ohm thermistor type sensors for measurement of pool and air temperature. The sensors come with a 15ft (4.6m) cable. If a longer cable is required, contact the Hayward Technical support for information on suitable cable types and splices.
- Page 18 Configuration section of this manual. For Ethernet connections, use outdoor rated Cat5e or Cat6 Ethernet cable. Connect one end to the Controller and the other to an available LAN port (not WAN) on the home router or access point. Ethernet port LAN port USE ONLY HAYWARD GENUINE REPLACEMENT PARTS...
- Page 19 (solar, water feature, in-floor cleaner, etc.). For installations with solar heating, Hayward offers the AQ-SOL-KIT-xx solar kit that contains a valve, actuator, and extra temperature sensor. The “xx” indicates the valve type from the 2 choices below: 1.5”...
-
Page 20: Preparing Water
Use the table above to determine Ti, Ci, Ai, and TDS in the formula shown above. If the Si is equal to 0.2 or more, stains may appear. If the Si is equal to -0.2 or less, corrosion or deterioration may occur. -0.2 Corrosion Stain USE ONLY HAYWARD GENUINE REPLACEMENT PARTS... - Page 21 Always check stabilizer (cyanuric acid), when checking salt. These levels will most likely decline together. Use the chart on the following page to determine how much stabilizer must be added to raise the level to 40 ppm. USE ONLY HAYWARD GENUINE REPLACEMENT PARTS...
- Page 22 If using chlorinator function, pool/spa salt level is between 2700 – 3400 PPM for Standard Salt mode or 1200-1800 PPM for Low Salt mode. All wiring is performed according to NEC and local codes. The AQR S3 Omni is properly grounded. The deadfront panel has been reinstalled. USE ONLY HAYWARD GENUINE REPLACEMENT PARTS...
-
Page 23: Configuration
Also, if you have experienced problems, Hayward Technical Support may advise you to upgrade your AQR S3 Omni firmware. To upgrade the AQR S3 Omni firmware, refer to the procedure shown in the AQR S3 Omni Operation Manual. - Page 24 Would you like to set up a network connection now? Select the type of connection you would like to setup/modify or select “Not Now”. For external antenna connections, you must have a Hayward HLWLAN connected to the AQR S3 Omni. “Wired” requires an ethernet connec- tion to the router.
- Page 25 Configuration Wizard. External Antenna - Make this selection when setting up a Hayward HLWLAN. Once the system is done running through the diagnostics, press the check mark to continue to the next section of the Configuration Wizard.
- Page 26 3 minutes to establish normal water flow every time the pump is acti- vated after being off for at least 30 seconds. This option only appears if the filter pump is configured as a 2-speed pump. USE ONLY HAYWARD GENUINE REPLACEMENT PARTS...
- Page 27 Which Hayward Unique Address? If using a VSP, you’ll be asked what is the Hayward Unique Address (HUA). If a value is already shown in the box, advance to the next screen. If no value is shown, selecting the box will bring you to a table showing all detected devices.
- Page 28 Name Heater Select the box, then type the desired name for your heater. This name will be used when referring to this particular heater. Which Relay is it Wired to? Selecting the box will bring you to a table USE ONLY HAYWARD GENUINE REPLACEMENT PARTS...
- Page 29 Minimum Operation Speed? For variable speed pumps, select the lowest pump speed that is allowed while heating. Set a speed that will ensure that there will be sufficient flow for the heater to operate properly. USE ONLY HAYWARD GENUINE REPLACEMENT PARTS...
- Page 30 Would You Like To Prioritize The Use Of Solar Heating Over Any Other Types? Select the lowest pump speed that is allowed while solar heating. Set a speed that will ensure that there will be sufficient flow for the solar heating system to operate properly. USE ONLY HAYWARD GENUINE REPLACEMENT PARTS...
- Page 31 Do you have a Sense & Dispense Module? Select Yes if a Hayward HL-CHEM (sold sepa- rately) is connected to the AQR S3 Omni. If Yes is selected: The next few screens will configure the AQR S3 Omni to use Sense and Dispense.
- Page 32 TurboCell or AquaRite with HLAQRPCB communication board) If Yes is selected: Type of Cell? Select the type of Hayward TurboCell that is installed in your system. Where is the Cell Located? If an entry is already shown in the box, touch the Advance button.
- Page 33 If VSP is selected: Which Hayward Unique Address? If using a VSP for your cleaner pump, you’ll be asked what is the Hayward Unique Address (HUA). If a value is already shown in the box, advance to the next screen. If no value is shown, selecting the box will bring you to a table showing all detected devices.
- Page 34 When finished configuring water features, you’ll be returned to this same screen. Touch the Done button and advance to the next section of configuration. Refer to the following information when configuring water features: USE ONLY HAYWARD GENUINE REPLACEMENT PARTS...
- Page 35 2-speed pump. If VSP is selected: Which Hayward Unique Address? If using a VSP for your water feature pump, you’ll be asked what is the Hayward Unique Address (HUA). If a value is already shown in the box, advance to the next screen.
- Page 36 Other. Name the Group of Lights - Touch the box and use the keyboard to name the lights. How Many Relays are Lights Wired to? Select the number of relays used by the lights. USE ONLY HAYWARD GENUINE REPLACEMENT PARTS...
- Page 37 3 minutes to establish normal water flow every time the pump is activated after being off for at least 30 seconds. This option only appears if the pump is configured as a 2-Speed pump. USE ONLY HAYWARD GENUINE REPLACEMENT PARTS...
- Page 38 If VSP is selected: Which Hayward Unique Address? If using a VSP for your accessory pump, you’ll be asked what is the Hayward Unique Address (HUA). If a value is already shown in the box, advance to the next screen. If no value is shown, selecting the box will bring you to a table showing all detected devices.
- Page 39 NOTE: The remaining configuration settings are not specific to a Body of Water. Do You Have an Air Temperature Sensor? Select whether there is an air temperature sensor wired to the AQR S3 Omni. USE ONLY HAYWARD GENUINE REPLACEMENT PARTS...
- Page 40 Universal ColorLogic lights must all be connected to the same high voltage relay for synchronization to function properly. If using Omni Direct mode, you must use an internal relay, not an HLRELAYBANK. If Yes is selected: USE ONLY HAYWARD GENUINE REPLACEMENT PARTS...
- Page 41 If Yes is selected: Select an Interlock Type - From this screen, select the type of interlock that you would like to configure. The choices are: Equipment to Equipment, Equipment to Sensor, Equipment to Mode, USE ONLY HAYWARD GENUINE REPLACEMENT PARTS...
- Page 42 The summary will describe how the interlocked Theme will function. Read through the description and make sure the equipment will function as desired. USE ONLY HAYWARD GENUINE REPLACEMENT PARTS...
- Page 43 Main Menu Pre Programmed Config (VSP, Htr, Lt) Bodies of Water System Options New Typical Configuration Backyard Spa Side New Advanced Configuration Sensors Edit Current Configuration Add Interlock QUICK EDIT QUICK EDIT configuration configuration USE ONLY HAYWARD GENUINE REPLACEMENT PARTS...
- Page 44 If FIlter Pumps is selected: Select a Filter Pump - Once you select a filter pump, all of the options for that filter pump will appear on the next screen. These options are as follows: USE ONLY HAYWARD GENUINE REPLACEMENT PARTS...
- Page 45 Type - Change the type of Filter Pump that is configured (Single Speed, 2-Speed, or VSP) HUA - Match the HUA (Hayward Unique Address) to the configured Filter Pump. This option only appears if the Filter Pump is configured as a Vari- able Speed Pump.
- Page 46 Chemical Type - Select the type of chemical that is being dispensed (acid or CO pH Dispensers - Configure the pH dispense unit. pH Timeout - Choose the pH timeout time. pH Extend - Select whether you want pH extend enabled for this Body of Water. USE ONLY HAYWARD GENUINE REPLACEMENT PARTS...
- Page 47 Valve - Configure the cleaner valve, if used. Freeze Protect - Select whether you want the cleaner to turn on for Freeze Protection. Also set the Freeze Protect air temperature threshold from this menu. USE ONLY HAYWARD GENUINE REPLACEMENT PARTS...
- Page 48 Freeze Protect - Select whether you want the water feature to turn on for Freeze Protection. Also set the Freeze Protect air temperature threshold from this menu. Delete a Water Feature - From this screen, if you wish to delete a water feature USE ONLY HAYWARD GENUINE REPLACEMENT PARTS...
- Page 49 Speed - Change the Minimum and Maximum Allowed Speeds of the acces- sory pump as well as the Low, Medium and High Speed settings. This op- tion only appears if the accessory pump is configured as a Variable Speed Pump. USE ONLY HAYWARD GENUINE REPLACEMENT PARTS...
- Page 50 Delete an Existing Group of Lights - From this screen, if you wish to delete a group of lights that is currently configured, select the group and then select the trash can button next to it. USE ONLY HAYWARD GENUINE REPLACEMENT PARTS...
- Page 51 NOTE: If there are currently no interlocks configured on your system, then the button will ap- USE ONLY HAYWARD GENUINE REPLACEMENT PARTS...
- Page 52 Would you like to set up a network connection now? Select the type of connection you would like to setup/modify or select “Not Now”. For external antenna connections, you must have a Hayward HLWLAN connected to the AQR S3 Omni. “Wired” requires an ethernet connection to the router.
- Page 53 Themes. These Themes had to have been defined prior to configuring the Aux buttons. Select the desired Theme that you want to assign to the Aux button Unconfigured - If set to “Unconfigured”, the Aux button will have no func- tion. USE ONLY HAYWARD GENUINE REPLACEMENT PARTS...
- Page 54 USE ONLY HAYWARD GENUINE REPLACEMENT PARTS...
-
Page 55: Warranty
AquaPlus and SwimPure chlorination products to be free of defects in materials and workmanship, under normal use and service, for a period of three (3) years. Hayward also warrants its Aqua Trol chlorination products to be free of defects in materials and workmanship, under normal use and service for a period of one (1) year. - Page 56 Hayward Industries, Inc. © 2021 Hayward Industries, Inc. All other trademarks not owned by Hayward are the property of their respective owners. Hayward is not in any way affiliated with or endorsed by those third parties.
Need help?
Do you have a question about the AQR S3 Omni Series and is the answer not in the manual?
Questions and answers