Panasonic RC-DC1 Operating Instructions Manual
Clock radio with ipod dock
Hide thumbs
Also See for RC-DC1:
- Operating instructions manual (20 pages) ,
- Operating instructions manual (76 pages) ,
- Operating instructions (2 pages)
Table of Contents
Advertisement
Available languages
Available languages
As an ENERGY STAR
determined that this product meets the ENERGY STAR
guidelines for energy effi ciency.
À titre de participant au programme ENERGY STAR
Panasonic a déterminé que cet appareil respecte les
directives ENERGY STAR
d'énergie.
Como socio de ENERGY STAR
cumple con las directrices de la ENERGY STAR
PP
®
Partner, Panasonic has
For Canada only: The word "Participant" is used in
place of the word "Partner".
®
en matière d'économie
®
, Panasonic ha determinado que este producto
®
para el rendimiento energético.
Instrucciones de funcionamiento
Model No. / Modèle / N
If you have any questions contact
®
In the U.S.A and Puerto Rico:
1-800-211-PANA (7262)
In Canada:
1-800-561-5505
®
,
Pour toute demande de
renseignements, appeler au
1-800-561-5505
Operating Instructions
Manuel d'utilisation
Clock Radio
Radio-réveil
Radio Reloj
RC-DC1
o
de modelo
RQTX1207-Y
Advertisement
Chapters
Table of Contents

Related Manuals for Panasonic RC-DC1


Summary of Contents for Panasonic RC-DC1
-
Page 1: Operating Instructions
For Canada only: The word “Participant” is used in place of the word “Partner”. À titre de participant au programme ENERGY STAR Panasonic a déterminé que cet appareil respecte les directives ENERGY STAR d’énergie. ®... - Page 2 (1) This device may not cause harmful interference, and (2) this device must accept any interference received, including interference that may cause undesired operation. Responsible Party: Panasonic Corporation of North America One Panasonic Way Secaucus, NJ 07094 Support Contact: Panasonic Consumer Electronics Company...
-
Page 3: Important Safety Instructions
IMPORTANT SAFETY INSTRUCTIONS Read these operating instructions carefully before using the unit. Follow the safety instructions on the unit and the applicable safety instructions listed below. Keep these operating instructions handy for future reference. 1) Read these instructions. 2) Keep these instructions. 3) Heed all warnings. -
Page 4: Table Of Contents
The model number and serial number of this product can be found on either the back or the bottom of the unit. Please note them in the space provided below and keep for future reference. RC-DC1 MODEL NUMBER SERIAL NUMBER 1 AM loop antenna... -
Page 5: Compatible Ipod And Iphone
In the U.S.A and Puerto Rico, refer to “Customer Services Directory (United States and Puerto Rico)” on page 16. In Canada, contact the Panasonic Canada Inc. Customer Care Centre at 1-800-561-5505, or visit the website (www.panasonic.ca), or an authorized Servicentre closest... -
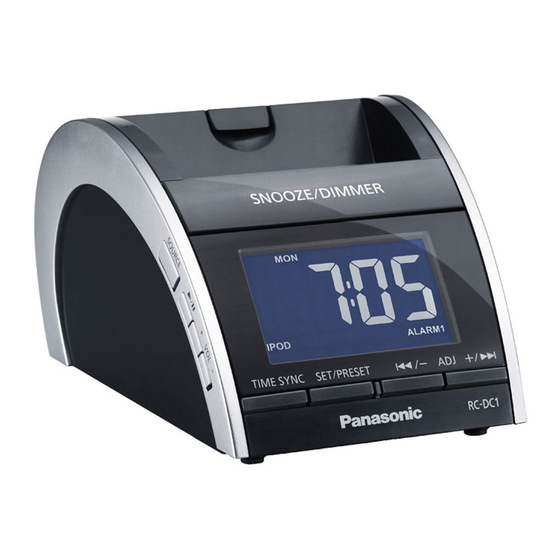
Page 6: Product View And Controls
Overview of controls [SNOOZE/DIMMER] Snooze: To stop the alarm for 9 minutes. Dimmer: To adjust the display panel’s brightness (High (default), Medium or Low). [ALARM OFF] To turn off the alarm. [ALARM 1], [ALARM 2] To activate either alarm 1 or alarm 2 function. To display alarm 1 or alarm 2 setting. -
Page 7: Making The Connections
Making the connections Rear view To household AC outlet FM indoor antenna Click! Connect the AM antenna. Stand the antenna up on its base. Connect the AC adaptor. • Do not use an AC adaptor from other equipment. • Do not use any other AC adaptors except the supplied one. -
Page 8: Using An Ipod Or Iphone
Synchronizing clock with iPod or iPhone time This function allows you to set the clock’s time to be the same time as your iPod or iPhone’s time (Z page 5, “Compatible iPod and iPhone”). Press [TIME SYNC] while an iPod or iPhone is docked unto the main unit. -
Page 9: Using The Radio
Using the radio Manual tuning Press [SOURCE] to select “RADIO FM” or “RADIO AM”. Press [2/–, ADJ] or [+/6, ADJ] to select the desired frequency. To tune automatically Press and hold [2/–, ADJ] or [+/6, ADJ] until the frequency starts changing rapidly. Automatic tuning stops when it fi nds a station or when [2/–, ADJ] or [+/6, ADJ] is pressed again. -
Page 10: Setting The Alarm
Using the alarm You can set two different alarm times. Before setting the alarm, make sure to set the clock (Z page 7, “Setting the clock”). Setting the alarm Press and hold [ALARM 1] or [ALARM 2] until the hour display blinks. -
Page 11: Using The Memory Loader Application
Using the Memory Loader application This main unit is designed to operate with the Memory Loader application which can be downloaded from the App Store (search for MemoryLoader). If you have not already downloaded the free Memory Loader application, you will see the following message on your iPod touch or iPhone display: Application Not Installed This accessory requires an... -
Page 12: Troubleshooting Guide
Note: • Insert with poles aligned. • Do not touch the terminals (+ and –) with metal objects. • Do not recharge, disassemble, remodel, heat or throw into fi re. • Keep out of reach of children. • Do not heat or expose to fl ame. •... -
Page 13: Maintenance
■ iPod or iPhone The iPod or iPhone cannot be operated with this unit. • Make sure the iPod or iPhone has been securely connected and turned on (Z page 8). • Update your iPod or iPhone with the latest software. There is no sound from the iPod or iPhone. -
Page 14: Specifi Cations
Specifi cations AMPLIFIER SECTION RMS Output Power (Mono) Front channel 2.6 W per channel (8 ), 1 kHz, 10% THD TUNER SECTION Preset memory Frequency modulation (FM) Frequency range 87.9 MHz to 107.9 MHz (200 kHz step) 87.5 MHz to 108.0 MHz (100 kHz step) Antenna terminals Amplitude modulation (AM) Frequency range... -
Page 15: Limited Warranty (Only For U.s.a. And Puerto Rico)
Limited Warranty (ONLY FOR U.S.A. AND PUERTO RICO) Panasonic Consumer Electronics Company, Division of Panasonic Corporation of North America One Panasonic Way, Secaucus, New Jersey 07094 Limited Warranty Coverage (For USA and Puerto Rico Only) If your product does not work properly because of a defect in materials or workmanship, Panasonic Consumer Electronics Company (referred to as “the warrantor”) will, for the length of the... - Page 16 LIMITED WARRANTY, ARE YOUR RESPONSIBILITY. Accessory Purchases (United States and Puerto Rico) Purchase Parts, Accessories and Instruction Books online for all Panasonic Products by visiting our Web Site at: http://www.pstc.panasonic.com Or, send your request by E-mail to: npcparts@us.panasonic.com You may also contact us directly at:...
-
Page 17: Limited Warranty (Only For Canada)
Accessories including rechargeable batteries This warranty is given only to the original purchaser, or the person for whom it was purchased as a gift, of a Panasonic brand product mentioned above sold by an authorized Panasonic dealer in Canada and purchased and used in Canada, which product was not sold “as is”, and which product was delivered to you in new condition in the original packaging. - Page 18 Il est recommandé de noter, dans l’espace prévu ci-dessous, le numéro de modèle et le numéro de série inscrits à l’arrière, ou sous le fond de l’appareil, et de conserver ce manuel pour référence ultérieure. RC-DC1 NUMÉRO DE MODÈLE NUMÉRO DE SÉRIE Emplacement...
- Page 19 IMPORTANTES MISES EN GARDE Avant d’utiliser l’appareil, lire attentivement les instructions qui suivent. Se conformer tout particulièrement aux avertissements inscrits sur l’appareil et aux consignes de sécurité indiquées ci-dessous. Conserver le présent manuel pour consultation ultérieure. 1) Lire attentivement ces instructions. 2) Conserver ces instructions.
- Page 20 Table des matières IMPORTANTES MISES EN GARDE ...3 Accessoires fournis ...4 iPod et iPhone compatibles ...5 Service après-vente...5 Emplacement des commandes ...6 Raccordements ...7 Réglage de l’horloge ...7 Utilisation d’un iPod ou d’un iPhone ...8 Utilisation de la radio ...9 Utilisation de la minuterie-sommeil ...9 Utilisation du réveil ...10 Utilisation de l’application Memory Loader ...11...
-
Page 21: Ipod Et Iphone Compatibles
Demande d’informations Pour toutes réparations, renseignements ou conseils sur le fonctionnement du produit : Veuillez contacter le service à la clientèle de Panasonic Canada Inc. au 1-800-561-5505, son site web (www.panasonic.ca) ou le centre de service agréé le plus proche. -
Page 22: Emplacement Des Commandes
Emplacement des commandes [SNOOZE/DIMMER] Auto-vigile : Pour différer le réveil de 9 minutes. Atténuateur : Pour régler la luminosité de l’affi chage (Haut (par défaut), Moyen ou Bas). [ALARM OFF] Mise hors marche du réveil. [ALARM 1], [ALARM 2] Active les fonctions réveil 1 ou réveil 2. Affi... -
Page 23: Raccordements
Raccordements Vue arrière Vers une prise secteur Antenne FM intérieure Déclic! Raccorder l’antenne AM. Placer l’antenne à la verticale, sur sa base. Brancher l’adaptateur secteur. • Ne pas utiliser d’adaptateur secteur provenant d’un autre appareil. • N’utiliser que l’adaptateur secteur fourni. Adaptateur secteur Cet adaptateur secteur fonctionne sur une alimentation entre 100 V et 240 V. -
Page 24: Utilisation D'un Ipod Ou D'un Iphone
Synchronisation de l’horloge avec un iPod ou un iPhone Cette fonction permet de synchroniser l’horloge de l’appareil avec celle de votre iPod ou iPhone (Z page 5, « iPod et iPhone compatibles »). Appuyer sur [TIME SYNC] pendant qu’un iPod ou un iPhone est installé... -
Page 25: Utilisation De La Radio
Utilisation de la radio Syntonisation manuelle Appuyer sur [SOURCE] et sélectionner « RADIO FM » ou « RADIO AM ». Appuyer sur [2/–, ADJ] ou sur [+/6, ADJ] pour sélectionner la fréquence souhaitée. Syntonisation automatique Appuyer et maintenir [2/–, ADJ] ou [+/6, ADJ] enfoncée jusqu’à... -
Page 26: Utilisation Du Réveil
Utilisation du réveil Il est possible de régler deux réveils distincts. Avant de régler le réveil, s’assurer de régler l’horloge (Z page 7, « Réglage de l’horloge »). Réglage du réveil Appuyer et maintenir [ALARM 1] ou [ALARM 2] enfoncée jusqu’à ce que l’heure clignote. À... -
Page 27: Utilisation De L'application Memory Loader
Utilisation de l’application Memory Loader Cet appareil est conçu pour opérer avec l’application Memory Loader pouvant être téléchargée depuis l’App store (rechercher MemoryLoader). Si cette application n’a pas été installée, le message suivant s’affi chera à l’écran du iPod touch ou du iPhone : Application non installée Cet accessoire requiert une application dont vous ne disposez... -
Page 28: Guide De Dépannage
Nota : • Insérer la pile en respectant la polarité. • Ne pas permettre aux terminaux (+ et –) d’entrer en contact avec des objets de métal. • Ne pas recharger, démonter, remonter, chauffer ou jeter au feu. • Garder hors de la portée des enfants. •... -
Page 29: Entretien
■ iPod ou iPhone L’iPod ou l’iPhone ne peut être piloté à partir de cet appareil. • S’assurer que l’iPod ou l’iPhone a été bien mis en place, puis mis en marche (Z page 8). • Installer le logiciel le plus récent sur votre iPod ou iPhone. Aucun son ne sort de l’iPod ou l’iPhone. -
Page 30: Spécifi Cations
Spécifi cations SECTION AMPLIFICATEUR Puissance de sortie effi cace (mono) Canal avant 2,6 W par canal (8 ), 1 kHz, 10% DHT SECTION SYNTONISEUR Mémoire présyntonisée Modulation de fréquence (FM) Plage de fréquence 87,9 MHz à 107,9 MHz (modulation de 200 kHz) 87,5 MHz à... -
Page 31: Certifi Cat De Garantie Limitée
La présente garantie n’est fournie qu’à l’acheteur original d’un des produits de marque Panasonic indiqués plus haut, ou à la personne l’ayant reçu en cadeau, vendu par un détaillant Panasonic agréé au Canada et utilisé au Canada. Le produit ne doit pas avoir été... - Page 32 NE COUVRE PAS l’usure normale ni les dommages esthétiques. La présente garantie NE COUVRE PAS NON PLUS les dommages subis pendant le transport, les défaillances causées par des produits non fournis par Panasonic Canada Inc. ni celles résultant d’un accident, d’un usage abusif ou impropre, de négligence, d’une manutention inadéquate, d’une mauvaise application, d’une altération, d’une installation ou de réglages impropres, d’un mauvais réglage des contrôles de l’utilisateur, d’un mauvais...
- Page 33 MÉMO...
- Page 34 (1) Este dispositivo no podría causar interferencia dañina, y (2) Este dispositivo debe aceptar toda interferencia recibida, incluida la interferencia que podría causar su operación no deseada. Parte responsable: Panasonic Corporation of North America One Panasonic Way Secaucus, NJ 07094 Contacto de Soporte: Panasonic Consumer Electronics Company...
-
Page 35: Instrucciones Importantes De Seguridad
INSTRUCCIONES IMPORTANTES DE SEGURIDAD Lea estas instrucciones de funcionamiento minuciosamente antes de usar la unidad. Siga las instrucciones de seguridad en la unidad y las instrucciones de seguridad aplicables enumeradas abajo. Mantenga estas instrucciones de funcionamiento a mano para consultas futuras. 1) Lea estas instrucciones. -
Page 36: Accesorios Suministrados
El número de modelo y número de serie de este producto se puede encontrar en la parte posterior o inferior del mismo. Por favor, anótelo en el espacio suministrado a continuación y guárdelo para consultas futuras. MODELO NÚMERO NÚMERO DE SERIE 1 Antena de cuadro de AM (RFEX1003) RC-DC1... -
Page 37: Compatible Con El Ipod Y El Iphone
Compatible con el iPod y el iPhone • iPod nano 5ª generación (cámara de video) (8GB, 16GB) • iPod touch 2ª generación (8GB, 16GB, 32GB, 64GB) • iPod classic [120GB, 160GB (2009)] • iPod nano 4ª generación (video) (8GB, 16GB) •... -
Page 38: Panorama De Los Controles
Panorama de los controles [SNOOZE/DIMMER] Repetición de alarma: Para detener la alarma durante 9 minutos. Atenuador de luz: Para ajustar el brillo del panel de visualización (Alto (predeterminado), Medio o Bajo). [ALARM OFF] Para apagar la alarma. [ALARM 1], [ALARM 2] Para activar la función de alarma 1 o alarma 2. -
Page 39: Cómo Realizar Las Conexiones
Cómo realizar las conexiones Vista posterior Al enchufe de conexión a la red Antena interior de FM ¡ Haga clic! Conecte la antena de cuadro de AM. Ponga la antena en posición vertical sobre su base. Conecte el adaptador de CA. •... -
Page 40: Cómo Usar Un Ipod O Iphone
Sincronización del reloj con la hora del iPod o del iPhone Esta función le permite confi gurar la hora del reloj para que sea la misma que la hora de su iPod o iPhone (Z página 5, “Compatible con el iPod y el iPhone”). Pulse [TIME SYNC] mientras el iPod o iPhone esté... -
Page 41: Cómo Usar El Radio
Cómo usar el radio Sintonización manual Pulse [SOURCE] para seleccionar “RADIO FM” o “RADIO AM”. Pulse [2/–, ADJ] o [+/6, ADJ] para seleccionar la frecuencia deseada. Para sintonizar automáticamente Pulse y mantenga pulsado [2/–, ADJ] o [+/6, ADJ] hasta que la frecuencia empiece a cambiar rápidamente. La sintonización automática se detiene cuando encuentra una estación o cuando se pulsa [2/–, ADJ] o [+/6, ADJ] nuevamente. -
Page 42: Cómo Usar La Alarma
Cómo usar la alarma Usted puede confi gurar dos horas de alarma diferentes. Antes de confi gurar la alarma, asegúrese de confi gurar el reloj (Z página 7, “Confi guración de la hora”). Cómo confi gurar la alarma Pulse y mantenga pulsado [ALARM 1] o [ALARM 2] hasta que la hora visualizada parpadee. -
Page 43: Cómo Usar La Aplicación Memory Loader
Cómo usar la aplicación Memory Loader Esta unidad principal ha sido diseñada para operar con la aplicación Memory Loader, que puede ser descargada del App Store (realice una búsqueda con MemoryLoader). Si no ha descargado la aplicación gratuita Memory Loader, visualizará... -
Page 44: Guía Para La Solución De Problemas
Nota: • Inserte con los polos alineados. • No toque los terminales (+ y –) con objetos metálicos. • No recargue, desarme, remodele, caliente o lance al fuego. • Manténgase fuera del alcance los niños. • No caliente o exponga a las llamas. •... -
Page 45: Mantenimiento
■ iPod o iPhone El iPod o iPhone no funciona con esta unidad. • Asegúrese de que el iPod o el iPhone estén conectados de manera segura y encendidos (Z página 8). • Actualice su iPod o iPhone con el software más reciente. El iPod o iPhone no emite sonido. -
Page 46: Especifi Caciones
Especifi caciones SECCIÓN DEL AMPLIFICADOR Potencia de Salida RMS (Mono) Canal frontal 2.6 W por canal (8 ), 1 kHz, 10% THD SECCIÓN DEL SINTONIZADOR Memoria presintonizada Modulación de frecuencia (FM) Gama de frecuencias 87.9 MHz a 107.9 MHz (en pasos de 200 kHz) 87.5 MHz a 108.0 MHz (en pasos de 100 kHz) Terminales de la antena Modulación de amplitud (AM) -
Page 47: Información Útil
Sitio Web para América Latina: http://www.lar.panasonic.com Además puede contactarnos directamente a través de nuestro Contact Center: Panama 800-PANA (800-7262) Colombia 01-8000-94PANA (01-8000-947262) Ecuador 1800-PANASONIC (1800-726276) Costa Rica 800-PANA737 (800-7262737) El Salvador 800-PANA (800-7262) Guatemala 1-801-811-PANA (1-801-811-7262) Chile 800-390-602 Desde teléfono Celular: 797-5000... - Page 48 Panasonic Consumer Electronics Company, Division of Panasonic Corporation of North America One Panasonic Way, Secaucus, New Jersey 07094 http://www.panasonic.com © Panasonic Corporation 2010 Printed in China Imprimé en Chine Impreso en China Panasonic Canada Inc. 5770 Ambler Drive Mississauga, Ontario L4W 2T3 www.panasonic.ca...