Advertisement
Advertisement
Table of Contents

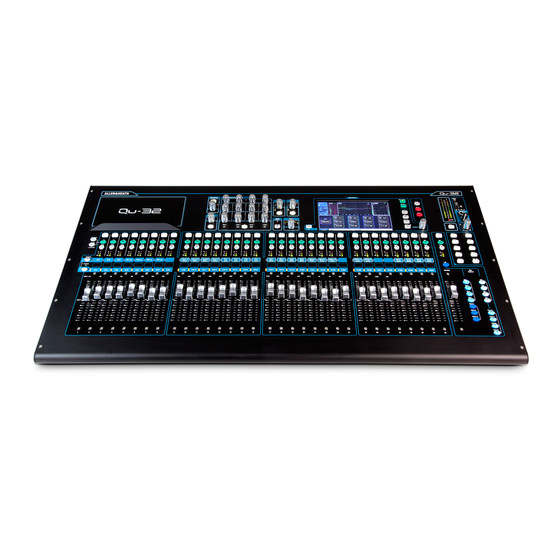
Summary of Contents for ALLEN & HEATH Qu Series
- Page 1 Qu Service Guide DISTRIBUTOR USE ONLY!
- Page 2 Warranty The Allen & Heath warranty policy is as follows: If the unit fails within 30 days of receipt by the distributor, then A&H will offer parts for repair. If the unit is DOA, then A&H will offer a replacement unit. If the unit fails within 12 months of purchase by the end user, then A&H will offer parts free of charge for repair by the distributor.
- Page 3 Qu Disassembly...
- Page 4 Bottom Panel Remove the bottom panel to access the inside of the unit.
- Page 5 Disassembly If removing the Fader PCB, remove all fader caps and position the faders away from the edge to avoid catching.
- Page 6 Disassembly Remove the front fader fixings when removing the fader PCB.
- Page 7 Disassembly If removing the Surface PCB or replacing the screen, remove the rotary pots and nuts.
- Page 8 12v Fader Motor Supply There is a separate 12 volt supply to the fader PCB to power the fader motors.
- Page 9 Changing the Screen When changing the screen, disconnect the screen’s connection to the CPU before removing PCB’s.
- Page 10 Changing the Screen Lift the CPU PCB upwards to remove, as connectors are placed between the CPU and Audio PCB.
- Page 11 Changing the Screen Once the CPU is removed, remove the Surface PCB. Pillars labelled Pillar Plus Nyloc do not need to be removed. Pillars labelled Pillar Only must be removed.
- Page 12 Changing the Screen Unclip the screen from the Surface PCB and separate the screen and bezel. Please note: The adhesive pad protectors on the back of the screen should not be removed. The screen should not be stuck to the Surface PCB.
- Page 13 Channel LED’s On Qu-24 and Qu-32 models, LED lights are mounted on the Fader PCB and a rubber mat is placed between the Fader PCB and metalwork.
- Page 14 Channel LED’s When replacing the Fader PCB, make sure the rubber mat is sat correctly to avoid pinching.
- Page 15 Qu Diagnostics...
- Page 16 Routing Overview – Qu16 Power +7.5V Fader AG8925 AG8700 +7.5V +15V -15V Audio Surface +3V3 AG8838 AG8904 AG8891 Connector Screen Mix Sel Headphone AG8890 AG8892 AG8904...
- Page 17 Routing Overview – Qu16 Control Audio Ethernet USB B Fader DSnake /Network AG8925 AG9146 AG8977 Audio Surface AG8838 AG8904 AG8891 Connector Screen Mix Sel Headphone AG8890 AG8892 AG8904...
- Page 18 Routing Overview – Qu32 Power +12V +12V +12V DC-DC Fader Fader Ext Mains Inlet AG9294 AM9504 AG9474 AG9471 AG9472 +12V +7.5V +12V +15V -15V +3V3 Audio Ext Audio Surface AG9466 AG9465 AG9534 AG9459 Connector Connector Ext Screen Mix Sel Headphone Surface Ext AG8892 AG9483...
- Page 19 Routing Overview – Qu32 Control Audio Ethernet Power Good Fader Ext Network DC-DC Fader Mains Inlet AG9472 AG9334 AG9294 AG9474 AG9471 Audio Ext Audio Surface AG9466 AG9465 AG9534 AG9459 Connector Ext Connector Headphone Screen Surface Ext AG8892 AG9460 AG9483 AG9484 AG9461...
- Page 20 Diagnostics A number of LEDs are placed on both the inside and outside of the console to help monitor activity and power. The blue LED on the rear of the unit should be on solid. If this is off, there will be an issue relating to power. The yellow LNK LEDs by the Network and dSnake ports should flash when a connection is made.
- Page 21 CPU Diagnostics 1 – Test points for +3v3 rail, +8v rail and PWM for TFT screen. 2 – Host Alive, Yellow LED with heartbeat pattern 3 – USB Processor Alive, Yellow LED with heartbeat pattern 4 – FPGA Programmed, Yellow LED with heartbeat pattern 5 –...
- Page 22 Firmware Firmware is available from the Allen & Heath website under the Software tab and is installed via a USB drive on the desk. Go to Setup > Utility > Firmware to install new firmware and view the current firmware version. You will need to format the USB drive under the Status/Format tab before placing the firmware on the drive using a computer.
- Page 23 Hard Reset Press and hold the above keys whilst powering on the unit...
- Page 24 Forced Reinstall of Firmware Please note: A hard rest Please note: If the .QUU should be performed firmware file is loaded into after a forced reinstall of a folder on the USB, the Qu firmware. will not see it. The file must be in the root of the drive.


Need help?
Do you have a question about the Qu Series and is the answer not in the manual?
Questions and answers