Advertisement
Table of Contents
- 1 Table of Contents
- 2 Your Sound Bar
- 3 Preparing the Remote Control
- 4 Recognising the Remote Control Buttons
- 5 Positioning Your Sound Bar
- 6 Fitting the Wall Brackets
- 7 Mounting the Sound Bar
- 8 Connecting Your Sound Bar
- 9 Using Your Sound Bar
- 10 Using the Bluetooth Function
- 11 Troubleshooting
- 12 Warnings
- 13 Battery Disposal Information
- 14 Technical Specification
- Download this manual
Advertisement
Table of Contents

Subscribe to Our Youtube Channel
Related Manuals for Polaroid PLA21SB001A


Summary of Contents for Polaroid PLA21SB001A
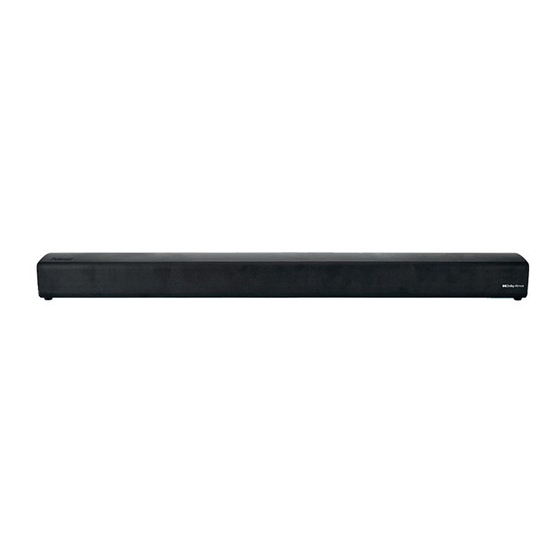
- Page 1 Dolby Atmos soundbar for TV’s, DVD/Blu-ray players, games consoles & MP3 players PLA21SB001A USER MANUAL 0333 6007700 0333 6007700...
- Page 2 Welcome Congratulations on purchasing this Sound Bar. This product will improve and amplify the sound from your TV or MP3 player Please read the warning section on pages 16 & 17 carefully before using your Sound Bar. You should have Sound Bar Power cable Wall brackets &...
-
Page 3: Table Of Contents
Contents Your Sound Bar Preparing the remote control Recognising the remote control buttons Positioning your Sound Bar Fitting the wall brackets Mounting the Sound Bar Connecting your Sound Bar Using your Sound Bar Using the bluetooth function Troubleshooting Warnings Battery disposal information Technical specification... -
Page 4: Your Sound Bar
Your Sound Bar 10. USB socket: Insert a USB Remote control sensor device to play music. It can also Display: Shows the current be used to update the sound status of the sound bar. bar's software functions. 3. Wall bracket screws. 11. -
Page 5: Preparing The Remote Control
Preparing the remote control IMPORTANT: The remote control will work within a 6m range, however this may be impossible if there are obstacles between the unit and the control. If the remote control is used near other devices which generate infrared rays then it may not operate properly and may interfere with other devices. -
Page 6: Recognising The Remote Control Buttons
Recognising the remote control buttons : Switches the Sound Bar ON or into the STANDBY mode. 2. SOURCE buttons: Use to select the input source for the sound bar. 3. ltt : Skip to previous track. uul : Skip to next track. ull : Play / pause / resume playback in Bluetooth mode. -
Page 7: Positioning Your Sound Bar
Positioning your Sound Bar Wall mounted Placed on a stand The correct position of the Sound Bar Placed on a stand: If your TV is placed on a stand, place the Sound Bar directly in front of the TV centred on the middle of the screen. Wall mounted: If your TV is fitted to the wall, Mount the Sound Bar directly below the TV centred on the middle of the screen. -
Page 8: Fitting The Wall Brackets
Fitting the wall brackets WARNING: Before attempting to fit the Sound Bar to the wall, if you are in any way unsure about how or where to fit the Sound Bar you should employ a qualified person to install your Sound Bar. IMPORTANT: The fittings supplied with your Sound Bar may not be suitable for all types of wall. -
Page 9: Mounting The Sound Bar
Mounting the Sound Bar 1. Remove the two wall bracket screws on the back of the Sound Bar using a cross head screwdriver (not supplied) (A). 2. Screw the two wall mounting screws into the two screw holes left by removing the two wall bracket screws (B). -
Page 10: Connecting Your Sound Bar
Connecting your Sound Bar Dolby Atmos ® Dolby Atmos gives you immersive listening experience by developing sound in 3 dimensional space, and richness, clarity, and power of Dolby sound. For more information, please visit: dolby.com/technologies/dolby-atmos. ® To use Dolby Atmos Dolby Atmos ®... - Page 11 HDMI IN HDMI OUT e.g. games consoles, DVD players and blu ray Connecting to the HDMI IN sockets using an HDMI cable If the device you want to connect to is not HDMI ARC compatible, you can connect to the device using the standard HDIM IN ports on the Sound Bar and a HDMI cable.
- Page 12 COAXIAL Connecting to the COAXIAL socket using an audio coaxial cable Slot one of the plugs on the audio coaxial cable (not supplied) into the COAXIAL socket on the back of the Sound Bar. Slot the other end of the audio coaxial cable into the COAXIAL OUT socket on your TV or other device you want to connect to.
- Page 13 Connecting to the AUX socket using an 3.5mm to 3.5mm audio cable Slot one of the plugs on the 3.5mm to 3.5mm audio cable (supplied) into the AUX socket on the back of the Sound Bar. Slot the other end of the 3.5mm to 3.5mm audio cable into the headphone socket on your TV or other device you want to connect to.
- Page 14 Attaching the power cable Slot the end of the power cable into the power socket on the back of the Sound Bar. Plugging the Sound Bar in Slot the plug on the end of the power cable into a wall socket and turn the power on if required. Note: Ensure the power supply voltage corresponds to the voltage stated on the back or underside of the Sound Bar.
-
Page 15: Using Your Sound Bar
Using your Sound Bar When you first connect your Sound If you want to turn the sound off Bar to the mains it will automatically completely press the button on the go into standby mode. remote control. To turn the sound on again, press the button again or the Turning on &... -
Page 16: Using The Bluetooth Function
Using the equalizer (EQ) console, DVD player e.t.c) is set to PCM or Dolby Digital (refer to the effect user manual for the input device for Press the VOICE / SPORT / MOVIE / its audio setting details) with HDMI 1 MUSIC buttons on the remote control / HDMI 2 / HDMI eARC / OPTICAL / to select the desired preset equaliser... - Page 17 Bar is not paired with a devise. Remote Control Profile (AVRCP), you Check the found list on your can use the players remote control to devise for 'PLA21SB001A' and play music stored on the device. connect to it. Pair the device with the Sound If the bluetooth connection is Bar.
-
Page 18: Troubleshooting
Troubleshooting What to do Problems • Ensure that the power cable of the apparatus is properly connected. • Ensure that there is power at the power outlet. No power • Press button on the remote control or Sound Bar to turn the unit • Before you press any playback control button, first select the correct source. -
Page 19: Warnings
Warnings This product was designed and manufactured to meet strict quality and safety standards. There are, however, some operation precautions that you should be aware of: • Read these instructions - openings. Install in accordance All the safety and operating with the manufacturer’s instructions should be read instructions. - Page 20 liquid has been spilled or objects • The ventilation should not have fallen into the unit, the be impeded by covering the unit has been exposed to rain ventilation openings with items or moisture, does not operate such as newspapers, table- normally, or has been dropped.
- Page 21 • Not placing the TV on tall DO NOT INGEST BATTERY, CHEMICAL BURN HAZARD. furniture (for example, cupboards or bookcases) without anchoring The remote control supplied with both the furniture and TV to a this product contains a coin/button suitable support. battery.
-
Page 22: Battery Disposal Information
Battery disposal information The batteries used with this product contain chemicals that are harmful to the environment. To preserve our environment, dispose of used batteries according to your local laws and regulations. Do not dispose of batteries with normal household waste. For more information, please contact the local authority or the retailer where you purchased the product. - Page 23 Free 1 year guarantee All our electrical items are covered by a full 1 year guarantee from the day you buy it. In the unlikely event that your product is faulty or you are simply struggling to set it up, don’t worry, here’s what you do: First call our Customer Helpline as they may be able to help you with the problem.
- Page 24 HDMI Licensing Administrator, Inc. Polaroid and Polaroid & Pixel [and if applicable any other PLR owned trademarks that are referred to or displayed in the document] are trademarks of PLR IP Holdings, LLC, used under license. PLR IP Holdings, LLC does not manufacture this product or provide any Manufacturer’s Warranty or support.
Need help?
Do you have a question about the PLA21SB001A and is the answer not in the manual?
Questions and answers