Yale nexTouch Installation And Programming Instructions
Hide thumbs
Also See for nexTouch:
- Installation and programming instructions (31 pages) ,
- Installation and programming instructions (27 pages) ,
- Installation and programming instructions (25 pages)
Advertisement
WARNING
This product can expose
you to lead which is
known to the state of
California to cause cancer
and birth defects or other
reproductiveharm.For
more information go to
www.P65warnings.ca.gov.
08/2018
Retrofitting or modifying this
product may impact fire rating,
safety features and warranty.
Consult with code specifications to
ensure compliance with all codes
and ratings.
Part of ASSA ABLOY
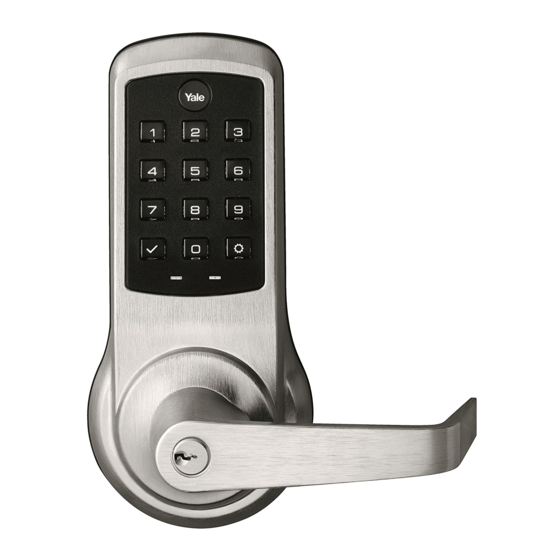
nexTouch
Keypad Access Sectional Mortise Lock
™
Touchscreen and Push Button
Installation and Programming Instructions
Tools Needed
Optional
1/8"
3/32"
#3 & #2
3/4"
1/2"
80-9086-0030-010 11-21
Advertisement
Table of Contents

Related Manuals for Yale nexTouch


Summary of Contents for Yale nexTouch
- Page 1 Keypad Access Sectional Mortise Lock ™ Touchscreen and Push Button Installation and Programming Instructions WARNING Tools Needed This product can expose you to lead which is known to the state of Optional California to cause cancer and birth defects or other 1/8"...
- Page 2 Determine Handing The hand of a door is determined from the secure side of the door. The term "secure" means the side from which you unlock and enter. Deadbolt Latchbolt - Beveled edge must face strike. (See step 1 to reverse latchbolt.) RED Locking Slide should face the secure...
- Page 3 Hand Latchbolt & Hubs (If Necessary) Insert flat head screwdriver to pry latch head up. Rotate latch head to correct orientation. Slide Locking PUSH away from square hole to create gap. Check for free movement of locking slide. Continue to rotate locking slide from other side PUSH IN...
-
Page 4: Prepare Door
Prepare Door Outside of Door Mortise Key Cylinder Hole: Drill only 1/2 way into door ONLY if lock is equipped with cylinder. Drill thru holes 1/2 way thru door then complete from other side to prevent splitting. Inside of Door Mortise Lock Cable Hole: Drill only 1/2 way into door (7/8"... - Page 5 Prepare Frame & Install Strike #12-24x1" Flat Head Combo Screw Frame This prep is standard with or without deadbolt. Optional Strike Box Use #3 Philips head screwdriver 80-9086-0030-010 11-21 Part of ASSA ABLOY...
- Page 6 Install Mortise Lock #12-24x1" Flat Head Combo Screw Inside of Door Mortise Lock Cable Hole Do not tighten screws until Step 10. Use #3 Philips head screwdriver Make sure mortise pocket is free from debris. 80-9086-0030-010 11-21 Part of ASSA ABLOY...
- Page 7 Philips head screwdriver Outside of Door HAND TIGHTEN. First, tighten cylinder Do not use powered until snug against screw driver. door with the Yale logo horizontal. Then, use #2 Philips head screwdriver to tighten cylinder set screw. Test Operation 80-9086-0030-010 11-21...
- Page 8 Install Rose Trim - all types Adjusting for 1-3/4" to 2-1/4" Door (if necessary) Use screw pack for thicker door at this step. Use appropriate fastener lengths to ensure proper installation. Outside of Door #8-32x1" Pan Head Screw with Thread Locker (For 1-3/4"...
- Page 9 Prepare Levers Loosen Inside Spindle 1/2 to 1 turn until Correct Orientation. Correct Inside Lever Orientation Inside Spindle Outside Lever Install Levers Pushing levers together, use hex wrench Outside to tighten set screw securely of Door against spindle. 80-9086-0030-010 11-21 Part of ASSA ABLOY...
- Page 10 Install Thumbturn (if applicable) For Deadbolt Option ONLY #6x3/8" Oval Head Screw Inside of Door Use #2 Philips head screwdriver Test Operation Deadbolt retracts and extends by thumbturn and key. Once extended, it will also retract by lever. Latchbolt retracts and extends by levers and key.
- Page 11 Install Armor Front 8x32-1/4" Flat Head Screw Yale logo will be Outside at top and visible of Door when installed. Use #2 Philips head screwdriver Tighten lockbody screws before installation of front. Do not bow front of lock case by overtightening.
- Page 12 Install Keypad Inside of Door 80-9086-0030-010 11-21 Part of ASSA ABLOY...
- Page 13 Install Inside Mounting Plate #10-32x3/4" Pan Head Screw with Washer (For 1-3/4" Door) 3/32" Hex Wrench Choose fasteners appropriate for your door thickness. Inside of Door Use #2 Philips head screwdriver 80-9086-0030-010 11-21 Part of ASSA ABLOY...
- Page 14 Attach Cables to Inside Lock Inside of Door Cables must be clear of all fastener holes. 80-9086-0030-010 11-21 Part of ASSA ABLOY...
- Page 15 Install Inside Lock #8-32x3/8" Pan Head Screw (Black) Inside of Door Use #2 Philips head screwdriver 80-9086-0030-010 11-21 Part of ASSA ABLOY...
- Page 16 “Welcome to Yale.” Optional Network or Yale Accentra Key module must be installed BEFORE batteries. See Installation Options. Congratulations, you’ve installed the Yale nexTouch™ Keypad Access Sectional Mortise Lock! Continue to customize your product. 80-9086-0030-010 11-21 Part of ASSA ABLOY...
-
Page 17: Installation Options
Installation Options optional Network or Yale Accentra Key Module Module must be installed BEFORE batteries. Remove batteries if adding module to existing unit. The Yale Accentra Key module enables access with physical (cards and fobs) and mobile credentials ONLY. Creation and use of User PIN codes are disabled. -
Page 18: Programming Instructions
Programming Instructions Lock Activation (Push Button) Lock Activation (Touchscreen) Press any key Press Yale logo Touch keypad with whole hand Press check key Low Battery Indicator (Touchscreen) Unlock Indicator (Touchscreen) 9Volt Battery Lockout Mode Indicator Override Terminal (Touchscreen) Keypad Indicator... - Page 19 Creating Master PIN Code Creating a Master PIN Code must be performed upon installation or after resetting the lock to factory default. Programming and use of lock is not possible until this step has been successfully completed. "Register Master Code. Press the gear key to continue."...
- Page 20 Master PIN code must be created first. *Max User Codes = 100 without Network Module / 500 with Network Module The Yale Accentra Key module enables access with physical (cards and fobs) and mobile credentials ONLY. Creation and use of User PIN codes are disabled.
- Page 21 Creating User PIN Codes con't Enter 4-8 digit PIN code followed by "Registered. Press the check key to complete. Press the gear key to continue." Adding more User Codes: To end programming: Press Press Enter 4-8 digit PIN code "Completed." Press "Registered.
- Page 22 Locking & Unlocking Door with Registered Master or User PIN Code The Yale Accentra Key module enables access with physical (cards and fobs) and mobile credentials ONLY. Creation and use of User PIN codes are disabled. Master PIN code is only used for programming and configuring lock with Yale Accentra Multi-Family configuration app and will not unlock door.
-
Page 23: Resetting Lock To Factory Default
15 seconds. Speaker will announce button on back of lock. Cables may stay "Welcome to Yale." connected. (See illustration at above for location of the reset button.) 9. Reassemble inside lock. - Page 24 PIN code for the duration of the shut down time. The touchscreen keypad will flash, and a red lock symbol will be at the bottom of the keypad. The push button keypad will flash and the Yale icon will flash blue for the shut down period. The...
-
Page 25: Feature Programming Through Menu Mode Using Master Pin Code
High Silent Default settings Language Setting English in bold. Spanish **This function appears only French with Yale Z-Wave network module installed. Enable All Code Lockout Disable **Network Module Setting Join the network Exit the network **Set-up Digital Keys 80-9086-0030-010 11-21... -
Page 26: Programming Troubleshooting
Programming Troubleshooting Symptom Suggested Action Touchscreen models become active by pressing Yale logo or key or by touching keypad with whole hand. Push Button models become active when any key is pressed. Lock does not respond. • Check batteries are installed and oriented correctly (polarity). -
Page 27: Factory Settings
Factory Settings Settings Factory Setting Creation required* Master PIN Code All Code Lockout Disabled Automatic Relock Disabled Escape Return Mode Disabled Inside Indicator Light Enabled Language Setting English** *The Master PIN code must be created prior to any other programming of the lock. One Touch Locking Enabled Privacy Mode... - Page 28 24/7 Support Email: Support@YaleLock.com Website: Yale Commercial is a business associated with ASSA ABLOY Access and Egress US.YaleHome.com Hardware Group, Inc., an ASSA ABLOY Group company. Copyright © 2018 - 2021, Email for orders: ASSA ABLOY Access and Egress Hardware Group, Inc.
Need help?
Do you have a question about the nexTouch and is the answer not in the manual?
Questions and answers