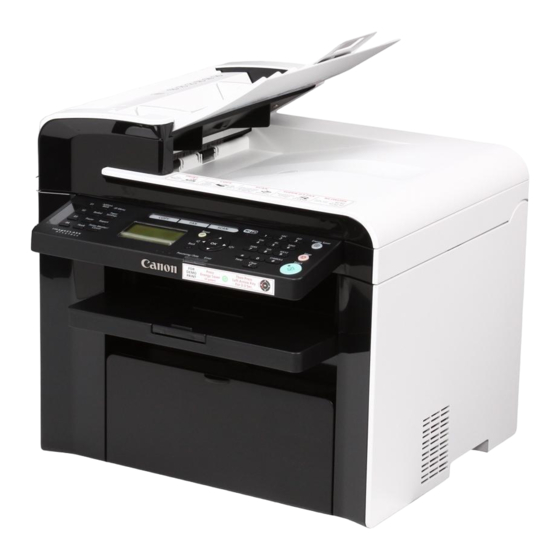
Canon ImageCLASS MF4570dw Network Setup Manual
Installing your wifi capable imageclass product to your network for the first time
Hide thumbs
Also See for ImageCLASS MF4570dw:
- Basic operation manual (164 pages) ,
- Starter manual (41 pages) ,
- Settings manual (21 pages)

Related Manuals for Canon ImageCLASS MF4570dw


Summary of Contents for Canon ImageCLASS MF4570dw
- Page 1 Next >> << Previous Installing Your WiFi capable imageCLASS Product to Your Network for the First Time imageCLASS MF4570dw Windows OS...
-
Page 2: Table Of Contents
Switching the connection method to wireless LAN Selecting a method for setting the wireless LAN Configuring using WPS Configuring Manually Required Information Using the Wireless Setup Assistant Checking the IP Address Installing MF Drivers and MF Toolbox imageCLASS MF4570dw Windows OS << Previous Next >>... -
Page 3: Before Adding The Machine To A Wireless Lan
Before adding the machine to a wireless LAN Check to make sure that the setup of the computer and wireless LAN or access point are complete. If they are not set up, you will not be able to use the machine on the wireless LAN network even if you perform the following steps. -
Page 4: Connection Procedure
Connection procedure << Previous Next >> Once you have finished checking, connect the machine to the wireless LAN The diagram below shows the primary steps in connecting your imageCLASS device to the wireless LAN. -
Page 5: Switching The Connection Method To Wireless Lan
Switching the connection Method to Wireless LAN 1. Press [ ] (Menu). 2. Press [ ] or [ ] to select <Network Settings>, and then press [OK]. The next screen is displayed for approximately 5 seconds. It is not necessary to turn OFF/ON the main power of the machine here. It will be done on Step 5. <<... -
Page 6: Wireless Lan
Switching the connection Method to Wireless LAN 3. Press [ ] or [ ] to select <Select Wired/Wireless LAN> , and then press [OK]. 4. Select <Wireless LAN> using [ ] or [ ], and then press [OK]. << Previous Next >>... - Page 7 Switching the connection Method to Wireless LAN 5. Turn the machine OFF/ON when the following screen disappears. It is necessary to turn the machine OFF/ON to activate the settings. Turn OFF the machine and wait for at least 10 seconds before turning it back ON. <<...
-
Page 8: Selecting A Method For Setting The Wireless Lan
Selecting a method for setting the wireless Two methods are provided for connecting to the wireless LAN or access point, connecting using WPS (Wi-Fi Protected Setup) function or connecting manually. Select the appropriate setting method after checking the following function on the wireless LAN or access point you are using. - Page 9 Configuring with WPS Features Is there a WPS button? Connect using “WPS Push Button Mode.” Click Here Set the machine’s PIN code using “WPS PIN Code Mode” that is entered manually from the computer to the wireless LAN router or access point.
- Page 10 Configuring with WPS Features (Push Button Mode) 1. Press [ ] (Menu). 2. Press [ ] or [ ] to select <Network Settings> , and then press [OK]. The next screen is displayed for approximately 5 seconds. You do not need to turn the machine OFF/ON in this step. <<...
- Page 11 Configuring with WPS Features (Push Button Mode) 3. Press [ ] or [ ] to select <Wireless LAN Settings>, and then press [OK]. 4. Press [OK]. 5. Press [ ] or [ ]to select <WPS Push Button Mode>, and press [OK] <<...
- Page 12 Configuring with WPS Features (Push Button Mode) 6. Press [ ] to select <Yes>, and press [OK]. 7. Within 2 minutes, press and hold the WPS button on the wireless LAN router or access point. The amount of time you must hold down the WPS button will depend on the wireless LAN router or access point you are using.
- Page 13 Configuring with WPS Features (Push Button Mode) 8. Make sure the WiFi indicator blinks. When the wireless LAN router or access point is detected, the Wi-Fi indicator blinks. The screen below is displayed for approximately 2 seconds, and then the Wi-Fi indicator lights up. *If an error message appears, press [OK] to close the screen and follow the procedure again from Step 5 <<...
- Page 14 Configuring with WPS Features (Push Button Mode) 9. Wait until the machine sets the IP address automatically (approx. 2 min). The machine sets the IP address automatically and connects to the network. When the next screen is displayed, click [OK]. If you want to set the IP address manually, see the following.
- Page 15 Configuring with WPS Features (Pin Code Mode) << Previous Next >> Enter the PIN code generated by the machine to wireless LAN routers and/or access points for connection. 1. Press [ ] (Menu). 2. Press [ ] or [ ] to select <Network Settings>, and then press [OK]. 3.
- Page 16 Configuring with WPS Features (Pin Code Mode) << Previous Next >> 4. Press [OK]. 5. Press [ ] or [ ] to select <WPS PIN Code Mode>, and then press [OK]. 6. Press [ ] to select <Yes>, and then press [OK].
- Page 17 Configuring with WPS Features (Pin Code Mode) << Previous Next >> 7. Within 10 Minutes, use the computer to enter the PIN code displayed on the screen into the wireless LAN router or access point. *For PIN code entry methods, see the instruction manual provided with the wireless LAN router or access point you are using.
- Page 18 Configuring with WPS Features (Pin Code Mode) << Previous Next >> 8. Make sure the WiFi indicator blinks. When the wireless LAN router or access point is detected, the Wi-Fi indicator blinks. The next screen is displayed for approximately 2 seconds, and then the Wi-Fi indicator lights. *If an error message appears, press [OK] to close the screen and follow the procedure again from Step 5...
- Page 19 Configuring with WPS Features (Pin Code Mode) << Previous Next >> 9. Wait until the machine sets the IP address automatically (approx. 2 min). The machine sets the IP address automatically and connects to the network. If you want to set the IP address manually, see the following. •e-Manual “Setting the IP Address (IPv4) •e-Manual “Setting the IP Address (IPv6) Automatic obtaining of the IP address (Auto IP)
-
Page 20: Configuring Manually
Configuring Manually << Previous Next >> If your wireless LAN routers and/or access points do not support WPS, enter the wireless LAN router and/or access point information to the machine for connection. Select Access Point From the list of access points searched by the machine, select a wireless LAN router or an access point to be connected and enter a network key for connection. - Page 21 Configuring Manually << Previous Next >> Preparing The following information is required. Check your wireless LAN routers and/or access points, and make a note of the information labeled on the bottom. * See the manual provided with your wireless LAN routers and/or access points, or contact the manufacturer for where the information is displayed or how to check it.
-
Page 22: Required Information
Configuring Manually (Required Information) Access Point Name/Network Name * It may be labeled as “SSID.” It is the distinguished name for specifying a particular access point. It is used for selecting an access point. Network Key *It is also called encryption key, WEP key, WPA/WPA2 passphrase, PSK or pre-shared key. It is a password that must be set in order to prevent communications from being intercepted. -
Page 23: Using The Wireless Setup Assistant
If the SSID and network key are not indicated on the body of the wireless LAN router or access point or if you are not sure because they are changed, you can check using Canon MF/LBP Wireless Setup Assistant. * Canon MF/LBP Wireless Setup Assistant is included in the supplied User Software CD-ROM. - Page 24 Configuring Manually (Using the Wireless Setup << Previous Next >> Assistant) 3. Click [Additional Software Programs].
- Page 25 Configuring Manually (Using the Wireless Setup << Previous Next >> Assistant) 4. Click [Start] for [Canon MF/LBP Wireless Setup Assistant].
- Page 26 Configuring Manually (Using the Wireless Setup Assistant) 5. Read the License Agreement. If you agree, click [Yes]. 6. The information for the wireless LAN router or access point is displayed. Write down the information outlined in orange. << Previous Next >>...
- Page 27 Configuring Manually (Using the Wireless Setup Assistant) If multiple access points are displayed Write down all of the displayed SSIDs When wireless LAN routers or access points are not displayed Click [Refresh] When information is not displayed even after clicking [Refresh], check that the settings for the computer and wireless LAN or access point are complete.
- Page 28 Configuring Manually (Selecting Access Points) << Previous Next >> From the list of access points searched by the machine, select a wireless LAN router or an access point to be connected and enter a network key for connection. Selecting Access Point For selecting access points, WEP 802.11 authentication system is set to <Open System>, while WPA/WPA2 is set to Auto>...
- Page 29 Configuring Manually (Selecting Access Points) << Previous Next >> 3. Press [ ] or [ ] to select <Wireless LAN Settings>, and then press [OK]. 4. Press [OK]. 5. Press [ ] or [ ] to select <SSID Settings>, and then press [OK].
- Page 30 Configuring Manually (Selecting Access Points) << Previous Next >> 6. Press [ ] or [ ] to select <Select Access Point>, and then press [OK].
- Page 31 Configuring Manually (Selecting Access Points) << Previous Next >> 7. Press [ ] or [ ] to select the matched SSID that you have written down earlier using, and then press [OK]. If multiple matched SSID are displayed, select the one that is displayed at the top (a stronger signal).
- Page 32 Configuring Manually (Selecting Access Points) << Previous Next >> 8. Press [ ] or [ ] to select entry format that matches the number of network key characters (digits) that you have written down earlier, and then press [OK]. Either of the following screens is displayed.
- Page 33 Configuring Manually (Selecting Access Points) << Previous Next >> 9. Enter the network key that you have written down. ASCII text 1. Press [ ] (Tone), and the select <Entry Mode>. 2. Enter the network key. Enter it using the numeric keys. 3.
- Page 34 Configuring Manually (Selecting Access Points) << Previous Next >> 10. Press [ ] to select <Yes>, and then press [OK].
- Page 35 Configuring Manually (Selecting Access Points) << Previous Next >> The Wi-Fi indicator blinks. The screen below is displayed for approximately 2 seconds, and then the Wi-Fi indicator lights up. * When a message appears, press [OK] to close the screen and start the procedure from Step 4.
-
Page 36: Checking The Ip Address
Configuring Manually (Selecting Access Points) 11. Wait until the machine sets the IP address automatically (approx. 2 min). The machine sets the IP address automatically and connects to the network. If you want to set the IP address manually, see the following. •e-Manual “Setting the IP Address (IPv4) •e-Manual “Setting the IP Address (IPv6) Automatic obtaining of the IP address (Auto IP) - Page 37 Configuring Manually (Manually Entering SSID) << Previous Next >> 1. Press [ ] (Menu). 2. Press [ ] or [ ] to select <Network Settings>, and then press [OK]. 3. Press [ ] or [ ] to select <Wireless LAN Settings>, and then press [OK]. 4.
- Page 38 Configuring Manually (Manually Entering SSID) << Previous Next >> 5. Press [ ] or [ ]to select <SSID Settings>, and then press [OK]. 6. Press [ ] or [ ] to select <Manual Settings>, and then press [OK]. 7. Enter the SSID that you have written down. After entering it using the numeric keys, select <Apply>...
- Page 39 Configuring Manually (Manually Entering SSID) 8. Press [ ] or [ ] to select encryption types that you have written down, and then press [OK]. In case of <None>, go to step 12. 9. Press [ ] or [ ] to select the authentication method or encryption type that you have written down, and then press [OK].
- Page 40 Configuring Manually (Manually Entering SSID) 2. Press [ ] or [ ] to Select <Edit WEP Key>, and then press [OK]. 3. Press [ ] or [ ]to select the WEP key using, and then press [OK]. * Select the key number to be used for encryption that you wrote down earlier. When the type of encryption is WPA/WPA2-PSK Auto (AES-CCMP or TKIP) •...
- Page 41 Configuring Manually (Manually Entering SSID) 10. Press [ ] or [ ] to select the entry format that matches the number of network key characters (digits) that you have written down, and then press [OK]. Either of the following screens is displayed. <<...
- Page 42 Configuring Manually (Manually Entering SSID) 11. Enter the network key that you have written down. ASCII text 1. Press [ ](Tone), and then select <Entry Mode>. 2. Enter the network key, using the numeric keys. 3. After entering, press [ When WEP is the encryption type •...
- Page 43 Configuring Manually (Manually Entering SSID) Hexadecimal 1. Enter the network key. *Press [ ] or [ ] to select the character, and then press [OK] to enter. 2. After entering, press [ When WEP is the encryption type • Select WEP keys (1 to 4) for encryption 1.
- Page 44 Configuring Manually (Manually Entering SSID) << Previous Next >> 12. Press [ ] to select <Yes>, and then press [OK]. The Wi-Fi indicator blinks.
- Page 45 Configuring Manually (Selecting Access Points) << Previous Next >> The screen below is displayed for approximately 2 seconds, and then the Wi-Fi indicator lights up. * When one of the following messages appears, press [OK] to close the screen and check to make sure that the type of encryption, the authentication method or encryption method, the network key are correctly entered.
- Page 46 Configuring Manually (Manually Entering SSID) 13. Wait until the machine sets the IP address automatically (approx. 2 min). The machine sets the IP address automatically and connects to the network. If you want to set the IP address manually, see the following. •e-Manual “Setting the IP Address (IPv4) •e-Manual “Setting the IP Address (IPv6) Automatic obtaining of the IP address (Auto IP)
- Page 47 Checking IP Address Settings Follow the steps below to confirm the IP address set on the machine. Write down the IP address as you may need it when installing the software. Checking IPv4 address settings 1. Press [ ] (Status Monitor/Cancel). 2.
- Page 48 Checking IP Address Settings << Previous Next >> 4. Press [ ] or [ ] to select <IP Address> , and then press [OK]. 5. Write down the IP address. 6. Press [ ] (Status Monitor/Cancel) to close the screen. *If you are using IPv6, please see the e-Manual for instructions on checking the IP address.
- Page 49 Installing the MF Drivers and MF Toolbox << Previous Next >> *When you are in an IPv6 environment, you may not be able to use the installation procedure below to install the MF drivers. See “Installing the MF Drivers on the WSD Network” to install the MF Drivers. *Note that you cannot use the scan functions in an IPv6 environment.
- Page 50 Installing the MF Drivers and MF Toolbox << Previous Next >> 2. Click [Easy Installation].
- Page 51 Installing the MF Drivers and MF Toolbox << Previous Next >> 3. When the following screen appears, select [Next] for [Connect Printer to a computer via Network.
- Page 52 Installing the MF Drivers and MF Toolbox << Previous Next >> 4. Click [Install].
- Page 53 Installing the MF Drivers and MF Toolbox << Previous Next >> 5. Read the License Agreement and click [Yes].
- Page 54 Installing the MF Drivers and MF Toolbox << Previous Next >> 6. Click [Next]. The following screen appears. Click [Yes].
- Page 55 Installing the MF Drivers and MF Toolbox 7. Select the device to be installed. Select the device. Click [Next]. When no devices are displayed in [Device List] Try the following procedure. 1. Check the following. The computer and machine are connected over the network. •...
- Page 56 Installing the MF Drivers and MF Toolbox If the problem persists, try the following procedure. 1. Click [Search by IP Address]. 2. Enter the IP address of the machine. *If the IP address of the machine is set between "169.254.1.0 and 169.254.254.255", it means that the IP address is automatically assigned to the machine in the auto configuration procedure.
- Page 57 Installing the MF Drivers and MF Toolbox << Previous Next >> 8. Click [Start] to begin installation. 9. Click [Exit].
- Page 58 Installing the MF Drivers and MF Toolbox << Previous Next >> 10. Click [Start]. 11. Click [Exit].
- Page 59 Installing the MF Drivers and MF Toolbox << Previous Next >> 12. Confirm that the applications are selected [ ] under [Install] and click [Next].
- Page 60 Installing the MF Drivers and MF Toolbox 13. Restart your computer. Select the [Restart Computer Now (Recommended)] check box. Click [Restart]. * The CD-ROM can be ejected once this screen appears. << Previous Next >>...
- Page 61 Congratulations! << Previous Next >> You have successfully added your Canon imageCLASS device to your wireless network.