Advertisement
Available languages
Available languages
Quick Links
Advertisement

Related Manuals for nardi FEX4752N4

Summary of Contents for nardi FEX4752N4
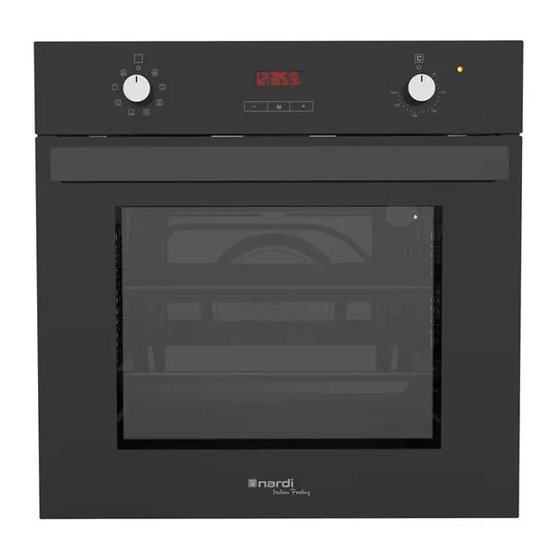
- Page 1 FEX4752N4 / W4 - FEX97S3XN4 MOD:...
-
Page 3: Table Of Contents
Pulizia e Manutenzione del Dispositivo ............: 9-10 Efficienza Energetica del Forno ..............: 11 Specifiche Tecniche del Forno, ……………………………………………………………..……: 11 Uso del Forno, MODELLO FEX4752N4 / W4……………………......: 12-13-14-15 Uso del Forno, MODELLOL FEX9S3XNN4 …………………………......: 16-17 Istruzioni per Cucinare ………………..............: 18... - Page 4 INFORMAZIONI IMPORTANTI RELATIVE ALLA SICUREZZA Gentile Cliente, Grazie per aver scelto uno dei nostri prodotti. Questa apparecchiatura è facile da usare, ma è necessario leggere attentamente questo manuale prima di installarla e utilizzarla. Il libretto contiene istruzioni che ti aiuteranno a installare, utilizzare e manutenere il prodotto nel modo migliore.
- Page 5 INFORMAZIONI IMPORTANTI RELATIVE ALLA SICUREZZA È molto importante che questo libretto di istruzioni sia conservato con l'apparecchio se cambia il proprietario. Questo apparecchio è stato progettato per l'uso non professionale da parte di privati nelle loro case e il suo scopo è quello di cucinare e riscaldare il cibo.
- Page 6 INFORMAZIONI IMPORTANTI RELATIVE ALLA SICUREZZA IMPORTANTE: Il forno produce aria calda o vapore durante i processi di cottura. Fare molta attenzione quando si apre la porta. Il cavo di alimentazione elettrica dell'apparecchio non deve essere sostituito dall'utente. Deve essere sostituito solo da personale qualificato.
-
Page 7: Istruzioni Per L'installazione
ISTRUZIONI PER L’INSTALLAZIONE L'installazione deve essere eseguita da un tecnico autorizzato secondo le linee guida. La nostra azienda non può essere ritenuta responsabile per i danni a persone, animali o alle cose, a causa di un'installazione scorretta. AVVERTENZE PER L’INSTALLAZIONE Le dimensioni e i materiali del mobile in cui verrà... - Page 8 ISTRUZIONI PER L'INSTALLAZIONE FEX4752N4 /W4 FEX97S3XN4...
- Page 9 ISTRUZIONI PER L'INSTALLAZIONE Aprire la porta e fissare il forno con quattro viti per legno che devono essere avvitate attraverso i fori nei montanti laterali del forno. CONNESSIONE ELETTRICA * Il dispositivo deve essere collegato alla rete elettrica principale solo da tecnici autorizzati ed in conformità...
- Page 10 ISTRUZIONI PER L'INSTALLAZIONE * Non è consigliabile utilizzare adattatori, prese multiple o prolunghe. Se assolutamente necessario, è possibile utilizzare adattatori o prolunghe conformi alle norme di sicurezza. Tuttavia, non superare mai la capacità di corrente massima e la potenza massima dichiarata per l'adattatore.
-
Page 11: Pulizia E Manutenzione Del Dispositivo
PULIZIA E MANUTENZIONE DEL DISPOSITIVO Importante: prima di eseguire la manutenzione o la pulizia del forno, scollegarlo e attendere che si raffreddi. Pulizia generale Per mantenere la parte smaltata lucida il più a lungo possibile, il forno deve essere pulito ogni volta dopo averlo usato. - Page 12 PULIZIA E MANUTENZIONE DEL DISPOSITIVO RIMOZIONE PORTA DEL FORNO È possibile rimuovere e pulire facilmente la PORTA del forno. È necessario seguire le procedure seguenti per rimuovere la PORTA * Aprire completamente la PORTA. * Sollevare i 2 perni mostrati nell'immagine. * Tenere la PORTA e richiuderla fino al primo punto di arresto.
-
Page 13: Efficienza Energetica Del Forno
- I forni devono essere installati in un luogo lontano da ambienti infiammabili. - I forni continueranno a rimanere alla temperatura raggiunta usando meno energia se la porta viene tenuta chiusa il più possibile SPECIFICHE TECNICHE DEL FORNO MODELLO : FEX4752N4 / W4 FEX97S3XN4 Top Heater Resistenza superiore 800 W... - Page 14 USO DEL FORNO FEX4752N4 / W4 MODELLO : 1 : MANOPOLA COMMUTATORE= consente di selezionare le funzioni del forno 2 : TIMER DIGITALE = È necessario eseguire la configurazione dell’ora corrente prima di utilizzare il forno. Altrimenti il forno non funzionerà.
- Page 15 USO DEL FORNO ISTRUZIONI PER IL TIMER DIGITALE M = pulsante di selezione della funzione; (-) = pulsante meno; (+) = pulsante più (-) (+) insieme = manuale icona contaminuti icona di cottura cottura automatica blocco di sicurezza IMPOSTAZIONE DELL'ORA DEL GIORNO (PER 24 ORE) Dopo aver collegato o ricollegato il prodotto a una fonte di alimentazione il display lampeggia con "0.00"...
- Page 16 USO DEL FORNO MODIFICARE I SEGNALI ACUSTICI DEL TIMER Il tono dei segnali acustici del timer può essere modificato come segue: Premere contemporaneamente i pulsanti (-) e (+), Premere il pulsante M per vedere sul display il tono attuale "tono 1". Premere il pulsante (-) per selezionare il tono che si desidera da 1 a 3.
- Page 17 USO DEL FORNO BLOCCO DI SICUREZZA Questo timer digitale ha una funzione che blocca il forno o il set di programmazioni. Il blocco non funziona quando il timer è attivo. Attivazione: toccare il pulsante (+) per circa 5 secondi, quindi verrà visualizzato simbolo.
-
Page 18: Uso Del Forno, Modellol Fex9S3Xnn4
USO DEL FORNO FEX97S3XN4 MODELLO : 1 : MANOPOLA COMMUTATORE= consente di selezionare le funzioni del forno 2 : TIMER MECCANICO= Leggere le istruzioni qui sotto 3 : MANOPOLA TERMOSTATO = Consente di scegliere la temperatura di cottura. Selezionare la posizione “max”... - Page 19 USO DEL FORNO UTILIZZO DEL TIMER MECCANICO È possibile impostare il tempo fino a 90 minuti max. Dopo aver impostato il commutatore ed il termostato nelle posizione desiderate e posizionato il cibo all'interno del forno , ruotare la manopola in senso orario per caricare l'orologio e quindi riportarla in senso antiorario fino al tempo di cottura desiderato.
-
Page 20: Istruzioni Per Cucinare
ISTRUZIONI PER LA COTTURA Per una cottura perfetta, il forno deve essere preriscaldato alla temperatura di cottura preimpostata. Solo la carne molto grassa può essere cucinata con il forno partendo dal freddo. Non utilizzare mai pentole poco profonde o il vassoio raccogligocce come padelle per arrosti, per sporcare il meno possibile le pareti del forno ed evitare schizzi di grasso e fumi. - Page 21 Instruction for Installation ..............…: 23,24,25,26 Device Cleaning and Maintenance, .............: 27,28 Oven Energy Efficiency ................: 29 Oven Technical specification ………………………………………………………………..……: 29 Oven Use, MODEL FEX4752N4 / W4……………………........: 30,31,32,33 Oven Use, MODEL FEX9S3XNN4 …………………………........: 34,35 Instruction for cooking ………………..............: 36...
- Page 22 Dear Customer, Thank you for having chosen one of our products. This appliance is easy to use, but you must read this booklet carefully before installing and using it. The booklet contains instructions that will help you to install, use and service the product in the best way. WARNING: This appliance and its accessible parts become very hot during use.
- Page 23 It is very important for this instruction booklet to be kept with the appliance if it changes hands. This appliance has been designed for non-professional use by private individuals in their homes and its purpose is to cook and heat food. Do not use it for other purposes.
- Page 24 IMPORTANT: The oven produces hot air or steam during the cooking processes. Take great care when you open the door. The electric power cable of the appliance must not be replaced by the user. It must only be replaced by a qualified electrician. Never line the oven with aluminium foil.
- Page 25 Installation must be carried out by an authorized technician according to the guidelines. Our company cannot be held responsible for the damages to people, animals or properties due to improper installation. INSTALLATION WARNINGS Dimensions and materials of the cabin or cupboard in which the built-in oven will be installed in have to be correct and it has to be resistant to temperature increases.
- Page 26 FEX4752N4 /W4 FEX97S3XN4...
- Page 27 Open the door and fix the oven with four wood screws which must be screwed through the holes in the lateral jambs of the oven ELECTRICAL CONNECTION *The device must be connected to the main electricity grid only by authorized electricity technicians in accordance with the laws and regulations in force.
- Page 28 if the device is to be connected directly to the electric wiring. Ground wire must not be cut be double pole switch. *It is not advised to use adapters, multi plugs or extension cords. If absolutely necessary, adapters or extension cords in line with safety laws can be used. However, never go beyond the maximum current capacity and maximum power stated for the adapter.
- Page 29 Important: before carrying out maintenance or cleaning the oven, unplug it and wait for it to cool down. General cleaning To keep the enamelled part shiny for as long as possible, the oven must be cleaned each time after using it. Leave the oven to cool down and you can easily remove the deposits of fat with a sponge or damp cloth and warm soapy water and, if necessary with a product on the market.
- Page 30 REMOVING OVEN DOOR You can remove and clean the oven DOOR easily. You must follow the procedures below to remove the DOOR *Open the DOOR completely. *Push the 2 hinges shown in the picture backwards. *Hold the DOOR and close up to the first stopping place. *Pull the raised DOOR away from its mounted location.
- Page 31 - Ovens must be installed on a location far from inflammable environments. - Ovens will continue cooking in current temperature by using less energy if the lid is closed a few minutes before cooking. FEX4752N4 / W4 FEX97S3XN4 MODEL :...
- Page 32 FEX4752N4 / W4 MODEL : 1 : FUNCTION SELECTION BUTTON = Sets the oven working positions 2 : DIGITAL TIMER = You should do the clock setup before using the oven. Otherwise the oven won't work. Read the instructions below 3 : TEMPERATURE ADJUSTMENT BUTTON = Used for setting the oven temperature between 50-250 °C when working.
- Page 33 INSTRUCTIONS FOR DIGITAL TIMER M = function selection button ; ( - ) = minus button ; ( + ) = plus button ( - ) ( + ) together = manual SETTING THE TIME OF DAY (24 H CLOCK) After plugging in or reconnecting to a power source after current decay, “0.00”, and “AUTO”...
- Page 34 CHANGE THE TIMER BEEPS The tone of the timer beeps may be changed as follows: Press buttons (-) and (+) simultaneously, Press button M to see actual tone “ton.1” to see on the display. Press button (-) to select the tone you wish from 1 to 3. CANCEL SETTINGS Cancel automatic function settings: Press buttons (-) and (+) simultaneously.
- Page 35 Press button (-) ,(+)or M to cancel signal and to return to the manual operation. SAFETY LOCK This digital timer has a function that locks the oven or the programmings set. The lock does not work when the timer is active. Activation: touch the (+) button for about 5 seconds then the symbol will appear.
- Page 36 FEX97S3XN4 MODEL : 1 : FUNCTION SELECTION BUTTON = Sets the oven working positions 2 : MECHANICAL TIMER = Read the instructions below 3 : TEMPERATURE ADJUSTMENT BUTTON = Used for setting the oven temperature between 50-250 °C when working. Only put to max. position for Grill function.
- Page 37 USING MECHANICAL TIMER You can adjust up to 90 minute by rotating the mechanical clock button clock wise. The clock will have the oven work for the set duration and shut it down automatically when the time is up. Set the function and temperature adjustment buttons after placing the meal inside the oven and adjust the mechanical clock button to the position you want.
- Page 38 For perfect roasting, the oven has to be pre-heated to the pre-set cooking temperature. Only very fatty meat can be cooked with the oven starting from cold. Never use shallow pans or the drip-tray as pans for roasts, to dirty the walls of the oven as little as possible, avoid the fat splattering, the juices burning quickly and smoke being produced.
- Page 39 Etichetta dati caratteristici del prodotto Label of ratings plate COD : HF21.47.00.0204 REV 00...
Need help?
Do you have a question about the FEX4752N4 and is the answer not in the manual?
Questions and answers