
Related Manuals for nardi FEX47D50N5

Summary of Contents for nardi FEX47D50N5
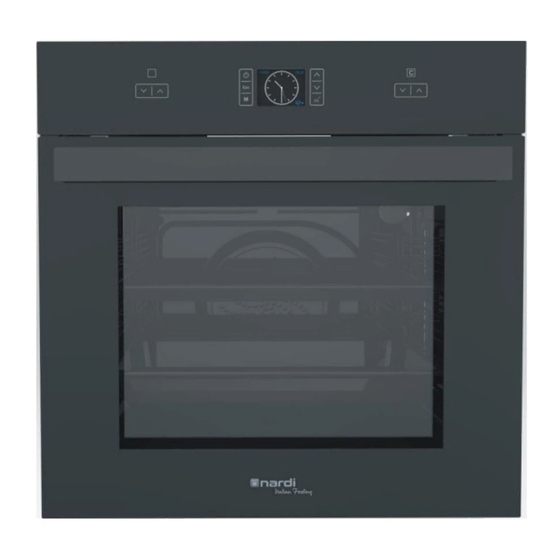
- Page 1 CONTROLLO ELETTRONICO TOUCH COMPLETO FULL ELECTRONIC TOUCH CONTROL MOD: FEX47D50N5 FEX47D50W5 Pagina 1 / 26...
-
Page 2: Table Of Contents
ITALIANO Prima di lasciare la fabbrica, questo apparecchio è stato testato e regolato da personale esperto e qualificato per fornire i migliori risultati operativi. Qualsiasi riparazione o regolazione che possa essere successivamente necessaria deve essere eseguita con la massima cura e attenzione. Per questo motivo, Vi consigliamo di contattare sempre il Rivenditore da cui hai acquistato l'apparecchio o il nostro Centro di Assistenza più... - Page 3 INFORMAZIONI IMPORTANTI RELATIVE ALLA SICUREZZA Gentile Cliente, Grazie per aver scelto uno dei nostri prodotti. Questa apparecchiatura è facile da usare, ma è necessario leggere attentamente questo manuale prima di installarla e utilizzarla. Il libretto contiene istruzioni che ti aiuteranno a installare, utilizzare e manutenere il prodotto nel modo migliore. ATTENZIONE: questo apparecchio e le sue parti accessibili diventano molto calde durante l'uso.
- Page 4 INFORMAZIONI IMPORTANTI RELATIVE ALLA SICUREZZA Attenzione: assicurarsi sistema anti-ribaltamento funzioni correttamente, prima inserire la parte "A" e tenerla rivolta verso l'alto come mostrato in figura. È molto importante che questo libretto di istruzioni sia conservato con l'apparecchio se cambia il proprietario. Questo apparecchio è...
- Page 5 INFORMAZIONI IMPORTANTI RELATIVE ALLA SICUREZZA Prima di iniziare a utilizzare il forno per cucinare, è necessario rimuovere eventuali pellicole protettive dalla porta del forno e riscaldare il forno vuoto alla massima temperatura per circa 45 minuti (questo eliminerà gli odori e i fumi creati dai residui di fabbricazione).
-
Page 6: Istruzioni Per L'installazione
ISTRUZIONI PER L'INSTALLAZIONE L'installazione deve essere eseguita da un tecnico autorizzato secondo le linee guida. La nostra azienda non può essere ritenuta responsabile per i danni a persone, animali o alle cose, a causa di un'installazione scorretta. AVVERTENZE PER L’INSTALLAZIONE Le dimensioni e i materiali del mobile in cui verrà... - Page 7 ISTRUZIONI PER L'INSTALLAZIONE FEX47D50N5/W5 Aprire la porta e fissare il forno con due viti per legno che devono essere avvitate attraverso i fori nei montanti laterali del forno. Pagina 7 / 26...
- Page 8 ISTRUZIONI PER L'INSTALLAZIONE CONNESSIONE ELETTRICA * Il dispositivo deve essere collegato alla rete elettrica principale solo da tecnici elettrici autorizzati in conformità con le leggi e le normative vigenti. * Assicurarsi che l'alimentazione dalla rete principale sia sufficiente per fornire la potenza indicata nell'etichetta delle informazioni posta sul frontale del dispositivo.
-
Page 9: Pulizia E Manutenzione Del Dispositivo
PULIZIA E MANUTENZIONE DEL DISPOSITIVO Importante: prima di eseguire la manutenzione o la pulizia del forno, scollegarlo e attendere che si raffreddi. Pulizia generale Per mantenere la parte smaltata lucida il più a lungo possibile, il forno deve essere pulito ogni volta dopo averlo usato. - Page 10 RIMOZIONE PORTA DEL FORNO È possibile rimuovere e pulire facilmente la PORTA del forno. È necessario seguire le procedure seguenti per rimuovere la PORTA * Aprire completamente la PORTA. * Sollevare i 2 perni mostrati nell'immagine. * Tenere la PORTA e richiuderla fino al primo punto di arresto. * Estrarre la PORTA sollevandola dalla sua posizione.
-
Page 11: Efficienza Energetica Del Forno
- - I forni devono essere installati in un luogo lontano da ambienti infiammabili. - - I forni continueranno a rimanere alla temperatura raggiunta usando meno energia se la porta viene tenuta chiusa il più possibile SPECIFICHE TECNICHE DEL FORNO FEX47D50N5/W5 MODELLO : Resistenza Superiore 800 W... -
Page 12: Uso Del Forno
USO DEL FORNO Questo forno è dotato di controllo elettronico. Attraverso 6 pulsanti a sfioramento e 2 altri tasti touch si possono selezionare la funzione e la temperatura desiderate, oltre a numerose altre regolazioni descritte di seguito. L'utente viene guidato attraverso i menu mediante spiegazioni alfanumeriche e simboliche che appaiono sullo schermo TFT con ampio angolo di visualizzazione. -
Page 13: Simboli Dello Schermo
Utilizzato per scorrere verso l'alto all'interno delle voci di menu o per aumentare qualsiasi parametro numerico sullo schermo durante la modifica. Premuto a lungo durante una cottura, attiva la funzione RAPID HEAT UP (RAPIDO RISCALDAMENTO). Utilizzato per scorrere verso il basso all'interno delle voci di menu o per diminuire qualsiasi parametro numerico sullo schermo durante la modifica. - Page 14 Aspettando l'ora di inizio della Cottura Appare quando è cottura programmata una Appare quando è in corso una cottura cottura ritardata e attende il momento di iniziare la cottura. Allarme Appare fisso quando un allarme è Riscaldamento Rapido impostato o è in fase di impostazione. Lampeggia quando il tempo impostatato è...
-
Page 15: Manuale Dell'utente
MANUALE UTENTE: Accensione: Lo schermo sarà nero e vuoto quando il dispositivo è SPENTO. Premendo per 1 secondo il pulsante ( on-off ), il dispositivo si accende, lo schermo si illumina (potrebbe apparire una schermata temporanea del logo a seconda della versione del software) e la schermata di standby sarà... -
Page 16: La Schermata Del Menu Principale E Delle Voci
La Schermata del Menu Principale e le Sue Voci: Sono presenti 4 voci del menu principale: "ALLARME", "COTTURA", "GUIDA DI COTTURA" e "IMPOSTAZIONI". È possibile accedere alla schermata MENU PRINCIPALE premendo il pulsante quando nessun programma di cottura è in corso. E’... -
Page 17: Cottura Manuale
Cottura Manuale: Si selezionano manualmente sia la funzione di cottura che la temperatura e terminerà manualmente. 1. In assenza di cotture attive ,premere e inserire il menu principale. Selezionare “COTTURA” premendo . Lo schermo mostrerà la prima funzione di cottura e la relativa temperatura consigliata in modo lampeggiante. -
Page 18: Cottura Automatica
Cottura Automatica: Se si utilizza la cottura automatica, programmando il tempo di cottura e / o il tempo di fine cottura (o temperatura sonda carne se in dotazione), la cottura verrà interrotta automaticamente e di conseguenza. Cottura Automatica / Avvio Istantaneo La cottura inizierà... - Page 19 Nell'esempio seguente, viene spiegato come viene ritardata una cottura di durata 1ora e 15 minuti precedentemente inserita, in modo che la cottura venga terminata automaticamente alle 12:50. Poiché l'ora attuale è alle 10:30, il forno aspetterà fino alle 11:35, a quel punto inizierà a cucinare per 1 ora e 15 minuti e si fermerà...
- Page 20 GUIDA ALLA CUCINA: Usando il menu Guida alla Cucina, puoi selezionare un tipo di cibo tra una varietà. La funzione di cottura più adatta, la temperatura, la durata della cottura verrà impostata automaticamente. Verrà inoltre consigliata una posizione adatta per il vassoio.. 1.
- Page 21 Mettere in pausa, modificare o cancellare una cottura: Se durante la cottura si preme il tasto la cottura va in pausa, PAUSA e Temperatura inizieranno a lampeggiare sul display. Agendo sulle frecce touch la temperatura può essere cambiata. È anche possibile preme per accedere ai menu per modificare la durata della cottura e si riprenderà...
- Page 22 ALLARME : È possibile utilizzare la funzione di allarme indipendentemente dalle funzioni di cottura. L'allarme suonerà dopo che è trascorso il tempo impostato o che è stata raggiunta l'ora del giorno regolata. . Questo si trova sulla schermata del menu principale se non è in corso alcuna cottura 1.
- Page 23 IMPOSTAZIONI: Utilizzando questo menu, è possibile regolare l'ora del giorno, la data, la lingua, lo schermo (digitale o analogico), le preferenze audio e l'unità di temperatura da utilizzare. Premere con nessun programa di cottura in corso e accedere ai menu principali, selezionare IMPOSTAZIONI usando i pulsanti e premere .
- Page 24 Suoni : , il suono del cicalino sarà attivo solo in caso di allarme e / Selezionando e confermando , attiverà tutti gli altri toni di avviso disponibili in aggiunta. o fine cottura. La selezione di Unità di Temperatura: La si può selezionare in Celsius ( °C ) o in Fahrenheit ( F ) Orologio sullo Schermo: L'indicazione dell'orologio sulla schermata di standby può...
-
Page 25: Blocco Bambini
Blocco bambini: Per evitare la pressione involontaria dei pulsanti, è possibile utilizzare la funzione di blocco bambini. Per attivare, premere entrambi contemporaneamente per 2 secondi, quando non si è in alcuna modalità di regolazione. Il apparirà nella parte superiore sinistra dello schermo. è... -
Page 26: Accensione/Spegnimento Della Lampada
La funzione di riscaldamento rapido viene automaticamente annullata quando la temperatura della cavità del forno raggiunge il valore impostato, il simbolo, scompare. Nota: Il Riscaldamento Rapido non può essere attivato durante alcuna funzione di grill o se la differenza tra la temperatura impostata e quella effettiva è inferiore a 50 ° C o se la temperatura impostata è... -
Page 27: Messaggi Di Errore
3. Messaggi di Errore: Qualsiasi errore che impedisca il normale funzionamento verrà visualizzato sullo schermo. In tal caso, qualsiasi cottura in corso o programma di cottura verrà annullato. Il messaggio rimarrà sullo schermo finché non viene premuto il tasto anche se l'errore è... - Page 28 Before leaving the factory, this appliance was tested and regulated by expert and skilled personnel to give the best operating results. Any repair or regulation that may subsequently be necessary must be carried out with the greatest care and attention. For this reason, we recommend you always contact the Dealer you bought the appliance from or our nearest Service Centre, specifying the type of problem and the model of your appliance.
- Page 29 Dear Customer, Thank you for having chosen one of our products. This appliance is easy to use, but you must read this booklet carefully before installing and using it. The booklet contains instructions that will help you to install, use and service the product in the best way WARNING: This appliance and its accessible parts become very hot during use.
- Page 30 Warning: to ensure that the anti-tipping system functions correctly, first insert part “A” and keep it pointing upwards as shown in thefigure. It is very important for this instruction booklet to be kept with the appliance if it changes hands. This appliance has been designed for non-professional use by private individuals in their homes and its purpose is to cook and heat food.
- Page 31 Never line the oven with aluminium foil. It could block the slots and prevent regular heat exchanges from taking place, consequently damaging the enamelled surface. Before you start using the oven for cooking, you must remove the protective film from the oven door and heat the empty oven at maximum temperature for about 45 minutes (this will eliminate the odours and fumes created by manufacturing residues).
- Page 32 Installation must be carried out by an authorized technician according to the guidelines. Our company cannot be held responsible for the damages to people, animals or properties due to improper installation. INSTALLATION WARNINGS Dimensions and materials of the cabin or cupboard in which the built-in oven will be installed in have to be correct and it has to be resistant to temperature increases.
- Page 33 FEX47D50N5/W5 Open the door and fix the oven with two wood screws which must be screwed through the holes in the lateral jambs of the oven Page 6 / 28...
- Page 34 ELECTRICAL CONNECTION *The device must be connected to the main electricity grid only by authorized electricity technicians in accordance with the laws and regulations in force. *Make sure that the power from the main grid is enough to supply the power stated in the information tag placed on the front bottom of the device.
- Page 35 Important: before carrying out maintenance or cleaning the oven, unplug it and wait for it to cool down. General cleaning To keep the enamelled part shiny for as long as possible, the oven must be cleaned each time after using it. Leave the oven to cool down and you can easily remove the deposits of fat with a sponge or damp cloth and warm soapy water and, if necessary with a product on the market.
- Page 36 REMOVING OVEN DOOR You can remove and clean the oven DOOR easily. You must follow the procedures below to remove the DOOR *Open the DOOR completely. *Push the 2 hinges shown in the picture backwards. *Hold the DOOR and close up to the first stopping place. *Pull the raised DOOR away from its mounted location.
- Page 37 - Ovens must be installed on a location far from inflammable environments. - Ovens will continue cooking in current temperature by using less energy if the lid is closed a few minutes before cooking. FEX47D50N5/W5 MODEL : Top Heater Top Heater...
- Page 38 This is a full electronic oven control unit. Serve to select the desired Cooking Function and Temperature besides 6 touch buttons for adjustments. (other two touch buttons serve to select the desired Cooking Function and Temperature) The user is guided through the menus by alphanumeric and symbolic explanations appearing on the wide view angle TFT screen.
-
Page 39: Screen Symbols
Used to scroll upwards within menu items or for increasing any numerical parameter on the screen during editing. Long press during a cooking activates the RAPID HEAT UP function. Used to scroll downwards within menu items or for decreasing any numerical parameter on the screen during editing. - Page 40 Waiting for the cooking start time Cooking Appears when a delayed cooking is programmed and waiting for the time to start Appears when a cooking is in progress cooking. Alarm Rapid Heat Up Appears steady when an alarm is or being set, flashes when the set alarm time has expired.
-
Page 41: User Manual
USER MANUAL : Switching ON : The screen will be black and empty when the device is OFF. By long ( 1 sec) pressing of the button, the device is switched on, the screen lights up ( a temporary logo screen may appear depending on the software version ) and the idle screen will be visible. -
Page 42: The Main Menu Screen And Items
The Main Menu Screen and its items : There are 4 main menu items: ‘ALARM‘,‘COOKING’ , ‘COOKING GUIDE’ and ‘SETTINGS’. The MAIN MENU screen can be accessed upon pressing the button when no cooking program is in progress . You can scroll through the 4 main menu items by pressing buttons and select one by pressing . -
Page 43: Manual Cooking
Manual Cooking : It is a cooking type in which you selec t the cooking function and Temperature manually and terminate cooking manually after being sure the food is well cooked. as no cooking present and enter the main menü. Select “COOKING” by 1. - Page 44 Auto Cooking: In case of using automatic cooking, by programming the cooking period and/or the cooking end time ( or meat probe Temperature if equipped ) , cooking will be terminated automatically and accordingly. Auto Cooking / Instant start Cooking will start immediately and will be automatically terminated when the defined cooking duration has elapsed.
- Page 45 In the example below, it is explained how a previously entered 1h:15 min duration cooking is delayed so that cooking will be terminated automatically at 12:50 . Since the current time of day is 10:30 , the oven will wait until 11:35 , at that time start cooking for 1 hour 15 minutes and automatically stop cooking at 12:50 .
- Page 46 COOKING GUIDE : Using the Cooking Guide menu, you can select one food type among a variety . The most suitable cooking function, Temperature , Cooking Duration will be automatically set . You will also be advised a suitable tray position. 1.
-
Page 47: Automatic Cooking
Pause , Edit or Cancel a Cooking : During Cooking , pressing will pause it, PAUSE and Temperature will start flashing. Touching the related button, Temperature can be changed. You may also press to enter the menus for editing the cooking duration and end time. Pressing will resume auto cooking with the changes made if any. - Page 48 ALARM : You may use the Alarm function independent of the cooking functions. The alarm will sound after the adjusted duration has elapsed or the adjusted time of day has been reached. 1. Press . This will result in the main menu screen if no cooking or cooking program is running , select ALARM using buttons and confirm with .
- Page 49 SETTINGS: Using this menu, you may adjust the time of day, date, language , screen clock ( digital or analog ) , sound preferences and the Temperature unit to be used. as no running cooking program, and access the main menü, select SETTINGS Press .
- Page 50 Sounds: Selecting and confirming , the buzzer sound will only be active upon any alarm and/or cooking end. Selecting will activate all other warning tones available additionally. Temperature Unit : Any of the units Celcius or Fahrenheit can be selected as explained below. Screen Clock: The clock indication on the idle screen may be selected as digital or analog as explained below.
-
Page 51: The Child Lock
The Child Lock: In order to prevent unintended button presses , you may use the child lock function. To activate, press both simultenously for 2 seconds, when not beeing in any adjustment mode. The symbol will appear on the left top of the screen. When the child lock is active, only button will be functional . -
Page 52: Lamp On Off
The rapid heat up function is automatically cancelled when the oven cavity Temperature reaches the set value, symbol will disappear. Note: Rapid Heat Up cannot be activated during any grill function or if the difference between set and actual Temperature is less than 50C or the set Temperature is below 100C in other functions Lamp ON OFF: When not in any adjustment menü, pressing for 2 seconds will toggle the lamp off and on. -
Page 53: Error Messages
3. Error Messages: Any error preventing normal operation will be displayed on the screen . In that case, any running cooking or cooking program will be cancelled. The message will remain on the screen until is pressed , even if the error has been recovered. Error Code Explanation Temperature Sensor Error... - Page 54 Etichetta dati caratteristici del prodotto Label of ratings plate COD : HF21.47.00.0207 REV 00...
Need help?
Do you have a question about the FEX47D50N5 and is the answer not in the manual?
Questions and answers