Table of Contents
Advertisement
Quick Links
Advertisement
Table of Contents

Related Manuals for Volpi Tecno Energia PAGURO 6000


Summary of Contents for Volpi Tecno Energia PAGURO 6000
- Page 1 USER AND MAINTENANCE MANUAL MARINE GENERATORS TYPE: PAGURO 6000/9000/14000/18000/6500/8500 MODEL: 2020 YEAR OF CONSTRUCTION: VTE Srl – Via Luciano Lama, 5 – 33059 Fiumicello – Villa Vicentina (UD) – Italy Phone: +39 0431 96488 – e-mail: info@volpitecno.com Website: www.volpitecno.com...
- Page 3 REVISIONS TABLE REVISIONS TABLE CHAPTER DESCRIPTION REVISION DATE Warnings 12.03.2020 Technical specifications 12.03.2020 Operating conditions 12.03.2020 Operator 12.03.2020 Transport and handling 12.03.2020 Installation of the machine 12.03.2020 Installation errors 12.03.2020 Start and stop procedure 12.03.2020 Remote control panel 12.03.2020 General safety information 12.03.2020 Maintenance 12.03.2020...
- Page 4 EC Declaration of Conformity (Annex IIA Machinery Directive 2006/42/EC) The undersigned: VTE S.r.l. Via Luciano Lama, 5 33059 – Fiumicello Villa Vicentina (UD) - Italy - Declares that the machine called MARINE DIESEL GENERATOR of own production: Model…………………..PAGURO XXXXX Serial no.…....XXXXXX Year of construction...2020 to which this declaration relates is in accordance with the following directives: - Machinery Directive 2006/42/EC...
-
Page 5: Table Of Contents
INDEX INDEX PAGE WARNINGS Premise….……………………………………………………………………………………….…. Introduction……………………………………………………………………………………….… Purpose and contents of the User and Maintenance Manual………………………………..General warnings….…………………………………………………………………………….…. Terminology used in the User and Maintenance Manual……………………………………… Obligation to keep the User and Maintenance Manual safe…..………………………….……. Manufacturer Details……………………………………………………………………………….. Technical Assistance……………………………………………………….………………………. General safety notes………………………………………………………………………………… Warranty………….………………………………………………………….………………………. - Page 6 INDEX PAGE 3.3.2 Qualified technician................Categories of operators authorised to work and intervene on the generator..3.4.1 Installers………………………………………………………………………. 3.4.2 Ordinary maintainers……………………………………………………... 3.4.3 Extraordinary maintainers…………………………….……………….… Exposure to hazards and risks from materials…………………………………... Operators training…………..………………….……….………………..………… 4. TRANSPORT AND HANDLING Transport and handling………………………………………………………………………. General notions……..……………………………………………………………..
- Page 7 INDEX PAGE Exhaust line………………………………………………………..………………… 7. STARTING/STOPPING PROCEDURE Starting/Stopping procedure……………………………………………………………….. Checks to be carried out before starting……………….……………….…….….. Startup procedure……………………………………………………………………. Operating the generator…………………………………………………..……… 7.4.1 Check list……………………………………………………………………... 2 Stopping the generator………..……………………………………..……………… 8. REMOTE CONTROL PANEL Remote control panel………………………………………………………………………… Control panel description……................Alarm management………………………………………………………………… 8.2.1 Reset alarms…………………………………………………………..……...
- Page 8 Paguro 14000 - 18000 electrical drawing...…………………….…………… 12.3 Paguro 6500 electrical drawing...…………………….………………………. 12.4 Paguro 8500 electrical drawing...…………………….………………………. 12.5 Alternator electrical drawing Paguro 6000 - 9000...………….…………….. 12.6 Alternator electrical drawing Paguro 14000 - 18000….……………………. 12.7 Alternator electrical drawing Paguro 6500 - 8500…….……………………. ATTACHMENTS Attachments……………………………………………………………………………………………….
-
Page 9: Warnings
WARNINGS WARNINGS PREMISE This User Maintenance Manual Marine Diesel Generator mod. Paguro 6000/9000/14000/18000/6500/8500 contains the instructions that allow the operator to use the generator to the best of its operational capabilities and provides all necessary information and instructions to operate in observance of the Machinery Directive 2006/42/EC. -
Page 10: Terminology Used In The User And Maintenance Manual
WARNINGS Terminology used in the User and Maintenance Manual - WORK AREA The operating area is defined as the area for the installation of the generator. - INSTALLATION: Installation is defined as the mechanical and plant integration of the generator on the boat. - COMMISSIONING: Commissioning is defined as the functional verification of the installed system. -
Page 11: Obligation To Keep The User And Maintenance Manual Safe
WARNINGS Obligation to keep the User and Maintenance Manual safe You must keep this manual and all attached documents in an easily accessible place, near the generator, and known to all operators. The operators and maintenance staff must be able to quickly locate and consult, in any situation, the User and Maintenance Manual. -
Page 12: Warranty
WARNINGS Warranty The company VTE S.r.l. guarantees the generator according to the terms and times provided on the sales contract. The warranty does not cover wear parts such as brass, gaskets, etc. The warranty is void if the failure/damage to the generator is caused by incorrect installation, tampering, unauthorized service or the use of non-genuine spare parts. -
Page 13: Additional Warnings
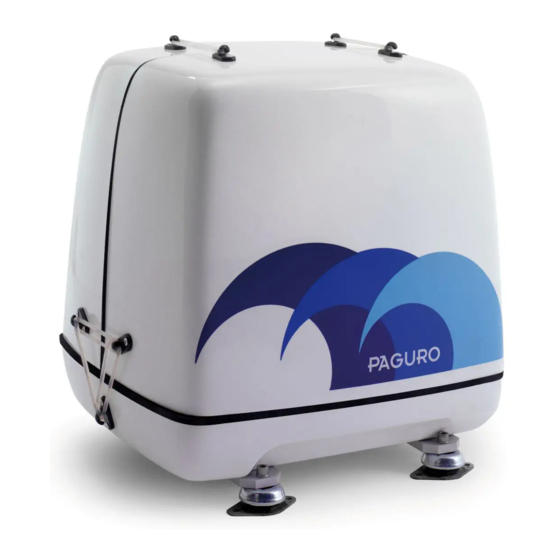
DESCRIPTION OF THE GENERATOR The Marine diesel generator mod. Paguro 6000/9000/14000/18000/6500/8500 is a generator designed to produce electricity on board boats. This generator has been designed and built to be installed on a boat, (able to house the generator in terms of size and weight). -
Page 14: Operation Principle
WARNINGS Operation principle The operation of the generator, for the generation of energy, develops through the following phases: 1. The fuel arrives at the endothermic engine where, by means of the combustion process, it is transformed into mechanical energy; 2. Mechanical energy is converted by the alternator into electrical energy; 3. -
Page 15: Explosive Atmosphere
WARNINGS EXPLOSIVE ATMOSPHERE This generator and its devices are made in standard version and can therefore not be installed and used in premises where the concentration of dust may exceed acceptable limits and create potentially explosive atmospheres. DISPOSAL OF WASTE PRODUCTS During normal operation, the generator generates waste or waste substances that must be collected, recycled or disposed of in accordance with current laws in the country in which it is installed and used. -
Page 16: Technical Specifications
“CE” identification plate 1.2 TECHNICAL SPECIFICATIONS In the following tables are listed the Generator technical characteristics in Your possession (please refer to the individual model): GENERATOR SPECIFICATIONS DESCRIPTION U.M. PAGURO 6000 PAGURO 9000 PAGURO 14000 PAGURO 18000 PAGURO PAGURO 8500 6500... -
Page 17: Technical Specifications
TECHNICAL SPECIFICATIONS GENERATOR SPECIFICATIONS DESCRIPTION U.M. PAGURO 6000 PAGURO 9000 PAGURO 14000 PAGURO 18000 PAGURO 6500 PAGURO 8500 Engine cooling 4.25 4.25 system capacity 3000 (50 Hz) 3000 (50 Hz) 3000 (50 Hz) 3000 (50 Hz) 1,500 (50 Hz) 1,500 (50 Hz) - Page 18 TECHNICAL SPECIFICATIONS Below is the Generator with a basic description of the main units and components installed. Internal Paguro 6000/9000/14000/18000/65000/8500 Key: 1. Lifting eye; Heat exchanger; 2. Engine oil dipstick; Seawater pump; 3. Manual engine oil extraction pump; 10. Electrical box;...
-
Page 19: Copyright
TECHNICAL SPECIFICATIONS 1.3 COPYRIGHT ATTENTION! All rights are reserved under the "INTERNATIONAL COPYRIGHT CONVENTIONS", it is forbidden to reproduce any part of this manual in any form, without the express written permission of the Manufacturer VTE S.r.l. The contents of this guide are subject to change without notice. Every care has been taken to collect and verify the documentation contained in this manual in order to make the guide as complete and understandable as possible. -
Page 20: Operating Conditions
OPERATING CONDITIONS 2. OPERATING CONDITIONS 2.1 COMPARTMENT Paguro generator has been designed and manufactured to operate on board boats and in a well ventilated and closed compartment, where there are no danger of explosion or fire. The Marine generator containment compartment must ensure minimum distances for correct air replacement. 2.2 VENTILATION The minimum distances indicated in the image below are recommended around the generator. -
Page 21: Lighting
OPERATING CONDITIONS 2.4 LIGHTING The generator, once installed, must have sufficient natural light to ensure adequate visibility to the operator during maintenance. It is the task of the operator to equip the boat with suitable artificial lighting systems such as to ensure adequate lighting on the generator in case of maintenance work. - Page 22 OPERATING CONDITIONS NOTE: The external shock-absorbers supports already have holes for securing the generator to the boat. A further solution to increase the dampening of vibrations is adding a plate between the generator and the boat's mounting platform. This will also improve the sound insulation This platform must have the following requirements: At least 30 mm thick.
-
Page 23: Noise Power Emission
OPERATING CONDITIONS 2.6 NOISE POWER EMISSION The Paguro generator has been designed and manufactured to significantly reduce the sound power level. In particular, the generator adopts a soundproofing capsule to limit the emission of the noise generated by the internal endothermic engine into the surrounding environment. The capsule is made of fiberglass and is internally coated with sound-absorbing material. -
Page 24: Operator
OPERATOR 3. OPERATOR This chapter is an information and precautionary source of technical precautions that the operator must observe when performing his/her functions (installation and maintenance). 3.1 OPERATOR TRAINING It is the responsibility of the employer to provide the operator with the necessary information for the installation and maintenance of all generator components and to provide the operator with appropriate Personal Protective Equipment. -
Page 25: Ordinary Maintainers
OPERATOR 3.4.2 Ordinary maintainers They are trained and authorized technicians for ordinary maintenance, each for its (mechanical or electrical) skills: – mechanical maintenance workers: they are technical workers, trained and authorized to perform the maintenance of mechanical parts and fluidic liquid/aeriform systems. –... -
Page 26: Transport And Handling
TRANSPORT AND HANDLING 4. TRANSPORT AND HANDLING 4.1 GENERAL NOTIONS The lifting, handling, transport of the generator must be assigned exclusively to operators skilled in those types of operations (slingers, crane operators, forklift operators, signallers). Operators must also be: aware of the kind of loads that require lifting, the operations that need to be carried out and the procedures set forth in the User and Maintenance Manual;... -
Page 27: Lifting And Handling By Crane Or Overhead Crane
TRANSPORT AND HANDLING Generator packaging Generator packaging + optional The packaging ensures the preservation and integrity of the generator during transport, preserving it against mechanical, climatic, and biological influences that may occur during transport. Upon arrival, check that the generator has not been damaged during transport and that all components are included in the scope of delivery, including the User and Maintenance Manual if it is included in the packaging. - Page 28 TRANSPORT AND HANDLING Type of sling Slinging Sling single leg Sling double leg Sling of two method legs simple double simple double VERTICAL CHOKER HITCH DOUBLE WRAP CHOKER HITCH SINGLE/TWO SINGLE BASKET HITCH DOUBLE WRAP BASKET HITCH Mod. PAGURO 6000/9000/14000/18000/6500/8500 Date: 12.03.2020_Rev: 0.0...
-
Page 29: Lifting And Handling With Forklift
TRANSPORT AND HANDLING 4.2.2 Lifting and handling with forklift This type of handling is used to move the packed generator. WARNING! Always check where the forks rest under the box. To lift with a forklift, follow these steps: a) Insert the fork of the truck under the wooden box, taking care that they protrude from the opposite side. -
Page 30: Unpacking
TRANSPORT AND HANDLING 4.3 UNPACKING Once the generator has been unloaded from the means of transport, unpack it according to the following procedure: 1. Remove the optional cardboard box strapping (if equipped); 2. Remove the top cover of the wooden case using a hammer with a nail puller; 3. - Page 31 TRANSPORT AND HANDLING Paguro 6000/9000/14000/18000/6500/8500 lifting points Tension the ropes/chains slightly and check that they do not exert any pressure on the structure or components of the generator. Failure to wait for this point can cause serious damage to the generator;...
-
Page 32: Storage
TRANSPORT AND HANDLING 4.5 STORAGE If the generator will not be installed immediately but has to be warehoused for a prolonged period of time, the storage must take place in a sheltered environment, with a degree of protection appropriate for the installed components. -
Page 33: Installation Of The Generator
INSTALLATION OF THE GENERATOR 5. INSTALLATION OF THE GENERATOR 5.1 SET UP FOR INSTALLATION Installation and commissioning of the generator must be carried out by a qualified technician or an authorized company. It is the task of the installer to provide an area suitable for the overall dimensions of the generator and to carry out the necessary interventions for the correct and safe installation of the generator. -
Page 34: Ventilation
INSTALLATION OF THE GENERATOR Locate the generator away from living quarters and away from bilge splashes and vapours. Select a location that allows adequate space on all sides for ventilation and easy access for service. A further solution to increase the dampening of vibrations, is adding a plate between the generator and the boat’s mounting platform. -
Page 35: External Connections
(as indicated in Chap. 1 “TECHNICAL SPECIFICATIONS”) not only to avoid loosening or leakages, but also because using the correct sizes will prevent unnecessary gaps in the sound-shield that could emit noise. Paguro 6000-9000-6500-8500 connections Paguro 14000-18000 connections Key: Gas/water mixture exhaust;... -
Page 36: Exhaust System Installation (On Request)
INSTALLATION OF THE GENERATOR 5.5 EXHAUST SYSTEM INSTALLATION (on request) The generator is supplied an exhaust manifold, on which an overtemperature safety switch is installed. Overtemperature switch Exhaust manifold It is the responsibility of the installer to design and install a suitable exhaust system in order to avoid water returning to the engine with any sea conditions and any inclination of the boat. -
Page 37: Traditional System
INSTALLATION OF THE GENERATOR The VTE S.r.l. warranty does not cover errors and inaccuracies in the installation of the exhaust line. VTE S.r.l. recommends the installation of an exhaust system having in-line mufflers. The in-line water-lock muffler must first muffler must be installed below the generator, in order to avoid water return/entrance into the engine. -
Page 38: On-Board System With Space Shortage
INSTALLATION OF THE GENERATOR END SEPARATOR SIPHON BREAK MINIMUM 30 CM MINIMUM 40 CM THRU-HULL INTERMEDIATE SILENCER MINIMUM 45 CM MINIMUM 15 CM MAXIMUM 150 CM STRAINER SAFETY BOAT PASSAGEWAY PIPE MINIMUM LENGTH 30 CM VALVE STERN WATERLOCK MUFFLER WATER INTAKE NOTE: THE LENGTH OF THE PIPE FROM THE WATERLOCK TO THE THRU-HUL MUST NOT EXCEED 3 MTRS. -
Page 39: On-Board System With Long Exhaust Line
INSTALLATION OF THE GENERATOR 5.5.3 On-board system with long exhaust line In case of a long exhaust pipe, it is recommended to use an exhaust system with two water-lock mufflers (see picture below). Due to the large quantity of water in the exhaust line, the second water-lock muffler protects the generator from water return. - Page 40 INSTALLATION OF THE GENERATOR NOTE: The injection pump of the Paguro is a self-bleeding., it means that in case the engine shut-off for lack of fuel, after fuel tank filling up there is no need of disconnecting the pipes for bleeding, because this operation is simply obtained acting by hand on the lever of the feeding pump.
-
Page 41: Installation Of The Cooling System
INSTALLATION OF THE GENERATOR DIESEL SUPPLY AND RETURN DIAGRAM WITH GENERATOR LEVEL IN RELATION TO TANK ≥ 70 CM PROPULSION ENGINE RETURN RETURN IF MORE THAN 70 CM SUPPLY SUPPLY SEPARATOR FILTER DIESEL ELECTRIC PUMP FUEL TANK 5.7 INSTALLATION OF THE COOLING SYSTEM The raw water flow is created by a positive displacement impeller pump that is gear-driven by the camshaft. -
Page 42: Siphon-Break Valve
INSTALLATION OF THE GENERATOR 5.7.1 Siphon-break valve If the generator is installed below or at the same level of the seawater-line (refer to external shock absorbers), a siphon-break valve must be installed in the seawater cooling circuit. The siphon-break valve prevents any seawater entrance into the engine through the seawater pump when the engine is installed below or at the same level of the seawater line, even considering the boat in movement. -
Page 43: Raw Water Intake (On Request)
INSTALLATION OF THE GENERATOR 5.7.2 Raw water intake (on request) VTE S.r.l. recommends the “grid” type of raw water intake. A flush-type thru-hull fitting is recommended for the raw water intake. It should be located on the boat's hull where it will be below the waterline during all angles of the boat's operation NOTE: The seawater intake shape is usually designed asymmetrically, so that depending on the fitting direction can cause, when the boat is sailing, pressure or vacuum in the water circuit connected. -
Page 44: Main Output Voltage
INSTALLATION OF THE GENERATOR CONNECTION TO STARTER LITTLE ENGINE: POSITIVE NEGTIVE STARTING BATTERY 90 AH GENERATORS 6 kVA Startup battery diagram 5.8.2 Main output voltage The connection of the main voltage (115V/230V AC) is located in electrical box (grey) installed above the alternator. -
Page 45: Transfer Switch Over Shore Line/Generator
A manual switch (shore / generator) or an automatic switch (shore / generator) must be provided. Both the lines or at least the generator line only, have to be protected with a thermo-switch, fitted on the main board panel. For your PAGURO choose a: 230V 115V PAGURO 6000 PAGURO 9000 PAGURO 14000 125A PAGURO 18000... -
Page 46: Remote Control Panel
At the side of the electrical box, there is a safety switch that trips, interrupting the output of the battery charger section in case of overload. In case of overload, fix the problem and then press the button to reset the protection. Paguro 6000/9000/6500/8500 Paguro 14000/18000 5.8.4 Remote control panel Install the plug-in control panel in any desired remote location always inside the vessel. -
Page 47: Pre-Start Inspections
INSTALLATION OF THE GENERATOR PAGURO PAGURO 14000/18000 6000/9000/6500/8500 8-pole connector socket For a description of the functions on the operator panel, refer to Chap. 8 “REMOTE CONTROL PANEL”. 5.9 PRE-START INSPECTIONS Before starting your engine for the first time, or after a prolonged layoff, check the following items: –... - Page 48 INSTALLATION ERRORS 6. INSTALLATION ERRORS A big number of marine generators of any type and manufacturers, after the first installation on board, are flooded by sea water causing severe damages to the engine with consequent high repairing costs, improperly claimed in warranty but gently refused, because it always depends from a critical/wrong installation, made compromising some physical rules.
- Page 49 INSTALLATION ERRORS Another water presence signal becomes from starting difficulties as due to some roost on the exhaust valve, the compression does not reach the proper burning value. Spraying some lubricating oil into the cylinder while insisting with the starter, very often the engine can be started. When started the valve self-cleans, but in some cases, of too long-time water presence, also the piston rings are locked from roost, so the engine must be opened for repairing.
-
Page 50: Checks To Be Carried Out Before Starting
START AND STOP PROCEDURE 7. STARTING/SOPPING PROCEDURE 7.1 CHECKS TO BE CARRIED OUT BEFORE STARTING Before starting, the following checks must be carried out: 1. Check for possible leaks from all the connections inside the sound-shield. 2. Make sure the cooling water is discharging properly, outboard from the exhaust outlet. 3. -
Page 51: Operating The Generator
START AND STOP PROCEDURE WARNING! Prolonged cranking intervals without the engine starting can result in the engine exhaust system filling with raw water. This may happen because the pump is pumping raw water through the raw water-cooling system during cranking. This raw water can enter the engine's cylinder once the exhaust system fills. -
Page 52: Stopping The Generator
START AND STOP PROCEDURE After the first 20 hours of generator operation, check the maintenance table (par. 10.3.7) for the correct maintenance operations to be carried out. 7.4 STOPPING THE GENERATOR To stop the generator, follow this procedure: 1. Remove the AC loads from the generator one at a time and allow the generator to run for an additional 3 to 5 minutes (this stabilizes its operating temperature). -
Page 53: Remote Control Panel
REMOTE CONTROL PANEL 8. REMOTE CONTROL PANEL 8.1 CONTROL PANEL DESCRIPTION The generator is supplied with the remote control panel and 15 m of cable with multipolar sockets at the ends for connection to the generator. The operator panel is a device that allows you to start, stop and manage generator functions. Each function is described below Remote control panel LCD DISPLAY... -
Page 54: Alarm Management
REMOTE CONTROL PANEL An icon will also appear on the display to help you quickly identify any alarm generated by the generator. An intermittent warning light indicates the generator is being preheated. START Button to start the generator. Press and hold the button for approximately 10 seconds. This time is required to start the pre-heat and then the generator. -
Page 55: Electrical Connections (8 Wires Blue Cable / Control Panel)
REMOTE CONTROL PANEL 8.3 ELECTRICAL CONNECTIONS (8 WIRES BLUE CABLE / CONTROL PANEL) The table below shows the electrical connections between the generator, the 8-wire cable and the control panel. Connector Connector 15 m cable Description 8 PINS 24 PINS 8A and 4C Battery positive brown... -
Page 56: General Safety Information
GENERAL SAFETY INFORMATION 9. GENERAL SAFETY INFORMATION Read these safety instructions carefully. Most accidents are caused by failure to follow fundamental rules and precautions. Know when dangerous conditions exist and take the necessary precautions to protect yourself, your personnel and your machinery. The following safety instructions are in compliance with the American Boat and Yacht Council (ABYC) standards. -
Page 57: Battery Acid
GENERAL SAFETY INFORMATION 9.4 ACCIDENTAL STARTING Accidental starting can cause injury or death! Disconnect the battery cables before servicing the engine/generator. Remove the negative lead first and reconnect it last. Make certain all personnel are clear of the engine before starting. ... -
Page 58: Maintenance
MAINTENANCE 10. MAINTENANCE The term "MAINTENANCE" includes the following fields of activity: 1. Inspection: includes measures designed to recognize the actual condition, i.e. to identify the reasons and ways in which the wear reserve is reduced. 2. Restoration: includes measures designed to achieve the desired condition, i.e. to compensate for the reduction in performance and to restore the wear reserve. -
Page 59: Ordinary Maintenance
MAINTENANCE 2. Access to the generator is allowed only to authorized personnel. 3. Do not modify or tamper with the generator structure without a written statement to the company VTE S.r.l.. 4. Record the maintenance operations on the “SHEET OF MAINTENANCE INTERVENTIONS” attached to the manual, which shows the date, group of the generator, type of work and signature of the person who performed the operation. -
Page 60: Functional Checks On Safety Devices
MAINTENANCE 10.2.3 Functional checks on safety devices The primary task of the ordinary maintenance technician is to check the efficiency of the safety devices after every maintenance operation and before putting the generator back into operation: – generator guards, which prevent the contact of dangerous parts through the human body; –... -
Page 61: General Advices
MAINTENANCE 10.2.5 General advices To carry out the maintenance operations safely: – respect the timescale for scheduled maintenance as stated in the User and Maintenance Manual (preventive and periodic); – the distance (indicated by time or by work cycles) between one procedure and another is to be understood as the maximum acceptable;... - Page 62 MAINTENANCE OPERATIONS TO BE CARRIED OUT DAILY OR EVERY 10 HOURS Check the engine oil level. If the level does not exceed the minimum level, top up; Check the coolant level. If the level is below the mark, it must be topped up; ...
-
Page 63: Extraordinary Maintenance
MAINTENANCE OPERATIONS TO BE CARRIED OUT EVERY 300 HOURS Replace the engine oil by pulling it out with the oil pump. OPERATIONS TO BE CARRIED OUT EVERY 500 HOURS Clean the heat exchanger tube nest. Adjust the rocker arm clearance at a Service Centre authorized by the Manufacturer VTE S.r.l. OPERATIONS TO BE CARRIED OUT EVERY 1000 HOURS ... -
Page 64: Troubleshootings
MAINTENANCE The extraordinary maintenance technician shall document any modifications and/or replacements in writing and shall provide a copy of the documentation to the ordinary maintenance technician and a copy to the Manufacturer. The ordinary maintenance technician must update every copy of the User and Maintenance Manual in the customer's possession;... - Page 65 MAINTENANCE Faulty capacitor. Replace. Demagnetized fields. Apply a high load. Check the resistance of the Faulty windings. windings. The engine starts and Clogged air filter; Replace. stops. Fuel pump defective. Replace. Clogged fuel filter; Replace. High no load voltage (over Engine speed too high.
- Page 66 MAINTENANCE Clogged fuel filter; Replace. Low engine oil pressure. Oil pump worn. Replace. Adjustment valve not Record. registered. Noisy generator Damaged bearings. Replace. Loose coupling. Check and repair. Fluid leaks found. Loose lines or fittings. Position and tighten properly. Replace. Contact Technical Faulty lines or fittings.
-
Page 67: Maintenance Procedures
MAINTENANCE 10.5 MAINTENANCE PROCEDURES The following paragraph provides specific procedures for servicing the generator. Maintenance operations must be carried out with the generator in maintenance state by authorized technical personnel. WARNING! Replaced oils and specific elements (filters, etc.) must be disposed of in accordance with the regulations in force. - Page 68 MAINTENANCE 10.5.2 Cleaning the raw water intake filter The raw water intake filter is one of the fundamental components of the generator cooling system. Check the condition of the filter frequently. The internal water must be clear and clean and there must be no impurities on the retina.
- Page 69 MAINTENANCE 10.5.4 Checking engine oil Check the lube oil level daily, prior to starting. With continuous operation, check the oil level every 8-10 hours. Check the lube oil level a few minutes after stopping the engine because lube oil from the bearings etc. continues to drain down into the oil sump.
-
Page 70: Generator Cleaning
MAINTENANCE 10.5.6 Heat exchanger tube nest cleaning and coolant replacement Drain exchanger cooling liquid; shut heat exchanger outlet; remove plug from the engine; drain coolant from engine; put cap back on engine; remove outlet fastening nuts; loosen sleeve fixing bands; remove the exhaust manifold;... -
Page 71: Endothermic Engine Maintenance
MAINTENANCE WARNING! Sulfuric acid in lead batteries can cause severe burns on skin and damage clothing. Wear protective gear. WARNING! Wear rubber gloves, a rubber apron and eye protection when servicing batteries. Lead acid batteries emit hydrogen, a highly explosive gas, which can be ignited by electrical arcing or a lighted cigarette, cigar or pipe. -
Page 72: Types Of Risks And Safety Pictograms Included
TYPES OF RISKS AND SAFETY PICTOGRAMS INCLUDED 11. TYPES OF RISKS AND SAFETY PICTOGRAMS INCLUDED 11.1 RISKS OF A MECHANICAL NATURE This paragraph describes the mechanical risks that can arise during installation or maintenance operations on the generator, the risks that they can generate and the protections that have been adopted. Normally these risks do not affect the operator since protections are enabled during ordinary operation and the risks have been eliminated or reduced. -
Page 73: Design And Physical Features Of Safety Guards
TYPES OF RISKS AND SAFETY PICTOGRAMS INCLUDED WARNING! IT is always mandatory to secure all guards in place before operating the generator. 11.2 DESIGN AND PHYSICAL FEATURES OF SAFETY GUARDS The generator is protected by a multilayer fiberglass capsule, lined internally with sound-absorbing material, consisting of: N.1 lower containment element of the generator equipped with anti-vibration system. -
Page 74: Other Nature Risks Or Residual Risks
TYPES OF RISKS AND SAFETY PICTOGRAMS INCLUDED 11.5 OTHER NATURE RISKS OR RESIDUAL RISKS 11.5.1 Risk of fire The generator uses diesel fuel and engine oil, which can cause fire if it comes into contact with parts that are generating or subjected to extreme temperatures. The safety of the generator against fire is intricately linked to maintenance operations and to the observance of the timing. - Page 75 ELECTRICAL DRAWINGS PAGURO 6000 / 9000 Mod. PAGURO 6000/9000/14000/18000/6500/8500 Date: 12.03.2020_Rev: 0.0...
- Page 76 ELECTRICAL DRAWINGS PAGURO 14000 / 18000 Mod. PAGURO 6000/9000/14000/18000/6500/8500 Date: 12.03.2020_Rev: 0.0...
- Page 77 ELECTRICAL DRAWINGS PAGURO 6500 Mod. PAGURO 6000/9000/14000/18000/6500/8500 Date: 12.03.2020_Rev: 0.0...
- Page 78 ELECTRICAL DRAWINGS PAGURO 8500 THIN GREEN THIN GREEN THIN RED THIN RED Y ELLOW / GREEN GLOW GLOW GLOW GLOW PRE-HEATING RELAY BLUE TEMPERATURE SWITCH WHITE EXHAUST TEMPERATURE SWITCH YELLOW ENGINE PRESSURE SWITCH BLACK OIL ENGINE GREEN SOLENOID STARTER GREY STARTING RELAY BROWN SHUT-OFF VALVE...
- Page 79 ELECTRICAL DRAWINGS ALTERNATOR DRAWING PAGURO 6000 / 9000 Mod. PAGURO 6000/9000/14000/18000/6500/8500 Date: 12.03.2020_Rev: 0.0...
- Page 80 ELECTRICAL DRAWINGS ALTERNATOR DRAWING PAGURO 14000 / 18000 Mod. PAGURO 6000/9000/14000/18000/6500/8500 Date: 12.03.2020_Rev: 0.0...
- Page 81 ELECTRICAL DRAWINGS ALTERNATOR DRAWING PAGURO 6500 / 8500 Mod. PAGURO 6000/9000/14000/18000/6500/8500 Date: 12.03.2020_Rev: 0.0...
- Page 82 ATTACHMENTS ATTACHMENTS Attachment 1: A. User and Maintenance Manual – Lombardini Endothermic motor. Attachment 2: A. Sheet of maintenance Mod. PAGURO Date: 12.03.2020_Rev: 0.0 6000/9000/14000/18000/6500/8500...
- Page 84 VTE Srl – Via Luciano Lama, 5 – 33050 Fiumicello (UD) – Italy Phone: +39 0431 96488 – e-mail: info@volpitecno.com Website : www.volpitecno.com...
Need help?
Do you have a question about the PAGURO 6000 and is the answer not in the manual?
Questions and answers