Table of Contents
Advertisement
Quick Links
SERVICE MANUAL
6 S ERVICE MANUAL
PA056<Rev.002>
2017
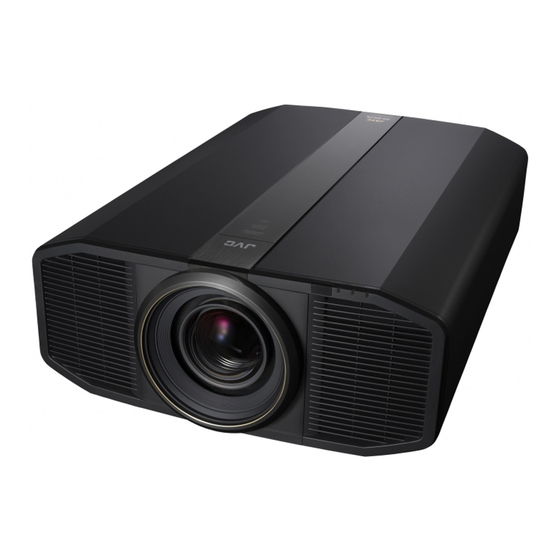
DLA-RS4500K, DLA-Z1E, DLA-Z1C,
DLA-VS4500
COPYRIGHT © 2017 JVC KENWOOD Corporation
1
PRECAUTION. . . . . . . . . . . . . . . . . . . . . . . . . . . . . . . . . . . . . . . . . . . . . . . . . . . . . . . . . . . . . . . . . . . . . . . . . . . 4
2
SPECIFIC SERVICE INSTRUCTIONS . . . . . . . . . . . . . . . . . . . . . . . . . . . . . . . . . . . . . . . . . . . . . . . . . . . . . . . . 8
3
DISASSEMBLY . . . . . . . . . . . . . . . . . . . . . . . . . . . . . . . . . . . . . . . . . . . . . . . . . . . . . . . . . . . . . . . . . . . . . . . . 12
4
ADJUSTMENT . . . . . . . . . . . . . . . . . . . . . . . . . . . . . . . . . . . . . . . . . . . . . . . . . . . . . . . . . . . . . . . . . . . . . . . . . 16
5
TROUBLESHOOTING . . . . . . . . . . . . . . . . . . . . . . . . . . . . . . . . . . . . . . . . . . . . . . . . . . . . . . . . . . . . . . . . . . . 20
D-ILA PROJECTOR
TABLE OF CONTENTS
COPYRIGHT © 2017 JVC KENWOOD Corporation
No.PA056<Rev.002>
2017/6
Advertisement
Table of Contents

Related Manuals for JVC DLA-RS4500K


Summary of Contents for JVC DLA-RS4500K
- Page 1 DLA-RS4500K, DLA-Z1E, DLA-Z1C, DLA-VS4500 COPYRIGHT © 2017 JVC KENWOOD Corporation TABLE OF CONTENTS PRECAUTION................4 SPECIFIC SERVICE INSTRUCTIONS .
-
Page 2: Specification
D-ILA PROJECTOR with Laser Light and D-ILA Native 4K device. ) AC100 to 240V 50/60Hz Max750W ( Standby mode: 1.5W, Eco mode* : 0.4W ) POWER * Only DLA-RS4500K, DLA-Z1E, DLA-Z1C Operating temp./hum. +5 to +35, 20% to 80% (no-condensation) Strage temp./hum. -
Page 3: Input Connectors
PJ control / service correspondence / calibration dence / calibration compatible / for firmware up compatible 1-System/RS-232C/D-Sub9 pin, JVC External command system (HD-ILA compliant), all settings status, RS-232 terminal individual retrieval possible, maintains OSD display when reference commands are received during OSD... -
Page 4: Section 1 Precaution
SECTION 1 PRECAUTION SAFETY PRECAUTIONS Prior to shipment from the factory, JVC products are strictly in- Consequently, when servicing these products, replace the spected to conform with the recognized product safety and elec- cathode ray tubes and other parts with only the specified trical codes of the countries in which they are to be parts. -
Page 5: Safety Check After Servicing
1.1.2 SAFETY CHECK AFTER SERVICING Examine the area surrounding the repaired location for damage (4) Leakage current test or deterioration. Observe that screws, parts and wires have been Confirm specified or lower leakage current between earth returned to original positions, Afterwards, perform the following ground/power cord plug prongs and externally exposed ac- tests and confirm the specified values in order to verify compli- cessible parts (RF terminals, antenna terminals, video and... -
Page 6: Warning And Caution Labels
WARNING AND CAUTION LABELS • Labels advising of warning and caution are affixed on and in various locations of the product. • Take careful notice of these during service and inspection. Class Label advisory Location High voltage caution REAR PANEL WARNING Do not open the cabinet unless you are the service person. - Page 7 • Select a stable, horizontal work site to prevent dropping the 1.6.2 INSTALLATION SITE AND STATUS product and components. The projector contains some fans for cooling. If the air inlets or • Use the power cord and interface cable supplied with the prod- the vent holes of cooling fans are blocked, cooling efficiency may uct.
-
Page 8: Section 2 Specific Service Instructions
SECTION 2 SPECIFIC SERVICE INSTRUCTIONS DIFFERENCE POINT Differences other than the following items For details, refer to P2, 3 "Specification" and WEB instruction manual. DLA-RS4500K Item DLA-Z1C DLA-VS4500 DLA-Z1E Model code A0A1 A0B1 Input terminal HDMI x 2 Display Port x 4... - Page 9 NOTES ON REPAIRING LASER PRODUCTS • The laser safety goggles absorb a great amount of light of spe- cific wavelengths. This affects the color balance of your eyes The light leakage of this product (when the shield cover is temporarily after a long period of use. assembled correctly) is Class 1 or below.
- Page 10 FUNCTIONS 2.4.3 LED LOCATION 2.4.1 LED INDICATIONS FRONT VIEW The LED operations are as follows. STANDBY/ON NOTE: LIGHT When the unit is on standby in "ECO Mode" (LED: STANDBY/ WARNING ON lamp is off), press the "STANDBY/ON" button on the re- mote control to cancel the standby state (LED: STANDBY/ON STANDBY/ON LIGHT...
-
Page 11: Setting Items
Lens Position Reset *1 3D L/R Picture *1 Standard / L/R Switch Standard Phase setting of 3D signal All reset Restore main unit setting to factory default *1: Exclusive for DLA-RS4500K, DLA-Z1E and DLA-Z1C. DLA-VS4500 is not displayed. (No.PA056<Rev.002>) 11... -
Page 12: Section 3 Disassembly
SECTION 3 DISASSEMBLY CAUTION AT DISASSEMBLY • Make sure that the power cord is disconnected from the outlet. • Pay special attention not to break or damage the parts. Also, please pay attention to lens dirt and fingerprints. • Make sure that there is no bent or stain on the connectors before inserting, and firmly insert the connectors. •... - Page 13 3.2.3 Remove the INTERLOCK PWB, PROCESSOR PWB, 3.2.4 Remove the TERMINAL PWB, LD FAN (Fig.3-5) MOTOR PWB and DD PWB (Fig.3-4) (1) Remove 6 screws (a, b, c), and remove the REAR BASE. (1) Remove 14 screws (a), and remove the TOP PLATE. (2) Remove the 2 screws (d), and remove the TERMINAL (2) Remove the 2 screws (b), and remove the INTERLOCK PWB.
- Page 14 3.2.6 Remove the AC INPUT PWB and POWER PWB (Fig.3-7) 3.2.7 Remove the RELAY 2 PWB and LD DRIVER PWB (1) Remove 13 screws (a), and remove the SIDE PLATE. (Fig.3-8) (2) Remove the 4 screws (b), and remove the AC INPUT PWB. (1) Remove 13 screws (a), and remove the SIDE PLATE.
-
Page 15: Optical Unit
3.2.8 Remove the INTERLOCK PWB and OPTICAL UNIT (8) Remove the 2 screws (a), and remove the FRONT PLATE. (Fig.3-9 and Fig.3-10) (9) Remove the 2 screws (b), and remove the INTERLOCK (1) Remove the 8 screws (a), and remove the BRACKET. PWB (for the FONT COVER). -
Page 16: Section 4 Adjustment
SECTION 4 ADJUSTMENT BEFORE STARTING ADJUSTMENT INSTRUMENTS AND TOOLS (1) Adjustment items utilize a personal computer. Be sure to • Oscilloscope use the latest adjustment software. • Adjustment software (2) Data back up is required before adjustments. • RS-232C Reverse (Cross) cable (3) Allow the equipment and test instruments adequate time •... - Page 17 (2) Select Com Port, then connect the PC to the projector and click "Connect". (3) Select the info menu. (4) Select the model code from the Model, and write the model code. A0A1-----DLA-RS4500K, DLA-Z1C/E A0C1-----(Not use) A0B1-----DLA-VS4500 4.4.3 Destination writing Fig.4-1 "Service Commander Software" screen...
- Page 18 4.4.4 Transferring CMS Data from DD PWB 4.4.5 Adjustment data backup of DD PWB Instruments VPWriter REPLACING Instruments ServiceCommander REPLACING COMPONENTS Software COMPONENTS Test point PROCESSOR PWB DD PWB Test point Adjustment menu OP UNIT Adjustment menu Preparation Preparation Note: •...
- Page 19 4.4.8 MAC address writing 4.4.10 Mecha EEPROM (lens set value etc.) backup Instruments ServiceCommander REPLACING Instruments ServiceCommander REPLACING Software COMPONENTS Software COMPONENTS PROCESSOR PWB MOTOR PWB Test point Test point Adjustment menu Adjustment menu Preparation Preparation Note: Note: Perform this operation during standby mode. •...
-
Page 20: Section 5 Troubleshooting
SECTION 5 TROUBLESHOOTING PROTECTIVE SENSOR AND PROTECTIVE SWITCH In event of abnormal operation due to circuit or component failure, setting error or other reason, in order to prevent serious damageto the set and preserve the integrity of peripheral equipment, sensors and switches are provided for protective functions. Cooling iscon- ducted at the same time a corresponding LED flashes (about 10 seconds). -
Page 21: Reading Procedure
LOG (SELF-DIAGONOSIS RECORD AND INDICATION) 5.3.1 OUTLINE Error code Content By using the special setting and adjustment software, data relat- Intake fan of the power supply PWB is abnormal ed to abnormal operation (history) stored in the projector can be (stop) load.On the basis of contents "LED (INDICATOR) WARNING IN- DICATONS"... -
Page 22: Event Log
USB update Error code Content Update files are distributed in a compressed format (ZIP) through Power supply error of D-ILA device CuSIS. Rch D-ILA device is not connected USB memory for updating Rch D-ILA device is not connected TYPE2 Format: "FAT32"... - Page 23 If the USB memory is inserted, mount and check whether the predetermined folder and files exist. After a short while, the LED will light up repeatedly in the order of WARNING LIGHT STANDBY/ON. The interval of light- ing up will become shorter as it progresses. Once the LED of the "LAN terminal"...
- Page 24 JVC KENWOOD Corporation Media Business Division 7,58, shinmei-cho, Yokosuka-city, Kanagawa-prefecture, 239-8550, Japan (No.PA056<Rev.002>) Printed in Japan...