Table of Contents
Advertisement
Available languages
Available languages
Quick Links
Advertisement
Table of Contents

Related Manuals for Termozeta Airzeta DRY


Summary of Contents for Termozeta Airzeta DRY
- Page 1 DEUMIDIFICATORE MODELLO: TZDEU10L...
-
Page 2: Manuale D'istruzioni
MANUALE D’ISTRUZIONI Vi ringraziamo per la preferenza accordata avendo scelto un prodotto TERMOZETA.. Vi preghiamo di leggere attentamente le informazioni contenute in questo manuale, in quanto Vi aiuteranno a sfruttare al meglio le caratteristiche di questo prodotto. Il presente libretto è parte integrante dell’apparecchio e deve essere letto attentamente prima dell’utilizzo perché... -
Page 3: Avvertenze Generali
Leggere attentamente questo manuale d’istruzioni poichè all’interno vi sono importanti informazioni sulla sicurezza, l’uso e la manutenzione dell’elettrodomestico. Conservare il manuale per consultazioni future. AVVERTENZE GENERALI Questo apparecchio può essere utilizzato da bambini dagli 8 anni in su e da persone con ridotte capacità fisiche, sensoriali o mentali o con mancanza di esperienza o conoscenza se a loro è... - Page 4 Si prega di tenere una distanza di 20 cm tra l’unità e la parete o altri oggetti per garantire la circolazione dell'aria. L’unità è concepita per un solo per uso interno. Non per emetter che gli agenti atmosferici vengano in contatto con il prodotto.
-
Page 5: Dati Tecnici
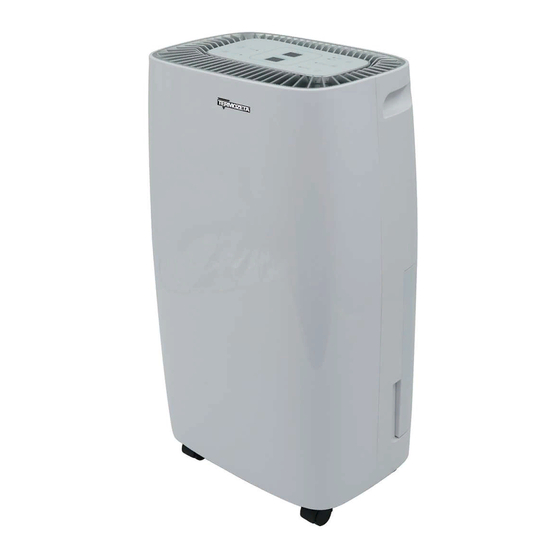
. Questo dispositivo è caricato con gas infiammabile R290. ATTENZIONE: Il prodotto deve essere installato, messo in funzione e riposto in un ambiente con superficie superiore di 4m2.Non tentare di accelerare il processo di sbrinamento e di pulizia. ma seguire le operazioni indicate nel manuale. Il prodotto non deve essere installato in ambienti in cui sono presenti fonti di iniezione (ad esempio: fiamme libere, apparecchi a gas in funzione o stufe elettriche in funzione). - Page 6 DESCRIZIONE DELLE PARTI 1. Pannello superiore 2. Pannello di controllo 3. Gusci posteriore 4. Filtro 5. Guscio frontale 6. Serbatoio acqua 7. Rotelle 8. Cordone alimentazione 9. Feritoia ACCESSORI OPZIONALI Tessuto filtrante a carbone attivo(Opzione)...
- Page 7 PANNELLO DI CONTROLLO INDICATORI A LED LED ACCENSIONE LED IMPOSTAZIONE LED VELOCITA’ LED TIMER LED LIVELLO SERBATOIO Display a 2 cifre per Livello Umidità e Timer L’indicatore ha 3 funzioni: 1. quando l'unità è collegata, indicherà il livello di umidità ambientale. 2.
-
Page 8: Funzionamento
FUNZIONAMENTO 1. La spia di accensione si accenderà quando l'unità è collegata, indipendentemente dal fatto che l'unità funzioni o meno. 2. Premere per far funzionare l’apparecchio. Premere di nuovo per spegnere. 3.Premere il pulsante per impostare la velocità della ventola desiderata. Può essere regolato tra alta e bassa velocità. - Page 9 Svuotare il serbatoio 1. Premere leggermente sui lati del serbatoio con entrambe le mani ed estrarre delicatamente il serbatoio. 2. Scaricare l’acqua raccolt NOTA 1. Non rimuovere il galleggiante dal serbatoio dell'acqua. Il sensore pieno d'acqua non sarà più in grado di rilevare correttamente il livello dell'acqua senza galleggiante e l'acqua potrebbe fuoriuscire dal serbatoio.
-
Page 10: Pulizia E Manutenzione
Drenaggio continuo dell'acqua L'unità è dotata di una porta per il drenaggio continuo. Utilizzando un tubo di plastica (con un diametro interno di 10 mm) si inserisce nel foro di scarico (sulla piastra intermedia), si allunga dal lato del serbatoio dell'acqua, lo si installa in posizione e si posiziona il tubo di scarico. - Page 11 2. Pulizia del filtro Passare leggermente un aspirapolvere sulla superficie del filtro dell'aria per rimuovere lo sporco. Se il filtro dell'aria è molto sporco, lavarlo con acqua calda e un detergente delicato e asciugare accuratamente. 3. Inserimento del filtro Inserire il filtro nella griglia uniformemente e posizionare la griglia di ingresso nella posizione corretta. 2.
- Page 12 CONSERVAZIONE Conservazione del deumidificatore Quando l'unità non viene utilizzata per un lungo periodo di tempo e si desidera conservarla, tenere presente quanto segue: 1. Svuotare l'eventuale acqua rimasta nel serbatoio di drenaggio. 2. Ripiegare il cavo di alimentazione e inserirlo nel serbatoio dell'acqua. 3.
-
Page 13: Risoluzione Dei Problemi
RISOLUZIONE DEI PROBLEMI Se si verifica una condizione elencata di seguito, controllare i seguenti elementi prima di chiamare il servizio clienti. Se si verifica una condizione elencata di seguito, controllare i seguenti elementi prima di chiamare il servizio clienti. Problema Possibile Causa Soluzione Il cavo di alimentazione è... - Page 14 DEHUMIDIFIER MODEL: TZDEU10L...
-
Page 15: Safety Warnings
INSTRUCTION MANUAL Read this instruction manual carefully. Keep it for future reference. SAFETY WARNINGS When using the unit, please observe the following safety precautions: This appliance can be used by children aged from 8 years and above and persons with reduced physical, sensory or mental capabilities or lack of experience and knowledge if they have been given supervision or instruction concerning use of the appliance in a safe way and understand the hazards involved. - Page 16 Before removing the appliance, be sure that the water tank is empty Never damage, modify, heat up the power cable. Never put heavy or sharp objects on it. Keep the power chord far for source of heat. Discharge water that has collected in the tank as required ...
-
Page 17: Technical Data
Adjustable Humidistat Adjust the desired humidity level by the humidistat. Timer On / Off Program the unit to turn on and off automatically. Quiet Operation The dehumidifier operates with a low noise level. Energy Efficient The power consumption of the unit is low. TECHNICAL DATA Model TZDEU10L... -
Page 18: Led Indicators
OPERATING INSTRUCTIONS LED INDICATORS 1. POWER-LED 2. SET-LED 3. W.F-LED 4. TIM-LED 5. FULL-LED Humidity Level & Timer 2 digit display The indicator features 3 functions:。 1. when the unit is turned on, it will indicate the room humidity level. 2. - Page 19 Press to set the desired fan speed. It can be adjusted between high speed and low speed. 4. Press button to set the desired humidity level in the room, which can be set from 40% to 80% at 5% intervals. After a period of working, when environment humidity is lower than the selected humidity by 2%, compressor will stop and fan continues to run without dehumidification function;...
- Page 20 NOTE 1. Do not remove the float from the water tank. The water full sensor will no longer be able to detect the water level correctly without the float and water may leak from the water tank. 2. If the drainage tank is dirty, wash it with cold or lukewarm water. Do not use detergent, scouring pads, chemically treated dust cloths, gasoline, benzene, thinner, or other solvents, as these can scratch and damage the tank and cause water leakage 3.
- Page 21 MAINTENANCE AND CLEANING Cleaning the Dehumidifier To clean the Body Wipe it with a soft damp cloth. To Clean the Air Filter 1.Open the inlet grill firstly and remove the air filter 2. Clean the air filter Run a vacuum cleaner lightly over the surface of the air filter to remove dirt. If the air filter is exceptionally dirty, wash it with warm water and a mild cleanser and dry thoroughly.
- Page 22 Storing the Dehumidifier When the unit is not being used for a long period of time and you want to store it note the following steps: 1. Empty any water left in the drainage tank. 2. Fold up the power supply cord and put it in the water tank. 3.
-
Page 23: Troubleshooting
TROUBLESHOOTING If a condition listed below occurs, please check the following items before calling customer service. Problem Possible Cause Solution Has the power cord been Plug the power cord into the disconnected? outlet. Is the tank full indication Empty the water in the lamp blinking? (The tank is drainage tank and then full or in a wrong position.)
Need help?
Do you have a question about the Airzeta DRY and is the answer not in the manual?
Questions and answers