
Related Manuals for Silvercrest MONSIEUR CUISINE CONNECT


Summary of Contents for Silvercrest MONSIEUR CUISINE CONNECT
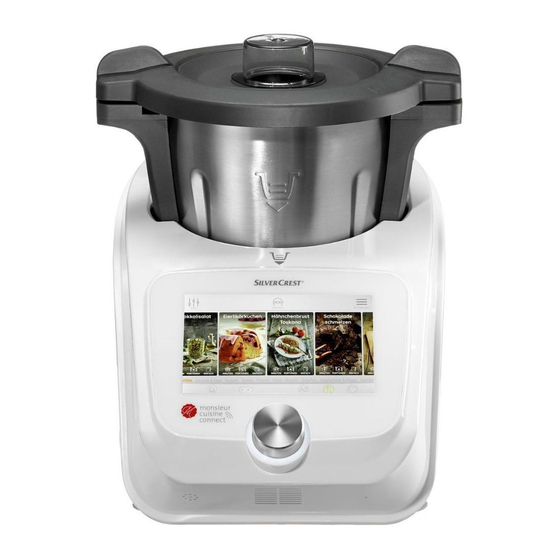
- Page 1 MONSIEUR CUISINE CONNECT SKMC 1200 C3 MONSIEUR CUISINE CONNECT Operating instructions IAN 338924_1907...
-
Page 2: Table Of Contents
Contents Overview ................4 Overview of symbols .............. 6 Intended purpose ..............7 Safety information ..............8 Items supplied ............... 10 Switching on for the first time and connecting to the Internet . 10 Overview of functions ............12 Light, sound and image signals ..........13 Adjust the volume of the audio signals ............ - Page 3 13.6 Steaming with the cooking pot ..............27 13.7 Overheating protection ................27 13.8 Tips on steaming ..................27 13.9 Using the steamer attachments ..............27 13.10 Preparing menus ..................27 14. Dough kneading ..............28 14.1 General program information ............... 28 14.2 Starting the program..................
-
Page 4: Overview
1. Overview... - Page 5 Lid for the steamer attachments Steamer attachment, shallow Steamer attachment, deep Seal for the deep steamer attachment (ensure the correct position) Blender jug Direction icon 0/I On/off switch Touchscreen Control dial LED ring Holder for the blender jug Blade socket Overflow hole Base unit Suction feet...
-
Page 6: Overview Of Symbols
2. Overview of symbols Automatic programs Navigation bar Knead Start menu Steam Settings Brown Recipes (guided cooking, CookingPilot) Recipes / CookingPilot Automatic programs Changing the direction of scrolling: move finger across the screen either with an up / down or a left / Start menu right movement. -
Page 7: Intended Purpose
3. Intended purpose Thank you for your trust! The “Monsieur Cuisine connect” is used to mix, whisk, beat, Congratulations on the purchase of your new food proces- stir, chop, purée, emulsify, steam, stew, knead, brown, cook, sor with cooking function “Monsieur Cuisine connect”. -
Page 8: Safety Information
4. Safety information Warnings If necessary, the following warnings are used in this copy of the user instructions: DANGER! High risk: failure to observe this warning may result in injury to life and limb. WARNING! Moderate risk: failure to observe this warning may result in injury or serious material damage. CAUTION: low risk: failure to observe this warning may result in minor injury or material damage. - Page 9 … before you assemble or disassemble the “Monsieur Never place the device on a hot surface, e.g. a hot Cuisine connect”, plate. … before cleaning the “Monsieur Cuisine connect” The mixer attachment must only be used with speed settings 1 to 4. … during thunderstorms.
-
Page 10: Items Supplied
Do not change the position of the device, as long as You can use your “Monsieur Cuisine connect” at any time there is still food or dough in the device. and without restrictions even without an Internet connec- Never overfill the blender jug, since otherwise the con- tion. - Page 11 You can start or cancel this. in the “Monsieur Cuisine connect”. - Press Continue to connect to the Internet. 17. Press Continue. In the next window you can subscribe to the newsletter.
-
Page 12: Overview Of Functions
7. Overview of functions Button/ Function Notes Working tool Weighing accurately to the gram with Up to 5,000 g TARE / Weighing 34 Tara function (set to 0 to weigh additional Works only in idle state, not during ingredients) operation Gentle mixing of food not to be chopped - Speed 1 - 3 Anti-clockwise rota- tion 36... -
Page 13: Light, Sound And Image Signals
8. Light, sound and image 8.2 Overview of the signals signals Signal Meaning The “Monsieur Cuisine connect” gives you information appears about the status of the device, about the completion of a Audio signal function as well as warnings about possible improper When the main menu appears, a sig- handing. -
Page 14: Unpacking And Setting Up
9. Unpacking and setting up 10. Using the blender jug During production, a thin film of oil is applied to protect NOTE: these user instructions describe the basic functions many components. Prior to the first use, operate the device such as mixing, chopping and steaming. For information only with water so that any residues can evaporate. -
Page 15: Using And Removing The Blade Assembly
10.2 Using and removing the blade CAUTION: assembly Ensure that the seal 18 is properly positioned on the blade assembly 19, since otherwise the contents The blade assembly 19 is used to chop food. might escape. The blender jug 5 must never be used without the blade as- sembly 19, since the blade assembly 19 seals the blender jug 5 on the bottom. -
Page 16: Put On The Lid Of The Blender Jug
10.6 Measuring beaker as lid for the CAUTION: filling opening The mixer attachment 21 must only be used with speed settings 1 to 4. Simultaneously, the measuring beaker 25 is used to close The turbo button 38 must not be pressed if the mixer the lid of the blender jug 5 and to measure ingredients attachment 21 is used. -
Page 17: Using The Spatula
10.8 Using the spatula 10.9 Removing the blender jug The spatula 22 is used to stir the ingredients and to remove the cooking pot 20. DANGER! Risk of injury through burning! CAUTION: If the contents of the blender jug 5 are hot, the lid 24 The spatula 22 must not be used with the mixer attach- must be opened slowly and carefully. -
Page 18: Screen
11.3 Screen The display dial The touchscreen 8 shows all settings and operating values. In sleep mode, the screen is dark and uses less energy. The 00:00 °C device is switched on with the on/off switch 7. If no function is active and no operation takes place for ap- prox. -
Page 19: Setting The Time
11.5 Setting the time 11.6 Setting the temperature Display of the set temperature 00:00 00:00 °C °C Display of the food temperature in the pot Turn this display dial to set the time of the cooking process Turn this display dial to set the cooking temperature: or the processing: The adjustable temperature ranges from 37 °C to •... -
Page 20: Setting The Speed
11.7 Setting the speed 11.8 Anti-clockwise rotation 00:51 °C 00:00 °C The anti-clockwise rotation is used for gentle stirring of Turn this display dial to set the speed: food not to be chopped. The speed can be adjusted in 10 increments: - Speed 1 - 4: for the mixer attachment 21;... -
Page 21: Scale
Weighing with the Tara function NOTES: With the Tara function you can reset the display of the • The turbo function will only work, scale to 0 grams and then add new items to be weighed. - if the blade assembly 19 is not turning. The device is switched on but no other cycle is in op- - if the food temperature in the blender jug 5 is less eration. -
Page 22: The Most Important Menus
Auto Start menu Settings Auto Recipes Start menu WLAN Click here to select a network CHANGE KNEADING Volume STEAMING About... your Monsieur Cuisine connect OPEN ROASTING Frequently asked questions OPEN Data protection Privacy statement OPEN MINUTES PORTIONS FACILE MINUTES PORTIONS... -
Page 23: The Start Menu
12.2 The start menu This menu appears after switching on the “Monsieur Cuisine connect”. In this menu, you set the values for the time, speed, anti-clockwise rotation and the de- sired temperature. You can also select the scale and start turbo. -
Page 24: Automatic Programs
12.3 Automatic programs In this menu you can select 3 different automatic programs. After entering the sub-menu, you can change some presets of the automatic programs or start the program directly. Start menu Recipes Settings KNEADING STEAMING ROASTING 00:45 4 Return to start menu Call up the menu of the selected automatic program Display of the preset values for the selected automatic program... -
Page 25: Recipes
12.4 Recipes In this menu you can choose various recipes. On the screen you will automati- cally be guided through all steps of the selected recipe. Simply read and follow the instructions on the screen: cooking has never been easier. Auto Start menu Settings... -
Page 26: Steaming
13. Steaming The program can only be started if the steamer at- tachment 3 is set correctly. NOTE: in order to facilitate the attaching of the steamer DANGER! Risk of injury through scalding! attachment 3 somewhat, put a few drops of oil on a cloth When opening the lid 1 or 24 during operation, hot and rub it on the seal 4. -
Page 27: Pause And End
After the set time has elapsed, a short signal sounds, 13.6 Steaming with the cooking pot the LED ring 10 is lit green and the touchscreen 8 shows the output values of the program again. NOTE: you can also use the cooking pot 20 when the Press the on/off switch 7 to switch off the device or steaming function is selected. -
Page 28: Dough Kneading
14. Dough kneading 14.3 Pause and end With this device you can process up to a maximum of 500 g • To stop a program which is running, press: flour for heavy doughs and 600 g flour for light doughs. - II: the time is no longer counted down. -
Page 29: Pause And End
35 button. The program is started. The time set is counted down on the touchscreen 8. The The CookingPilot of the “Monsieur Cuisine connect” program controls the anti-clockwise rotation automati- guides you step by step through the selected recipe - hence cally. -
Page 30: Functions Of The Buttons In The Cookingpilot Menu
16.2 Functions of the buttons in the 16.3 Search for recipes CookingPilot menu There are several ways to search for a recipe. CookingPilot displays buttons which can only be seen Press the Search type On the screen here. Read below to see what they mean. button Letters appear under NOTE: the symbols do not all appear at the same time, but... -
Page 31: Choose A Recipe And Cook
This only ap- played. plies to the recipes for the Monsieur Cuisine Connect. Complete the first step and then call up the next one. NOTE: if you did not log in to your member account when You have several options. -
Page 32: Factory Settings
- After entering, press Connect in the upper window. The connection will be established. Once the connection is established and you are logged into the member account, new recipes from our website will automatically be loaded and saved in the “Monsieur Cuisine connect”. -
Page 33: Switching Off The Wlan Connection
17.6 Switching off the WLAN When do you receive new recipes? • Every few weeks new recipes are automatically add- connection • Due to the large number of devices, a new set of reci- • To cancel the connection to the Internet, slide the pes will not be uploaded to all devices in one day. -
Page 34: Change Menu Language
17.9 Change menu language 18.2 Cleaning in the dishwasher If desired, you can change the language for the menus. The following parts are dishwasher-safe: Blender jug 5 Measuring beaker 25 Tap the button on the screen. Lid for blender jug 24 If required, tap Seal for blender jug 23 Slide the menu up with one finger and then press the Blade assembly 19... -
Page 35: Cleaning, Checking And Replacing The Spatula
Blade assembly For cleaning, remove the silicone scraper, and check it for damage. Pay attention to changes (e.g. porous material or Remove the blade assembly 19 from the blender tears). jug 5 (see “Using and removing the blade assembly” Both parts can be cleaned in the dishwasher. on page 15). -
Page 36: Replacing The Blade Socket
18.7 Replacing the blade socket 18.8 Storage If you process larger quantities than those specified in Store the device so that it is protected against dust and dirt these instructions (e.g. dough with more than 600 g of and out of the reach of children. flour), the blade socket 12 can become so worn out that the blade assembly 19 no longer turns correctly. -
Page 37: Malfunctions, Cause, Remedy
19. Malfunctions, Cause, Remedy If your device fails to function as required, please try this checklist first. Perhaps there is only a minor problem, and you can solve it yourself. DANGER! Risk of electric shock! Do not attempt to repair the device yourself under any circumstances Malfunction Cause Remedy... -
Page 38: Disposal
20. Disposal Symbols used Certified Safety. Devices must comply with the gener- This product is subject to the provisions of Eu- ally acknowledged rules of technology and the Ger- ropean Directive 2012/19/EC. The symbol man Product Safety Act (Produktsicherheitsgesetz - showing a wheelie bin crossed through indi- ProdSG). -
Page 39: Warranty Of The Hoyer Handel Gmbh
24. Warranty of the HOYER Handel • Then, you are able to send a product reported as defective free of charge to the service address specified to you, includ- GmbH ing the purchase receipt and the information on the defect Dear Customer, and when it occurred. - Page 40 HOYER Handel GmbH Tasköprüstraße 3 DE-22761 Hamburg DEUTSCHLAND Status of information: 12/2019 ID: SKMC 1200 C3_19_V1.4 IAN 338924_1907...
Need help?
Do you have a question about the MONSIEUR CUISINE CONNECT and is the answer not in the manual?
Questions and answers