Kenwood DNX8160DABS Instruction Manual
Hide thumbs
Also See for DNX8160DABS:
- Quick start manual (36 pages) ,
- Instruction manual (117 pages) ,
- Quick start manual (32 pages)
Table of Contents
Advertisement
Quick Links
Before reading this manual, click the button below to check the latest edition and the
modified pages.
http://manual.kenwood.com/edition/im391/
© 2016 JVC KENWOOD Corporation
DNX8160DABS
DNX716WDABS
DNX5160DABS
DNX516DABS
DNX5160BTS
DNX3160BT
GPS NAVIGATION SYSTEM
INSTRUCTION MANUAL
Check the latest edition
im391_Ref_E_En_01 (E)
Advertisement
Table of Contents

Related Manuals for Kenwood DNX8160DABS


Summary of Contents for Kenwood DNX8160DABS
- Page 1 DNX8160DABS DNX716WDABS DNX5160DABS DNX516DABS DNX5160BTS DNX3160BT GPS NAVIGATION SYSTEM INSTRUCTION MANUAL Before reading this manual, click the button below to check the latest edition and the modified pages. http://manual.kenwood.com/edition/im391/ Check the latest edition © 2016 JVC KENWOOD Corporation im391_Ref_E_En_01 (E)
- Page 2 What Do You Want To Do? What Do You Want To Do? Thank you for purchasing the KENWOOD GPS NAVIGATION SYSTEM. In this manual, you will learn various convenient functions of the system. Click the icon of the media you want to play.
-
Page 3: Table Of Contents
Contents Contents Before Use Radio # WARNING _______________________ 4 Radio Basic Operation _______________ 52 Digital Radio Basic Operation _________ 54 How to Read this Manual Memory Operation __________________ 56 Basic Operations Selecting Operation _________________ 57 Functions of the Buttons Traffic Information on the Front Panel __________________ 6 (FM Tuner and Digital Radio only) ______ 58 Turning on the Unit _________________ 14... - Page 4 Contents Controlling Audio Speaker/ X’over setup ________________ 88 Controlling General Audio ____________ 91 Equalizer Control ___________________ 92 Volume Offset ______________________ 93 Zone Control _______________________ 94 Sound Effect _______________________ 95 Listening Position/ DTA ______________ 96 Remote control Battery Installation __________________ 100 Functions of the Remote control Buttons 101 Troubleshooting Problems and Solutions ______________ 104...
-
Page 5: Before Use
• When you purchase optional accessories, • Do not use disc type accessories. check with your KENWOOD dealer to make sure that they work with your model and in • Clean from the center of the disc and move your area. -
Page 6: How To Read This Manual
How to Read this Manual How to Read this Manual CD/Audio and Visual Files/iPod/APPS Operation title Search Operation Introduces the function. You can search music or video files by the following operations. NOTE NOTE Introduces some tips, notes, etc. • If you use a remote control, you can jump directly to the desired track/file with entering the track/ folder/file number, play time, etc. -
Page 7: Basic Operations
Basic Operations Basic Operations Functions of the Buttons on the Front Panel DNX8160DABS NOTE • The panels shown in this guide are examples used to provide clear explanations of the operations. For this reason, they may be different from the actual panels. - Page 8 Basic Operations Number Name Motion • This indicator flashes when the vehicle ignition is off (P.82). S, R • Adjusts volume. The volume will go up until 15 when you keep pressing [ R ]. (Volume) • Displays the navigation screen. MENU •...
- Page 9 Basic Operations DNX716WDABS NOTE • The panels shown in this guide are examples used to provide clear explanations of the operations. For this reason, they may be different from the actual panels. • In this manual, each model name is abbreviated as follows. DNX716WDABS: If above icon is showed, read the article applicable to the unit you use.
- Page 10 Basic Operations Number Name Motion • Displays the navigation screen. S, R • Adjusts volume. The volume will go up until 15 when you keep pressing [ R ]. (Volume) • Displays the HOME screen (P.22). HOME • Pressing for 1 second turns the power off. •...
- Page 11 Basic Operations DNX5160DABS/DNX5160BTS/DNX3160BT NOTE • The panels shown in this guide are examples used to provide clear explanations of the operations. For this reason, they may be different from the actual panels. • In this manual, each model name is abbreviated as follows. DNX516DABS, DNX5160BTS: DNX3160BT: If above icons are showed, read the article applicable to the unit you use.
- Page 12 Basic Operations Number Name Motion Disc insert • A slot to insert a disc media. slot G (Eject) • Ejects the disc. • To forcibly eject the disc, press it for 2 seconds and touch [Yes] after the message is displayed. •...
- Page 13 Basic Operations DNX516DABS NOTE • The panels shown in this guide are examples used to provide clear explanations of the operations. For this reason, they may be different from the actual panels. • In this manual, each model name is abbreviated as follows. DNX516DABS: If above icons are showed, read the article applicable to the unit you use.
- Page 14 Basic Operations Number Name Motion • This indicator flashes when the vehicle ignition is off (P.82). Disc insert • A slot to insert a disc media. slot G (Eject) • Ejects the disc. • To forcibly eject the disc, press it for 2 seconds and touch [Yes] after the message is displayed.
-
Page 15: Turning On The Unit
Basic Operations Turning on the Unit The method of turning on is different depending on the model. Press the <HOME> button. DNX8160DABS DNX716WDABS DNX5160DABS/ DNX5160BTS/ DNX3160BT DNX516DABS The unit is turned on. ● To turn off the unit: Press the <HOME> button for 1 second. - Page 16 Basic Operations Initial setup Perform this setup when you use this unit first time. Set each item as follows. Locale Select the country for the navigation system. The language, the distance unit, and the gasoline unit are set. 1 Touch [Locale]. 2 Select the desired country.
- Page 17 Basic Operations Touch [Finish]. NOTE Setting Up (P.76). • These settings can be set from the SETUP menu. See...
-
Page 18: How To Play Media
Basic Operations How to Play Media Insert the disc into the slot. Music CD and disc media Press the <G> button. Touch [DISC EJECT]. The panel opens. Insert the disc into the slot. The unit loads the disc and playback starts. - Page 19 Basic Operations USB device SD card Connect the USB device with the USB cable. Press the <G> button. Press the <HOME> button. Touch [OPEN] to the panel fully Touch [USB]. (P.22) opens. ● To disconnect the device: Insert the SD card into the slot Press the <HOME>...
- Page 20 Basic Operations HDMI/ MHL source Insert the microSD card into the slot until it clicks. You can display the screen of smartphones connected via the HDMI/MHL input terminal. Press the <HOME> button. Touch [ Touch [HDMI/ MHL]. (P.22) Start an application or playback on your smartphone.
- Page 21 Basic Operations TV tuner Menu control screen: 1) Touch Key display area. You can connect the TV tuner (commercially available) with this unit and watch TV. Before use • When you use TV control function, connect the TV tuner (commercially available) and set 3rd Party TV AV Setup (P.87) Tuner Control in to ON.
-
Page 22: Detaching The Front Panel
Hold the panel securely so as not to drop You can detach the front panel to prevent it accidentally, and fit it onto the attaching theft. plate until it is firmly locked. DNX8160DABS Press the <0> button. Touch [OPEN] to the panel fully opens. DNX516DABS Slide the Release key rightward to detach the part of the front panel. -
Page 23: Operating With The Home Screen
Basic Operations Operating with the HOME Screen Most functions can be performed from the HOME screen. Press the <HOME> button. DNX8160DABS DNX5160DABS/ DNX5160BTS/ DNX3160BT DNX716WDABS DNX516DABS HOME screen appears. Flick the screen left or right to select the widget. Touch the widget to display the detailed screen. - Page 24 Basic Operations Touch [ From this screen, you can perform the following functions. Function Icon Operation Switch the audio source Touch the icon of the desired source. etc. Switch the video source Touch the icon of the desired video source. etc.
-
Page 25: Common Operations
: Turns the display off. : Displays the view camera. Press the <MENU> button. : Displays the SETUP Menu screen. DNX8160DABS : Displays the Audio Control Menu screen. : Displays the control screen of current source. Icon feature differs depending on the source. - Page 26 Basic Operations Secondary screen etc. [<] [>] : The Secondary screen changes every Keys with various functions are displayed time you touch it. here. • Indicators: Displays the current source : Plays all tracks in the folder containing condition and so on. the current track.
-
Page 27: Navigation Operation
Display the navigation screen Also, you can view the navigation Press the <NAV> button. information while the source control screen is displayed. DNX8160DABS Touch the Navigation information of Secondary screen. DNX716WDABS DNX5160DABS/ DNX5160BTS/ DNX3160BT The navigation screen with audio information appears. - Page 28 Android smartphone in which the “KENWOOD Traffic Powered By INRIX” application is installed to this unit. Preparation • Install the latest version of the KENWOOD Traffic Powered By INRIX application on your iPhone or Android. Displays the navigation and current video/ –...
-
Page 29: Dvd/Video Cd (Vcd)
DVD/Video CD (VCD) DVD/Video CD (VCD) DVD/VCD Basic Operation Most functions can be controlled from the source control screen and playback screen. NOTE Switching the operation mode • Set the remote control mode switch to DVD mode before starting operation, see (P.101). - Page 30 DVD/Video CD (VCD) 5 Searching area Touch to search the next/previous content. 6 Key display area Touch to display the control screen. NOTE • The control screen disappears when no operation is done for 5 seconds. • If you use a remote control, you can jump directly to the desired image with entering the chapter number, scene number, play time, etc (P.101).
- Page 31 DVD/Video CD (VCD) Function panel Touch on the left side of the screen. The functions of each key are as follows. Stops playback. When touched twice, the disc is played from the beginning when you play it the next time. [<<] [>>] Fast forward or fast backward.
-
Page 32: Dvd Disc Menu Operation
DVD/Video CD (VCD) DVD Disc Menu Operation Enters selected item Touch [Enter]. You can set up some items in the DVD-VIDEO Enables direct operation disc menu. Touch [Highlight] to enter the highlight control Touch illustrated area during playback. mode (P.31). Moves the cursor Touch [R], [S], [C], [D]. -
Page 33: Dvd Setup
DVD/Video CD (VCD) DVD Setup Screen Ratio Sets the screen display mode. You can set up the DVD playback functions. 16:9 (Default): Displays wide pictures. 4:3 LB: Displays wide pictures in the Letter Box NOTE format (having black stripes at the top and •... - Page 34 DVD/Video CD (VCD) Language setup This setting is for the language used in the menu, subtitle, and voice. Touch the desired item; [Menu Language], [Subtitle Language], [Audio Language]. Language Set screen appears. Select a language. DVD Language For language code, refer to Codes (P.115).
-
Page 35: Cd/Audio And Visual Files/Ipod/Apps
CD/Audio and Visual Files/iPod/APPS CD/Audio and Visual Files/iPod/APPS See the following sections for each source operation. • Music CD (P.36) • Spotify (P.44) • Disc media (P.37) • Mirroring (P.46) • USB device (P.37) • Apple CarPlay (P.48) • iPod (P.37) •... -
Page 36: App/Ipod Settings
CD/Audio and Visual Files/iPod/APPS APP/iPod settings Touch [APP/iPod SETUP]. Select how to connect your android smartphone or iPhone to use apps like Mirroring, etc. Preparation • To connect an Android device or iPhone via Bluetooth, register it as the Bluetooth device and do the profile setting of the connection Registering from the Bluetooth beforehand. -
Page 37: Music/Video Basic Operation
CD/Audio and Visual Files/iPod/APPS Music/Video Basic Operation Most functions can be controlled from the source control screen and playback screen. NOTE Switching the operation • Set the remote controller mode switch to AUD mode before starting operation, see mode (P.101). •... - Page 38 CD/Audio and Visual Files/iPod/APPS Disc media, USB device, SD card, and iPod To enter USB/ SD/ iPod source, touch [USB], [SD] or [iPod] icon in the HOME screen. NOTE • SD card is for , and only. • The screen shot below is for USB device. It may be different from the one for iPod. Control screen Content list panel ] / [...
- Page 39 CD/Audio and Visual Files/iPod/APPS 7 Content list panel Displays the playing list. When you touch a track/file name on the list, playback will start. Picture/video screen 8 Searching file area (picture/video file only) Touch to search the next/previous file. 9 Key display area (picture/video file only) Touch to display the control screen.
- Page 40 CD/Audio and Visual Files/iPod/APPS Function panel Touch on the left side of the screen. Disc media and SD card USB device The following functions can be performed by using keys in this area. ] (disc media, USB device, and SD card only) Searches previous/next folder.
-
Page 41: Search Operation
CD/Audio and Visual Files/iPod/APPS Search Operation Category search (USB device, iPod, and SD card only) You can search music or video files by the following operations. You can search a file by selecting category. Touch [1]. NOTE Category List screen appears. •... - Page 42 CD/Audio and Visual Files/iPod/APPS Link search (USB device, iPod, NOTE and SD card only) • Touch [A-Z] to narrow the search you can select a letter. You can search a file of same artist/album/ List screen • For operations in the list screen, see genre/composer as the current track.
- Page 43 CD/Audio and Visual Files/iPod/APPS Folder search (USB device, disc media, and SD card only) You can search a file according to hierarchy. Touch [1]. Category List screen appears. Touch [ S ]. Touch [Folder List]. Touch the desired folder. When you touch a folder its contents are displayed.
- Page 44 CD/Audio and Visual Files/iPod/APPS...
-
Page 45: Spotify Operation
CD/Audio and Visual Files/iPod/APPS Spotify Operation You can listen to the Spotify on this unit by controlling the application installed in the iPhone or Android. To enter Spotify source, touch [Spotify] icon in the HOME screen. Preparation • Install the latest version of the Spotify application "Spotify" on your iPhone or Android. iPhone: Search for "Spotify"... - Page 46 CD/Audio and Visual Files/iPod/APPS Function bar Selecting a track Touch [ Menu screen appears. The following functions can be performed by Select the list type, then select a using keys in this area. desired item. Displays the Menu screen New radio station that relates to the artist of the currently playing song is selected and playback starts.
-
Page 47: Mirroring Operation
You can listen to music or watch video from the Mirroring operating on Android. Preparation • Install the latest version of the KENWOOD Smartphone Control application on your Android. Search for “KENWOOD Smartphone Control” in Google play to find and install the most current version. - Page 48 Touch [Agree]. KENWOOD Music Control for Android Preparation • Install the latest version of the KENWOOD Music Control application on your Android. Search for “KENWOOD Music Control for Android” in Google play to find and install the most current version.
-
Page 49: Apple Carplay Operation
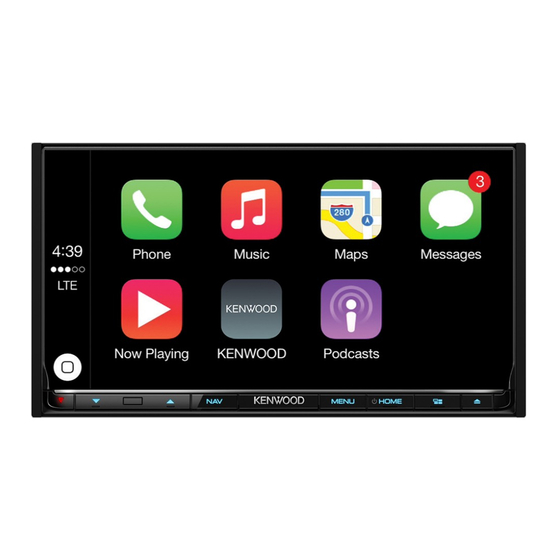
CD/Audio and Visual Files/iPod/APPS Apple CarPlay Operation Preparation CarPlay is a smarter, safer way to use your Press the <MENU> button/ iPhone in the car. CarPlay takes the things volume knob. you want to do with iPhone while driving Popup menu appears. and displays them on the screen of the product. - Page 50 CD/Audio and Visual Files/iPod/APPS Operation buttons and Using Siri available Apps on the home You can activate Siri. screen of CarPlay Press the < > button for 1 second. You can use the Apps of the connected iPhone. Press for 1 second The items displayed and the language used on the screen differ among the connected devices.
-
Page 51: Android Auto™ Operation
CD/Audio and Visual Files/iPod/APPS Android Auto™ Operation Preparation DNX516DABS) Press the <MENU> button. Android Auto enables you to use functions of Popup menu appears. your Android device convenient for driving. Touch [SETUP]. You can easily access route guidance, make SETUP Menu screen appears. calls, listen to music, and access convenient functions on the Android device while Touch [AV]. - Page 52 CD/Audio and Visual Files/iPod/APPS Operation buttons and Using voice control available Apps on the Android Auto screen Press the < > button for 1 second. You can perform the operations of the Apps Press for 1 second of the connected Android device. The items displayed on the screen differ among the connected Android devices.
-
Page 53: Radio
Radio Radio Radio Basic Operation Most functions can be controlled from the source control screen. To enter Radio source, touch [Radio] icon in the HOME screen. NOTE Switching the operation mode • Set the remote control mode switch to AUD mode before starting operation, see (P.101). - Page 54 Radio 7 Preset list Recalls the memorized station. When touched for 2 seconds, stores the current receiving station in memory. Function panel Touch on the left side of the screen. The functions of each key are as follows. [TI] (FM Tuner only) Traffic Information (P.58).
-
Page 55: Digital Radio Basic Operation
Radio Digital Radio Basic Operation (DNX8160DABS, DNX716WDABS, DNX5160DABS, DNX516DABS only) Most functions can be controlled from the source control screen. To enter Radio source, touch [DAB] icon in the HOME screen. NOTE Switching the operation mode • Set the remote control mode switch to AUD mode before starting operation, see (P.101). - Page 56 Radio 7 Artwork area The picture data is displayed if available from current content. Touch to switch between the Control and Information screen. 8 Preset list Recalls the memorized service. When touched for 2 seconds, stores the current service in memory. Function panel Touch on the left side of the screen.
-
Page 57: Memory Operation
Radio Memory Operation Manual memory You can store the current receiving station or Auto memory service in memory. You can store stations with good reception in Select a station or service you wish to store in memory. memory automatically. This function is for radio only. Touch [FM#] (#:1-15), [AM#] (#:1-5), or [P#] (#:1-15) in which you want to store Touch desired band key. -
Page 58: Selecting Operation
Radio Selecting Operation Search by program type You can tune to a station with a specific Preset select program type when listening to FM/ Digital Radio. You can list and select memorized station or Touch on the left side of the screen. service. -
Page 59: Traffic Information (Fm Tuner And Digital Radio Only)
Radio Service search Traffic Information (FM Tuner (Digital Radio only) and Digital Radio only) You can select a service from a list of all You can listen and watch the traffic services received. information automatically when a traffic bulletin starts. Touch [1]. -
Page 60: Replay (Digital Radio Only)
Radio Replay (Digital Radio only) NOTE • PTY Watch starts operating and Replay function You can replay last 30 minutes of current cannot be used while receiving a program. station. • While replaying the current station, you can not Manual memory (P.56). -
Page 61: Radio Setup
Radio Radio Setup You can set tuner related parameters. Touch on the left side of the screen. Touch [SETUP]. Radio SETUP screen appears. Set each item as follows. NEWS Sets a news bulletin interrupt time. Default is “OFF”. When station reception is poor, automatically switches to the station that is broadcasting the same program over the same Radio Data System network. -
Page 62: Digital Radio Setup
Radio Digital Radio Setup Antenna Power* Sets power supply to the Digital Radio You can set Digital Radio related parameters. antenna. Set to “ON” when the Digital Radio antenna in use is equipped with a booster. Touch on the left side of the screen. Default is “ON”. - Page 63 Radio Announcement setup When the service for which ON is selected starts, switches from any source to Announcement to receive it. Touch [Announcement Select] in the DAB SETUP screen. The Announcement Select screen appears. Touch each Announcement list and set on or off.
- Page 64 Radio...
-
Page 65: Bluetooth Control
NOTE • For the cell-phones verified for compatibility, Bluetooth SETUP screen appears. access the following URL: http://www.kenwood.com/cs/ce/bt/. See the following section for each setting. • Registering from the Bluetooth unit • The units supporting the Bluetooth function have been certified for conformity with the Bluetooth (P.65) - Page 66 Bluetooth Control Registering from the NOTE Bluetooth unit • A new device cannot be registered if there are 10 registered Bluetooth units. Delete unnecessary Follow the step 1, 2 and 3 for registration. Connecting the Bluetooth unit registration. See (P.66). •...
- Page 67 Bluetooth Control Step 3: Phonebook transfer Connecting the Bluetooth unit Select if you want to transfer your Touch [Select Device] in the Bluetooth phonebook data. SETUP screen. This message appears if the device supports PBAP. Touch the device name you want to connect.
- Page 68 Bluetooth Control Change the PIN code Audio (A2DP)/App (SPP) The device is connected with the unit as an audio player or as a smartphone with apps Touch [PIN Code] in the Bluetooth installed. SETUP screen. PIN Code Set screen appears. Touch [Close].
-
Page 69: Playing Bluetooth Audio Device
Bluetooth Control Playing Bluetooth Audio Device Bluetooth basic operation Control screen Function panel 1 Device name/ [ ] / [ • Connected device name. • [ ] : Repeats the current track/folder. Each time you touch the key, repeat mode switches in the following sequence;... - Page 70 Bluetooth Control Function panel Touch the device name you want to connect. Touch on the left side of the screen. Touch [Close]. The following functions can be performed by using keys in this area. Folder search [BT DEVICE CHANGE] Touch [1]. Selects the device to connect via Bluetooth Connecting audio (A2DP) or APP (SPP).
-
Page 71: Using Hands-Free Unit
Bluetooth Control Using Hands-Free Unit Select a dialing method. You can use telephone function by connecting the Bluetooth telephone to this unit. Making a call Touch [Û]. • [ ]: Call by entering a phone number • [ ]: Call using call records •... - Page 72 Bluetooth Control Call using call records Call using the phonebook Touch [ Touch [ Select the phone number from the list. Touch [ Select the initial. • Characters with no corresponding name Call by entering a phone number will not appear. Touch [ •...
- Page 73 Bluetooth Control Receiving a call Adjust the receiver volume Press the <S> or <R> button. Touch [ ] to answer a phone call or Turn the volume knob. ] to reject an incoming call. Mute your voice Touch [ ] to mute or not to mute your NOTE voice.
- Page 74 Bluetooth Control Phone number preset NOTE • To delete the preset number, touch [Delete] and You can register frequently used phone then touch [YES] on the confirmation screen. numbers to this unit. Touch [ Voice Recognition Touch [Edit]. You can access the voice recognition function of the cell-phone connected to this unit.
-
Page 75: Hands-Free Setup
Bluetooth Control Phonebook transfer Touch [Delete Phonebook]. You can transfer the phonebook in your Bluetooth smartphone via PBAP. Touch [ Touch [Edit]. Touch the name to check. Touch [Add to Phonebook]. [þ All] Checks all boxes. [¨ All] Erases all check marks. The phonebook data transmission starts. - Page 76 Bluetooth Control Touch [Bluetooth]. Auto Response* Sets an automatic response time to pick-up an incoming call. OFF (Default): Automatic response is not available. 1/ 5/ 10/ 15/ 20/ 25/ 30: Set calling ring time (second). Auto Pairing When set to “ON”, the Apple Auto Pairing function is turned on to automatically register the iPod touch or iPhone connected to this Bluetooth SETUP screen appears.
-
Page 77: Setting Up
Setting Up Setting Up Monitor Screen Setup NOTE • Adjusting items are different depending on the You can adjust image quality in video, menu current source. screen, etc. • The image quality can be set for each source. Backlight and Black are common to all sources. Press the <MENU>... -
Page 78: Monitor Angle Control
Touch [Memory] when the desired angle is selected. It is effective when “Auto Open” is set to OFF. Auto Open (DNX8160DABS) The front panel can be set to open 1 Switching the View Camera automatically when the ignition is turned... -
Page 79: System Setup
Setting Up System Setup User Interface Setup You can setup user interface parameters. NOTE Press the <MENU> button/ • Each operation in this section can be started from volume knob. the multi function menu. Popup menu appears. Touch [SETUP]. Press the <MENU>... - Page 80 Setting Up Steering Remote Controller Time Zone Sets the desired function in the steering remote If you have selected [Manual] for Clock, select controller. (Contact your KENWOOD dealer for the time zone. details.) Clock Adjust Beep If you select [Manual] for Clock, adjust the date Turns the key touch tone on or off.
- Page 81 Setting Up Adjust the date and time manually. Touch [Clock Adjust] on the User Interface screen. Clock Adjust screen appears. Adjust the date, then adjust the time. Touch [Set]. Touch panel adjustment Touch [Touch Panel Adjust] on the User Interface screen. Touch Panel Adjust screen appears.
-
Page 82: Special Setup
Setting Up Special Setup Audio SETUP Clear Clears the AUDIO SETUP Memory and the You can setup Special parameters. currently memorized audio setting. Software Information Press the <MENU> button/ volume knob. Check the software version of this unit. Popup menu appears. (P.81) Open Source Licenses Touch [SETUP]. -
Page 83: Security Setup
Setting Up Security Setup Security Code When the Security Code function is You can set up a security code to protect activated, the code cannot be changed your receiver system against theft. and the function cannot be released. Note Press the <MENU>... -
Page 84: Display Setup
Setting Up Display Setup OSD Clock Select if you want to display the clock while watching DVD video, etc. Press the <MENU> button/ "ON" (Default)/ "OFF" volume knob. Popup menu appears. Panel Color You can set the screen and button illumination Touch [SETUP]. - Page 85 Setting Up Registering original color Registering original image You can register your original color. You can load an image from the connected USB device and set it for the background Touch [User] in the Panel Color image. Coordinate screen. Before operating this procedure, it is necessary to connect the device which has Touch [Adjust].
-
Page 86: Camera Setup
Setting Up Camera Setup Front Camera On: Activates the front view camera. Select this You can set camera parameters. to use the front view camera. OFF (Default): Select this when no camera is Press the <MENU> button/ connected. volume knob. Popup menu appears. -
Page 87: Navigation Setup
Setting Up Navigation Setup Adjusting the parking guidelines Touch [ON] of [Parking Guidelines] in You can set navigation parameters. the Camera screen. Press the <MENU> button/ Touch [Guideline Setup] in the Camera volume knob. screen. Popup menu appears. Adjust the parking guidelines by Touch [SETUP]. -
Page 88: Av Setup
Setting Up AV Setup AV-OUT You can select an AV source to be output from You can set AV parameters. the AV OUTPUT port. OFF, AV-IN, AV-IN1, AV-IN2, DISC, USB, SD, or Press the <MENU> button/ iPod volume knob. • You cannot select iPod if it is connected via Popup menu appears. -
Page 89: Controlling Audio
Controlling Audio Controlling Audio Speaker/ X’over setup NOTE • Each operation in this section can be started from Press the <MENU> button/ the multi function menu. volume knob. You can adjust the various settings such as Popup menu appears. audio balance or subwoofer level. Touch [Audio]. - Page 90 Controlling Audio Location Location (Only for Front, Rear) Select the speaker position you have fixed. Front Tweeter (Only for Front) Select the location from “Upper Door Area”/ “Lower Door Area”/ “On Dash”/ “Under Dash”. You can set the tweeter when you are selecting front speakers.
- Page 91 Controlling Audio Crossover network setup Phase Inversion* Sets the phase of subwoofer output. You can set a crossover frequency of Check [Phase Inversion] to shift the phase speakers. 180 degrees. (When subwoofer is selected on Speaker Select screen) Touch [X’over]. Only when “Tweeter”...
-
Page 92: Controlling General Audio
Controlling Audio Controlling General Audio Press the <MENU> button/ volume knob. Popup menu appears. Touch [Audio]. Audio screen appears. Touch [Fader / Balance]. Fader / Balance screen appears. Set each item as follows. Fader / Balance Adjust the volume balance around the touched area. -
Page 93: Equalizer Control
Controlling Audio Equalizer Control Memory Saves the adjusted equalizer curve to “User1” You can adjust equalizer by selecting the to “User4”. optimized setting for each category. Initialize Press the <MENU> button/ The current EQ curve returns to flat. volume knob. ALL SRC Popup menu appears. -
Page 94: Volume Offset
Controlling Audio Save the EQ curve Volume Offset Finely adjust the volume of the current Adjust the EQ curve. source to minimize the difference in volume between different sources. Touch [Memory]. Select where to save. Press the <MENU> button/ volume knob. Popup menu appears. -
Page 95: Zone Control
Controlling Audio Zone Control Set each source as follows. You can select different sources for both front and rear positions in the vehicle. Press the <MENU> button/ volume knob. Popup menu appears. Touch [Audio]. [Zone Select] Touch [Single Zone] to turn off the dual zone Audio screen appears. -
Page 96: Sound Effect
Controlling Audio Sound Effect Bass Boost Sets the amount of bass boost among “OFF”/ You can set sound effects. “1”/ “2”/ “3”. Loudness Press the <MENU> button/ volume knob. Sets the amounts of boost of low and high Popup menu appears. tones. -
Page 97: Listening Position/ Dta
Controlling Audio Listening Position/ DTA Listening Position Adjust the sound delay time as nearer You can adjust the sound effects according speakers to the selected seat have more to your listening position. delay time, so that the sound from each Press the <MENU>... - Page 98 Controlling Audio Position DTA control You can fine-adjust your listening position. Touch [Adjust]. Touch [Delay]. Touch [T] or [U] to adjust the delay time of the selected speaker. Touch [Level]. Touch [T] or [U] to adjust the sound level of the selected speaker. NOTE •...
- Page 99 Controlling Audio Front Focus Front Focus fine adjustment This is the function to focus the imaginary Touch [Adjust]. sound image in front of the selected seat. Touch [Delay]. Touch [Front Focus] in the Position/DTA screen. Set each item as follows. Select a front focus position.
- Page 100 Controlling Audio NOTE • To return to the initial setting of Delay and Level, touch [Initialize] and [YES] in the confirmation screen.
-
Page 101: Remote Control
Remote control Remote control This unit can be operated using the remote control. The remote control is the optional accessory (KNA-RCDV331). 2CAUTION • Put the remote control in a place where it will not move during braking or other operations. A dangerous situation could result, if the remote control falls down and gets wedged under the pedals while driving. -
Page 102: Functions Of The Remote Control Buttons
Remote control Functions of the Remote control Buttons Switching the operation mode Direct search mode The functions operated from the remote Using the remote control, you can jump control differ depending on the position of directly to the desired file, track chapter, etc. the mode switch. - Page 103 Remote control Location of Function Name the mode switch Switches to the source to be played. In hands-free mode, hangs up the phone. − Switches between the navigation and the source screens. MENU Stops playing and memorizes the last point where the disc stopped.
- Page 104 Remote control Location of Function Name the mode switch VOICE Displays the control screen of current source. (USB/ SD/ iPod/ DISC) Displays the DVD menu. Turns the playback control on or off while playing VCD. Speaks the voice guidance. 10 VIEW AUD, DVD Switches the AV source to be output.
-
Page 105: Troubleshooting
Troubleshooting Troubleshooting Problems and Solutions If any trouble occurs, first check the following table for possible problems. • Some functions of this unit may be disabled by some settings made on this unit. • What might seem to be a malfunction in your unit may just be the result of slight misoperation or miswiring. -
Page 106: Error Messages
Mecha Error The disc player is malfunctioning. Eject the disc and try inserting it again. Contact the KENWOOD dealer if this indicator continues blinking or the disc cannot be ejected. Disc Error An unplayable disc is inserted. - Page 107 Troubleshooting Error Message Cause Solution USB device The connected USB device is rated Check the USB device. Some trouble may have over current a current capacity higher than the occurred to the connected USB device. status detected. allowable limit. Change the source to any source other than USB.
- Page 108 Troubleshooting...
-
Page 109: Appendix
Appendix Appendix Playable Media and Files You can play various kinds of media and files on this unit. List of playable discs Disc types Standard Support Remark ‡ DVD Video DVD Audio × DVD-VR × ‡ DVD-R* • MP3/ WMA/ AAC/ WAV/ FLAC/ Vorbis/ MPEG1/ MPEG2/ MPEG4/ H.264/ WMV/ MKV playback •... - Page 110 • Although the audio files are complied with the standards listed above, the play may be impossible depending on the types or conditions of media or device. www.kenwood.com/cs/ce/audiofile/. • An online manual about audio files is put on the site, On this online manual, detailed information and notes which are not written in this manual are provided.
- Page 111 Changing the browse item will display a correct title, etc. • When the iPod is connected to this unit, “KENWOOD” or “ä” is displayed on the iPod to indicate that you cannot operate the iPod.
- Page 112 Appendix Usable USB device You can use a mass-storage-class USB device on this unit. The word “USB device” appearing in this manual indicates a flash memory device and digital audio players can be recognized as mass-storage. ■ About file system The file system should be the one of the following.
-
Page 113: Status Bar Indicator Items
Appendix Status Bar Indicator Items Shown below is a list of indicators displayed on the status bar in the screen. Current status of this unit is displayed on the bar. Status bar ■ General ■ VCD 1chLL/2chLL The attenuator is active. Identifies the left audio output of channel 1 or 2. - Page 114 Appendix ■ USB/SD ■ Tuner VIDEO Identifies the video file. A stereo broadcast is being received. MUSIC MONO Identifies the music file. The forced monaural function is on. ■ iPod The AF search function is on. MUSIC Identifies the music file. The Radio Data System station is sending EON.
-
Page 115: Region Codes In The World
Appendix Region Codes in the World The DVD players are given a region code according to the country or area it is marketed, as shown in the following map. ■ DVD disc marks ■ Operation regulatory marks With this DVD, some functions of this unit such as the play function may be restricted depending on the location where the DVD is playing. -
Page 116: Dvd Language Codes
Appendix DVD Language Codes Code Language Code Language Code Language Afar Interlingua Kirundi Abkhazian Interlingue Romanian Afrikaans Inupiak Russian Amharic Indonesian Kinyarwanda Arabic Icelandic Sanskrit Assamese Italian Sindhi Aymara Japanese Sangho Azerbaijani Javanese Serbo-Croatian Bashkir Georgian Singhalese Byelorussian Kazakh Slovak Bulgarian Greenlandic Slovenian... -
Page 117: Specifications
: TFT active matrix system Video Decoder Number of Pixels : MPEG1/ MPEG2/ MPEG4/ WMV/ H.264/ mkv : 1,152,000 (800H x 480V x RGB) Effective Pixels ■ SD (DNX8160DABS, DNX716WDABS, : 99.99 % DNX5160DABS, DNX5160BTS, Pixel Arrangement DNX516DABS) : RGB striped arrangement... - Page 118 Appendix ■ Bluetooth section ■ DAB section (DNX8160DABS, DNX716WDABS, DNX5160DABS, Technology DNX516DABS) : Bluetooth Ver.3.0 Frequency Frequency Range : 2.402 – 2.480 GHz L-BAND: 1452.960 – 1490.624 (MHz) BAND III: 174.928 – 239.200 (MHz) Output Power Sensitivity : +4dBm (MAX), 0dBm (AVE), Power Class2...
- Page 119 : 50 W × 4 Typical Power Output (Front & Rear) Full Bandwidth Power (at less than 1% THD) : 22 W × 4 Preout Level (V) DNX8160DABS, DNX716WDABS : 5 V/ 10 kΩ DNX5160DABS, DNX516DABS, DNX5160BTS, DNX3160BT : 4 V/ 10 kΩ...
-
Page 120: About This Unit
Maximum Current Consumption the Bluetooth SIG, Inc. and any use of such marks : 15 A by JVC KENWOOD Corporation is under license. Installation Dimensions (W × H × D) Other trademarks and trade names are those of their DNX8160DABS respective owners. - Page 121 Appendix • MHL and the MHL logo are a trademark or registered specific prior written permission. trademark of MHL, LLC. THIS SOFTWARE IS PROVIDED BY THE COPYRIGHT - Incorporates MHL 2 HOLDERS AND ONTRIBUTORS ``AS IS’’ AND ANY EXPRESS OR IMPLIED WARRANTIES, INCLUDING, •...
- Page 122 Appendix ■ The marking of products using lasers above copyright notice, this list of conditions and the following disclaimer in the documentation and/or other materials provided with the distribution. CLASS 1 - Neither the name of the Xiph.org Foundation nor the LASER PRODUCT names of its contributors may be used to endorse or promote products derived from this software without...
- Page 123 Appendix ■ Information on Disposal of Old Electrical and Electronic Equipment and Batteries (applicable for EU countries that have adopted separate waste collection systems) Products and batteries with the symbol (crossed-out wheeled bin) cannot be disposed as household waste. Old electrical and electronic equipment and batteries should be recycled at a facility capable of handling these items and their waste byproducts.
- Page 124 1999/5/CE. 1999/5/EK. Español Eesti Por medio de la presente JVC KENWOOD declara que el DNX8160DABS, Sellega kinnitab JVC KENWOOD, et see DNX8160DABS, DNX716WDABS, DNX716WDABS, DNX5160DABS, DNX516DABS, DNX5160BTS, DNX3160BT DNX5160DABS, DNX516DABS, DNX5160BTS, DNX3160BT vastab direktiivi 1999/5/ cumple con los requisitos esenciales y cualesquiera otras disposiciones aplicables o EC põhilistele nõudmistele ja muudele asjakohastele määrustele.
Need help?
Do you have a question about the DNX8160DABS and is the answer not in the manual?
Questions and answers