Toshiba Qosmio X500 User Manual
Hide thumbs
Also See for Qosmio X500:
- Maintenance manual (277 pages) ,
- User manual (237 pages) ,
- Resource manual (60 pages)
Table of Contents
Advertisement
Quick Links
Advertisement
Table of Contents

Related Manuals for Toshiba Qosmio X500


Summary of Contents for Toshiba Qosmio X500
- Page 1 User's Manual Qosmio X500 computers.toshiba-europe.com...
- Page 2 Disclaimer This manual has been validated and reviewed for accuracy. The instructions and descriptions it contains are accurate for the Qosmio X500 Portable Personal Computer at the time of this manual’s production. However, succeeding computers and manuals are subject to change without notice.
- Page 3 Adobe Systems Incorporated in the United States and/or other countries. Bluetooth™ is a registered trademark owned by its proprietor and used by TOSHIBA under license. ConfigFree is a trademark of TOSHIBA Corporation. WinDVD is a trademark of Corel Corporations. DVD MovieFactory is a trademark of Corel Corporations.
- Page 4 This product is carrying the CE-Mark in accordance with the related European Directives. Responsible for CE-Marking is TOSHIBA Europe GmbH, Hammfelddamm 8, 41460 Neuss, Germany. The complete and official EU Declaration of Conformity can be found on TOSHIBA’s web site http://epps.toshiba-teg.com on the Internet.
- Page 5 Malfunction of, or data loss from, this product caused by disturbances generated by other devices or machines in the near surrounding area. Therefore TOSHIBA strongly recommend that the electromagnetic compatibility of this product should be suitably tested in all non-approved working environments before use.
- Page 6 For more detailed information about the collection and recycling programmes available in your country, please visit our website (http://eu.computers.toshiba-europe.com) or contact your local city office or the shop where you purchased the product. Disposal of batteries and/or accumulators...
- Page 7 The new European Union (EU) chemical regulation, REACH (Registration, Evaluation, Authorization and Restriction of Chemicals), entered into force on 1 June 2007. TOSHIBA will meet all REACH requirements and is committed to provide our customers with information about the chemical substances in our products according to REACH regulation.
- Page 8 Qosmio X500 Products that earn the ENERGY STAR prevent greenhouse gas emissions by meeting strict energy efficiency guidelines set by the US EPA and the EU Commission. According to the EPA, a computer meeting the new ENERGY STAR specifications will use between 20% and 50% less energy depending on how it is used.
- Page 9 Qosmio X500 Optical disc drive safety instructions Be sure to check the international precautions at the end of this section. Panasonic BD Combo UJ141/BD-R/RE UJ240 with Labelflash™ ■ The BD Combo/BD-R/RE drive employs a laser system. To ensure proper use of this product, please read this instruction manual carefully and retain for future reference.
- Page 10 Qosmio X500 Hitach-LG Data Storage DVD Super Multi GT20N/GT20F with Labelflash™ ■ The DVD Super Multi drive employs a laser system. To ensure proper use of this product, please read this instruction manual carefully and retain for future reference. Should the unit ever require maintenance, contact an authorized service location.
- Page 11 Qosmio X500 TOSHIBA SAMSUNG STORAGE TECHNOLOGY DVD Super Multi TS-L633C/TS-L633Y ■ This dvd writable drive employs a laser system to ensure proper use of this product, please read this instruction manual carefully and retain for future reference. should the unit ever require maintenance, contact an authorized service location-see service procedure.
- Page 12 To prevent direct exposure to the laser beam, do not try to open the enclosure. Using WinDVD BD for TOSHIBA Do not sleep or hibernate PC while WinDVD BD for TOSHIBA is running. When you need it, exit WinDVD BD for TOSHIBA in advance. User’s Manual...
- Page 13 Qosmio X500 Panasonic DVD Super Multi UJ890AD/UJ890ED with Labelflash™ ■ The DVD Super Multi drive employs a laser system. To ensure proper use of this product, please read this instruction manual carefully and retain for future reference. Should the unit ever require maintenance, contact an authorized service location.
- Page 14 Qosmio X500 International Precautions CAUTION: This appliance contains a laser system and is classified as a "CLASS 1 LASER PRODUCT." To use this model properly, read the instruction manual carefully and keep this manual for your future reference. In case of any trouble with this model, please contact your nearest "AUTHORIZED service...
-
Page 15: Table Of Contents
Special features ......... 1-11 TOSHIBA Value Added Package ......1-12 Utilities and Applications. - Page 16 Video ..........4-29 TOSHIBA VIDEO PLAYER ....... . . 4-29 Using WinDVD BD for TOSHIBA .
- Page 17 TOSHIBA support ........
- Page 18 This manual tells you how to set up and begin using your Qosmio X500 computer. It also provides detailed information on configuring your computer, basic operations and care, using optional devices and troubleshooting.
- Page 19 Qosmio X500 Chapter 5, Keyboard, describes special keyboard functions including hot keys. Chapter 6, Power and Power-Up Modes, gives details on the computer's power resources and battery save modes. Chapter 7, HW Setup explains how to configure the computer using the HW Setup program.
- Page 20 Qosmio X500 When procedures require an action such as clicking an icon or entering text, the icon’s name or the text you are to type in is represented in the type face you see to the left. Display Names of windows or icons or text generated by the computer that appears on its display screen is presented in the type face you see to the left.
- Page 21 Qosmio X500 General Precautions TOSHIBA computers are designed to optimize safety, minimize strain and withstand the rigors of portability. However, certain precautions should be observed to further reduce the risk of personal injury or damage to the computer. Be certain to read the general precautions below and to note the cautions included in the text of the manual.
- Page 22 Qosmio X500 ■ Equipment that generates a strong electromagnetic field, such as stereo speakers (other than speakers that are connected to the computer) or speakerphones. ■ Rapid changes in temperature or humidity and sources of temperature change such as air conditioner vents or heaters.
- Page 23 Qosmio X500 Mobile phones Please be aware that the use of mobile phones can interfere with the audio system. The operation of the computer will not be impaired in any way, but it is recommended that a minimum distance of 30cm is maintained between the computer and a mobile phone that is in use.
-
Page 24: Introduction
Some of the features described in this manual may not function properly if you use an operating system that was not pre-installed by TOSHIBA. Equipment checklist Carefully unpack your computer. Save the box and packing materials for future use. -
Page 25: Features
■ TOSHIBA PC Health Monitor ■ TOSHIBA USB Sleep and Charge Utility ■ TOSHIBA eco Utility ■ TOSHIBA Resolution+ Plug-in for Windows Media Player ■ Online Manual Other software may be preinstalled dependant on the model purchased. Documentation ■ Quickstart ■... - Page 26 Introduction Memory Slots PC2-6400 or PC3-8500 1GB, 2GB, 4GB memory modules can be installed in the two memory slots. Maximum system memory size and speed depend on the model you purchased. Disclaimer (Memory (Main System)) For more information regarding Memory (Main System), please refer to the Disclaimers section in Appendix E or click the *2 above.
- Page 27 Introduction Disclaimer (Battery Life) For more information regarding Battery Life, please refer to the Disclaimers section in Appendix E or click the *3 above. RTC Battery The internal RTC battery backs up the Real Time Clock and calendar. AC Adaptor The universal AC adaptor provides power to the system and recharges the batteries when they are low.
- Page 28 Introduction BD-R/RE drive with Some models are equipped with a full-size BD-R/ Labelflash™ RE drive module that lets you record data to rewritable CD/DVD/BDs. It reads BD-ROM discs at maximum 6 speed, BD-ROM (DL) discs at maximum 6 speed, DVD-ROM's at maximum 8 speed and CD-ROM's at maximum 24 speed.
- Page 29 Introduction BD Combo drive with Some models are equipped with a full-size BD Labelflash™ Combo drive module that lets you record data to rewritable CD/DVDs. It reads BD-ROM discs at maximum 6 speed, BD-ROM (DL) discs at maximum 6 speed, DVD-ROM's at maximum 8 speed and CD-ROM's at maximum 24 speed.
- Page 30 Introduction DVD Super Multi drive Some models are equipped with a full-size DVD Super Multi drive module that lets you record data to rewritable CD/DVDs. It reads DVD- ROM's at maximum 8 speed and CD-ROM's at maximum 24 speed. It writes CD-R's at up to 24 speed, CD-RW's at up to 24 speed, DVD-R's at maximum 8 speed, DVD-RW's at maximum 6 speed.
- Page 31 For more information regarding Graphics Processor Unit, please refer to the Disclaimers section in Appendix E or click the *5 above. Keyboard Built-In TOSHIBA keyboard, 104 keys or 105 keys with numeric keypad, compatible with IBM enhanced keyboard, dedicated cursor control, keys. Refer to Chapter 5, Keyboard, for details.
- Page 32 Introduction TV In This port allows you to connect a coaxial cable for viewing cable TV on your computer. (Depends on the model you purchased) Infrared receiver This window receives signals from the remote window control which is provided with your computer. (Depends on the model you purchased) Slots ExpressCard...
- Page 33 Introduction Wireless LAN Where present, it supports the A,B,G and N standards but it is compatible with other LAN systems based on Direct Sequence Spread Spectrum/Orthogonal Frequency Division Multiplexing radio technology that complies with the IEEE 802.11 Standard. ■ Automatic Transmit Rate Select mechanism in the transmit range of 54, 48, 36, 24, 18, 12, 9 and 6 Mbit/s.
-
Page 34: Special Features
Two level password architecture Fingerprint authentication (not available on all models) Special features The following features are either unique to TOSHIBA computers or are advanced features, which make the computer more convenient to use. Hot Keys Key combinations let you quickly modify the system configuration directly from the keyboard without running a system configuration program. -
Page 35: Toshiba Value Added Package
USB Sleep and Charge function in Chapter 4, Operating Basics. TOSHIBA Value Added Package This section describes the TOSHIBA Component features pre-installed on the computer. TOSHIBA Power TOSHIBA Power Saver provides you with the Saver features of more various power supply managements. -
Page 36: Utilities And Applications
Diagnostic Tool basic system configuration information and allow the functionality of some of the computer's built- in hardware devices to be tested. TOSHIBA Flash Cards This utility supports the following functions. ■ Hot key function ■ TOSHIBA utility launcher function... - Page 37 TOSHIBA DVD-RAM Utility has a Physical Utility Format function and Write-Protect function to DVD-RAM. This utility is contained in the TOSHIBA Disc Creator setup module. To run TOSHIBA DVD-RAM Utility, click select All Programs, TOSHIBA, CD&DVD Applications, and then click DVD-RAM Utility.
- Page 38 The DVD PLAYER is used to play DVD Video. It PLAYER has an on-screen interface and functions. TOSHIBA ConfigFree ConfigFree is a suite of utilities to allow easy control of communication devices and network connections. ConfigFree also allows you to find...
-
Page 39: Options
* The availability of DDRII or DDRIII depends on the model you purchased. Battery pack An additional battery pack can be purchased from your TOSHIBA dealer. Use it as a spare to increase your computer operating time. AC Adaptor If you use your computer at more than one site... -
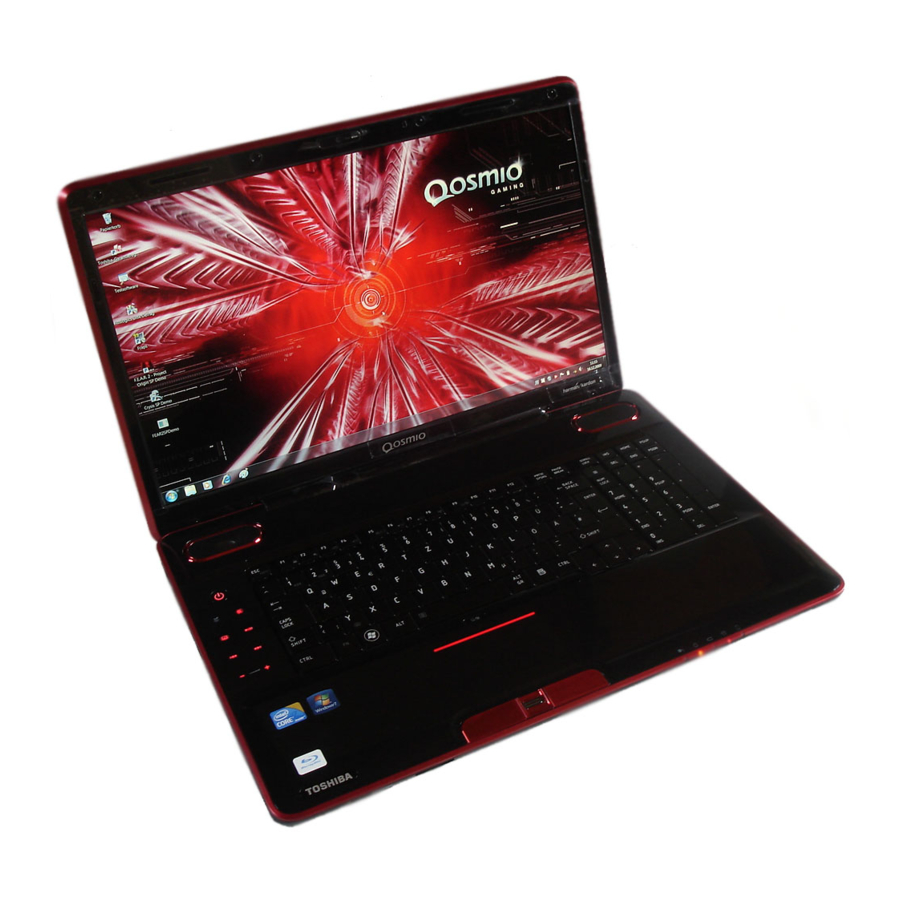
Page 40: Chapter 2 The Grand Tour
The Grand Tour Chapter 2 The Grand Tour This chapter identifies the various components of your computer. Become familiar with each component before you operate the computer. Front with the display closed The following figure shows the computer's front with its display panel in the closed position. - Page 41 The Grand Tour ■ Set the wireless communication switch to off in airplanes and hospitals. Check the wireless activity indicator. It will stop glowing when the wireless communication function is off. ■ Turn Wi-Fi and Bluetooth functionalities off when near a person who may have a cardiac pacemaker implant or other medical electric device.
-
Page 42: Left Side
The Grand Tour Multiple Digital Media Multiple Digital Media Card Slot LED lights up Card Slot LED when the Multiple Digital Media Card Slot is accessed. (Provided with some models) Left side The following figure shows the computer's left side. ■... - Page 43 The Grand Tour eSATA/ eSATA/USB Combo The eSATA/USB combo port supports the USB Port 2.0 and eSATA functions. Ports with the icon ( ) have USB Sleep and Charge function. Universal Serial Bus The Universal Serial Bus Port complies with the (USB 2.0) Port USB 2.0 standard.
-
Page 44: Right Side
The Grand Tour Right side The following figure shows the computer's right side. 1. Headphone (S/P DIF) jack 5. External Monitor Port 2. Microphone Jack 6. DC in 19V Jack 3. USB Serial Bus (USB 2.0) Ports 7. Security Lock Slot 4. -
Page 45: Backside
The Grand Tour Backside The following figure shows the computer's back panel. 1. Cooling Vents The backside of the computer Cooling Vents Cooling vents help prevent the CPU from overheating. Do not block the cooling vents. Make sure that foreign objects such as pins (or similar objects) are kept out of the vents, to avoid damaging the computer's circuitry. -
Page 46: Underside
The Grand Tour Underside The following figure shows the underside of the computer. Make sure the display is closed before turning over your computer. 1. Hard Disk Cover 5. Hard Disk Cover 2. Battery Pack Lock 6. Memory Module Cover 3. -
Page 47: Front With The Display Open
The Grand Tour Front with the display open This section shows the front of the computer with the display open. Refer to the appropriate illustration for details. To open the display, lift the front of the display. Position the display at a comfortable viewing angle. 16 17 1. - Page 48 Press this button to launch the eco application. CD/DVD/BD Button Press this button to launch an application program that allows for playing of CDs, DVDs or BDs. The application that is launched differs by model: Windows Media Player/TOSHIBA DVD PLAYER/WinDVD BD for TOSHIBA. User’s Manual...
-
Page 49: Optical Disc Drive
The Grand Tour Previous Button Skips backwards to the previous track, chapter or digital file. Refer to Chapter 4, Operating Basics, for details. (Provided with some models) Volume Down Button Decreases the volume of the speakers. Mute Button Press this button to mute/un-mute sound. Play/Pause Button Press this button to begin playing an audio CD, a DVD movie or digital audio file. - Page 50 The Grand Tour ■ CD-RW discs can be recorded more than once. Use either 1, 2, or 4 multi speed CD-RW discs or high-speed 4- to 10-speed discs. The write speed of the ultra-speed CD-RW discs (Ultra-speed is available on the DVD-ROM &...
- Page 51 The Grand Tour CD read 24 speed (maximum) CD-R write 24 speed (maximum) CD-RW write 16 speed (maximum, Ultra-speed media) BD Combo drive The full-size BD Combo drive module lets you record data to writable CD/ DVDs as well as run either 12 cm (4.72") or 8 cm (3.15") for Tray type, 12 cm (4.72") for Slot type CD/DVDs without using an adaptor.
-
Page 52: Ac Adaptor
The Grand Tour The read speed is slower at the centre of a disc and faster at the outer edge. DVD read 8 speed (maximum) DVD-R write 8 speed (maximum) DVD-RW write 6 speed (maximum) DVD+R write 8 speed (maximum) DVD+RW write 8 speed (maximum) DVD-R(DL) write... -
Page 53: Remote Controller
Always use the TOSHIBA AC adaptor that was included with your computer, or use AC adaptors specified by TOSHIBA to avoid any risk of fire or other damage to the computer. Use of an incompatible AC adaptor could cause fire or damage to the computer possibly resulting in serious injury. - Page 54 9. Play/Pause 19. Volume + 10. Skip 20. DVD Menu CD/DVD/BD button Press this button to launch Windows Media Player/DVD Video Player/WinDVD BD for TOSHIBA. Brightness down Decreases the computer’s display panel brightness. Brightness up Increases the computer’s display panel brightness.
- Page 55 The Grand Tour Power Starts or terminate the operating system.This button functions like the power button of your computer. By default, the Sleep mode is equivalent to the power off state of your computer. To change the setting, click Start Control panel System and Security Power Options...
- Page 56 The Grand Tour Replay Moves media backward (seven seconds for videos, one music track or one DVD chapter at a time). Stop Stops the currently playing media. Skip Moves media forward (30 seconds for videos, one music track or one DVD chapter at a time). Using the remote controller Some computers include a remote control unit, which allows you to control some of your computer’s functions from a distance.
- Page 57 The Grand Tour 15˚ 1. Infrared Receiver Window 2. Remote Controller Operational range of the remote controller Even if within the effective scope as described above, the remote controller may malfunction or not work correctly in the following cases. ■ When an obstacle stands between the infrared receiver window of your computer and the remote controller.
- Page 58 The Grand Tour Store the battery for the remote controller beyond the reach of children. If a child swallows a battery, this might result in choking. If this happens, seek medical attention immediately. Observe the following precautions when using the battery of the remote controller.
- Page 59 The Grand Tour 2. Be sure to place the batteries with correct polarities. Press the battery down to the stopper then push it forward to fit into the battery case. 1. Stopper 2. Battery Inserting the batteries 3. Close the battery cover. Press gently until it clicks into place. Closing the battery cover Replacing the batteries When the batteries in the remote controller reach the end of their life, the...
- Page 60 The Grand Tour 3. Insert the battery in place. Be sure to place the batteries with correct polarities. Press the battery down to the stopper then push it forward to fit into the battery case. 4. Close the battery cover. Press gently until it clicks into place. Placing the slim size remote controller Inserting a slim size remote controller To insert the slim size remote controller, follow the steps below.
-
Page 61: Chapter 3 Getting Started
Getting Started Chapter 3 Getting Started This chapter provides basic information to get you started using your computer. It covers the following topics: ■ All users should be sure to read the section Starting up for the first time. ■ Be sure to read the enclosed Instruction Manual for Safety and Comfort for information on the safe and proper use of this computer. -
Page 62: Connecting The Ac Adaptor
Getting Started Connecting the AC adaptor Attach the AC adaptor when you need to charge the battery or you want to operate from AC power. It is also the fastest way to get started, because the battery pack will need to be charged before you can operate from battery power. - Page 63 ■ Always use the TOSHIBA AC adaptor that was included with your computer or use AC adaptors specified by TOSHIBA to avoid any risk of fire or other damage to the computer. Use of an incompatible AC adaptor could cause fire or damage to the computer possibly resulting in serious injury.
-
Page 64: Opening The Display
Getting Started Either a 2-pin or 3-pin adaptor/cord will be included with the computer depending on the model. 2. Connect the AC adaptor's DC output plug to the DC IN 19V jack on the right of the computer. Connecting the adaptor to the computer 3. -
Page 65: Turning On The Power
Getting Started ■ When opening the panel, please be careful not to force it beyond the point where it moves easily. ■ Be careful not to open the display panel too far as this could put stress on the display panel’s hinges and cause damage. ■... -
Page 66: Windows Setup
Getting Started Turning on the power Windows setup When you first turn on the power, the computer's initial screen is the ® Microsoft Windows Startup Screen Logo. Follow the on-screen directions. Be sure to read the Windows End User License Agreement display carefully. - Page 67 Getting Started 3. Click then click the Shut down button . From the drop down menu, choose Shut Down. 4. Turn off the power to any peripheral devices. Do not turn the computer or devices back on immediately. Wait a moment to let all capacitors fully discharge.
- Page 68 Getting Started ■ Saves power by shutting down the system when the computer receives no input or hardware access for the duration set by the System Sleep Mode feature. ■ You can use the panel power off feature. Entering Sleep Mode You can enter Sleep Mode in one of three ways: ■...
- Page 69 Getting Started ■ Save your data. While entering Hibernation Mode, the computer saves the contents of memory to the HDD. However, as a safety precaution, it is best to save your data manually. ■ Data will be lost if you remove the battery or disconnect the AC adaptor before the save is completed.
-
Page 70: Restarting The Computer
Getting Started Data saving in Hibernation Mode When you turn off the power in Hibernation Mode, the computer takes a moment to save current memory data to the hard disk. During this time, the Disk LED will light up. After you turn off the computer and memory is saved to the hard disk, turn off the power to any peripheral devices. - Page 71 ■ Restoring the pre-installed software from the Recovery hard disk drive ■ Ordering Recovery Discs from TOSHIBA and restoring the pre-installed software from them* * Please note that this service is not free-of-charge. Creating Optical Recovery Discs This section describes how to create Recovery Discs.
- Page 72 When you reinstall the Windows operating system, the hard disk will be reformatted and all data will be lost. 1. Turn off your computer. 2. Turn on the computer and when the TOSHIBA screen appears repeatedly press the F8 key. User’s Manual...
- Page 73 4. Select your preferred keyboard layout and press Next. 5. To access the recovery process please log on as an enabled user with sufficent rights. 6. Click TOSHIBA HDD Recovery on the System Recovery Options screen. 7. Follow the on-screen instructions on the TOSHIBA HDD Recovery dialog.
- Page 74 Getting Started You will receive your Recovery Discs within two weeks after placing your order. User’s Manual 3-14...
-
Page 75: Chapter 4 Operating Basics
Operating Basics Chapter 4 Operating Basics This chapter gives information on basic operations including using the TouchPad, optical media drives, sound system, modem, the wireless LAN and LAN. It also provides tips on caring for your computer. Using the TouchPad To use the TouchPad, simply touch and move your finger tip across it in the direction you want the on-screen pointer to go. - Page 76 Operating Basics Two buttons below the keyboard are used like the buttons on a mouse pointer. Press the left button to select a menu item or to manipulate text or graphics designated by the pointer. Press the right button to display a menu or other function depending on the software you are using.
- Page 77 Operating Basics To use a Pinch Zoom gesture: 1. Place two fingers down on the TouchPad surface. 2. Slide the fingers further apart to zoom in or slide the fingers closer together to zoom out. For the best zooming experience, use the tips of your fingers.
- Page 78 Operating Basics How to swipe the finger Using the following steps when swiping fingers for fingerprint registration or authentication will help to minimize authentication failures: 1. Align the first joint of the finger to the center of the sensor. 2. While lightly touching the sensor, swipe the finger towards you until the sensor surface becomes visible.
- Page 79 Operating Basics ■ Do not touch the sensor with a wet finger or any wet objects. Keep the sensor surface dry and free of water vapor. ■ Do not touch the sensor with a soiled finger. Minute foreign particles on a soiled or dirty finger may scratch the sensor.
- Page 80 Toshiba does not guarantee that the fingerprint sensor will recognize the enrolled user or accurately screen out unauthorized users at all times.Toshiba is not liable for any failure or damage that might arise out of the use of this fingerprint recognition software or utility.
- Page 81 ■ Up to 30~34 fingerprint patterns can be registered. 1. Click Start All Programs Toshiba Utilities TOSHIBA Fingerprint Utility, or double click the icon in the Task Bar. The Enter Windows Password screen is displayed. 2. Enter a password into the Enter Windows Password field and click Next.
- Page 82 ■ It is necessary to register the User Password before using the fingerprint Pre-OS feature and its extended function, the fingerprint Single Sign-On feature. Please use TOSHIBA HW Setup to register the User Password. ■ If you fail fingerprint authentication more than five times, you must enter the User Password or Supervisor Password manually to start the computer.
- Page 83 TOSHIBA does not guarantee that the fingerprint utility will accurately screen out unauthorized users at all times. TOSHIBA is not liable for any failure or damage that might arise out of the use of the fingerprint software or utility.
- Page 84 Starting the USB Sleep and Charge Utility To start the utility, click Start All Programs TOSHIBA Utilities USB Sleep and Charge. Enabling USB Sleep and Charge This utility can be used to enable and disable the USB Sleep and Charge function.
- Page 85 Operating Basics There are several USB Sleep and Charge function modes. "Mode4/Typical Mode" should normally be used. Set one of the other modes (try from "Mode3/Alternate Mode") if the charge function cannot be used in "Mode 4 (Default)". This function may not be able to be used with some connected external devices even if the appropriate mode is selected.
- Page 86 Operating Basics Using the software The web camera software is pre-configured to start when you turn on Windows. To start it manually, go to Start All Programs Toshiba Utilities Web Camera Application. 1. Capture Still Images 5. Display Window 2. Video Recording 6.
- Page 87 Master Volume panel. Using the TOSHIBA Face Recognition TOSHIBA Face Recognition uses a face verification library to verify the face data of users when they log on to Windows. This way the user can avoid having to enter a password, which makes the logon process easier.
- Page 88 Toshiba does not guarantee that the face recognition utility will accurately screen out unauthorized users at all times. Toshiba is not liable for any failure or damage that might arise out of the use of the face recognition software or utility.
- Page 89 Delete image data, account information, and personal record data created during registration. To delete the Face Recognition Data, follow the steps as described below: 1. Click Start All Programs TOSHIBA Utilities Face Recognition. The Management screen is displayed. 2. Select a user.
- Page 90 Utilities Face Recognition Help. Windows Logon via TOSHIBA Face Recognition This section explains how to logon to Windows with TOSHIBA Face Recognition. Two authentication modes are provided. ■ AUTO Mode Logon screen: If the face authentication file is selected by default, you can log on without using the keyboard or mouse.
- Page 91 Operating Basics Using the optical disc drive ■ Tray ODD Operation is the same for all optical media drives. The full-size drive provides high-performance execution of CD/DVD/BD-based programs. You can run either 12 cm (4.72") or 8 cm (3.15") CD/DVD/BDs without an adaptor.
- Page 92 Operating Basics To load a disc, follow the steps below and refer to the figures. 1. a. When the power is on, press the eject button to pop open the drawer partially. 1. Eject Button Pressing the eject button b. Pressing the eject button will not pop open the drawer when the disc drive's power is off.
- Page 93 Operating Basics 2. Grasp the drawer gently and pull until it is fully opened. Pulling the drawer open 3. Place the disc, label side up, in the drawer. Inserting a disc User’s Manual 4-19...
- Page 94 Operating Basics When the drawer is fully opened, the edge of the computer will extend slightly over the disc tray. Therefore, you will need to turn the disc at an angle when you place it in the tray. Once the disc is seated, make sure it lies flat, as shown in the figure above.
- Page 95 Operating Basics Inserting a disc Removing discs ■ Tray ODD To remove the disc, follow the steps below and refer to the figure. Do not press the eject button while the computer is accessing the disc drive. Wait for the optical media drive indicator to go out before you open the drawer.
-
Page 96: Writing Cd/Dvd/Bds
You can use the BD Combo drive or DVD Super Multi drive to write data to CD-R-RW or DVD-R/-RW/+R/+RW/-RAM or BD-R/-RE discs. Corel Digital Studio for TOSHIBA is preinstalled. Important message Before you write or rewrite to CD-R-RW or DVD-R/-RW/+R/+RW/-RAM or BD-R/RE discs, read and follow all setup and operating instructions in this section. - Page 97 Based on TOSHIBA's limited compatibility testing, we suggest the following manufacturers of CD-R-RW and DVD-R/+R/-RW/+RW/-RAM and BD-R/RE discs. However, in no event does TOSHIBA guarantee the operation, quality or performance of any disc. Disc quality can affect write or rewrite success rates.
- Page 98 Based on TOSHIBA's limited compatibility testing, we suggest the following manufacturers of CD-R-RW and DVD-R/+R/-RW/+RW/-RAM discs. However, in no event does TOSHIBA guarantee the operation, quality or performance of any disc. Disc quality can affect write or rewrite success rates.
- Page 99 Based on TOSHIBA's limited compatibility testing, we suggest the following manufacturers of CD-R-RW and DVD-R/+R/-RW/+RW/-RAM discs. However, in no event does TOSHIBA guarantee the operation, quality or performance of any disc. Disc quality can affect write or rewrite success rates.
- Page 100 Operating Basics DVD+R (Double Layer): MITSUBISHI KAGAKU MEDIA CO., LTD. (for 2.4x and 8x speed media) DVD+R for Labelflash: FUJIFILM CORPORATION (for 16x speed media) DVD-RW: DVD Specifications for Recordable Disc for Version 1.1 or version 1.2 Victor Company of Japan, Ltd. (JVC) (for 2x, 4x and 6x speed media) MITSUBISHI KAGAKU MEDIA CO., LTD.
- Page 101 LAN server or any other network device. Corel Digital Studio ■ Writing with software other than for TOSHIBA is not recommended. When writing or rewriting Please observe/consider the following when you write or rewrite to a CD-R/ -RW, DVD-R/-RW/-RAM, DVD+R/+RW, or BD-R/-RE disc.
-
Page 102: Data Verification
-RW/-RAM, DVD+R/+RW or BD-R/-RE disc. Do not use cut-and-paste. The original data will be lost if there is a write error. Disclaimer (DVD Super Multi drive or BD-R/RE drive) TOSHIBA does not bear responsibility for the following: ■ Damage to any CD-R-RW or DVD-R/-R(DL)/-RW/+R/+R(DL)/+RW/ -RAM or BD-R/RE disc that may be caused by writing or rewriting with this product. -
Page 103: Video
Corel Digital Studio You can record video using for TOSHIBA. TOSHIBA VIDEO PLAYER Please be aware of the following limitations when you use the TOSHIBA VIDEO PLAYER: Notes on use ■ This software can only be used on Windows 7. - Page 104 Media Player, please use "TOSHIBA VIDEO PLAYER" or "Media Center" to play DVD. Display Devices & Audio ■ "TOSHIBA VIDEO PLAYER" will only run when "Colors" is set to "True color (32 bit)". Click Start Control Panel Appearance and Personalization Display Adjust resolution, click "Advanced...
- Page 105 2D home video, and other 2D content you create, in 3D according to your personal preferences. ■ Toshiba does not intend that this computer be used to convert pre- recorded 2-D content to 3-D unless copyright owners have granted direct or indirect permission or applicable law permits such use. 2Dto3D conversion is activated and controlled by you according to your personal preferences.
- Page 106 When a DVD-Video disc is set in the DVD drive (for models with DVD Super Multi drive), the following application selection screen may appear. If this occurs, select Play DVD movie (using TOSHIBA VIDEO PLAYER), to launch the TOSHIBA VIDEO PLAYER.
-
Page 107: Using Windvd Bd For Toshiba
Please be aware of the following limitations when you use WinDVD BD for TOSHIBA: Notes on use ■ "WinDVD BD for TOSHIBA" is for Blu-ray Disc playback only. DVD playback is not supported. Please use "TOSHIBA DVD PLAYER" for DVD playback. ■... - Page 108 Starting WinDVD BD for TOSHIBA Use the following procedure to start "WinDVD BD for TOSHIBA". 1. When a Blu-ray disc is set in the BD drive, WinDVD BD for TOSHIBA starts automatically. 2. Touch the CD/DVD/BD button on the Front operation panel. Or select...
- Page 109 Operating Basics 3D playback feature WinDVD BD for TOSHIBA supports the playback of Blu-ray 3D discs on external 3D display/TV connected using HDMI 1.4. Before playback Blu-ray 3D discs, configure the 3D Playback. 1. Click Tools. 2. Select 3D Playback.
-
Page 110: Media Care
Operating Basics Media care This section provides tips on protecting data stored on your CD/DVD/BD. Handle your media with care. The following simple precautions will increase the lifetime of your media and protect the data stored on them: CD/DVD/BD 1. Store your CD/DVD/BD in the container they came in to protect them and keep them clean. -
Page 111: Wireless Communications
Be sure to enable the encryption function. Otherwise, you may expose your computer to illegal access by an outsider across the Wireless LAN, which may cause intrusion, eavesdropping, and the loss or destruction of stored data. TOSHIBA strongly recommends the customer to enable the encryption function. User’s Manual... - Page 112 Operating Basics ■ TOSHIBA is not liable for the eavesdropping of data due to the use of Wireless LAN and the damage thereof. Bluetooth Stack for Windows by TOSHIBA (depends on the model you purchased) ® Please note that this software is specifically designed for Windows...
-
Page 113: Lan
Operating Basics Indication Indicator status LED off Wireless communication switch is set to off. Automatic power down because of overheating. Power malfunction. LED glows Wireless communication switch is on. Wireless LAN is turned on by an application. If you use the Task Bar to disable Wireless LAN, you will need to restart the computer to re-enable it. -
Page 114: Cleaning The Computer
Operating Basics Connecting the LAN cable 3. Plug the other end of the cable into a LAN hub connector. Check with your LAN administrator before connecting to a hub. Disconnecting LAN cable To disconnect the LAN cable, follow the steps below. 1. -
Page 115: Moving The Computer
Using the Hard Disk Drive (HDD) Protection This computer has a function for reducing the risk of damage on the hard disk drive. Using an acceleration sensor built into the computer, TOSHIBA HDD Protection detects vibration shocks and similar signs of movement of... - Page 116 TOSHIBA HDD Protection is disabled. TOSHIBA HDD Protection Properties You can change the TOSHIBA HDD Protection settings by using the TOSHIBA HDD Protection window. To open the window, click Start Programs TOSHIBA HDD Protection Settings.
- Page 117 Intensely shaking the computer or other subjecting it to strong impacts may cause damage to the computer. Details To open the Details window, click the Setup Detail button in the TOSHIBA HDD Protection Properties window. Detection Level Amplification When the AC adaptor is disconnected or the lid is closed, HDD Detection assumes that the computer will be carried and sets the detection level to the maximum for 10 seconds.
-
Page 118: Chapter 5 The Keyboard
The Keyboard Chapter 5 The Keyboard The number of keys on your keyboard depends on which country/region’s keyboard layout your computer is configured with. Keyboards for numerous languages are available. There are five types of keys: typewriter keys, function keys, soft keys, Windows special keys, and cursor control keys. -
Page 119: Soft Keys: Fn Key Combinations
The Keyboard F1 ... F12 function keys The function keys (not to be confused with Fn) are the 12 keys at the top of your keyboard. These keys function differently from other keys. F1 through F12 are called function keys because they execute programmed functions when pressed. - Page 120 The Keyboard Power plan: Displays the power save modes and lets you change the power settings. Sleep: This hot key switches the system to Sleep Mode. Hibernate: This hot key switches the system to Hibernate mode. Output: Changes the active display device. Default resolution for simultaneous mode is set to 1024x768.
-
Page 121: Windows Special Keys
TOSHIBA Zooming Utility (enlarge): Increases the icon size on the desktop or the font size within one of the supported application windows. Before using Fn + 1 and Fn + 2, you must install the TOSHIBA Zooming Utility. The Utility only supports the following application windows: Microsoft Internet Explorer, Microsoft Office, Windows Media Player, Adobe Reader and the icons on the desktop. -
Page 122: Chapter 6 Power And Power-Up Modes
Power and Power-Up Modes Chapter 6 Power and Power-Up Modes The computer's power resources include the AC adaptor and internal batteries. This chapter gives details on making the most effective use of these resources, including charging the computer and battery tips for saving battery power, and power up modes. -
Page 123: Power Indicators
Power and Power-Up Modes Power indicators As shown in the above table, the Battery and Power indicators on the front of the system alert you to the computer’s operating capability and battery charge status. Battery indicator Check the Battery indicator to determine the status of the battery pack. The following indicator lights indicate the battery status: Flashing amber The battery charge is low. - Page 124 Dispose of the battery as required by local ordinances or regulations. Use only batteries recommended by TOSHIBA as replacements. ■ Do not remove the battery pack while the computer is in Sleep Mode.
-
Page 125: Care And Use Of The Battery Pack
The computer's RTC battery is a lithium ion battery and should be replaced only by your dealer or by a TOSHIBA service representative. The battery can explode if not properly replaced, used, handled or disposed of. - Page 126 The battery pack is lithium ion battery, which can explode if not replaced, used, handled or disposed of properly. Dispose of the battery as required by local ordinances or regulations. Use only batteries recommended by TOSHIBA as replacements. ■ Charge the battery pack only in an ambient temperature between 5 and 35 degrees Celsius.
- Page 127 Power and Power-Up Modes The charging time when the computer is on is affected by ambient temperature, the temperature of the computer and how you use the computer. If you make heavy use of external devices, for example, the battery might scarcely charge at all during operation. Refer also to the section Maximizing battery operating time.
- Page 128 Power and Power-Up Modes ■ Wait at least 16 seconds after turning on the computer before trying to monitor the remaining operating time. The computer needs this time to check the battery's remaining capacity and to calculate the remaining operating time, based on the current power consumption rate and remaining battery capacity.
-
Page 129: Replacing The Battery Pack
Power and Power-Up Modes Retaining data with power off When you turn off your computer with fully charged batteries, the batteries retain data for the following approximate time periods. Battery pack Approximately 2 days (6-cell, 12-cell) (Sleep mode, 6-cell) Approximately 3.5 days (Sleep mode, 12-cell) Approximately 1 month (Shut down mode, all type of battery... - Page 130 Power and Power-Up Modes Removing the battery pack To replace a discharged battery, follow the steps below. ■ When handling battery packs, do not short-circuit the terminals. Also, do not drop, hit or otherwise apply impact; do not scratch or break the casing and do not twist or bend the battery pack.
-
Page 131: Toshiba Password Utility
2. Battery Pack Lock Securing the battery pack TOSHIBA Password Utility The TOSHIBA Supervisor Password Utility allows you to maintain an additional level of security and provides two levels of password security: User and Supervisor. Passwords set in TOSHIBA Supervisor Password Utility are different from ®... -
Page 132: Power-Up Modes
Supervisor password If you set a supervisor password, some functions will be restricted when a user logs on with the user password. To set a supervisor password: TOSHIBA Assist SECURE Supervisor password This utility lets you do the following: ■... -
Page 133: Panel Power Off/On
Power and Power-Up Modes Refer also to the sections Turning on the power Turning off the power in Chapter 3, Getting Started. Hot keys You can use hot keys Fn + F3 to enter Sleep Mode and Fn + F4 to enter Hibernation Mode. -
Page 134: Chapter 7 Hw Setup
HW Setup Chapter 7 HW Setup This chapter explains how to use TOSHIBA HW Setup program to configure your computer. TOSHIBA HW Setup lets you configure settings for General, Password, Display, Boot Priority, Keyboard, LAN, and USB. Accessing HW Setup To run HW Setup, click , All Programs, TOSHIBA, Utilities, HWSetup. - Page 135 HW Setup User Password Lets you register a new password or un-register an existing password. Not Registered Un-registers an existing password Registered Register a new password by following the on screen instructions Owner String This blank field is used to display a message when the password field is displayed on startup.
- Page 136 HW Setup Keyboard Wake-up on Keyboard When this feature is enabled and the computer is in Sleep Mode, you can turn on the computer by pressing any key. It is effective only for the internal keyboard and only when the computer is in Sleep Mode. Enabled Enables the Wake-up on Keyboard function.
- Page 137 HW Setup SATA Interface setting This feature allows you to set SATA interface setting. Performance Let HDD/SSD work with maximum performance. (Default) Battery life Let HDD/SSD work with battery life mode. If this setting is selected, this causes performance down. User’s Manual...
-
Page 138: Chapter 8 Optional Devices
Optional Devices Chapter 8 Optional Devices Optional devices can expand the computer's capabilities and its versatility. This chapter describes connection or installation of the following devices, which are available from your TOSHIBA dealer: Cards/memory ■ ExpressCard ■ SD (Secure Digital)/SDHC (Secure Digital High Capacity)/... -
Page 139: Expresscard
Optional Devices ExpressCard The computer is equipped with an ExpressCard expansion slot that can accommodate two standard module formats: anExpressCard/34 module and an ExpressCard/54 module. An ExpressCard module is a small, modular add-in card technology based on PCI Express and Universal Serial Bus (USB) interfaces. -
Page 140: Sd/Sdhc/Mmc/Memory Stick/Memory Stick Pro/Xd Memory
Optional Devices Removing an ExpressCard ■ Before removing an ExpressCard, make sure that any applications or system services are not using the card. ■ Be sure to disable the ExpressCard prior to removing it. Otherwise, the system may be fatally damaged. To remove an ExpressCard, follow the steps below. - Page 141 Optional Devices Card Type Capacities MEMORY STICK up to 128MB, 256MB (128MB x 2) MEMORY STICK PRO up to 4GB up to 2GB ■ Keep foreign objects out of the memory card slot. A pin or similar object can damage the computer's circuitry. ■...
- Page 142 Optional Devices Removing a memory card To remove a memory card, follow the steps below: 1. Click the Safely Remove Hardware icon on the Taskbar. 2. Select a device, then click Stop. A confirmation dialog may appear, depending on how the device is registered with the system; if so, confirm that you want to remove the device.
-
Page 143: Memory Expansion
RAM. This section describes how to install and remove a memory module. ■ Use only memory modules approved by TOSHIBA. ■ Do not try to install or remove a memory module under the following conditions. You can damage the computer and the module. Also, data will be lost. - Page 144 Optional Devices 1. Memory Module Cover Removing the memory module cover 6. Fit the module's connectors into the computer's connectors at about a 45 degree angle. Press the module carefully to ensure a firm connection. Do not touch the connectors on the memory module or on the computer. Debris on the connectors may cause memory access problems.
- Page 145 Optional Devices 1. Slot A 2. Slot B Installing the memory module 8. Seat the cover and secure it with the screws. 9. Replace the battery pack as described in Chapter 6, Power and Power- Modes. 10. Turn the power on and make sure the added memory is recognized. Open System in the Control Panel and click the General tab.
- Page 146 Optional Devices Removing a memory module Before removing the memory module, make sure the computer is in boot mode. To remove the memory module: 1. Be sure the power is off and all cables are disconnected from the computer. 2. Turn the computer upside down and remove the battery and the screws securing the memory module cover.
-
Page 147: Additional Battery Pack
Optional Devices Additional battery pack You can increase the portability of the computer with additional battery packs. If you’re away from an AC power source and your battery runs low, you can replace it with a freshly charged battery. Refer to Chapter 6, Power and Power-Up Modes of your online manual. - Page 148 Optional Devices As the port operation of all HDMI (High-Definition Multimedia Interface) monitors has not been confirmed, some HDMI monitors may not function properly. 1. Plug one end of the HDMI cable into the HDMI port of the HDMI device. Connecting a HDMI cable 2.
- Page 149 Optional Devices Before you setup HDMI 1.4 3D Video feature, please complete Internet setup to see some notification via network. *As the port operation of all 3D televisions has not been confirmed, HDMI 1.4 3D Video feature may not work on some 3D televisions properly. 1.
-
Page 150: I.link (Ieee1394)
There is a possibility that the original data will be damaged. There is a particular risk that some frames will be deleted in the case of digital video transfer. TOSHIBA assumes no liability for such loss of data. 2. Do not transfer data in areas where static electricity is easily generated or in areas subjected to electronic noise. -
Page 151: Esata (External Serial Ata)
Optional Devices Connecting 1. Make sure the connectors are properly aligned and plug the i.LINK (IEEE1394) cable into the computer. 2. Plug the other end of the cable into the device. Note the following when you use i.LINK: a. You may need to install drivers for your i.LINK devices. b. - Page 152 Optional Devices Connecting an eSATA cable to the eSATA/USB combo port If you connect an eSATA device after the computer has already been turned on, it will take about ten seconds for it to be recognized by the computer. Do not attempt to disconnect and reconnect the drive before this period has elapsed.
-
Page 153: Security Lock
Optional Devices Security lock Security locks enable you to anchor your computer to a desk or other heavy object to help prevent unauthorized removal of the computer. The computer has a security lock slot on the left side. Attach one end of the cable to a desk and the other end to the security lock slot. -
Page 154: Troubleshooting
Troubleshooting Chapter 9 Troubleshooting TOSHIBA designed the computer for durability. However, should problems occur, following the procedures in this chapter can help to determine the cause. All readers should become familiar with this chapter. Knowing what might go wrong can help prevent problems from occurring. - Page 155 Troubleshooting ■ Inspect all connecting cables for loose wires and all connectors for loose pins. ■ Check that your CD/DVD/BD is correctly inserted. Make notes of your observations and keep them in a permanent error log. This will help you describe your problems to your dealer. If a problem recurs, the log will help you identify the problem faster.
-
Page 156: Hardware And System Checklist
This message remains on the screen for a few seconds. If the self test is successful, the computer tries to load the operating system, depending on how the Boot Priority is set in the TOSHIBA HW Setup program. If any of the following conditions are present, the self test failed: ■... - Page 157 Troubleshooting Power When the computer is not plugged into an AC outlet, the battery pack is the primary power source. However, your computer has a number of other power resources, including an intelligent power supply and a Real Time Clock battery. These resources are interrelated and any one could affect apparent power problems.
- Page 158 Troubleshooting Problem Procedure Battery doesn’t charge If the battery is completely discharged, it will not when the AC adaptor is begin charging immediately. Wait a few minutes. attached (Battery If the battery still does not charge, make sure the indicator does not glow outlet of the AC adaptor is supplying power.
- Page 159 Troubleshooting ■ Please be kind to our shared environment. Check with your local government authority for details regarding where to recycle old batteries or how to dispose of them properly. This product contains mercury. Disposal of this material may be regulated due to environmental considerations.
- Page 160 Troubleshooting Keyboard Keyboard problems can be caused by your setup configuration. For more information, refer to Chapter 5, Keyboard. Problem Procedure Output to screen is Make sure the software you are using is not garbled remapping the keyboard. Remapping involves reassigning the meaning of each key.
- Page 161 Troubleshooting Solid State drive Problem Procedure Computer does not There may be a problem with your operating boot from hard disk system files. Refer to your operating system drive documentation. Recovery Media Creator Problem Procedure The Recovery Media You will see this message if you have previously Creator can not be chosen to remove the partition and are trying to launched because...
- Page 162 Troubleshooting BD drive For more information, refer to Chapter 4, Operating Basics. Problem Procedure You cannot access a Make sure the drive's drawer is securely closed. CD/DVD/BD in the drive Press gently until it clicks into place. Open the drawer and make sure the CD/DVD/BD is properly seated.
- Page 163 Cannot write correctly If you have trouble writing, make sure you are observing the following precautions: Use only media recommended by TOSHIBA. Do not use the mouse or keyboard during writing. Use only the software supplied with the computer for recording.
- Page 164 Troubleshooting Problem Procedure The response of the Adjust the touch sensitivity. TouchPad is too 1. Click , Control Panel, Hardware and sensitive Sound, and the Mouse icon. 2. Select the Device Settings tab in the Mouse Properties window. 3. Click the Settings button. The Properties for Synaptics Touchpad on PS/2 port screen appears.
- Page 165 Troubleshooting Problem Procedure The mouse pointer The mouse might be dirty. Refer to your mouse moves erratically documentation for instructions on cleaning. If problems persist, contact your dealer. Also refer to your USB device’s documentation. Problem Procedure USB device does not Check for a firm cable connection between the work USB ports on the computer and the USB device.
- Page 166 Connect the AC adaptor to the computer or uncheck the "USB Sleep and Charge" check box to disable this function in the TOSHIBA USB Sleep and Charge Utility. User’s Manual 9-13...
- Page 167 The "USB WakeUp When "USB Sleep and Charge function" is set to function" does not work [Enabled] in the TOSHIBA USB Sleep and Charge Utility, the "USB WakeUp function" does not work for ports that support the USB Sleep and Charge function.
- Page 168 Troubleshooting Sound system Refer also to documentation for your audio devices. Problem Procedure No sound is heard Check the software volume settings. Make sure the headphone connection is secure. If problems persist, contact your dealer. Monitor Refer also to Chapter 8, Optional Devices, and to your monitor’s documentation.
- Page 169 If problems persist, contact your dealer. Fingerprint Pre-OS Please use TOSHIBA HW Setup to register the feature or Single Sign User Password if it was not registered. On feature cannot be...
-
Page 170: Toshiba Support
They are your best sources for current information and support. Where to write If you are still unable to solve the problem and suspect that it is hardware related, write to TOSHIBA at the location listed in the enclosed warranty booklet or visit http://www.toshiba-europe.com on the Internet. -
Page 171: Specifications
Specifications Appendix A Specifications This appendix summarizes the computer's technical specifications. Environmental Requirements Operating Non-operating Ambient temperature 5°C to 35°C -20°C to 60°C Relative humidity 20% to 90% 10% to 95% Altitude (from sea 0 to 10,000 feet 0 to 40,000 feet level) Power Requirements AC adaptor... - Page 172 Specifications Communication specifications Communication Data: Full duplex System Fax: Half duplex Communication Data protocol ITU-T-Rec V.21/V.22/V.22bis/V.32/ (Former CCITT) V.32bis/V.34/V.90/V.92 Bell 103/212A Fax: ITU-T-Rec V.17/V.29/V.27ter/V.21 ch2 (Former CCITT) Communication Data transmission and reception Speed 300/1200/2400/4800/7200/9600/12000/14400/ 16800/19200/21600/24000/26400/28800/31200/ 33600 bps Data reception only with V.90 28000/29333/30666/32000/33333/34666/36000/ 37333/38666/40000/41333/42666/44000/45333/ 46666/48000/49333/50666/52000/53333/54666/...
-
Page 173: Appendix B Display Controller
Display Controller Appendix B Display Controller Display controller The display controller interprets software commands into hardware commands that turn particular pels on or off. A high-resolution external monitor connected to the computer can display up to 2048 horizontal and 1536 vertical pixels at up to 16M colors. The display controller also controls the video mode, which uses industry standard rules to govern the screen resolution and the maximum number of colours that can be displayed on screen. -
Page 174: Wireless Lan
Wireless LAN Appendix C Wireless LAN Card Specifications Form Factor Mini PCI TypeIII Compatibility Wi-Fi ■ IEEE 802.11 Standard for Wireless LANs ■ Wi-Fi (Wireless Fidelity) certified by the Wi-Fi Alliance. The "Wi-Fi CERTIFIED" logo is a certification mark of the Wi-Fi Alliance. ®... - Page 175 Subject to the radio regulations that apply in the countries/regions, your Wireless LAN card may support a different set of 2.4 GHz channels. Consult your Authorized Wireless LAN or TOSHIBA Sales office for information about the radio regulations that apply in the countries/regions.
- Page 176 Wireless LAN *1 Check, if these channels can be used in your country/region. When installing Wireless LAN cards, the channel configuration is managed as follows: ■ For wireless clients that operate in a Wireless LAN Infrastructure, the Wireless LAN card will automatically start operation at the channel identified by the Wireless LAN Access Point.
-
Page 177: Ac Power Cord And Connectors
AC Power Cord and Connectors Appendix D AC Power Cord and Connectors The power cord’s AC input plug must be compatible with the various international AC power outlets and the cord must meet the standards for the country/region in which it is used. All cords must meet the following specifications: Wire size: Minimum 0.75 mm... - Page 178 AC Power Cord and Connectors The following illustrations show the plug shapes for the U.S.A. and Canada, the United Kingdom, Australia and Europe. USA and Canada United Kingdom UL approved BS approved CSA approved Australia Europe AS approved Approved by the appropriate agency User’s Manual...
- Page 179 Disclaimers Appendix E Disclaimers This chapter slates the Disclaimer(s) information applicable to TOSHIBA computers. Central Processing Unit ("CPU") Performance Disclaimer. CPU performance in your computer product may vary from specifications under the following conditions: ■ use of certain external peripheral products ■...
- Page 180 Published battery life numbers are achieved on select models and configurations tested by Toshiba at the time of publication. Recharge time varies depending on usage. Battery may not charge while computer is consuming full power.
- Page 181 Disclaimers Over a period of time, and depending on the usage of the computer, the brightness of the LCD screen will deteriorate. This is an intrinsic characteristic of LCD technology. Maximum brightness is only available when operating in AC power mode. Screen will dim when the computer is operated on battery power and you will not be able to increase the brightness of the screen.
- Page 182 Disclaimers Copy Protection Applicable copy protection standards included in certain media may prevent or limit recording or viewing of the media. LCD Brightness and Eye Stain Your display panel has a brightness approaching that of a TV device. We recommend that you adjust the brightness of your LCD to a comfortable level to prevent possible strain on your eyes.
- Page 183 ■ Once enabled, you may disable the TOSHIBA PC Health Monitor at any time by uninstalling the software via Uninstall a program in the Control Panel. Doing so will automatically delete all collected information from the HDD.
- Page 184 PC Health Monitor. ■ Click the icon in the notification area, then click the "TOSHIBA PC Health Monitor is not enabled. Please click here for more details." message when it is displayed. This message will no longer be displayed after clicking Please enable software now or "Please disable software now"...
- Page 185 What is your address, phone, and fax number? To register the theft on paper, please follow these procedures: ■ Fill in the TOSHIBA Theft Registration form (or a copy of it) below. ■ Attach a copy of your receipt showing where your computer was purchased.
- Page 186 TOSHIBA Europe GmbH Technical Service and Support Blumenstrasse 26 93055 Regensburg Germany Fax number: +49 (0) 941 7807 921 Country stolen: Machine type: (e.g. Qosmio X500) Model number: (e.g. PSL45E-YXT) Serial number: (e.g. 12345678G) Date stolen: Year Month Owner’s details...
- Page 187 Glossary Glossary The terms in this glossary cover topics related to this manual. Alternate naming is included for reference. Abbreviations AACS: advanced access content system AC: Alternating current ACPI: Advanced Configuration and Power Interface AMT: Intel Active Management Technology ASCII: American Standard Code for Information Interchange BIOS: basic input/output system bps: bits per second CD: compact disc...
- Page 188 Glossary GB: gigabyte HDD: hard disk drive HDCP: high-bandwidth digital content protection HDMI: high definition multimedia interface HDMI-CEC: high definition multimedia interface consumer electronics control IDE: integrated drive electronics IEEE: Institute of Electrical and Electronics Engineers IMSM: Intel Matrix Storage Manager I/O: input/output IRQ: interrupt request KB: kilobyte...
- Page 189 Glossary adaptor: A device that provides a compatible connection between two units. For example, the computer's internal display adapter receives information from the software and translates it into images on the screen. An adapter can take a number of forms, from a microprocessor to a simple connector: An intelligent adapter (one that is capable of doing some processing) may also be called a controller.
- Page 190 Glossary boot: Short for bootstrap. A program that starts or restarts the computer. The program reads instructions from a storage device into the computer's memory. boot disk: See system disk. bootable disk: See system disk. bps: Bits per second. Typically used to describe the data transmission speed of a modem.
- Page 191 Glossary click: To press and release the pointing device's primary button without moving the pointing device. In the Windows operating system, this refers to the pointing device's left button, unless otherwise stated. See also double-click. CMOS: Complementary Metal-Oxide Semiconductor. An electronic circuit fabricated on a silicon wafer that requires very little power.
- Page 192 Glossary data bits: A data communications parameter controlling the number of bits (binary digits) used to make up a byte. If data bits = 7 the computer can generate 128 unique characters. If data bits = 8 the computer can generate 256 unique characters. DC: Direct Current.
- Page 193 Glossary DVD-ROM: A Digital Versatile Disc-Read Only Memory is a high capacity, high performance disc suitable for play back of video and other high-density files. The DVD-ROM drive uses a laser to read data from the disc. DVD-RW (+RW, -RW): A Digital Versatile Disc-ReWritable disc can be rewritten many times.
- Page 194 FN, can be used to set system parameters, such as speaker volume. HW Setup: A TOSHIBA utility that lets you set the parameters for various hardware components. icon: A small graphic image displayed on the screen or in the indicator panel.
- Page 195 Glossary input: The data or instructions you provide to a computer, communication device or other peripheral device from the keyboard or external or internal storage devices. The data sent (or output) by the sending computer is input for the receiving computer. instruction: Statements or commands that specify how to perform a particular task.
- Page 196 Glossary LAN: A group of computers or other devices dispersed over a relatively limited area and connected by a communications link that enables any device to interact with any other on the network. Light Emitting Diode (LED): A semiconductor device that emits light when a current is applied.
- Page 197 Glossary network: A collection of computers and associated devices that are connected by communications facilities. A network allows you to share data and peripheral devices, such as printers, with other users and to exchange electronic mail. non-system disk: A disk for storing programs and data that cannot be used to start the computer.
- Page 198 The electrical connection through which the computer sends and receives data to and from devices or other computers. Power Saver: A TOSHIBA utility that lets you set the parameters for various power-saving functions. program: A set of instructions a computer can execute that enables it to achieve a desired result.
- Page 199 Glossary resolution: A measure of the sharpness of the images that can be produced by a printer or displayed on a screen. For a printer, resolution is expressed in dots per inch (dpi). For a screen, it is expressed as the number of pixels available horizontally and vertically restart: Resetting a computer without turning it off (also called "warm boot", "soft reset"...
- Page 200 TFT display: A liquid crystal display (LCD) made from an array of liquid crystal cells using active-matrix technology with thin film transistor (TFT) to drive each cell. Touch Pad: A pointing device integrated into the TOSHIBA computer palm rest. USB: Universal Serial Bus. This serial interface lets you communicate with several devices connected in a chain to a single port on the computer.
- Page 201 Glossary Wireless WAN: Wide Area Network (WAN) through wireless communication. write protection: A method for protecting a floppy diskette from accidental erasure. User’s Manual Glossary-15...
- Page 202 Index Index AC adaptor, 1-4 Equipment checklist, 1-1 additional, 1-16 Express card connecting, 3-2 inserting, 8-2 ASCII characters, 5-4 removing, 8-3 Expresscard, 8-2 Battery charging, 6-5 Floppy disk extending battery life, 6-8 using, 4-17 indicator, 6-1 Fn + Esc (sound mute), 5-2 Monitoring capacity, 6-6 Fn + F1 (instant security), 5-2 real time clock, 1-4, 6-3...
- Page 203 Power, 9-4 expansion, 1-16, 8-6 Real Time Clock, 9-6 installing, 8-6 Self test, 9-3 removing, 8-9 Sound system, 9-15 Modem, 4-36 Support from TOSHIBA, Monitor, external, 1-8, 8-10 9-17 System start-up, 9-3 USB, 9-12 Password Wireless LAN, 9-15 user, 6-10...
- Page 204 5-2 ScrLock, 5-2 Sound System, 1-9 Headphone(S/P DIF) jack, microphone jack, 1-9 mute hot keys, 5-2 TOSHIBA ConfigFree, 1-15 TOSHIBA Theft Registration, Touch Pad, 1-8 using, 4-1 USB, 1-8 Video RAM, 1-3 Wireless communication switch, 4-38...