
Related Manuals for Huawei ETS3023


Summary of Contents for Huawei ETS3023
- Page 1 Wonderful Communication, Mobile Life. Thank you for choosing HUAWEI ETS3023/3223 Fixed Wireless Terminal. HUAWEI ETS3023/3223 Fixed Wireless Terminal User Guide...
- Page 2 No part of this manual may be reproduced or transmitted in any form or by any means without prior written consent of Huawei Technologies Co., Ltd. Trademarks and HUAWEI are trademarks of Huawei Technologies Co., Ltd. All other trademarks and trade names mentioned in this manual are the property of their respective holders.
-
Page 3: Table Of Contents
Table of Contents 1 Warnings and Precautions .....................1 2 Introduction ...........................5 Packing List ........................5 Appearance of the FWT ....................5 Menu Tree........................8 Icons..........................8 Hardware Specifications....................9 3 Installation...........................11 Installing the SIM Card (Optional) ................11 Installing the Power Adapter or Battery..............11 Installing the Antenna....................12 Placing the FWT......................13 Validating........................14 4 Basic Operations .........................15... - Page 4 Adding a Contact ......................23 View a Contact......................23 Memory Status......................23 9 Phone Settings........................24 Profiles.........................24 Auto Dialing ........................24 Time & Date ........................25 Languages ........................25 Network Service ......................25 Security ........................25 Version .........................26 10 Applications........................27 Alarm Clock ........................27 Calculator........................27 11 Maintenance and Troubleshooting..................28 Maintenance.........................28 Troubleshooting......................28...
-
Page 5: Warnings And Precautions
Warnings and Precautions Before using HUAWEI Fixed Wireless Terminal (hereinafter referred to as the FWT), read the following cautions and let your children know these, so that you can use your FWT correctly and safely. Basic Cautions According to the packing list, check items in the package box to make sure that they are complete and undamaged. - Page 6 Your FWT is designed to conform to the authoritative international Radio Frequency (RF) specifications. Use FWT accessories approved by Huawei only. The antenna(s) used for this transmitter must be installed with providing a separation distance of at least 20 cm from all persons.
- Page 7 Emergency Call You can use your FWT for emergency calls; however, connections in all conditions cannot be guaranteed. You should never rely solely on the FWT for essential communications. Battery If the battery fluid gets into eyes, do not rub them. Wash with clean water and seek medical assistance immediately.
- Page 8 Environmental Protection This HUAWEI device complies with Directive 2002/95/EC on the restriction of the use of certain hazardous substances in electrical and electronic equipment. Abide by the local laws in disposing of the package materials of your FWT, consumed batteries and the used FWT, and try to recycle them.
-
Page 9: Introduction
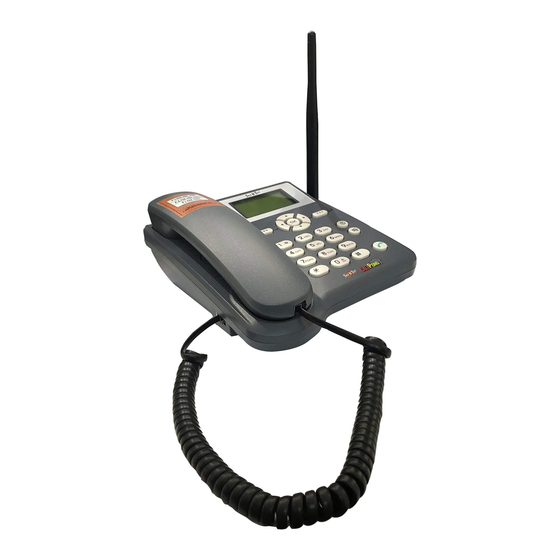
Introduction Packing List The FWT package box contains the following items. If any of the items is lost or damaged, contact your local dealer. Item Quantity Item Quantity Main unit, handset, and coiled cord Certificate of Quality Power adapter Battery Fixed Wireless Terminal User Guide Antenna Appearance of the FWT... - Page 10 Item Description Display Screen To display information. Antenna To receive signals. In the standby mode, press it to access the home screen. Left soft key In the non-standby mode, press it to perform the operation displayed on the lower left corner of the screen.
- Page 11 Item Description Press it to make or answer a call. Call/Redial key In the standby mode, press it to view the call history. Enter the "#". # key In the edit mode, press it to switch between input methods. Enter the "*". * key In the edit mode, press it to display a symbol list.
-
Page 12: Menu Tree
Menu Tree Messages Phonebook Recent Calls Write Message Name list Missed Calls Inbox Add New Answered Calls Outbox Speed Dial Dialed Calls Draft Memory Status Voice Mail Settings Broadcast Memory Status Applications Phone Settings Alarm Profiles Calculator Auto Dial Voice Memo Time &... -
Page 13: Hardware Specifications
Hardware Specifications Item Description Technical standard Working ETS3023 900M Frequency Band frequency Uplink: 880.2–914.8 MHz Downlink: 925.2–959.8 MHz 1800M Frequency Band Uplink: 1710.2–1784.8 MHz Downlink: 1805.2–1879.8 MHz ETS3223 850M Frequency Band Uplink: 824–849 MHz Downlink: 869–894 MHz 1900M Frequency Band Uplink: 1850–1910 MHz... - Page 14 Item Description Dimensions 166 mm ×216 mm × 86 mm (W × D × H) Weight Less than 700g (including the battery) 128 × 64 dots matrix Backlight Provides backlight for the LCD and keypad (green LCD backlight and red keypad backlight) Temperature Working temperature: –10°C to +55°C Charging temperature: –10°C to +45°C...
-
Page 15: Installation
Installation Installing the SIM Card (Optional) Caution: Consult your service provider to decide whether to use a Subscriber Identity Module (SIM) card. The SIM card and its golden contact can be easily damaged by a scratch or bend. Be careful when installing or removing the SIM card. Press and hold to power off your FWT and then disconnect it from the power socket. -
Page 16: Installing The Antenna
Installing the Power Adapter Press and hold to power off your FWT. Connect the power adapter to the FWT, and plug it to the power socket. Installing the Battery Press and hold to power off your FWT and then disconnect the FWT from the power socket. -
Page 17: Placing The Fwt
Placing the FWT You can place the FWT horizontally or vertically. Horizontally Place the FWT on a flat surface. Select a cool and ventilated place for the FWT to dissipate the heat. Vertically 1. Pull out the handset retaining clip from the slot and turn it around. Then push it back, so that the handset will not fall down when the FWT is placed vertically. -
Page 18: Validating
7.7 cm 3. Snap the hooks to the nails. Validating After installing the FWT, you can make a call to check whether it is correctly installed. 1. Press and hold to power on your FWT. After connecting the FWT to the power socket, the icon appears, indicating that the FWT is powered normally. -
Page 19: Basic Operations
Basic Operations Powering On or Off the FWT When the FWT is off, press and hold to power it on. In the standby mode, press and hold to power it off. Making a Call Making a Call through the Keypad 1. -
Page 20: Answering A Call
Making a Call from the Phonebook 1. In the standby mode, press the right soft key; or press (Menu) and select Phonebook. 2. Press to scroll the contacts. 3. Press to dial. Speed Dialing If a number key is set as the speed dial key of a phone number, you can press and hold it to call the number. -
Page 21: Recent Calls
Recent Calls The FWT can store a maximum of 20 missed calls, answered calls, and dialed calls respectively. In standby mode, press (Menu) and select Recent Calls. Then select Missed calls, Answered calls or Dialed Calls. When viewing the records, press (Option) for the following operations: View: View the details of a record. -
Page 22: Text Entry
Text Entry Text Input Mode While entering text, you can press to change the input mode. Note: In the edit mode, press (Delete) once to delete the letter on the left of the cursor. Press and hold (Delete) for over two seconds to delete all letters. Entering Letters In the "Abc", "ABC"... - Page 23 Entering Numbers Do as follows to enter numbers: In the "123" input mode, press the number key labeled with the desired digit. In the "Abc", "ABC" or "abc" input mode, press the number key repeatedly until the desired digit appears on the screen. Entering Symbols 1.
-
Page 24: Messages
Messages Writing and Sending a Message 1. Press (Menu) and select Messages > Write Message. 2. Write a message. 3. After writing the message, press (Option) for the following operations: Save: Save the message to the Draft. Send: Add the recipient(s) and send the message. Note: Select Send, and press to add up to ten recipients by the following options:... -
Page 25: Voice Mail
Delete: Delete the message. Save Number: Save the message sender as a contact and save the phone number. Call: Call the message sender. Viewing the Outbox/Draft The Outbox stores messages that are sent successfully. You can view, re-send, forward, delete a message or delete all the messages stored in the Outbox. The Draft can store up to ten drafts and messages that are not sent successfully. -
Page 26: Memory Status
Press (Menu) and select Messages > Settings > Service Center to view the SMSC number. Setting the Validity Period The validity period means how long a message is stored in the SMSC. 1. Press (Menu) and select Messages > Settings > Validity. 2. -
Page 27: Phonebook
Phonebook Adding a Contact 1. Press (Menu) and select Phonebook > Add New. 2. Select the memory in use. Phone: Save the contact to the FWT. SIM: Save the contact to the SIM card. 3. Press to set the Name and Mobile Number of the contact. 4. -
Page 28: Phone Settings
Phone Settings Profiles The FWT provides two profiles. You can enable and customize a profile. Selecting a Profile 1. In the standby mode, press (Menu) and select Phone Settings > Profiles. 2. Press to select General or Outdoor. 3. Press to enable it. -
Page 29: Time & Date
Time & Date You can set the current time and date. 1. Press (Menu) and select Phone Settings > Time & Date. 2. Press to select Date or Time. 3. Press (Select) or , and set the time or date. 4. -
Page 30: Version
Setting the PIN Lock If the PIN code is activated, you have to enter the PIN code every time you power on the FWT. Enter the correct PIN code and press (OK). To set the PIN code, do as follows: 1. -
Page 31: Applications
Applications Alarm Clock If the alarm clock is activated, the FWT rings at the preset time when it is powered on. You can set up to three alarm clocks. 1. Press (Menu) and select Applications > Alarm. 2. Press to scroll the alarm clocks. 3. -
Page 32: Maintenance And Troubleshooting
Maintenance and Troubleshooting Maintenance 1. Place the FWT in a clean and dry environment. The temperature of the place should be between –10°C and 55°C. 2. If the FWT is covered with dust, clean it with fine and clean cloth. Do not clean it with cleanser or other chemical solvents. - Page 33 Time is not displayed. 1. Make sure that the antenna is installed properly. 2. Adjust the antenna direction or move the FWT to a place covered with strong signals. 3. If the problem persists, contact your service provider to check whether the FWT is in the signal coverage area.