Table of Contents
Advertisement
Quick Links
Advertisement
Table of Contents

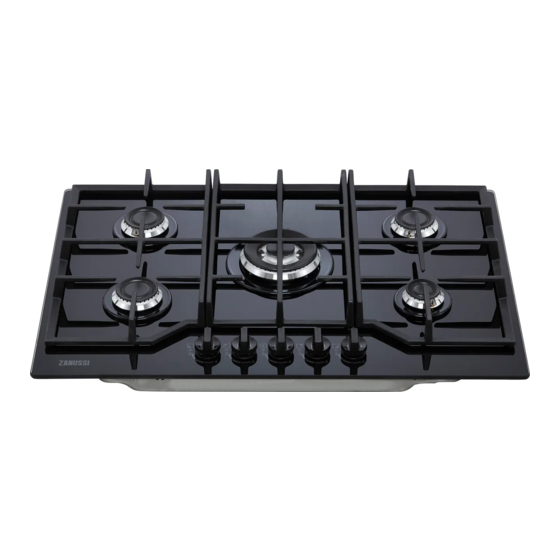
Summary of Contents for Zanussi ZGGN755K
- Page 1 User Manual GETTING STARTED? EASY. ZGGN755K EN User Manual...
-
Page 2: Safety Information
VISIT OUR WEBSITE FOR: Get usage advice, brochures, trouble shoot- er, service and repair information: www.zanussi.com/support SAFETY INFORMATION Before the installation and use of the appliance, carefully read the supplied instructions. The manufacturer is not responsible for any injuries or damage that are the result of incorrect installation or usage. - Page 3 WARNING: Unattended cooking on a hob with fat or oil can be • dangerous and may result in fire. NEVER try to extinguish a fire with water, but switch off the • appliance and then cover flame e.g. with a lid or a fire blanket. CAUTION: The appliance must not be supplied through an •...
-
Page 4: Safety Instructions
sleeving) with parts that can reach temperatures of more than 50°C above room temperature. WARNING: Use only hob guards designed by the manufacturer • of the cooking appliance or indicated by the manufacturer of the appliance in the instructions for use as suitable or hob guards incorporated in the appliance. -
Page 5: Gas Connection
• If the mains socket is loose, do not connect the • Fats and oil when heated can release flammable mains plug. vapours. Keep flames or heated objects away • Do not pull the mains cable to disconnect the from fats and oils when you cook with them. appliance. -
Page 6: Installation
• Discoloration of the enamel or stainless steel • Do not clean the burners in the dishwasher. has no effect on the performance of the SERVICE appliance. • To repair the appliance contact the Authorised CARE AND CLEANING Service Centre. •... -
Page 7: Injectors Replacement
GAS CONNECTION CAUTION! Make sure that the gas WARNING! Any gas installation must supply pressure of the appliance be carried out by a GAS SAFE obeys the recommended values. REGISTER installer. Rigid connection: Make sure that, once the hob is installed, it is easily Carry out connection by using metal rigid pipes accessible for the engineer in the event of a (copper with mechanical end). -
Page 8: Replacement Of The Connection Cable
ELECTRICAL CONNECTION • Do not pull the mains cable to disconnect the appliance. Always pull the mains plug (if applicable). • The appliance must not be connected with an extension cable, an adapter or a multiple socket. There is a risk of fire. •... - Page 9 min. 600 mm min. 650 mm min. 200 mm min. 55 mm 30 mm 560 mm 1. Connect the green and yellow (earth) wire to the terminal which is marked with the letter 'E', or the earth symbol , or coloured green and yellow.
-
Page 10: Product Description
POSSIBILITIES FOR INSERTION The panel installed below the hob must be easy to remove and let an easy access in case a technical assistance intervention is necessary. Kitchen unit with door or drawer 30 mm min 20 mm (max 150 mm) 60 mm A) supplied seal B) supplied brackets... -
Page 11: Daily Use
Symbol Description minimum gas supply DAILY USE IGNITION OF THE BURNER WARNING! Refer to Safety chapters. Always light the burner before you put on the cookware. BURNER OVERVIEW WARNING! Be very careful when you use open fire in the kitchen environment. -
Page 12: Hints And Tips
TURNING THE BURNER OFF The spark generator can start To put the flame out, turn the knob to the off automatically when you switch on the position mains, after installation or a power cut. It is normal. WARNING! Always turn the flame down or switch it off before you The hob is supplied with the remove the pans from the burner. -
Page 13: Pan Supports
• Wash stainless steel parts with water, and then keeping them in horizontal position as shown in the dry them with a soft cloth. graphic. PAN SUPPORTS Do not lift the pan supports at an angle, as this will put strain on the The pan supports are not resistant to metal pins. -
Page 14: Periodic Maintenance
moist cloth and a non-abrasive detergent. After components well clean to prevent difficult lighting cleaning, wipe the hob dry with a soft cloth. and check that the burner crown holes are not • To clean the enamelled parts, caps and crowns, obstructed. -
Page 15: Technical Data
LABELS SUPPLIED WITH THE ACCESSORIES Stick the adhesive labels as indicated below: MOD. MOD. MOD. TYPE PROD.NO. IP20 PROD.NO. PROD.NO. SER.NO. 0049 SER.NO SER.NO 03 IT DATA DATA MADE IN ITALY A. Stick it on Guarantee Card and send this part C. -
Page 16: Energy Efficiency
MINIMUM INJECTOR BURNER POWER kW POWER kW MARK G30 28-30 mbar G31 37 mbar Multi Crown 3,55 Semi-rapid Auxiliary 0,33 ENERGY EFFICIENCY PRODUCT INFORMATION ACCORDING TO EU 66/2014 Model identification ZGGN755K Type of hob Built-in hob Number of gas burners... -
Page 17: Environmental Concerns
Left rear - Semi-rapid 56.1% Right rear - Semi-rapid 56.1% Energy efficiency per gas burner Centre middle - Multi Crown 53.3% (EE gas burner) Left front - Semi-rapid 54.8% Right front - Auxiliary not applicable Energy efficiency for the gas hob 55.1% (EE gas hob) EN 30-2-1: Domestic cooking appliances burning gas - Part 2-1 : Rational use of energy - General... - Page 20 WWW.ZANUSSI.COM/SHOP...


