Table of Contents
Advertisement
Advertisement
Table of Contents

Related Manuals for IBM 7063-CR2


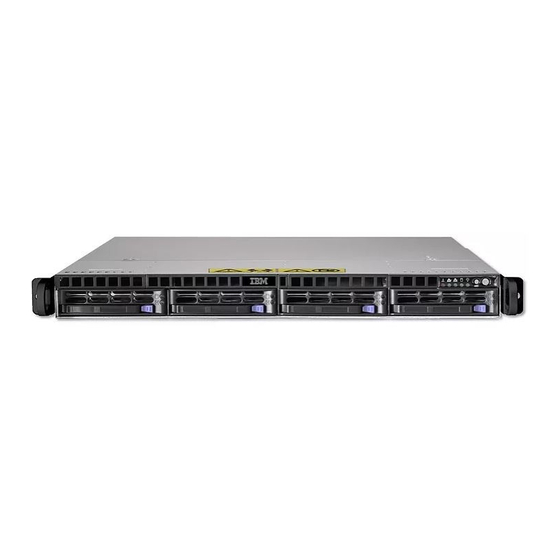
Summary of Contents for IBM 7063-CR2
- Page 1 Power Systems Servicing the IBM Power Systems HMC (7063-CR2)
- Page 2 Note Before using this information and the product it supports, read the information in “Safety notices” on page v, “Notices” on page 109, the IBM Systems Safety Notices manual, G229-9054, and the IBM Environmental Notices and User Guide, Z125–5823. ®...
-
Page 3: Table Of Contents
Trusted platform module........................... 89 Common service procedures for servicing the 7063-CR2........93 Before you begin............................93 Identifying the 7063-CR2 system that contains the part to replace............96 LEDs on the 7063-CR2 system......................96 Identifying the 7063-CR2 that needs servicing.................. 97 Starting and stopping the system......................98... - Page 4 Disconnecting the power cords......................100 Connecting the power cords......................101 Service and operating positions......................101 Placing a 7063-CR2 system into the service position..............101 Placing a 7063-CR2 system into the operating position..............103 Removing and replacing covers......................104 Removing the service access cover....................104 Installing the service access cover....................105...
-
Page 5: Safety Notices
Das Produkt ist nicht für den Einsatz an Bildschirmarbeitsplätzen im Sinne § 2 der Bildschirmarbeitsverordnung geeignet. Laser safety information IBM servers can use I/O cards or features that are fiber-optic based and that utilize lasers or LEDs. Laser compliance IBM servers may be installed inside or outside of an IT equipment rack. - Page 6 • Each rack cabinet might have more than one power cord. – For AC powered racks, be sure to disconnect all power cords in the rack cabinet when directed to disconnect power during servicing. vi Power Systems: Servicing the IBM Power Systems HMC (7063-CR2)
- Page 7 – For racks with a DC power distribution panel (PDP), turn off the circuit breaker that controls the power to the system unit(s), or disconnect the customer’s DC power source, when directed to disconnect power during servicing. • Connect all devices installed in a rack cabinet to power devices installed in the same rack cabinet.
- Page 8 (for example, when working from a ladder). Stability hazard: • The rack may tip over causing serious personal injury. • Before extending the rack to the installation position, read the installation instructions. viii Power Systems: Servicing the IBM Power Systems HMC (7063-CR2)
- Page 9 • Do not put any load on the slide-rail mounted equipment mounted in the installation position. • Do not leave the slide-rail mounted equipment in the installation position. (L002) (L003) Safety notices ix...
- Page 10 There are no serviceable parts inside the device. • Use of the controls or adjustments or performance of procedures other than those specified herein might result in hazardous radiation exposure. (C026) x Power Systems: Servicing the IBM Power Systems HMC (7063-CR2)
- Page 11 Exchange only with the IBM-approved part. Recycle or discard the battery as instructed by local regulations. In the United States, IBM has a process for the collection of this battery. For information, call 1-800-426-4333. Have the IBM part number for the battery unit available when you call.
- Page 12 Freewheeling will cause uneven cable wrapping around winch drum, damage cable, and may cause serious injury. • This TOOL must be maintained correctly for IBM Service personnel to use it. IBM shall inspect condition and verify maintenance history before operation. Personnel reserve the right not to use TOOL if inadequate.
- Page 13 The dc-powered system employs an isolated DC return (DC-I) design. The DC battery return terminal shall not be connected to the chassis or frame ground. The dc-powered system is intended to be installed in a common bonding network (CBN) as described in GR-1089-CORE.
- Page 14 Power Systems: Servicing the IBM Power Systems HMC (7063-CR2)
-
Page 15: Removing And Replacing Parts In The 7063-Cr2
Electrical voltage and current from power, telephone, and communication cables are hazardous. To avoid a shock hazard: If IBM supplied the power cord(s), connect power to this unit only with the IBM provided power cord. Do not use the IBM provided power cord for any other product. Do not open or service any power supply assembly. -
Page 16: Cables
Learn how to remove and replace cables in the IBM Power Systems HMC (7063-CR2) system. Removing and replacing the drive power cable in the 7063-CR2 Learn how to remove and replace the drive power cable in the IBM Power Systems HMC (7063-CR2) system. - Page 17 For instructions, see “Placing a 7063-CR2 system into the service position” on page 101. 4. Remove the service access cover. For instructions, see “Removing the service access cover from a 7063-CR2 system” on page 104. 5. Remove the drive power cable.
-
Page 18: Drive Signal Cable
For instructions, see “Starting the 7063-CR2 system ” on page 98. Removing and replacing a drive signal cable in the 7063-CR2 Learn how to remove and replace a drive signal cable in the IBM Power Systems HMC (7063-CR2) system. 4 Power Systems: Servicing the IBM Power Systems HMC (7063-CR2) - Page 19 Removing a drive signal cable from the 7063-CR2 system To remove a drive signal cable from the IBM Power Systems HMC (7063-CR2) system, complete the steps in this procedure. Procedure 1. Attach the electrostatic discharge (ESD) wrist strap. The ESD wrist strap must be connected to an unpainted metal surface until the service procedure is completed, and if applicable, until the service access cover is replaced.
- Page 20 Figure 3. Disconnecting the drive signal cable Replacing a drive signal cable in the 7063-CR2 system To replace a drive signal cable in the IBM Power Systems HMC (7063-CR2) system, complete the steps in this procedure. Procedure 1. Ensure that you have the electrostatic discharge (ESD) wrist strap on and that the ESD clip is plugged into a ground jack or connected to an unpainted metal surface.
-
Page 21: Operator Console Cable
For instructions, see “Starting the 7063-CR2 system ” on page 98. Removing and replacing the control panel cable in the 7063-CR2 Learn how to remove and replace the control panel cable in the IBM Power Systems HMC (7063-CR2) system. Removing the control panel cable from the 7063-CR2 system To remove the control panel cable from the IBM Power Systems HMC (7063-CR2) system, complete the steps in this procedure. - Page 22 Figure 5. Disconnecting the control panel cable Replacing the control panel cable in the 7063-CR2 system To replace the control panel cable in the IBM Power Systems HMC (7063-CR2) system, complete the steps in this procedure. Procedure 1.
-
Page 23: Usb Cable
For instructions, see “Starting the 7063-CR2 system ” on page 98. Removing and replacing the USB cable in the 7063-CR2 Learn how to remove and replace the USB cable in the IBM Power Systems HMC (7063-CR2) system. Removing the USB cable from the 7063-CR2 system To remove the USB cable from the IBM Power Systems HMC (7063-CR2) system, complete the steps in this procedure. -
Page 24: Drive
The drives have an ID of 0. If one of the drives needs to be replaced, use the “Drive commands for the 7063-CR2 system” on page 99 to check the status of the drives, the IDs of the drives, and to rebuild the RAID1 array. -
Page 25: Removing A Drive
Removing a drive from the 7063-CR2 system To remove a drive from the IBM Power Systems HMC (7063-CR2) system, complete the steps in this procedure. Procedure 1. Attach the electrostatic discharge (ESD) wrist strap. The ESD wrist strap must be connected to an unpainted metal surface until the service procedure is completed, and if applicable, until the service access cover is replaced. -
Page 26: Replacing A Drive
Replacing a drive in the 7063-CR2 system To replace a drive in the IBM Power Systems HMC (7063-CR2) system, complete the steps in this procedure. Procedure 1. Ensure that you have the electrostatic discharge (ESD) wrist strap on and that the ESD clip is plugged into a ground jack or connected to an unpainted metal surface. -
Page 27: Drive Holder
3. The drive rebuild operation starts automatically. Removing and replacing the drive holder in the 7063-CR2 Learn how to remove and replace the drive holder in the IBM Power Systems HMC (7063-CR2) system. Removing the drive holder from the 7063-CR2 system To remove the drive holder from the IBM Power Systems HMC (7063-CR2) system, complete the steps in this procedure. - Page 28 For instructions, see “Stopping the 7063-CR2 system” on page 99. 3. Place the system in the service position on an ESD surface on a table. For instructions, see “Placing a 7063-CR2 system into the service position” on page 101. 4. Label and remove the two drives from the system.
- Page 29 7. Label and disconnect the cables from the rear of drive holder. For instructions, see “Removing the drive power cable from the 7063-CR2 system” on page 2 and “Removing a drive signal cable from the 7063-CR2 system” on page 5.
-
Page 30: Replacing The Drive Holder
11. Place the drive holder and cables on the table. Replacing the drive holder in the 7063-CR2 system To replace the drive holder in the IBM Power Systems HMC (7063-CR2) system, complete the steps in this procedure. About this task You can use a magnetic tip screwdriver to remove and replace the screws. -
Page 31: Fans
For instructions, see “Starting the 7063-CR2 system ” on page 98. Removing and replacing fans in the 7063-CR2 Learn how to remove and replace fans in the IBM Power Systems HMC (7063-CR2) system. Removing and replacing parts in the 7063-CR2 17... -
Page 32: Removing A Fan
Removing a fan from the 7063-CR2 system To remove a fan from the IBM Power Systems HMC (7063-CR2) system, complete the steps in this procedure. Before you begin (L008) CAUTION: Hazardous moving parts nearby. (L008) About this task If a single fan failed, it can be replaced while the system is running. - Page 33 Use the ring (A) on the front of the fan to pull the fan from the system. b) Support the bottom of the fan as you slide it out of the system. Do not hold the fan by the ring. Figure 16. Removing a fan Removing and replacing parts in the 7063-CR2 19...
-
Page 34: Replacing A Fan
Replacing a fan in the 7063-CR2 system To replace a fan in the IBM Power Systems HMC (7063-CR2) system, complete the steps in this procedure. Procedure 1. Ensure that you have the electrostatic discharge (ESD) wrist strap on and that the ESD clip is plugged into a ground jack or connected to an unpainted metal surface. -
Page 35: Memory
Figure 18. Replacing the fan cover Removing and replacing memory in the 7063-CR2 To remove and replace memory in the IBM Power Systems HMC (7063-CR2) system, complete the steps in this procedure. About this task The four memory modules must be the same size and type. Mixing of memory module types is not allowed. - Page 36 3. Remove the system backplane from the rear of the system. a) Label and remove the two power cables. For instructions, see “Disconnecting the power cords from a 7063-CR2 system” on page 100. b) Label and remove the signal cables from the rear of the system.
- Page 37 DIMM. Be sure to unlock both tabs at the same time. The lever action of opening the tabs pushes the memory DIMM out of the slot. c) Hold the memory DIMM by the edges and pull it out of the slot. Removing and replacing parts in the 7063-CR2 23...
- Page 38 Press firmly on each side of the memory DIMM until the locking tab locks in place with an audible click. 24 Power Systems: Servicing the IBM Power Systems HMC (7063-CR2)
- Page 39 DIMMs in the system backplane if the insertion of the backplane is at an angle or is rushed. As a result of possible contact, DIMMs can be scratched and can leave residue on the top cover. Removing and replacing parts in the 7063-CR2 25...
-
Page 40: Control Panel
For instructions, see “Starting the 7063-CR2 system ” on page 98. Removing and replacing the control panel in the 7063-CR2 Learn how to remove and replace the control panel in the IBM Power Systems HMC (7063-CR2) system. Removing the control panel from the 7063-CR2 system To remove the control panel from the IBM Power Systems HMC (7063-CR2) system, complete the steps in this procedure. - Page 41 8. Remove the fan cover from the front of the system. a) Rotate the two levers (A) on each side of the fan cover up and out to unlock the fan cover. b) Pull the cover away from the system. Removing and replacing parts in the 7063-CR2 27...
- Page 42 Figure 28. Removing the fan cover 9. Slide the control panel out of the system. Be careful with the cables that are attached to the control panel. 28 Power Systems: Servicing the IBM Power Systems HMC (7063-CR2)
- Page 43 Use your thumb or finger to press the release latch on the connector to remove the cable. 11. Remove the three screws that secure the control panel card to the control panel cover. Figure 30. Removing the control panel screws Removing and replacing parts in the 7063-CR2 29...
-
Page 44: Replacing The Control Panel
Replacing the control panel in the 7063-CR2 system To replace the control panel in the IBM Power Systems HMC (7063-CR2) system, complete the steps in this procedure. Procedure 1. Ensure that you have the electrostatic discharge (ESD) wrist strap on and that the ESD clip is plugged into a ground jack or connected to an unpainted metal surface. - Page 45 Figure 33. Installing the control panel side screw 8. Turn the system upside down on the ESD surface. 9. Install the two screws (A) to secure the control panel to the bottom of the system. Removing and replacing parts in the 7063-CR2 31...
- Page 46 Figure 35. Replacing the fan cover 12. Replace the system in the rack and replace the components that you removed. For instructions, see “Placing a 7063-CR2 system into the operating position” on page 103. 32 Power Systems: Servicing the IBM Power Systems HMC (7063-CR2)
-
Page 47: Pcie Adapters
Parts must be replaced with the identical part in the exact same place. Removing a PCIe adapter from the 7063-CR2 system To remove a PCIe adapter from the IBM Power Systems HMC (7063-CR2) system, complete the steps in this procedure. - Page 48 Remove the screw that secures the PCIe adapter to the system backplane. Figure 39. Removing the tail-stock screw b) Open the retainer clip that secures the PCIe adapter to the PCIe riser, by moving the blue lever to the unlocked position. 34 Power Systems: Servicing the IBM Power Systems HMC (7063-CR2)
-
Page 49: Replacing A Pcie Adapter
Remove the PCIe adapter from the PCIe riser. Figure 41. Removing the PCIe adapter Replacing a PCIe adapter in the 7063-CR2 system To replace a PCIe adapter in the IBM Power Systems HMC (7063-CR2) system, complete the steps in this procedure. Procedure 1. - Page 50 DIMMs in the system backplane if the insertion of the backplane is at an angle or is rushed. As a result of possible contact, DIMMs can be scratched and can leave residue on the top cover. 36 Power Systems: Servicing the IBM Power Systems HMC (7063-CR2)
-
Page 51: Pcie Riser
For instructions, see “Starting the 7063-CR2 system ” on page 98. Removing and replacing the PCIe riser in the 7063-CR2 Learn how to remove and replace the PCIe riser in the IBM Power Systems HMC (7063-CR2) system. Removing the PCIe riser from the 7063-CR2 system To remove the PCIe riser from the IBM Power Systems HMC (7063-CR2) system, complete the steps in this procedure. - Page 52 For instructions, see “Disconnecting the power cords from a 7063-CR2 system” on page 100. b) Label and remove the signal cables from the rear of the system. c) Loosen the two screws (A) on the sides of the system backplane as shown in the following figure.
-
Page 53: Replacing The Pcie Riser
6. Lift the PCIe riser from the system and place it on an ESD surface. Replacing the PCIe riser in the 7063-CR2 system To replace the PCIe riser in the IBM Power Systems HMC (7063-CR2) system, complete the steps in this procedure. - Page 54 Figure 50. Replacing the PCIe riser screws 4. Replace the PCIe adapter or filler. For instructions, see “Replacing a PCIe adapter in the 7063-CR2 system” on page 35. 5. Replace the system backplane into the rear of the system. a) Ensure that the two system backplane levers are open.
-
Page 55: Power Distribution Board
For instructions, see “Starting the 7063-CR2 system ” on page 98. Removing and replacing the power distribution board in the 7063- Learn how to remove and replace the power distribution board in the IBM Power Systems HMC (7063- CR2) system. - Page 56 For instructions, see “Placing a 7063-CR2 system into the service position” on page 101. 6. Remove the service access cover. For instructions, see “Removing the service access cover from a 7063-CR2 system” on page 104. 7. Label and unplug the five cables (A) from the power distribution board. Unplug the drive cables from the rear of the drive holder.
- Page 57 8. Remove the right plastic air baffle (A) from the right edge of the system; lift it straight up. Figure 56. Right air baffle 9. Remove the cross bar from inside the system. Removing and replacing parts in the 7063-CR2 43...
- Page 58 Loosen the three screws at the top of the cross bar. Figure 59. Cross bar top screws d) Lift the cross bar out of the system. 10. Remove the 19 screws that secure the power distribution board to the system. 44 Power Systems: Servicing the IBM Power Systems HMC (7063-CR2)
- Page 59 Figure 60. Power distribution board screws 11. Use the two finger grips to lift the power distribution board up and out of the system. 12. Place the power distribution board on an ESD surface. Removing and replacing parts in the 7063-CR2 45...
-
Page 60: Replacing The Power Distribution Board
Replacing the power distribution board in the 7063-CR2 system To replace the power distribution board in the IBM Power Systems HMC (7063-CR2) system, complete the steps in this procedure. Procedure 1. Ensure that you have the electrostatic discharge (ESD) wrist strap on and that the ESD clip is plugged into a ground jack or connected to an unpainted metal surface. - Page 61 Put the cross bar into its location inside the system. Ensure that the five screw holes face the front. b) Tighten the three screws at the top of the cross bar. Removing and replacing parts in the 7063-CR2 47...
- Page 62 Replace the five screws into the front of the cross bar. Figure 64. Cross bar front screws 5. Replace the plastic air baffle (A) on the right edge of the system; place it straight down. 48 Power Systems: Servicing the IBM Power Systems HMC (7063-CR2)
- Page 63 The USB cable nests inside the control panel power cable in the right air baffle. Ensure that the cable latch clips snap into place on the connectors. Removing and replacing parts in the 7063-CR2 49...
- Page 64 Figure 66. Replacing cables from the power distribution board 7. Install the service access cover. For instructions, see “Installing the service access cover on a 7063-CR2 system” on page 105. 8. Replace the system in the rack and replace the components that you removed.
-
Page 65: Power Supplies
Learn how to remove and replace power supplies in the IBM Power Systems HMC (7063-CR2) systems. Removing a power supply from the 7063-CR2 system To remove a power supply from the IBM Power Systems HMC (7063-CR2) system, complete the steps in this procedure. -
Page 66: Replacing A Power Supply
Figure 68. Removing a power supply from the system Replacing a power supply in the 7063-CR2 system To replace a power supply in the IBM Power Systems HMC (7063-CR2) system, complete the steps in this procedure. Procedure 1. Ensure that you have the electrostatic discharge (ESD) wrist strap on and that the ESD clip is plugged into a ground jack or connected to an unpainted metal surface. -
Page 67: System Backplane
For instructions, see “Connecting the power cords to a 7063-CR2 system” on page 101. Removing and replacing the system backplane in the 7063-CR2 Learn how to remove and replace the system backplane in the IBM Power Systems HMC (7063-CR2) system. -
Page 68: Removing The System Backplane
Removing the system backplane from the 7063-CR2 system To remove the system backplane from the IBM Power Systems HMC (7063-CR2) system, complete the steps in this procedure. About this task You can use a magnetic tip screwdriver to remove and replace the screws. -
Page 69: Replacing The System Backplane
As a result of possible contact, DIMMs can be scratched and can leave residue on the top cover. Replacing the system backplane in the 7063-CR2 system To replace the system backplane in the IBM Power Systems HMC (7063-CR2) system, complete the steps in this procedure. Procedure 1. - Page 70 Figure 73. Loosening the load arm screw of the heat sink 4. Grip the heat sink and remove it by lifting it straight up as shown in the following figure. 56 Power Systems: Servicing the IBM Power Systems HMC (7063-CR2)
- Page 71 9. Align the tool with the beveled edge (A) of the system processor module as shown in the following figure. Lower the tool over the system processor module by ensuring the two guide pins (C) are inserted into the alignment holes (B) on each side of the tool. Removing and replacing parts in the 7063-CR2 57...
- Page 72 Make sure that both of the tool jaws are locked on the system processor module. Do not press the blue release tabs until directed to do so later. 58 Power Systems: Servicing the IBM Power Systems HMC (7063-CR2)
- Page 73 If the tool and the system processor module are not aligned with the guide pins, lift the tool and the system processor module and reposition them. Removing and replacing parts in the 7063-CR2 59...
- Page 74 13. After the tool and system processor module holes and guide pins are properly aligned, squeeze and hold the two blue release tabs (A) together until a firm stop is reached as shown in the following figure. Then, lift the tool off the system processor module. 60 Power Systems: Servicing the IBM Power Systems HMC (7063-CR2)
- Page 75 Figure 78. Removing the system processor module tool 14. Inspect the thermal interface material (TIM) for visible signs of damage. If you see folds, tears, bends, or if you have doubts about the TIM, replace it. Removing and replacing parts in the 7063-CR2 61...
- Page 76 19. Carefully lower the heat sink over the system processor module, ensuring that the holes in the heat sink align with the two guide pins (A) on the socket, as shown in the following figure. 62 Power Systems: Servicing the IBM Power Systems HMC (7063-CR2)
- Page 77 20. Move the load arm (A) into position over the heat sink (B) and tighten the load arm screw with a T20 hexalobular driver, as shown in the following figure. Note: Do not over tighten the load arm screw. Removing and replacing parts in the 7063-CR2 63...
- Page 78 22. Move the TPM card from the old system backplane to the corresponding location on the new system backplane. For instructions, see “Removing and replacing the trusted platform module in the 7063-CR2” on page 23. If applicable, move the PCIe adapter from the old system backplane to the corresponding location on the new system backplane.
- Page 79 Replace the PCIe adapter into the PCIe riser on the new system backplane Figure 85. Replacing the PCIe adapter f) Replace the screw that secures the PCIe adapter to the system backplane. Removing and replacing parts in the 7063-CR2 65...
- Page 80 DIMMs in the system backplane if the insertion of the backplane is at an angle or is rushed. As a result of possible contact, DIMMs can be scratched and can leave residue on the top cover. 66 Power Systems: Servicing the IBM Power Systems HMC (7063-CR2)
-
Page 81: Preparing The System For Operation After Removing And Replacing The System Backplane
For instructions, see “Connecting the power cords to a 7063-CR2 system” on page 101. Preparing the 7063-CR2 system for operation after removing and replacing the system backplane To prepare the IBM Power Systems HMC (7063-CR2) system for operation after removing and replacing the system backplane, complete the steps in this procedure. Procedure 1. -
Page 82: System Processor Module
To run the task, click the HMC Management icon, then select Console Settings > Console Inband Communication Credentials Removing and replacing the system processor module in the 7063- Learn how to remove and replace the system processor module in the IBM Power Systems HMC (7063- CR2) system. Before you begin Removing or replacing this part is a customer task. - Page 83 3. Remove the system backplane from the rear of the system. a) Label and remove the two power cables. For instructions, see “Disconnecting the power cords from a 7063-CR2 system” on page 100. b) Label and remove the signal cables from the rear of the system.
- Page 84 5. Loosen the load arm screw (A) of the system processor heat sink (B) that you are removing with a T20 hexalobular driver. The load arm pivots up in the direction that is shown in the following figure. 70 Power Systems: Servicing the IBM Power Systems HMC (7063-CR2)
- Page 85 Figure 93. Loosening the load arm screw of the heat sink 6. Grip the heat sink and remove it by lifting it straight up as shown in the following figure. Removing and replacing parts in the 7063-CR2 71...
- Page 86 10. Align the tool with the beveled edge (A) of the system processor module as shown in the following figure. Lower the tool over the system processor module by ensuring the two guide pins (C) are inserted into the alignment holes (B) on each side of the tool. 72 Power Systems: Servicing the IBM Power Systems HMC (7063-CR2)
- Page 87 Make sure that both of the tool jaws are locked on the system processor module. Do not press the blue release tabs until directed to do so later. Removing and replacing parts in the 7063-CR2 73...
- Page 88 Setting the system processor module at an angle on the top cover of the system processor module packaging will make it easier to pick up and place in the packaging after you replace the system processor module. 74 Power Systems: Servicing the IBM Power Systems HMC (7063-CR2)
- Page 89 Figure 97. Placing the system processor module at an angle on the top cover of the packaging 13. Squeeze the two blue tabs to release the system processor module from the tool as shown in the following figure. Removing and replacing parts in the 7063-CR2 75...
-
Page 90: Replacing The System Processor Module
Figure 98. Releasing the system processor module from the tool Replacing the system processor module in the 7063-CR2 system To replace the system processor module in the IBM Power Systems HMC (7063-CR2) system, complete the steps in this procedure. Procedure 1. - Page 91 Make sure that both of the tool jaws are locked on the system processor module. Do not press the blue release tabs until directed to do so later. Removing and replacing parts in the 7063-CR2 77...
- Page 92 Figure 100. Locking the system processor module into the tool 5. Lift the system processor module from the packaging tray as shown in the following figure. 78 Power Systems: Servicing the IBM Power Systems HMC (7063-CR2)
- Page 93 If the tool and the system processor module are not aligned with the guide pins, lift the tool and the system processor module and reposition them. Removing and replacing parts in the 7063-CR2 79...
- Page 94 7. After the tool and system processor module holes and guide pins are properly aligned, squeeze and hold the two blue release tabs (A) together until a firm stop is reached as shown in the following figure. Then, lift the tool off the system processor module. 80 Power Systems: Servicing the IBM Power Systems HMC (7063-CR2)
- Page 95 Figure 103. Removing the system processor module tool 8. Inspect the thermal interface material (TIM) for visible signs of damage. If you see folds, tears, bends, or if you have doubts about the TIM, replace it. Removing and replacing parts in the 7063-CR2 81...
- Page 96 13. Carefully lower the heat sink over the system processor module, ensuring that the holes in the heat sink align with the two guide pins (A) on the socket, as shown in the following figure. 82 Power Systems: Servicing the IBM Power Systems HMC (7063-CR2)
- Page 97 14. Move the load arm (A) into position over the heat sink (B) and tighten the load arm screw with a T20 hexalobular driver, as shown in the following figure. Note: Do not over tighten the load arm screw. Removing and replacing parts in the 7063-CR2 83...
- Page 98 Align the beveled corner of the module (A) to the corner of the tray with the triangle (B) and place it in the tray, as shown in the following figure. 84 Power Systems: Servicing the IBM Power Systems HMC (7063-CR2)
- Page 99 DIMMs in the system backplane if the insertion of the backplane is at an angle or is rushed. As a result of possible contact, DIMMs can be scratched and can leave residue on the top cover. Removing and replacing parts in the 7063-CR2 85...
-
Page 100: Time-Of-Day Battery
For instructions, see “Starting the 7063-CR2 system ” on page 98. Removing and replacing the time-of-day battery in the 7063-CR2 To remove and replace the time-of-day battery in the IBM Power Systems HMC (7063-CR2) system, complete the steps in this procedure. - Page 101 Lift the time-of-day battery from the battery socket. When you remove the time-of-day battery, do not use a metallic tool to disengage it from its slot. Removing and replacing parts in the 7063-CR2 87...
- Page 102 DIMMs in the system backplane if the insertion of the backplane is at an angle or is rushed. As a result of possible contact, DIMMs can be scratched and can leave residue on the top cover. 88 Power Systems: Servicing the IBM Power Systems HMC (7063-CR2)
-
Page 103: Trusted Platform Module
For instructions, see “Connecting the power cords to a 7063-CR2 system” on page 101. Removing and replacing the trusted platform module in the 7063- To remove and replace the trusted platform module in the IBM Power Systems HMC (7063-CR2) system, complete the steps in this procedure. - Page 104 3. Pull small the lever (A) slightly away from the trusted platform module to release the module and lift the module straight up from its slot on the system backplane. 90 Power Systems: Servicing the IBM Power Systems HMC (7063-CR2)
- Page 105 DIMMs in the system backplane if the insertion of the backplane is at an angle or is rushed. As a result of possible contact, DIMMs can be scratched and can leave residue on the top cover. Removing and replacing parts in the 7063-CR2 91...
- Page 106 Using your labels, replace the signal cables into the rear of the system. f) Using your labels, replace the two power cords at the rear of the system. For instructions, see “Connecting the power cords to a 7063-CR2 system” on page 101. 92 Power Systems: Servicing the IBM Power Systems HMC (7063-CR2)
-
Page 107: Common Service Procedures For Servicing The 7063-Cr2
Electrical voltage and current from power, telephone, and communication cables are hazardous. To avoid a shock hazard: If IBM supplied the power cord(s), connect power to this unit only with the IBM provided power cord. Do not use the IBM provided power cord for any other product. Do not open or service any power supply assembly. - Page 108 • Consideration should be given to the connection of the equipment to the supply circuit so that overloading of the circuits does not compromise the supply wiring or overcurrent protection. 94 Power Systems: Servicing the IBM Power Systems HMC (7063-CR2)
- Page 109 7. If you encounter difficulties during the installation, contact your service provider, your IBM reseller, or your next level of support. 8. For thermal performance, ensure that the top cover is on when the system is running.
-
Page 110: Identifying The 7063-Cr2 System That Contains The Part To Replace
LEDs on the 7063-CR2 system Use this information as a guide to the LEDs on the IBM Power Systems HMC (7063-CR2) system. The LEDs indicate various system statuses. If the part does not have a problem indicator LED, you can use a troubleshooting program such as impitool to identify the issue. -
Page 111: Identifying The 7063-Cr2 That Needs Servicing
Identifying the 7063-CR2 that needs servicing Use the Intelligent Platform Management Interface (IPMI) program to turn on the blue identify LED to help you find the IBM Power Systems HMC (7063-CR2) system that needs servicing. Procedure You can use the following command to activate the blue system identify LED: openbmctool -U <username>... -
Page 112: Starting And Stopping The System
Also visually check the LED. Starting and stopping the 7063-CR2 Learn how to start and stop the IBM Power Systems HMC (7063-CR2) system to perform a service action or system upgrade. Starting the 7063-CR2 system You can use the power button to start the IBM Power Systems HMC (7063-CR2) systems. -
Page 113: Stopping The 7063-Cr2 System
If you press the power button and the system does not start, contact your next level of support or your service provider. Stopping the 7063-CR2 system To stop the IBM Power Systems HMC (7063-CR2) systems, complete the steps in this procedure. Procedure You can use the hmcshutdown command to stop and power down the system. -
Page 114: Sensor Status
Removing and replacing power cords on a 7063-CR2 system Learn how to disconnect and connect the power cords on IBM Power Systems HMC (7063-CR2) systems. Disconnecting the power cords from a 7063-CR2 system To disconnect the power cords from an IBM Power Systems HMC (7063-CR2) system, complete the steps in this procedure. -
Page 115: Connecting The Power Cords
3. Label and disconnect the power cords from the system unit as shown in the following figure. Figure 123. Removing the power cords from the system Connecting the power cords to a 7063-CR2 system To connect the power cords to an IBM Power Systems HMC (7063-CR2) system, complete the steps in this procedure. Procedure 1. - Page 116 1. Label and remove the two power cords from the rear of the system. For instructions, see “Disconnecting the power cords from a 7063-CR2 system” on page 100. 2. Label and remove all cables from the rear of the system.
-
Page 117: Placing A 7063-Cr2 System Into The Operating Position
8. Carefully set the system on a table with an appropriate ESD surface. Placing a 7063-CR2 system into the operating position To place an IBM Power Systems HMC (7063-CR2) system into the operating position, complete the steps in this procedure. -
Page 118: Removing And Replacing Covers
For instructions, see “Connecting the power cords to a 7063-CR2 system” on page 101. Removing and replacing covers on a 7063-CR2 system Learn how to remove and replace the covers on an IBM Power Systems HMC (7063-CR2) system so that you can access the hardware parts or service the system. -
Page 119: Installing The Service Access Cover
6. Slide the cover to the rear and lift the cover from the system. Installing the service access cover on a 7063-CR2 system To install the service access cover on a rack-mounted IBM Power Systems HMC (7063-CR2) system, complete the steps in this procedure. - Page 120 Attach the rail to the system by placing the rail over the three support pins on the side of the system. Ensure that each of the three support pins goes through the rail. 106 Power Systems: Servicing the IBM Power Systems HMC (7063-CR2)
- Page 121 Slide the rail forwards onto the support pins. c) Replace the two screws that secure the rail to the front of the system. Common procedures for servicing the 7063-CR2 107...
- Page 122 108 Power Systems: Servicing the IBM Power Systems HMC (7063-CR2)
-
Page 123: Notices
Consult your local IBM representative for information on the products and services currently available in your area. Any reference to an IBM product, program, or service is not intended to state or imply that only that IBM product, program, or service may be used. Any functionally equivalent product, program, or service that does not infringe any IBM intellectual property right may be used instead. -
Page 124: Accessibility Features For Ibm Power Systems Servers
This product uses standard navigation keys. Interface information The IBM Power Systems servers user interfaces do not have content that flashes 2 - 55 times per second. The IBM Power Systems servers web user interface relies on cascading style sheets to render content properly and to provide a usable experience. -
Page 125: Privacy Policy Considerations
Contact the vendor for accessibility information about its products. Related accessibility information In addition to standard IBM help desk and support websites, IBM has a TTY telephone service for use by deaf or hard of hearing customers to access sales and support services:... - Page 126 Um dieses sicherzustellen, sind die Geräte wie in den Handbüchern beschrieben zu installieren und zu betreiben. Des Weiteren dürfen auch nur von der IBM empfohlene Kabel angeschlossen werden. IBM übernimmt keine Verantwortung für die Einhaltung der Schutzanforderungen, wenn das Produkt ohne Zustimmung von IBM verändert bzw.
- Page 127 Japan Electronics and Information Technology Industries Association (JEITA) Notice This statement applies to products less than or equal to 20 A per phase. This statement applies to products greater than 20 A, single phase. This statement applies to products greater than 20 A per phase, three-phase. Japan Voluntary Control Council for Interference (VCCI) Notice Korea Notice People's Republic of China Notice...
- Page 128 Properly shielded and grounded cables and connectors must be used in order to meet FCC emission limits. Proper cables and connectors are available from IBM-authorized dealers. IBM is not responsible for any radio or television interference caused by using other than recommended cables and connectors or by unauthorized changes or modifications to this equipment.
-
Page 129: Class B Notices
Um dieses sicherzustellen, sind die Geräte wie in den Handbüchern beschrieben zu installieren und zu betreiben. Des Weiteren dürfen auch nur von der IBM empfohlene Kabel angeschlossen werden. IBM übernimmt keine Verantwortung für die Einhaltung der Schutzanforderungen, wenn das Produkt ohne Zustimmung von IBM verändert bzw. - Page 130 This statement applies to products greater than 20 A, single phase. This statement applies to products greater than 20 A per phase, three-phase. Japan Voluntary Control Council for Interference (VCCI) Notice Taiwan Notice 116 Power Systems: Servicing the IBM Power Systems HMC (7063-CR2)
-
Page 131: Terms And Conditions
IBM reserves the right to withdraw the permissions granted herein whenever, in its discretion, the use of the publications is detrimental to its interest or, as determined by IBM, the above instructions are not being properly followed. - Page 132 INCLUDING BUT NOT LIMITED TO IMPLIED WARRANTIES OF MERCHANTABILITY, NON-INFRINGEMENT, AND FITNESS FOR A PARTICULAR PURPOSE. 118 Power Systems: Servicing the IBM Power Systems HMC (7063-CR2)
- Page 134 IBM®...
Need help?
Do you have a question about the 7063-CR2 and is the answer not in the manual?
Questions and answers