
Related Manuals for Janome Craft 6600P


Summary of Contents for Janome Craft 6600P
- Page 1 Janome 6600 Instruction Manual Janome Sewing Machine Janome Memory Craft 6600P Instruction Manual www.toews.com MC6600P Owners Manual/ User Guide...
- Page 2 Janome 6600 Instruction Manual Janome Sewing Machine IMPORTANT SAFETY INSTRUCTIONS When using an electrical appliance, basic safety precautions should always be followed, including the followings: Read all instructions before using this appliance. DANGER— To reduce the risk of electric shock: An appliance should never be left unattended when plugged in.
-
Page 3: Table Of Contents
Janome 6600 Instruction Manual Janome Sewing Machine TABLE OF CONTENTS NAME OF PARTS ..........3 BASIC STITCHES 30 - 44 (Mode 1) ......Straight Stitch(A:Zigzag foot) ......30 - 36 STANDARD ACCESSORIES ......4 Using the cloth guide ........... 31 GETTING READY TO SEW ...... - Page 4 Janome 6600 Instruction Manual Janome Sewing Machine UTILITY STITCHES AND EDITING (1) 77- 78 ............Viewing a Long Text ..........77 DECORATIVE STITCHES 49 -73 (Mode 3) .... Editing a Monogram ........77 - 78 Buttonholes ............49 Deleting a letter (character) ........ 77 Sensor buttonholes ........
-
Page 5: Name Of Parts
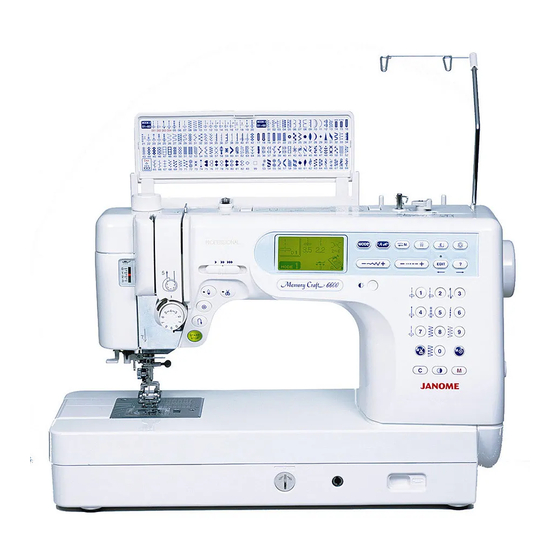
Janome 6600 Instruction Manual Janome Sewing Machine NAME OF PARTS Foot Pressure Dial Thread Take-up Lever Thread Guide Quick Reference Board Speed Control slider Retractable Thread Guide Bobbin Winder Spindle Bobbin Winder Stopper LCD Screen 10. Function Buttons 11. LCD Contrast Adjusting Dial 12. -
Page 6: Standard Accessories
Janome 6600 Instruction Manual Janome Sewing Machine STANDARD ACCESSORIES 1. Zigzag Foot A (comes attached to the machine) 2. Overedge Foot C 3. Rolled Hem Foot D 4. Zipper Foot E 5. Satin Stitch Foot F 6. Blind Hem Foot G 7. -
Page 7: Getting Ready To Sew
Janome 6600 Instruction Manual Janome Sewing Machine GETTING READY TO SEW Connecting the Power Supply CAUTION Always turn the power switch off and unplug the sewing machine from the electrical outlet when the machine is not in use. To use start/stop button... -
Page 8: Controlling Sewing Speed
Janome 6600 Instruction Manual Janome Sewing Machine Controlling Sewing Speed Speed control slider Sewing speed can be varied according to your sewing needs with the speed control slider. q To increase sewing speed, slide it to the right. w To decrease sewing speed, slide it to the left. -
Page 9: Function Buttons
Janome 6600 Instruction Manual Janome Sewing Machine Function Buttons 1 Start/stop button Press this button to start or stop the machine. The machine starts running slowly for the first few stitches, it then runs at the speed set by the speed control slider. - Page 10 Janome 6600 Instruction Manual Janome Sewing Machine 6 Thread cutter button Press this button after finishing sewing and the machine will trim the threads. The LED signal blinks while cutting the threads. 7 Thread Cutter Signal NOTES: The auto thread cutter will work well with normal sewing threads #30 or finer.
- Page 11 Janome 6600 Instruction Manual Janome Sewing Machine Mode button (See page 26) Press this button to select the desired mode. Letter style button (See page 74) Press this button to change the letter style of monogram. Memory/recall button (See pages 33, 82) Press this button to register or recall programmed pattern combinations.
- Page 12 Janome 6600 Instruction Manual Janome Sewing Machine 19 Pattern selection buttons (See page 27) Press these buttons to select the desired pattern. In the direct selection mode (Mode 1), patterns number 01 to 10 can be directly selected by pressing the corresponding button.
-
Page 13: Raising And Lowering The Presser Foot
Janome 6600 Instruction Manual Janome Sewing Machine Raising and Lowering the Presser Foot The presser foot lifter raises and lowers the presser foot. You can raise the presser foot higher than the normal up position. This allows for setting the dual feed device and helps you to place thick fabrics under it. -
Page 14: Changing The Presser Foot
Janome 6600 Instruction Manual Janome Sewing Machine Changing the Presser Foot CAUTION: Turn OFF the power switch before changing the foot. Always use the proper foot for the selected pattern. Wrong foot can cause the needle to break. To snap off: Raise the needle and presser foot. -
Page 15: Setting For Dual Feed Sewing
Janome 6600 Instruction Manual Janome Sewing Machine Setting for Dual Feed Sewing When you use the Dual feed, attach the Dual feed as follows. (See page 27) To attach the Dual feed foot: Raise the needle and presser foot. 1 Presser foot lifter Loosen the thumb screw and remove the foot holder. -
Page 16: To Disengage The Dual Feed Device
Janome 6600 Instruction Manual Janome Sewing Machine To disengage the Dual Feed Device Raise the needle and the presser foot lifter to its extra lift position. 1 Presser foot lifter Pull down the Dual feed device and swing it to the rear to disengage. -
Page 17: Variety Of Presser Feet And Their Uses
Janome 6600 Instruction Manual Janome Sewing Machine Variety of Presser Feet and Their Uses Zigzag foot A: This is the most versatile foot. It can be used for various stitches including straight stitches and zigzag stitches. It is designed to achieve firm and neat seam results. -
Page 18: Winding The Bobbin
Janome 6600 Instruction Manual Janome Sewing Machine Winding the Bobbin Removing the bobbin Slide the hook cover plate release button to the right, and remove the hook cover plate. Lift out the bobbin from the bobbin holder. 1 Hook Cover Plate Release Button... -
Page 19: Winding The Bobbin
Janome 6600 Instruction Manual Janome Sewing Machine Winding the bobbin Pass the thread through the guide on the thread guide bar from behind. 1 Thread Guide Bar Pass the thread under the bobbin winding tension disk. 2 Bobbin Winding Tension Disk Thread through the hole in the bobbin from the inside to the outside. -
Page 20: Inserting The Bobbin
Janome 6600 Instruction Manual Janome Sewing Machine Inserting the bobbin Place the bobbin in the bobbin holder with the thread running off counterclockwise. 1 Thread 2 Bobbin Holder Guide the thread into notch (A) on the front of the bobbin holder. -
Page 21: Threading The Machine
Janome 6600 Instruction Manual Janome Sewing Machine Threading the Machine Draw the thread in order from Raise the presser foot lifter. Press the up/down needle button twice to raise the needle to its highest position. Turn the power switch off. - Page 22 Janome 6600 Instruction Manual Janome Sewing Machine Threading the machine (continued) Draw the thread down and around the tension dial from the right to the left. Pull the thread up to insert it between the tension disks and under the loop of the check spring.
-
Page 23: Automatic Needle Threader
Janome 6600 Instruction Manual Janome Sewing Machine Automatic needle threader Raise the needle to its highest position by pressing the up/down needle button twice. Turn the power switch off. Lower the presser foot. 1 Up/Down Needle Button Depress the needle threader knob as far as it will go. -
Page 24: Drawing Up The Bobbin Thread
Janome 6600 Instruction Manual Janome Sewing Machine Drawing up the bobbin thread Raise the Presser Foot Lifter. Hold the needle thread with your finger and press the up/down needle button twice to pick up the bobbin thread. 1 Needle Thread... -
Page 25: Changing Needles
Janome 6600 Instruction Manual Janome Sewing Machine Changing Needles Raise the needle by pressing the up/down needle button and lower the presser foot. Turn off the power switch. Loosen the needle clamp screw by turning it counterclockwise. Remove the needle from the clamp. -
Page 26: Balancing Thread Tension
Janome 6600 Instruction Manual Janome Sewing Machine Balancing Thread Tension Correct tension: The ideal straight stitch has threads locked between two layers of fabric. For an ideal zigzag stitch, the bobbin thread does not show on the right side of the fabric, and the needle thread shows slightly on the wrong side of the fabric. -
Page 27: Adjusting The Foot Pressure
Janome 6600 Instruction Manual Janome Sewing Machine Adjusting the Foot Pressure The foot pressure dial should be set at “3” for regular sewing. Reduce the pressure for appliqué, sewing on fine synthetics and elastic fabrics. Set the dial at “1” when sewing extra fine fabrics. -
Page 28: Selecting The Sewing Mode
Janome 6600 Instruction Manual Janome Sewing Machine Selecting the Sewing Mode On the LCD screen, the mode number and the following information are displayed: 1 Stitch Pattern 2 Stitch Width 3 Stitch Length 4 Recommended Thread Tension 5 Recommended Foot... -
Page 29: The Help Button
Janome 6600 Instruction Manual Janome Sewing Machine The Help Button Pressing this button will show alternative applications of the selected pattern. Example: When pattern D1 has been selected. Each time you press the help button, the LCD will show as... -
Page 30: Customizing Machine Settings
Janome 6600 Instruction Manual Janome Sewing Machine Customizing Machine Settings You can customize the machine settings to your preference. Turn the power switch on while pressing the memory button and the LCD screen will show the machine setting window. 1 Memory button... -
Page 31: Language Selection
Janome 6600 Instruction Manual Janome Sewing Machine Language selection You can choose one of 10 languages for screen display. 1 English 2 Spanish 3 Finnish 4 French 5 German 6 Italian 7 Dutch 8 Portuguese 9 Russian 10 Swedish Press the button number 3 and the LCD screen shows language selection display. -
Page 32: Basic Stitches (Mode 1)
BASIC STITCHES (Mode 1) Janome 6600 Instruction Manual Janome Sewing Machine Straight Stitch Machine Setting Pattern: Thread tension:2-6 Presser foot: Zigzag foot A Foot pressure: 3 To sew Raise the presser foot and position the fabric next to a seam guide line on the needle plate. Lower the needle to the point where you wish to start. -
Page 33: Using The Cloth Guide
Janome 6600 Instruction Manual Janome Sewing Machine Changing sewing direction: Stop the machine a few stitches before the end of a seam. Press the up/down needle button a few times until the needle falls on the end of the seam. -
Page 34: Adjusting The Needle Drop Position,Stitch Length
Janome 6600 Instruction Manual Janome Sewing Machine Adjusting the needle drop position The needle drop position can be altered by pressing the stitch width adjusting button. Press the right side of the button (+ sign) to move the needle bar to the right. -
Page 35: Changing The Stitch Width, Length(Auto)
Janome 6600 Instruction Manual Janome Sewing Machine To customize the preset values for the stitch length and width The preset value of the stitch length and width are optimized for the selected pattern. However, you can change the preset value of the following patterns to suit your sewing preference. -
Page 36: Variety Of The Straight Stitches
Janome 6600 Instruction Manual Janome Sewing Machine Variety of the straight stitches Straight stitch with left needle position Machine Setting Pattern: Thread tension:2-6 Presser foot: Zigzag foot A, Dual feed foot AD Foot pressure: 3 Use this stitch to seam the edge of fabrics. - Page 37 Janome 6600 Instruction Manual Janome Sewing Machine Patchwork piecing Machine Setting Pattern: 13, 16 Thread tension:2-6 Presser foot: Zigzag foot A Foot pressure: 3 This stitch is ideal for patchwork piecing. French knots Machine Setting Pattern: Thread tension:5-8 Presser foot:...
-
Page 38: Straight Stitch(Ad:dual Feed)
Janome 6600 Instruction Manual Janome Sewing Machine Straight Stitch (Dual Feed: AD) Machine Setting Pattern: Thread tension:2-6 Presser foot: Dual Feed foot AD Foot pressure: 3 Dual Feed adjusting dial: 0 Patterns D1, D2, D3, D4 (mode 1) and D01, D02, D03, D04 (mode 2) can be used with the Dual Feed foot. -
Page 39: Basting
Janome 6600 Instruction Manual Janome Sewing Machine Basting Stitch Machine Setting Pattern: Thread tension:1-3 Presser foot: Basting/Darning foot P-2 Foot pressure: 1 Feed dog: Dropped (See page 25) Attaching the Basting/Darning foot P-2 Loosen the thumbscrew and remove the foot holder. -
Page 40: Zigzag Stitch
Janome 6600 Instruction Manual Janome Sewing Machine Zigzag Stitch Machine Setting Pattern: 8 (mode 1), 08,09 (mode2) 01, 02 (mode 3) Thread tension:3-7 Presser foot: Zigzag foot A Foot pressure: 3 Zigzag stitch is used for various sewing needs including overcasting. -
Page 41: Overcasting Stitch
Janome 6600 Instruction Manual Janome Sewing Machine Variety of Overcasting Stitches Overcasting with zigzag stitch Machine Setting Pattern: 8 (mode 1) Thread tension:3-7 Presser foot: Zigzag foot A Foot pressure: 3 Place the fabric edge next to the guide of the foot and then sew. -
Page 42: Variety Of Overcasting Stitches
Janome 6600 Instruction Manual Janome Sewing Machine Variety of Overcasting Stitches (continued) Knit stitch Machine Setting Pattern: 03 (Mode 3) Thread tension:3-6 Presser foot: Zigzag foot A Foot pressure: 3 This stitch is recommended for sewing such fabrics as synthetic knits and stretch velour as it provides the greatest amount of elasticity and strength. -
Page 43: Zipper Sewing
Janome 6600 Instruction Manual Janome Sewing Machine Zipper Sewing Machine Setting Pattern: D1 (Mode 1) Thread tension:2-6 Presser foot: Zipper foot E Foot pressure: 3 To attach the zipper foot E Fit the pin on zipper foot E to the groove on the foot holder. - Page 44 Janome 6600 Instruction Manual Janome Sewing Machine To sew Fold back the left seam allowance. Turn the right seam allowance under to form a 0.2 to 0.3 cm (1/8“) margin. place the zipper teeth next to the fold and pin it in place.
- Page 45 Janome 6600 Instruction Manual Janome Sewing Machine Close the zipper and spread the fabric open flat with the right side facing up. Baste the opened fabric and zipper tape together. 11 Basting 12 Zipper Tab Re-attach the zipper foot E with the left pin.
-
Page 46: Rolled Hem
Janome 6600 Instruction Manual Janome Sewing Machine Rolled Hem Machine Setting Pattern: D1 (Mode 1) Thread tension:2-6 Presser foot: Rolled hem foot D Foot pressure: 3 To sew: Fold the edge of the fabric twice, 6 cm (2 - 3/8”) in length and 0.3 cm (1/8”) in width. -
Page 47: Mode 2)
Janome 6600 Instruction Manual Janome Sewing Machine QUILTING (Mode 2) Angle scale on the needle plate You can easily seam patchwork pieces at the desired angles without marking, by using the unique angle scales on the needle plate. The angle scales are marked at 45, 60, 90 and 120 degrees. -
Page 48: Quilting
Janome 6600 Instruction Manual Janome Sewing Machine Quilting Machine Setting Pattern: D1 (Mode 1) Thread tension:2-6 Presser foot: Zigzag foot A or Dual feed foot AD (See page 13) Foot pressure: 3 Reduce the foot pressure to “2” for better handling of bulky material. -
Page 49: Clasp Stitch
Janome 6600 Instruction Manual Janome Sewing Machine Clasp stitch Machine Setting Pattern: 73 (Mode 2) Thread tension:3-6 Presser foot: Satin Stitch foot F Foot pressure: 2-3 You can tack thick quilt layers together with the clasp stitch. Select pattern 73 and press the memory button. -
Page 50: Programming French Knots
Janome 6600 Instruction Manual Janome Sewing Machine Programming French Knots Example: Combination of patterns 19 and 12. Select Mode 2. Select pattern 19. Press the memory button. Select pattern 12. Press the memory button. Lower the foot and start sewing. -
Page 51: Utility Stitches And Decorative Stitches (Mode 3)
UTILITY STITCHES AND DECORATIVE STITCHES (Mode 3) Janome 6600 Instruction Manual Janome Sewing Machine Buttonholes Variety of buttonholes 14 Sensor (Square) BH This square buttonhole is widely used on medium to heavy weight fabrics. The buttonhole size is automatically determined by placing a button in the foot. -
Page 52: Sensor Buttonholes
Janome 6600 Instruction Manual Janome Sewing Machine Sensor buttonholes Machine Setting Pattern: 14 (Mode 3) Thread tension:1-5 Presser foot: Automatic Buttonhole foot R Foot pressure: 3 Square Buttonhole Buttonholes 14 and 16 to 20 are sensor buttonholes. The size of a buttonhole is automatically set by placing a button in the rear of automatic buttonhole foot R. - Page 53 Janome 6600 Instruction Manual Janome Sewing Machine Pull the buttonhole lever down as far as it will go. 1 Buttonhole lever NOTE: If you start sewing without pulling down the buttonhole lever, the LCD screen will show a warning and the machine will stop after a few stitches.
- Page 54 Janome 6600 Instruction Manual Janome Sewing Machine Start the machine to sew the buttonhole. The buttonhole will be automatically sewn. Step 1 Step 1: The machine will sew the front bartack and the left row first. Then it goes back to the starting point with straight stitch.
-
Page 55: Corded Buttonhole
Janome 6600 Instruction Manual Janome Sewing Machine Corded buttonhole Machine Setting Pattern 14 (mode 3) Thread tension:1-5 Presser foot: Automatic Buttonhole foot R Foot pressure: 3 To sew a corded buttonhole, follow the same procedure as a sensor buttonhole. With the automatic buttonhole foot R raised, hook... -
Page 56: Changing Buttonhole Width
Janome 6600 Instruction Manual Janome Sewing Machine Changing buttonhole width Press the stitch width adjusting button and the adjusting window opens. Press on “+“ to increase the buttonhole width. Press on “—“ to decrease the buttonhole width. 1 Stitch Width Adjusting Button... -
Page 57: Automatic Buttonhole
Janome 6600 Instruction Manual Janome Sewing Machine Automatic buttonhole Machine Setting Pattern: 15(Mode 3) Thread tension:1-5 Presser foot: Automatic Buttonhole foot R Foot pressure: 3 Pull the button holder of the buttonhole foot all the way out. Insert the fabric under the foot. Press the up/down needle button twice. - Page 58 Janome 6600 Instruction Manual Janome Sewing Machine To sew Depress the foot control to sew the left side up to the required length of the buttonhole. Stop the machine and press the reverse button. 4 Required Length 5 Reverse Button Start the machine again.
-
Page 59: Round Buttonhole
Janome 6600 Instruction Manual Janome Sewing Machine Round-end buttonholes (#16, #17) Machine settings Pattern: 16 (mode 3) or 17 (mode 3) Thread tension: 1 - 5 Presser foot: Automatic Buttonhole foot R Foot pressure: * The sewing procedue is same as buttonhole #14... -
Page 60: Knit Buttonhole
Janome 6600 Instruction Manual Janome Sewing Machine Knit buttonhole (#19) Machine settings Pattern: 19 (mode 3) Thread tension: 1 - 5 Presser foot: Automatic Buttonhole foot R Foot pressure: z Sew the left row. x Sew the front bartack. c Sew the rear bartack and right row. The machine will automatically stop when buttonhole sewing is finished. -
Page 61: Button Sewing
Janome 6600 Instruction Manual Janome Sewing Machine Button Sewing Machine Settings Pattern: 08 (Mode 1) Thread tension:3-7 Presser foot: Satin Stitch foot F Foot pressure: 3 Feed dog: Dropped (See page 25) Unthread the needle thread. Adjust the stitch width so that the needle enters both holes in the button. -
Page 62: Darning
Janome 6600 Instruction Manual Janome Sewing Machine Darning Machine Settings Pattern: 21 (Mode 3) Thread tension: 3-6 Presser foot: Automatic Buttonhole foot R Foot pressure: The LCD screen shows the sewing instructions when selecting patteren 21. Pull the button holder to the rear. - Page 63 Janome 6600 Instruction Manual Janome Sewing Machine To sew a shorter darning To sew a darning shorter than 2 cm (3/4”), first stop the machine after sewing the required length, then press the reverse button. The required length has been determined.
-
Page 64: Tacking
Janome 6600 Instruction Manual Janome Sewing Machine Tacking Machine Settings Pattern: 22 (Mode 3) Thread tension:3-6 Presser foot: Satin Stitch foot F Foot pressure: 3 The LCD screen shows the sewing instruction when selecting pattern 22. Tacking is used to reinforce pockets, crotches and belt carriers where extra strength is needed. -
Page 65: Eyelet
Janome 6600 Instruction Manual Janome Sewing Machine Eyelet Machine Setting Pattern: 23 (Mode 3) Thread tension:1-4 Presser foot: Satin Stitch foot F Foot pressure: 3 The eyelet is used for belt holes etc. To sew Depress the foot control to sew. -
Page 66: Blind Hem
Janome 6600 Instruction Manual Janome Sewing Machine Blind Hem Machine Settings Pattern: 06 (Mode 3) Thread tension:1-4 Presser foot: Blind Hem foot G Foot pressure: 3 Select pattern 07 for woven fabrics or pattern 05 for elastic fabrics. NOTE: The stitch width of patterns 06 and 07can not be changed, but the needle drop position will move. - Page 67 Janome 6600 Instruction Manual Janome Sewing Machine Changing needle drop position Press the stitch width adjusting button. The LCD screen shows the left needle position from the guide in millimeters. Press on “–“ to move the needle to the right.
-
Page 68: Extender Stitches
Janome 6600 Instruction Manual Janome Sewing Machine Extender stitches Patterns 11, 12, 14, 15, 17, 18, 20 and 21 in Mode 2 are extender stitches, which are used to insert straight stitches after a stitch pattern. Patterns 17, 18 and 21 will inherit the stitch length and needle drop position of a previous pattern in the programmed pattern combination. -
Page 69: One Cycle Sewing With The Auto-Lock Stitch
Janome 6600 Instruction Manual Janome Sewing Machine One cycle sewing with the auto-lock stitch Select pattern 27. Press the memory button. Press the locking stitch button. NOTE: No further patterns can be memorized after pressing the auto-lock button. Depress the foot control to sew. -
Page 70: Pattern Combination With Auto Thread Cutting
Janome 6600 Instruction Manual Janome Sewing Machine Programming a Pattern Combination Pattern combination Example: Programming patterns 27 and 29. Select pattern 27 in the Mode 3. Press memory button. Select pattern 29. Press memory button. NOTE: Set the thread tension at 1-4, foot pressure at 3 and use the satin stitch foot F when sewing the programmed pattern combination. -
Page 71: Elongation Sewing
Janome 6600 Instruction Manual Janome Sewing Machine Elongation Sewing Machine Setting Pattern: 27 (Mode 3) Thread tension:1-4 Presser foot: Satin Stitch foot F Foot pressure: 3 Example: Pattern 27 Select pattern 27. Press the elongation button. Elongation ratio is indicated in multiples of the original pattern length. -
Page 72: Programming Pattern Combination With A Mirror Image
Janome 6600 Instruction Manual Janome Sewing Machine Programming pattern combination with a mirror Image Example: Pattern 28 Select pattern 28 in Mode 3. Press the memory button. Select pattern 28 in Mode 3. Press the turnover memory button. Press the memory button. -
Page 73: Sewing The Pattern Combination From The Beginning
Janome 6600 Instruction Manual Janome Sewing Machine Sewing the pattern combination from the beginning If you have to stop sewing the pattern combination and wish to sew it over again, press the memory button to sew the pattern combination from the beginning. -
Page 74: Shell Tuc
Janome 6600 Instruction Manual Janome Sewing Machine Shell Tuck Machine Setting Pattern: 08 (Mode 3) Thread tension: 6-8 Presser foot: Satin Stitch foot F Foot pressure: 3 Use a light weight fabric (tricot, for example). Fold the fabric as shown and stitch on the fold. Allow the needle to just clear the folded edge to create a shelled edge. -
Page 75: Cording
Janome 6600 Instruction Manual Janome Sewing Machine Cording 3-strand cording Machine Setting Pattern: 25 (Mode 3) Thread tension:1-4 Presser foot: Cording foot H Foot pressure: 3 Insert 3 strands of cording under the spring of the foot and draw them under the foot to the rear. -
Page 76: Monogramming
Janome 6600 Instruction Manual Janome Sewing Machine MONOGRAMMING Selecting a Letter Style You can select Block and Script Style letters. Machine Setting Thread tension:1-4 Presser foot: Satin Stitch foot F Foot pressure: 3 * Needle: Blue Tip needle Press the letter style button to choose one of the following:... -
Page 77: Programming A Monogram
Janome 6600 Instruction Manual Programming a Monogram Janome Sewing Machine Example: To program “R&B” Select the Letter Style Button Select letter “R” (pattern 28). Press the memory button. Select pattern “&” (pattern 64). Press the stitch width adjusting button. The letter size will be reduced to 2/3 of the original size. - Page 78 Janome 6600 Instruction Manual Janome Sewing Machine Press the auto thread cutter button after programming a monogram. The LED signal will turn on and the cutter mark will appear after the monogram. To sew Depress the foot control to sew. The machine will sew a monogram then stop automatically and trim the threads.
-
Page 79: Editing (1)
Janome 6600 Instruction Manual Janome Sewing Machine EDITING (1) Viewing a long text The LCD screen only shows 8 characters of a monogram at a time. If the entire text is not displayed, press the edit key or help key to scroll the text. -
Page 80: Inserting A Letter (Character)
Janome 6600 Instruction Manual Janome Sewing Machine Inserting a letter (character) Example: To insert a space in “ABCD”. Press the Edit button to shift the cursor under the letter “C ”. Select pattern 99 (blank space). Press the memory button and a space will be inserted before the letter “C”. -
Page 81: Editing (2)
Janome 6600 Instruction Manual Janome Sewing Machine EDITING (2) Uniform stitch adjustment (Modes 2 and 3 only) The stitch width and length of the programmed stitch patterns can be uniformly altered. Example 1: To alter the stitch width of the programmed patterns 41 and its mirror image in the Mode 3. - Page 82 Janome 6600 Instruction Manual Janome Sewing Machine Combining satin and decorative stitches Example: combination of patterns 28 and 41. Select the pattern 28 and 41 in the Mode 3. Press the stitch width adjustment key. The stitch width will be applied to all memorized patterns.
-
Page 83: Custom Stitch Adjustment (Mode 2 And 3 Only)
Janome 6600 Instruction Manual Janome Sewing Machine Custom stitch adjustment (Mode 2 and 3 only) The stitch width and length can be individually altered for each pattern in the programmed combination. Example: To alter the stitch width and length of a single pattern 73 in the combination. -
Page 84: To Store And Call Stitch Pattern Combinations (Mode2,Mode3,Monogram)
Janome 6600 Instruction Manual Janome Sewing Machine TO STORE AND CALL STITCH PATTERN COMBINATIONS A pattern combination will be kept in the memory for future use even after turning the machine off. The stored pattern combination can be recalled by pressing the memory/recall button. - Page 85 Janome 6600 Instruction Manual Janome Sewing Machine Recalling a stored combination Select mode 2, 3 or monogramming Press the stock/call key to select the desired memory address. Press the turnover memory key to recall the stored combination. Deleting a stored combination Press the stock/call key to select the desired memory address.
-
Page 86: Twin Needle Sewing
Janome 6600 Instruction Manual Janome Sewing Machine TWIN NEEDLE SEWING NOTES: When you sew patterns with the twin needle, press the twin needle button and test the stitches first before you begin to sew. Use the zigzag foot A or satin stitch foot F for twin needle sewing. - Page 87 Janome 6600 Instruction Manual Janome Sewing Machine To sew Select a pattern. Press the twin needle button The LCD screen shows a twin needle icon and the maximum permissible stitch width is restricted to 3.0 mm. 1 Twin Needle Icon 2 Maximum Width (3.0)
-
Page 88: Correcting Distored Stitch Patterns
Janome 6600 Instruction Manual Janome Sewing Machine CORRECTING DISTORED STITCH PATTERNS The sewing results of the stitch patterns may vary depending upon the sewing conditions, such as sewing speed, type of the fabric, number of layers etc. Always test sew on a scrap piece of the fabric that you wish to use. -
Page 89: Care And Maintenance
CARE AND MAINTENANCE Janome 6600 Instruction Manual Janome Sewing Machine Cleaning the Hook Race, Feed Dog and thread cutter WARNING: Turn the power switch off and unplug the machine before cleaning. NOTE: Do not dismantle the machine in any way other than what is explained on this page. -
Page 90: Replacing The Light Bulb
Janome 6600 Instruction Manual Janome Sewing Machine Replacing the Light Bulb WARNING: Turn the power off before replacing the light bulb. The bulb could be HOT, wait until it has cooled down before touching it. To remove: Remove the setscrew. -
Page 91: Problems And Warning Signals
PROBLEMS AND WARNING SIGNALS Janome 6600 Instruction Manual Janome Sewing Machine If a buzzer sounds and the LCD screen shows a warning sign, follow the guidance below. Try this Warning Sign Cause The power is turned on without the foot Connect the foot control control being connected. - Page 92 Janome 6600 Instruction Manual Janome Sewing Machine Warning Sign Try this Cause Sew with a single needle. The twin needle button is pressed when a pattern unsuitable for twin needle sewing has been selected. Elongation is applicable only to The elongation button is pressed when a satin stitches.
-
Page 93: Troubleshooting
Janome 6600 Instruction Manual Janome Sewing Machine TROUBLESHOOTING Cause Condition Reference The needle thread 1. The needle thread is not threaded properly. Page 19 - 21 breaks 2. The needle thread tension is too tight. Page 24 3. The needle is bent or blunt.
Need help?
Do you have a question about the Craft 6600P and is the answer not in the manual?
Questions and answers
My janome 6600 professional, the needle is hitting the presser foot when I try to sew, what can I do, every foot i put on does this