Table of Contents
Advertisement
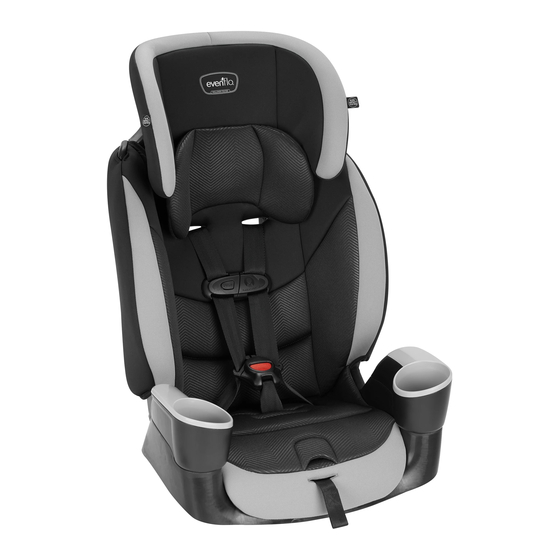
Maestro™ Sport
Child Restraint System
Owner's Manual
Keep instructions for future use.
Exclusive RightFit™
Belt Path
5-point Harness*
10 to 22.6 kg
(22 to 50 lbs)
71 to 127 cm
(28 to 50 in.)
At least 2 years old
Booster*
18 to 49,8 kg
(40 to 110 lbs)
112 to 145 cm
(44 to 57 in.)
At least 4 years old
* See page
Para instrucciones en Español,
llamar al: 1-800-233-5921
WARNING!
To reduce the risk of serious injury
or death, read this owner's manual prior
to installing and using this child restraint.
© 2018 Evenflo Company, Inc.
-
for complete requirements.
4
5
25701439
7/18
Advertisement
Table of Contents

Related Manuals for Evenflo Maestro Sport Exclusive RightFit Belt Path


Summary of Contents for Evenflo Maestro Sport Exclusive RightFit Belt Path
- Page 1 * See page for complete requirements. Para instrucciones en Español, llamar al: 1-800-233-5921 WARNING! To reduce the risk of serious injury or death, read this owner’s manual prior to installing and using this child restraint. © 2018 Evenflo Company, Inc. 25701439 7/18...
-
Page 2: Table Of Contents
More children are killed every year as passengers in car crashes than by any other type of injury. INTERACTIVE PDF Table of Contents (TOC) To reduce the risk of SERIOUS INJURY or DEATH, read this owner’s manual and your vehicle owner’s manual Important Information before installing and using this child restraint. -
Page 3: Child Requirements
MUST restraint properly, children meet the size and age are at or below the top of requirements below. In addition, Evenflo recommends the child restraint headrest consulting with your child’s physician before allowing • At least 2 years old your child to transition from a rear-facing to forward- facing child restraint. -
Page 4: Warnings
• If the child restraint cannot be properly installed, use the child restraint. Consult vehicle owner’s safest place for children 12 and under. manual, try a different seating location, or call Evenflo. ONLY use this child restraint on forward-facing vehicle •... - Page 5 DEATH or SERIOUS DEATH or SERIOUS WARNING! WARNING! INJURY can occur. INJURY can occur. Seat Belt Warnings Forward-Facing ONLY Warnings • If the child weighs more than 22.6 kg (50 lbs) or their To help prevent serious injury or death: shoulders are above the highest harness level, you •...
- Page 6 WARNING! DEATH or SERIOUS WARNING! DEATH or SERIOUS INJURY can occur. INJURY can occur. Seat Belt Warnings (cont.) Seat Belt Warnings (cont.) To help prevent serious injury or death: To help prevent serious injury or death: DO NOT • use with lap/shoulder belts with two If you have any of these types of vehicle belt systems retractors.
-
Page 7: Latch Warnings
DEATH or SERIOUS DEATH or SERIOUS WARNING! WARNING! INJURY can occur. INJURY can occur. LATCH/UAS Warnings LATCH/UAS Warnings Vehicle Top Tether Anchor What is LATCH? To help prevent serious injury or death: Points LATCH is an acronym for • DO NOT use the lower anchors of the child restraint (Lower Anchors and Tethers anchorage system (LATCH system) to attach this child... -
Page 8: Notes
DO NOT • attach additional padding, toys, or other devices not made by Evenflo or described in these instructions for the child restraint. Items not tested with the child restraint could injure the child. Additional pads or pillows may interfere with the function of the harness system, or cause breathing problems if the child’s head falls forward,... -
Page 9: Safe Practices
Veuillez remplir cette carte à l’encre bleue ou noire et la poster afin de pouvoir être contacté en cas d’un avis de in Ottawa region) or Evenflo at défaut lié à la sécurité de ce produit. Les informations fournies doivent être complètes. -
Page 10: Child Restraint Features
Child Restraint Features Child Restraint Features Front * Not all features are available on all models. Styles may vary. Description 1. Shoulder Belt Guide 2. Harness Straps 3. Cup Holder* 4. Headrest 5. Head Pillow 6. Chest Clip 7. Buckle 8. -
Page 11: Removing The Lower Anchor Connector
Child Restraint Features (cont.) Child Restraint Features (cont.) Lower Anchor Connector Storing the Lower Anchor Connector Which Type of Lower Anchor Connector Is on Your Child Restraint? When the Lower Anchor Connector assembly is not in MUST use you attach the hooks to the back of the child The lower anchor connector assembly that comes with restraint. -
Page 12: Using The Internal 5-Pt Harness
Using the Internal 5-pt Installation with Lower Anchor Connectors 5-pt Harness LATCH is a system for attaching the child restraint Child Requirements to your vehicle seat. It is to be used in place of your • Weight: 10 to 22.6 kg (22 to 50 lbs) vehicle’s seat belts and can be used in vehicles with •... - Page 13 5-pt Installation with Lower Anchor 5-pt Installation with Lower Anchor Connectors (cont.) Connectors (cont.) Know Your Lower Anchor Connector Assembly The lower anchor connector assembly that comes with your child restraint will be one of the two types below. SecureRight Quick Connector Adjuster Strap...
-
Page 14: Installation With Vehicle Seat Belts
Installation with Installation with Vehicle Seat Belts Vehicle Seat Belts IMPORTANT: If you are using the vehicle seat belt to Lap & Shoulder Belt Lap Belt Only DO NOT secure the child restraint, use the lower anchor connector assembly. 1. Disconnect tether hook from the back of the child restraint. -
Page 15: Removing The Lower Anchor Connectors
Installation with Removing the Lower Anchor Connectors Vehicle Seat Belts 1. Loosen the adjuster Using your full weight, push the child restraint into the vehicle seat while loosening the adjuster. 6. Connect and tighten tether strap. Connect the tether hook to the anchor behind the vehicle seat, as shown. -
Page 16: Positioning The Harness Strap
Positioning the Harness Strap Removing the Lower Anchor Connectors 3. Store lower anchor connectors. When the Lower Anchor Connector assembly is MUST not in use you attach the hooks to the back of the child restraint. A loose Lower Anchor Connector assembly strap and hook 3. - Page 17 Installation Checklist Using the Child Restraint in Booster Mode 1. Secure child restraint to the vehicle seat. D Child restraint is securely installed with lower anchor connector assembly through belt path Child Requirements (p. 23) • Weight: 18 to 49.8 kg (40 to 110 lbs) •...
-
Page 18: When To Put Your Child In A Booster Seat
When to Put Your Child in a How can you tell if your child is ready to transition to a booster seat? Booster Seat You should consider using a booster seat if the following conditions apply: • The child is mature enough to sit in the booster seat Booster seats raise the child up and help to position the and not put the belts under their arm or behind their vehicle lap and shoulder belt correctly. - Page 19 Booster Installation Checklist Leveling the Booster Seat (Canadian Models ONLY) 1. Convert child restraint to booster seat. See “Converting into a Booster Seat, ” (p. 37). Place the foam block on the 2. Secure booster seat to the vehicle seat. center of a vehicle seat making D Make sure the bottom and back of the booster seat sure it is pushed up against the...
- Page 20 Converting into a Booster Seat Converting into a Booster Seat 3. Disconnect all 6. Remove the crotch elastic loops and all strap. retaining strips, then Locate the crotch strap remove the seat pad. anchor on the bottom. Turn the anchor sideways and push it through the seat shell to remove, as shown.
-
Page 21: Shoulder Belt Routing While In Booster Mode
Shoulder belt routing while in booster Converting into a Booster Seat mode IMPORTANT: While the seat is used in booster mode the shoulder belt must be routed over the child’s shoulder. The belt must pass under the head rest, between the head rest and the seat as long as the child’s shoulders are at or below the opening between the... -
Page 22: Positioning The Crotch Strap
Positioning the Crotch Strap Securing the Child in the Child Restraint 1. Loosen harness. As your child grows, you will need to change the crotch Press the harness release strap position so that it is in the slot closest to your button on the front of ALWAYS child. -
Page 23: Removing The Child From The Child Restraint
Securing the Child in the Child Restraint Removing the Child from the Child (cont.) Restraint 4. Fasten and adjust 1. Loosen harness chest clip. straps. Snap the two halves of Press the harness release the chest clip together, button on the front of as shown, and slide to the seat while pulling the armpit level. -
Page 24: Removing The Tether Strap
Installing Child Restraint Removing the Tether Strap in Aircraft The Federal Aviation Administration (FAA) recommends 1. Loosen the adjuster that you secure your child for air travel in an appropriate The tether strap that comes with your child restraint based on your child’s weight and size. child restraint will be one of the two types below. -
Page 25: Removing The Seat Pad
WARNING belt. For your child’s comfort, Evenflo recommends cushioning the child’s back by placing a small pillow or folded-up blanket, Cup holders MUST be installed before use of this Child or a folded-up jacket, over the belt buckle. -
Page 26: Care And Cleaning
Care and Cleaning Storing Your Instructions / Model Info. • DO NOT lubricate or immerse in water the LATCH connectors, the buckle, or any other part of this child restraint, unless rinsing is permitted, as stated on the back of the buckle for your restraint. •... -
Page 27: Replacement Parts
Proper Disposal of this Child Restraint Replacement Parts When this child restraint reaches the expiration date found on the date of manufacture label, Evenflo encourages you to dispose of it properly. Most components of this child restraint Not available on all models. Styles may vary. -
Page 28: Limited Warranty
Evenflo’s sole obligation under this express limited warranty shall be, at Evenflo’s option, to repair or replace any Product that is determined to be defective by Evenflo and determined to be covered by this warranty. - Page 29 USA: 1-800-233-5921, 8 AM to 5 PM E.T. Canada: 1-937-773-3971 Mexico: 01-800-706-12-00...
Need help?
Do you have a question about the Maestro Sport Exclusive RightFit Belt Path and is the answer not in the manual?
Questions and answers