
Related Manuals for Pioneer HTZ-424DVD


Summary of Contents for Pioneer HTZ-424DVD
- Page 1 HTZ-424DVD surrounD system بأبعاد إفتراضية متعددة لنظام صوتيDVD HTZ-222DVD Operating Instructions تعليمات التشغيل...
-
Page 2: Caution
Safety Information Safety Information Thank you for buying this Pioneer product. Please read through these operating instructions so you will know how to operate your model properly. After you have finished reading the instructions, put them away in a safe place for future reference. - Page 3 When you find it device for the unit, you will need to unplug it from the damaged, ask your nearest PIONEER authorized AC outlet to shut down all power. Therefore, make service center or your dealer for a replacement.
-
Page 4: Copyrights
Safety Information Copyrights Safe way to remove the battery or the battery from the equipment: It is forbidden by law to copy, broadcast, show, Remove the old battery pack, follow the steps broadcast via cable, play in public, or rent in reverse order than the assembly. - Page 5 Safety Information Notes on Copyrights • Many DVD discs are encoded with copy protection. Because of this, you should only connect your player directly to your TV, not to a VCR. Connecting to a VCR results in a distorted picture from copy-protected discs. • Under the U.S.
-
Page 6: Table Of Contents
Contents Adjust the Initial Settings To display and exit the Initial Safety Information Settings Menu CAUTION Initial Settings Menu Copyrights Digital Audio Out settings Video Output settings Language settings Preparation Display settings Options settings Unique Features Playable Discs Supplied Accessories Operation Playable files Front panel... - Page 7 Language Codes Setting the TV system Area Codes Copying files on to USB devices Trademarks and Licences Recording audio CD tracks on to Specifications (HTZ-424DVD) USB devices Specifications (HTZ-222DVD) Karaoke Using karaoke Extra functions for karaoke...
-
Page 8: Preparation
Preparation Playable Discs • DVD‑Video discs Preparation • DVD‑R/‑RW/‑R DL and DVD-Video DVD+R/+RW/+R DL discs recorded in the Video mode DVD-R/-RW/-R DL discs DVD VR recorded in the VR mode Unique Features Video CDs (including Super Video CD VCDs) • Audio CDs • CD‑R/‑RW/‑ROM discs Portable In CD(R/RW) containing music recorded in... -
Page 9: Supplied Accessories
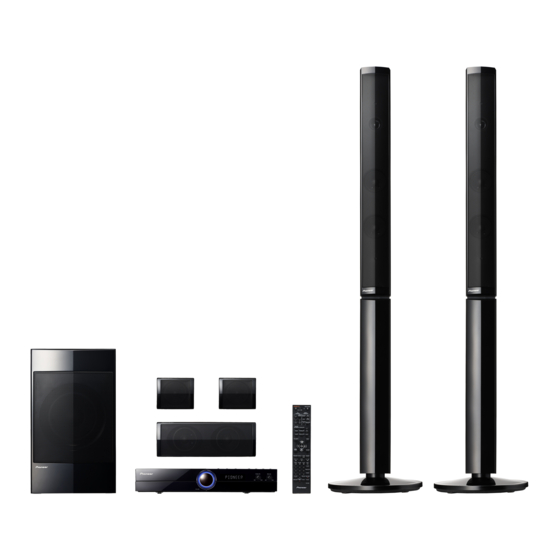
AAA/R03 dry cell FM Antenna (1) batteries (2) Screws M3.5 x 12 (2) (These screws are used to Accessories of speaker (HTZ-424DVD) fix the surround speakers to the stands.) WARNING Store small parts out of the reach of children and infants. If accidentally swallowed, contact a doctor immediately. -
Page 10: Playable Files
Preparation Playable files Symbol Used in this Manual • Only discs recorded in ISO9660 Level 1, NOTE Level 2 and Joliet can be played. Indicates special notes and operating • Files protected by DRM (Digital Rights features. Management) cannot be played. • Files other than the ones below (WMV, CAUTION MPEG4-AAC, etc.) are not guaranteed to play. Indicate cautions for preventing possible damages from abuse. - Page 11 Preparation • For external subtitle files the following • Bit‑rates: 128 kbps or higher subtitle format filename extensions are recommended supported (please note that these files • This Player supports ID3 tag Ver1.1. are not shown within the disc navigation menu): .srt, .sub, .ssa, .smi Compatible USB Devices • MP3 Player : Flash type MP3 player. • The filename of the movie file has to be repeated at the beginning of the • USB Flash Drive : Devices that support filename for the external subtitle file.
-
Page 12: Front Panel
Preparation Front panel 1 Disc Tray 3 ECHO VOL 2 Operation buttons 4 MIC VOL STANDBY/ON 5 MIC 1, 2 Switches the unit ON or OFF. OPEN/CLOSE 6 Remote Sensor FUNCTION 7 PORTABLE IN Changes the input source or function. ... -
Page 13: Rear Panel
Preparation Rear panel 4 5 6 7 1 AC IN 4 VIDEO OUTPUT Plug into the power source. 5 COMPONENT VIDEO (Y P ) OUTPUT 2 SPEAKERS connectors 6 AUX (L/R) INPUT 3 HDMI OUT (type A) 7 FM ANTENNA connector Connects to TV with HDMI inputs. -
Page 14: Remote Control
TV CONTROL buttons : Controls the TV. Remote control Controlling the TV You can control the sound level, input source, and power switching of Pioneer TVs as well (See page 42 for details). DIRECT FUNCTION buttons : Changes input source or function. - Page 15 Preparation USB REC ( ) : USB Direct Recording. ENTER : Acknowledges menu selection. HOME MENU : Press to display/hide HOME KARAOKE : Press to display the Karaoke MENU. Settings screen. KARAOKE REC ( ) : Starts recording RETURN : Moves backwards in the menu or exits the Initial Settings menu.
-
Page 16: Installation
Installation 2. Attach the non-skid pads to the base of each speaker. • Surround speaker (HTZ-222DVD only) Installation • Surround speaker (HTZ-222DVD only) Assemble the speakers Speaker Setup • Center speaker • Center speaker 1. Connect the wires to the player. Insert the cables connected to the player to the same colored connector on the speaker. - Page 17 Installation 2 Insert the lower cabinet to the base 5 Fix the upper cabinet and the lower so that the cable hole is positioned at cabinet from the backside of the the backside. speaker using the two screws (M4 x 12).
-
Page 18: Connecting The Cord
Mounting screws are not supplied. Use screws suitable for the wall material and support the weight of the speaker. CAUTION • If you are unsure of the qualities and strength of the wall, consult a professional for advice. • Pioneer is not responsible for any accidents or damage that result from improper installation. -
Page 19: Additional Notes On Speaker
Installation Additional notes on speaker • Surround speaker (HTZ-222DVD only) • Surround speaker (HTZ-222DVD only) Install the main front left and right speakers at an equal distance from the TV. Mounting screw (not supplied) Mounting screw 5 mm (not supplied) Precautions: 5 mm 10 mm... -
Page 20: Positioning The System
Installation Positioning the System Subwoofer: The position of the subwoofer is not so critical, because low bass The following illustration shows an sounds are not highly directional. But example of positioning the system. it is better to place the subwoofer near the front speakers. -
Page 21: Connections To Your Tv
Installation Connections to Your Component Video Connection Connect the COMPONENT VIDEO (PROGRESSIVE SCAN) OUTPUT jacks on the unit to the corresponding input jacks on the TV using Y Pb Pr cables. Make one of the following connections, You can hear the sound through the depending on the capabilities of your system’s speakers. -
Page 22: Hdmi Out Connection
Installation HDMI OUT Connection NOTE If you have a HDMI TV or monitor, you can • If a connected HDMI device does not accept connect it to this unit using a HDMI cable. the audio output of the unit, the HDMI Connect the HDMI OUT jack on the unit to device’s audio sound may be distorted or the HDMI IN jack on a HDMI compatible may not output. -
Page 23: Video Connection
Installation Video Connection Connect the VIDEO OUTPUT jack on the unit to the video in jack on the TV using a video cable. You can hear the sound through the system’s speakers. Video Connection... -
Page 24: Optional Equipment Connection
Installation Optional Equipment PORTABLE IN Connection Connection Connect an OUTPUT of portable device (MP3 or PMP etc) to the PORTABLE IN connector. PORTABLE IN Connection AUX IN Connection Connect an Output of auxiliary device to the AUX Input (L/R) Connector. If your TV has only one output for audio (mono), connect it to the left (white) audio jack on the unit. -
Page 25: Usb Connection
Installation USB Connection Antenna Connection Connect the USB port of USB Memory (or Connect the supplied FM antenna for MP3 player, etc.) to the USB port on the listening to the radio. front of the unit. Connect the FM Wire antenna to the FM antenna connector. -
Page 26: Adjust The Initial Settings
Installation Adjust the Initial Initial Settings Menu The factory default settings are indicated Settings in italic . Digital Audio Out settings By using the Initial Settings menu, you can HDMI Out make various adjustments to items such as picture and sound. Select the audio signals to be output from You can also set a language for the the HDMI OUT terminal ( LPCM (2CH) / Auto /... -
Page 27: Language Settings
Installation Language settings Options settings Audio Language Parental Lock Restrict DVD-Video viewing ( Password / Select the language you prefer for the Level Change / Country Code ). audio track when listening to the sound of DVD-Video discs ( English /available languages/ Other Language ). -
Page 28: Operation
Operation Do this During playback, press Operation or to go to the Skipping next chapter/track or to to the next/ return to the beginning of previous the current chapter/track. chapter/ Press twice briefly to track/file step back to the previous Basic Operations chapter/track. -
Page 29: Other Operations
Operation Other Operations Selecting a subtitle language DivX During playback, press SUBTITLE repeatedly to select a desired subtitle Displaying Disc Information language. on-screen DivX You can display various information about Switches Audio the disc loaded on-screen. During playback,press AUDIO to the audio 1. -
Page 30: Last Scene Memory
Operation Last Scene Memory Creating a program list This unit memorizes the last scene from the last disc that is viewed. The last scene This feature lets you program the play remains in memory even if you remove the order of titles/chapters/tracks on a disc. disc from the player or switch off (Stand- 1. -
Page 31: Other Functions Available From The Program Menu
Operation Other functions available from Viewing photo files as a slide the program menu show JPEG This unit can play discs with photo files. There are a number of other options in the 1. Select the DVD/CD or USB function by program menu in addition to Create/Edit. -
Page 32: Radio Operations
Operation Radio Operations Presetting the Radio Stations You can preset 50 stations for FM. Before tuning, make sure that you have Be sure that FM aerial is connected. (Refer turned down the volume. to the page 25) 1. Press FM TUNER or FUNCTION until FM appears in the display window. -
Page 33: Audio Settings
Operation Audio Settings Surround (Off/5 Speaker Mode1/ 5 Speaker Mode2/Dolby PL II Movie/ Dolby PL II Music) • Select the Surround mode. To display Audio Settings Menu 5 Speaker Mode1: The sound from the front speakers will also be output by the 1. Press HOME MENU to display “HOME rear speakers. -
Page 34: Video Adjust
Operation Video Adjust Video Adjust parameters The factory default settings are indicated in italic . Sharpness (Fine/Standard/Soft) To display Video Adjust Menu • Adjusts the picture’s sharpness. 1. Press DVD/CD or press FUNCTION Brightness (-20 to +20) several times to select “DVD/CD” • Adjusts the picture’s brightness. functions. -
Page 35: Advanced Operations
Operation Advanced Operations Audio Sync Sometimes Digital TV encounters a delay between picture and sound. You can improve it by setting the delay on the Sleep Timer Setting sound. Press SLEEP one or more times to select Press AUDIO SYNC and select delay time delay time between 15 and 60 minutes, using after the unit will turn off. -
Page 36: Setting The Tv System
ENTER . The file copying process will Video CD NTSC DivX appear on the screen. CD (R/RW) NTSC — NTSC NOTE JPEG no disc • Do not operate any buttons during the file copying process. • A folder named “PIONEER” is automatically created on the USB device. The copied files are stored in this folder. -
Page 37: Recording Audio Cd Tracks On To Usb Devices
CD is stopped. 1. Load the audio CD. • When recording is completed, a folder Press STOP to stop playback if it starts named “PIONEER” is automatically created on the USB device. The recorded automatically. tracks are stored in this folder. 2. Press HOME MENU . -
Page 38: Karaoke
Operation Karaoke To adjust the echo Adjust by turning the ECHO VOL on the front panel. • ECHO VOL is effective for both MIC 1 and MIC 2 . Using karaoke To adjust the key Be sure to adjust the volume to the Press either the KEY ... -
Page 39: Extra Functions For Karaoke
Operation Extra functions for karaoke Recording your karaoke tracks on to USB devices Scoring your karaoke You can record your karaoke tracks on to a 1. Display the Karaoke settings screen. USB device through the player. Press KARAOKE . 2. Select “Karaoke Score”. NOTE Use / to select, then press ENTER or • Use this function after adjusting the... -
Page 40: Maintenance
Maintenance Maintenance Notes on Discs Handling the Unit Handling Discs When shipping the unit Please save the original shipping carton and packing materials. If you need to ship the unit, for maximum protection, re-pack the unit as it was originally packed at the factory. -
Page 41: Troubleshooting
Troubleshooting Troubleshooting PROBLEM CAUSE CORRECTION No Picture Select the appropriate video input mode on the TV The TV is not set to receive the DVD signal. so the picture from the DVD Receiver appears on the TV screen. Connect the video cables securely to both the TV The video cables are not connected securely. -
Page 42: Appendix
NOTE • For some models it may not be possible to operate the TV with the player’s remote • The factory default setting is 00 control, even for TVs of brands listed on the (PIONEER). manufacturer code list. • If you make a mistake when inputting the • The setting may be restored to the default code, release TV CONTROL then start after the batteries are replaced. If this over from the beginning. - Page 43 Appendix TV Preset code list Manufacturer Code(s) PIONEER 00, 31, 32, 07, 36, GENERAL 29 MCMICHAEL 34 SCHAUB LORENZ 42 42, 51, 22 GENEXXA 31, 41 MEDIATOR 07 SCHNEIDER 07, 41, 47 ACURA 44 GOLDSTAR 10, 23, 21, 02, MEMOREX 44...
-
Page 44: Language Codes
Appendix Language Codes Use this list to input your desired language for the following initial settings: Disc Audio, Disc Subtitle, Disc Menu. Language names (codes) an input codes Japanese (ja), 1001 Bhutani (dz), 0426 Kirghiz (ky), 1125 Sinhalese (si), 1909 English (en), 0514 Esperanto (eo), 0515 Latin (la), 1201... -
Page 45: Area Codes
Appendix Area Codes Choose a area code from this list. Country/Area name, Input codes and Country/Area code United States, 2119, us Switzerland, 0308, ch Pakistan, 1611, pk Argentina, 0118, ar Sweden, 1905, se Philippines, 1608, ph Finland, 0609, fi United Kingdom, 0702, gb Spain, 0519, es Italy, 0920, it Thailand, 2008, th... -
Page 46: Trademarks And Licences
Appendix Trademarks and Licences HDMI, the HDMI Logo, and High-Definition Multimedia Interface are trademarks or Manufactured under license under U.S. registered trademarks of HDMI Licensing LLC Patent Nos: 5,956,674; 5,974,380; 6,487,535 in the United States and other countries. & other U.S. and worldwide patents issued &... -
Page 47: Specifications (Htz-424Dvd)
Appendix Specifications Amplifier • Power output, (RMS), THD 30 % (HTZ-424DVD) Front 125 W x 2 (6 Ω) Centre 250 W (3 Ω) Surround 125 W x 2 (6 Ω) Sub‑Woofer 250 W (3 Ω) General System • Power requirements: AC 220 V to 240 V, 50 Hz/60 Hz • Laser: Semiconductor laser • Power consumption: 120 W • Signal system:... -
Page 48: Specifications (Htz-222Dvd)
Type: 1 Way Impedance Rated: 8 Ω Net Dimensions Tuner (W x H x D): 200 mm x 340 mm x 270 mm Net Weight: 3.4 kg • FM Tuning Range: 87.5 MHz to 108.0 MHz © 2012 PIONEER CORPORATION. All rights reserved. - Page 51 7.0 كجم :الوزن الصافي المكبر الصوتي الفرعي أحادية االتجاهات :النوع Ω 8 :معدل المعاوقة 072 ممx 043 ممx 002 مم :صافي األبعاد )(العرض × االرتفاع × العمق 4.3 كجم :الوزن الصافي PIONEER CORPORATION 2012 © جميع الحقوق محفوظة...
- Page 52 ملحق المواصفات موالف :FM نطاق موالفة (HTZ-424DVD) 5.78 إلى 0.801 ميجا هرتز مكبر الصوت عام % 30 THD ،)RMS( مخرجات الطاقة :متطلبات الطاقة )Ω 6( 2 × 521 وات أمامية تيار مستمر 022 فولت إلى 042 فولت، 05 هرتز/06 هرتز...
- Page 53 ملحق العالمات التجارية والتراخيص High-Definition Multimedia وHDMI وشعارHDMI هي عالمات تجارية أو عالمات تجارية مسجلةInterface في الواليات المتحدةHDMI Licensing LLC لشركة :تم تصنيعه بترخيص بموجب براءات االختراع األمريكية التالية .وبلدان أخرى 476,659,5; 083,479,5; 535,784,6 وغيرها من .براءات االختراع العالمية الصادرة والتي تحت اإلصدار ...
- Page 54 ملحق رموز المنطقة .اختر أحد رموز المنطقة من هذه القائمة أسماء الدول/المناطق، ورموز اإلدخال، ورموز الدول/المناطق no ،1415 ،النرويج ch ،0308 ،سويسرا us ،2119 ،الواليات المتحدة pk ،1611 ،باكستان se ،1905 ،السويد ar ،0118 ،األرجنتين ph ،1608 ،الفلبين es ،0519 ،إسبانيا gb ،0702 ،المملكة...
- Page 55 ملحق رموز اللغة Disc Subtitle (صوت القرص) وDisc Audio :استخدم هذه القائمة إلدخال لغتك المطلوبة لإلعدادات األولية التالية .) (قائمة القرصDisc Menu(ترجمة القرص) و )رموز( أسماء اللغات ورموز اإلدخال Sinhalese )si(, 1909 Kirghiz )ky(, 1125 Bhutani )dz(, 0426 Japanese )ja(, 1001 Slovak )sk(, 1911 Latin )la(, 1201 Esperanto )eo(, 0515...
- Page 56 ملحق قائمة رموز التليفزيون المعدة مسب ق ً ا رموز جهات التصنيع SANYO 35, 45, 48, 21, MCMICHAEL 34 GENERAL 29 PIONEER 00, 31, 32, 07, 14, 91 MEDIATOR 07 GENEXXA 31, 41 36, 42, 51, 22 SBR 07, 34...
- Page 57 تشغيل التليفزيون باستخدام جهاز التحكم عن بعد الخاص .بالمشغل مالحظة تنبيه .)PIONEER( 00 اإلعداد المصنع االفتراضي هو إذا ارتكبت خطأ أثناء إدخال الرمز، حرر الرز قد يكون من غير الممكن بالنسبة لبعض الموديالت تشغيل CONTROL .ثم ابدأ من البداية...
- Page 58 استكشاف األخطاء وإصالحها استكشاف المشكالت وإصالحها العالج السبب المشكلة ال توجد صورة حدد وضع إدخال الفيديو المناسب على التلفزيون حتى تظهر الصورة .DVD جهاز التليفزيون غير معد الستقبال إشارة قرص . على شاشة التلفزيونDVD التي يستقبلها جهاز استقبال قم بتوصيل كابالت الفيديو بإحكام إلى كل من جهاز التلفزيون وجهاز .كابالت...
- Page 59 الصيانة الصيانة التعامل مع الوحدة ملحوظات حول األقراص عند شحن الوحدة التعامل مع األقراص يرجى االحتفاظ بصندوق الشحن األصلي ومواد التغليف. إذا ،رغبت في شحن الوحدة، مع التمتع بأقصى قدر من الحماية أعد تغليف الوحدة كما كانت مغلفة عند قدومها من المصنع .ألول...
- Page 60 العملية تسجيل مسارات الكاريوكي الخاصة بك على أجهزة وظائف الكاريوكي اإلضافية تسجيل نقاط الكاريوكي USB تسجيل مسارات الكاريوكي الخاصة بك على أجهزة (إعداداتKaraoke Settings 1. اعرض شاشة .)الكاريوكي مالحظة .KARAOKE اضغط ."Karaoke Score" 2. حدد استخدم هذه الوظيفة بعد ضبط مستوى صوت الميكروفون .
- Page 61 العملية (Karaoke) الكاريوكي لضبط الصدى . في اللوحة األماميةECHO VOL اضبط بإدارة وMIC1 فعا ال ً لكل منECHO VOL يكون خيار استخدام الكاريوكي .MIC2 تأكد من تعديل مستوى الصوت إلى الحد األدنى قبل توصيل لضبط المفتاح .الميكروفون، وإال قد يؤدي ذلك إلى تلف السماعات ....
- Page 62 .القرص المضغوط الصوتي .بدأ تلقائيا عند اكتمال التسجيل، ينشأ مجلد يحمل التسمية . ويتم حفظ الموادUSB " تلقائ ي ًا على جهازPIONEER" .HOME MENU 2 اضغط على شاشة القائمة الرئيسية .المسجلة في هذا المجلد .USB REC " أو اضغطCD -> USB Rec" حدد...
- Page 63 NTSC — .ستظهر عملية نقل الملفات على الشاشة JPEG ال يوجد قرص مالحظة . ال تضغط على أية أزرار خالل عملية النقل " فيPIONEER" سيتم إلقائيا إنشاء مجلد يحمل اسم .USB جهاز .يتم حفظ الملفات المنقولة في هذا المجلد...
- Page 64 العملية عمليات متقدمة تزامن الصوت يواجه التليفزيون الرقمي في بعض األحيان تأخيرً ا بين الصورة والصوت. ويمكنك تحسينه بضبط التأخير في ضبط مؤقت النوم .الصوت مرة أو أكثر لتحديد وقت التأجيلSLEEP اضغط على نوم وحدد زمن التأخير باستخدامAUDIO SYNC اضغط .بين...
- Page 65 العملية ضبط الفيديو (Video Adjust) معلمات ضبط الفيديو . تظهر إعدادات المصنع االفتراضية بخط مائل (Video Adjust) (Fine/Standard/Soft) Sharpness . لضبط حدة الصورة (Video Adjust) لعرض قائمة ضبط الفيديو (-20 to +20) Brightness عدةFUNCTION أو اضغطDVD/CD 1. اضغط ."DVD/CD"...
- Page 66 العملية إعدادات الصوت /Off/5 Speaker Mode1) Surround /Dolby PL II Movie/5 Speaker Mode2 (Audio Settings) (Dolby PL II Music اختر وضع الصوت المحيطي Audio) لعرض قائمة إعدادات الصوت 5: سوف يتم إخراج الصوتSpeaker Mode1 (Settings .الخاص بالسماعات األمامية من السماعات الخلفية أي ض ًا HOME"...
- Page 67 العملية عمليات اإلذاعة ضبط محطات الراديو مسبقا . ضبطا مسبقاFM يمكنك ضبط 05 قناة .FM تأكد من توصيل كل من هوائي .قبل التوليف، تأكد من إغالق الصوت )23 (ارجع إلى الصفحة إلىFUNCTION أوFM TUNER 1. اضغط على . على نافذة العرضFM أن تظهر االستماع...
- Page 68 العملية عرض ملفات الصور في شكل عرض شرائح الوظائف األخرى المتاحة JPEG من قائمة البرامج .تستطيع هذه الوحدة تشغيل األقراص التي بها ملفات صور يوجد عدد من الخيارات األخرى في قائمة البرامج باإلضافة بالضغط علىUSB أوDVD/CD 1. حدد خاصية .Create/Edit إلى...
- Page 69 العملية إنشاء قائمة برامج ذاكرة المشهد األخير تقوم هذه الوحدة بحفظ المشهد األخير من القرص األخير /تتيح لك هذه الخاصية برمجة ترتيب تشغيل العناوين الذي يتم عرضه. ويبقى المشهد األخير في الذاكرة حتى لو .الفصول/المسارات على أحد األقراص قمت بإخراج القرص من المشغل أو قمت بإيقاف تشغيل الوحدة...
- Page 70 العملية العمليات األخرى DivX تحديد لغة الترجمة ) (الترجمةSUBTITLE أثناء التشغيل، اضغط على .بصورة متكررة الختيار لغة الترجمة المطلوبة عرض بيانات األقراص على الشاشة DivX تبديل الصوت يمكنك عرض معلومات متنوعة عن القرص المركب على .الشاشة . لتبديل بث الصوت/القناةAUDIO أثناء التشغيل، اضغط ...
- Page 71 العملية نفذ ذلك كي خالل قراءة الملفات، اضغط على العملية / للذهاب إلى الفصل أو المسار التالي أو للعودة إلى بداية التخطي إلى الفصل/المسار الحالي. اضغط /الفصل/المسار مرتين لفترة موجزة على /الملف الالحق .للرجوع إلى الفصل/المسار السابق السابق تحديد...
- Page 72 التركيب (Options) إعدادات الخيارات (Language) إعدادات اللغة Parental Lock Audio Language DVD-Video تقييد مشاهدة حدد اللغة التي تفضلها لمسار الصوت عند االستماع لصوت Password/Level Change/Country( //اللغات المتاحةEnglish( DVD-Video أقراص .)Other Language .)Code DivX VOD Subtitle Language DivX VOD عرض رمز التسجيل الالزم لعرض ملفات حدد...
- Page 73 التركيب ضبط اإلعدادات األولية (Initial Settings) قائمة . تظهر إعدادات المصنع االفتراضية بخط مائل (Initial Settings) )خرج الصوتDigital Audio Out إعدادات (الرقمي (اإلعداداتInitial Settings يمكنك باستخدام قائمة األولية)، إجراء تعديالت مختلفة على العناصر مثل الصورة HDMI Out .والصوت HDMI حدد...
- Page 74 التركيب توصيل الهوائي USB توصيل . المزود لالستماع للراديوFM قم بتوصيل هوائي ،MP3 (أو مشغلUSB الخاص بذاكرةUSB وصل منفذ . الموجود في مقدمة الوحدةUSB الخ) بمنفذ .FM بموصل هوائيFM قم بتوصيل سلك هوائي USB توصيل توصيل الهوائي ...
- Page 75 التركيب توصيل األجهزة االختيارية PORTABLE IN توصيل ) الخPMP أوMP3( قم بتوصيل مخرج الجهاز المحمول .PORTABLE IN بموصل مدخل AUX IN توصيل PORTABLE IN توصيل ) مدخلL/R( توصيل مخرج الجهاز اإلضافي بموصل .AUX Input إن كان التلفزيون به مخرج واحد للصوت (أحادي)، قم .بتوصيله...
- Page 76 التركيب توصيل الفيديو )VIDEO OUTPUT( قم بتوصيل قابس مخرج الفيديو الموجود بالوحدة في الفيديو في قابس التلفزيون باستخدام .كابل الفيديو .وبإمكانك أن تسمع الصوت من سماعات النظام توصيل الفيديو...
- Page 77 التركيب HDMI Out وصلة مالحظة ، يمكنك توصيلهاHDMI إذا كان لديك شاشة أو تليفزيون HDMI . وصل مقبسHDMI بهذه الوحدة باستخدام كابل الموصل ال يقبل مخرجات الصوتHDMI إذا كان جهاز الموجودHDMI IN الموجود في الوحدة بمقبسOUT ...
- Page 78 التركيب التوصيل بالتلفزيون توصيل مكون الفيديو COMPONENT VIDEO وصل مقابس إخراج ) فيPROGRESSIVE SCAN( OUTPUT يتوقف إجراء إحدى التوصيالت التالية على قدرات الجهاز الوحدة بمقابس اإلدخال المناظرة في التليفزيون باستخدام .الموجود .Y Pb Pr كابالت .وبإمكانك أن تسمع الصوت من سماعات النظام مالحظة...
- Page 79 التركيب تعيين موضع النظام تنبيه الرسم التوضيحي التالي يوضح لك مثا ال ً على تعيين موضع .النظام تنبه للتأكد من عدم وضع األطفال أيديهم أو أي أشياء في قناة الحظ أن الرسوم البيانية الواردة في هذه التعليمات تختلف .*مكبر الصوت .عن...
- Page 80 ال تقم بتثبيت السماعات األمامية والسماعات المحيطية يستخدم هذا الثقب لتثبيت الوحدة This hole is used to x the فقط) و المكبر الصوتي الفرعي علىHTZ-424DVD( .إلى حامل السماعة unit to the speaker stand. .حائط أو سقف. فيمكن أن تسقط وتسبب اإلصابة...
- Page 81 مسامير التركيب اللولبية غير مزودة. استخدم المسامير اللولبية المناسبة لمادة الحائط والتي يمكنها أن تدعم وزن .السماعة تنبيه إذا كنت غير متأكد من خواص وقدرات الحائط، استشر .شخص متخصص للنصيحة المسؤولية عن أي حوادث أو أضرارPioneer ال تتحمل .تحدث بسبب التركيب بشكل خاطئ...
- Page 82 التركيب 5 ثبت الجزء العلوي للخزانة في الجزء المنخفض 2 أدخل الجزء المنخفض للخزانة إلى القاعدة كي يتم للخزانة من الجانب الخلفي للسماعة مستخدم ا ً في .وضع ثقب الكبل على الجانب الخلفي .)M4 x 12( ذلك المسمارين 3 ثبت القاعدة على الجزء المنخفض للخزانة من الجزء...
- Page 83 التركيب 2. ركب الوسائد غير المنزلقة في الجزء السفلي من قاعدة حامل كل سماعة (فقط ) السماعة المحيطية HTZ-222DVD (HTZ-222DVD only) • Surround speaker التركيب (HTZ-222DVD only) • Surround speaker تركيب السماعات وسائد غير منزلقة إعداد السماعة .1. وصل األسالك بالمشغل أدخل...
- Page 84 التحضير . : لقبول اختيار القائمةENTER • •• •• •• •• •• •• •• •• •• •• •• •• 7• •• •• •• •• •• •• •• •• •• •• •• HOME : اضغط لعرض/إخفاءHOME MENU : يزيل رقم المسار الموجود في قائمةCLEAR .)...
- Page 85 .: تتحكم في التلفزيونTV CONTROL أزرار جهاز التحكم عن بعد التحكم في جهاز التليفزيون يمكنك التحكم في مستوى الصوت ومصدر اإلدخال . أي ض ًاPioneer ومفتاح الطاقة الخاص بجهاز تلفزيون )(راجع صفحة 04 للحصول على التفاصيل : تقوم بتغيير مصدرDIRECT FUNCTION أزرار .اإلدخال أو الوظيفة...
- Page 86 التحضير اللوحة الخلفية 4 5 6 7 VIDEO OUTPUT 4 مخرج AC IN 1 .أدخل القابس في مصدر التيار COMPONENT VIDEO (Y P ) 5 مخرج OUTPUT SPEAKERS 2 موصالت AUX (L/R) INPUT 6 مدخل )A (النوعHDMI OUT 3 .HDMI للتوصيل...
- Page 87 التحضير اللوحة األمامية ECHO VOL 3 1 درج األسطوانات MIC VOL 4 2 أزرار التشغيل STANDBY/ON MIC 1, 2 5 .لتشغيل أو إيقاف تشغيل الوحدة OPEN/CLOSE 6 وحدة االستشعار عن بعد FUNCTION PORTABLE IN 7 .لتغيير مصدر اإلدخال أو الوظيفة )...
- Page 88 التحضير .ID3 tag Ver1.1 يدعم هذا المشغل التسمية قد ال تظهر بعض ملفات الترجمة الخارجية بشكل .صحيح أو ال تظهر على اإلطالق المالئمةUSB أجهزة بشأن ملفات الترجمة الخارجية، تم دعم امتدادات أسماء ملفات تنسيق الترجمة التالية (يرجى العلم أن تلك )MP3( ) مشغل...
- Page 89 التحضير الملفات القابلة للتشغيل الرمز المستخدم في هذا الدليل مالحظة ISO9660 يمكن عرض األقراص المسجلة بالنظام تشير إلى المالحظات الخاصة وميزات التشغيل . فقطJoliet وLevel 2 وLevel 1 ال يمكن عرض الملفات المحمية بإدارة الحقوق الرقمية .)DRM( تنبيه...
- Page 90 (تستخدم لتثبيت القاعدة إلى الجانب )الجانب السفلي للخزانة )السفلي من الخزانة AAA/ بطاريات خلية جافة )1( FM هوائي )2( R03 (HTZ-424DVD) ملحقات السماعة )2( M3.5 x 12 مسامير (تستخدم هذه المسامير لتثبيت )السماعات المحيطية للحامل تحذيرء قم بتخزين القطع الصغيرة بعيدا عن متناول األطفال...
- Page 91 التحضير األسطوانات القابلة للتشغيل DVD-Video أقراص التحضير DVD-R/-RW/-R DL أقراص DVD-Video DVD+R/+RW/+R DL و Video المسجلة في وضع الفيديو DVD-R/-RW/-R DL أقراص DVD VR VR المسجلة في وضع سمات فريدة (شاملةVideo CD أقراص الفيديو Video CD )Super VCD أقراص محمول...
- Page 92 )Settings رموز اللغة )Video Adjust( ضبط الفيديو رموز المنطقة )Video Adjust( لعرض قائمة ضبط الفيديو العالمات التجارية والتراخيص )Video Adjust( معلمات ضبط الفيديو )HTZ-424DVD( المواصفات عمليات متقدمة )HTZ-222DVD( المواصفات ضبط مؤقت النوم مخفف اإلضاءة شاشة التوقف إيقاف الصوت مؤقتا تزامن الصوت...
- Page 93 احملتويات )Initial Settings( ضبط اإلعدادات األولية لعرض قائمة اإلعدادات األولية معلومات األمان ) والخروج منهاInitial Settings( تنبيه )Initial Settings( قائمة حقوق النشر Digital Audio Out إعدادات Video Output إعدادات )Language( إعدادات اللغة التحضير )Display( إعدادات العرض )Options( إعدادات الخيارات سمات فريدة األسطوانات...
- Page 94 معلومات األمان حقوق النشر يحظر بحكم القانون نسخ أو بث أو عرض أو البث عبر الكابل أو .العرض العام أو تأجير المواد المحمية بحقوق النشر دون ترخيص يحتوي هذا المنتج على وظيفة الحماية ضد النسخ المطورة بواسطة . حيث يتم تسجيل إشارات الحمايةRovi Corporation شركة ضد...
- Page 95 معلومات األمان معلومات األمان . هذاPioneer شكرً ا لشرائك منتج .يرجى قراءة تعليمات التشغيل هذه حتى تتعرف على كيفية تشغيل الطراز الخاص بك بطريقة صحيحة . ً بعد انتهائك من قراءة التعليمات، ضعها بعي د ً ا في مكان آمن للرجوع إليها مستقب ال...
- Page 96 253 Alexandra Road, #04-01, Singapore 159936 TEL: 65-6472-7555 PIONEER ELECTRONICS AUSTRALIA PTY. LTD. 5 Arco Lane, Heatherton, Victoria, 3202, Australia, TEL: (03) 9586-6300 PIONEER ELECTRONICS DE MEXICO S.A. DE C.V. Blvd.Manuel Avila Camacho 138 10 piso Col.Lomas de Chapultepec, Mexico, D.F. 11000 TEL: 55-9178-4270 K002_B3_En...