Table of Contents
Advertisement
Quick Links
EN
PORTABLE AIR CONDITIONER (LOCAL)
MAXIME PLUS EU
OPERATING INSTRUCTIONS
Read the instructions carefully before operating the appliance or carrying out maintenance work.
Observe all the safety instructions; failure to observe the instructions may lead to accidents and/or
damage. Store these instructions in a safe place for future reference.
V 11/20
40
Advertisement
Table of Contents

Related Manuals for Argo MAXIME PLUS EU


Summary of Contents for Argo MAXIME PLUS EU
- Page 1 PORTABLE AIR CONDITIONER (LOCAL) MAXIME PLUS EU OPERATING INSTRUCTIONS Read the instructions carefully before operating the appliance or carrying out maintenance work. Observe all the safety instructions; failure to observe the instructions may lead to accidents and/or damage. Store these instructions in a safe place for future reference.
- Page 2 Appliance is filled with flammable gas R290. Before installing and using the appliance, read the owner manual. Before installing the appliance, read the installation manual. Any repairs you need, contact the nearest authorized Service Centre and strictly follow manufacturer’s Service Manual. The Refrigerant R290 •...
- Page 3 GENERAL OPERATING AND SAFETY INSTRUCTIONS • This appliance is a local air conditioner designed for domestic use. • Only use this air-conditioner as described in this manual. • Ensure that the required voltage and frequency (220-240V/50 Hz) match the available power source. •...
- Page 4 • Do not install the air conditioner in rooms where it may receive water splashes (e.g. laundry rooms). • This air conditioner can be used by children of 8 years of age or older, and by persons with reduced physical, sensory and mental abilities or who lack the necessary know-how and experience to operate it, if under the supervision or instruction of a person responsible for their safety, so that they are fully aware of the...
- Page 5 • Ensure that air circulates freely around the unit. Do not cover the air intake and delivery grilles with drapes or any other means. WARNING! • The air conditioner must be positioned at least 50 cm from the wall or any other obstacles, on a flat and stable surface so as to avoid water leaks.
-
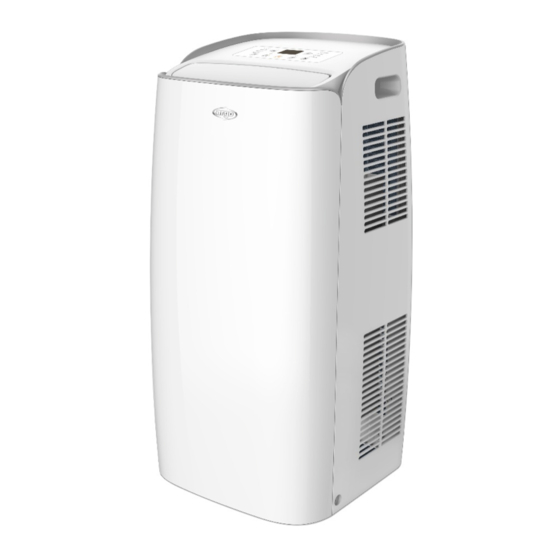
Page 6: Description Of Parts
DESCRIPTION OF PARTS FRONT VIEW REAR VIEW CONTROL PANEL AND FUNCTION BUTTONS AIR FILTER WITHOUT REMOTE CONTROL AIR EXPULSION HOSE VERTICAL FINS AND AIR INTAKE JOINT WHEELS 10) END FITTING FOR WINDOW CORD CABLE CLAMP 11) REMOTE CONTROL POWER CORD AIR FILTER Min/max operating limits (internal temperature) Cooling: 16 °C DB / 35 °C DB... -
Page 7: Appliance Start-Up
PRE-OPERATING CHECKS AND OPERATIONS The following space must be maintained to ensure the operating efficiency of the portable air conditioner. APPLIANCE START-UP Open the packaging and remove the box from above. Remove the product and the other elements supplied (illustrated in the box below). Type AAA batteries for the LCD remote control remote control... - Page 8 Position the product vertically on a flat and stable surface, as close as possible to a window and at least 50 cm from walls or other nearby obstacles. INSTALLATION OF CORD WINDER HOOKS 1. Hook 2. Screw Install the cord winder hooks to the back of the unit using the When the appliance is not being used, wind the power screws, as shown in the figure.
- Page 9 3. Insert the round fitting into the retractable flexible pipe and 4. Insert the round fitting onto the flexible pipe. insert the latter with its round fitting into the window unit without the plug. 6. Slide the flat fitting downwards into the grooves (A) and Insert the flat fitting onto the hose.
-
Page 10: How To Use The Appliance
Connect the power cord to a suitable electric socket (220–240 V). Insert the supplied batteries into the remote control and make sure the poles match. Select the desired operating mode from the remote control. HOW TO USE THE APPLIANCE This appliance can be used for cooling, heating, dehumidifying and ventilating. When switching between modes, the fan continues to rotate but the compressor stops: the compressor will start after 3 minutes. -
Page 11: Dehumidification Mode (Dry)
3. DEHUMIDIFICATION MODE (DRY) • Press the MODE button to select Dry. • The “Dry” LED on the control panel lights up • The temperature is controlled by the PCB and cannot be regulated. • In this mode, whenever the ON/OFF button is pressed, the unit switches off, the appliance saves the settings and, when switched back on again, retains them. -
Page 12: Remote Control Operation
WARNING! When using the air conditioner in dehumidification mode, always dispose continuous drainage, in order to maximise dehumidification efficiency. Use the drainage outlet on the appliance. The water can be drained into a drain by simply connecting a tube with 14 mm internal diameter (not supplied). -
Page 13: Remote Control
INFORMATION FOR CORRECT DISPOSAL OF THE BATTERIES PURSUANT TO EUROPEAN DIRECTIVE 2006/66/EC and modifications by Directive 2013/56/EU Replace the batteries when depleted. At the end of their working life, batteries must be disposed of separately from unsorted waste. They must be must be delivered to appropriate separated waste disposal plants or to dealers that provide a similar service. -
Page 14: Display Of Remote Control
DISPLAY OF REMOTE CONTROL I Feel function Auto Mode Cool mode Dry mode Fan mode Heat mode TIMER ON/OFF function Sleep mode Light 10. Fan speed setting 11. Signal transmission 12. Turbo mode 13. 8°C heating function 14. Temp. display 15. - Page 15 (2) TEMPERATURE + / - AND TIMER ADJUSTMENT BUTTONS (on control panel and on remote control) The temperature can be adjusted to between 16 °C and 30 °C. Increase temperature(+): 1) Allows for adjusting the desired temperature in cooling (COOL) mode. 2)Whenever the(...
-
Page 16: Clock Button
On the remote control, press the Wifi button to activate or deactivate the Wifi function, the corresponding icon on the display will appear. When the unit is off, press and hold the MODE and Wifi buttons simultaneously for 1 second to reset the Wifi to the factory settings. -
Page 17: Safety Functions
In cooling mode, after the first hour the set temperature increases by 1 ° C, after the second hour it increases again by 1 ° C; after the 5th hour it decreases by 1C °, continues in this way for another 3 hours now and then exits the Sleep function, continuing to operate normally in cooling mode. - Page 18 WIFI GUIDE How to set and operate the air conditioner with Wifi 1. Make sure that the device (smartphone or Tablet) used is equipped with a standard version of Android (version 4.4 or higher) and iOS (iOS7.0 or higher) as the operating system. For more details refer to the App. 2.
- Page 19 Open the app Make the registration before Access 3. Adding units Clicking on the icon of the little man opens a menu that includes, among other things, the "Help" function. Follow the instructions that appear on your device to add the unit or add a new unit, press + in the upper right corner of the homepage.
- Page 20 After choosing the category of interest, proceed with the reset of the unit. Different unit reset systems can be chosen depending on the type of unit / system and remote control (with or without wifi key). Follow step by step the operative instructions depending on the selected reset system. After performing the reset following the instructions, click on Next to automatically add the unit (it’s necessary to enter Wi-Fi password).
- Page 21 WIRE CONTROL OR REMOTE CONTROL WITH WIFI REMOTE CONTROL WITHOUT WIFI PORTABLE AIR BUTTON BUTTON (MODE andTURBO) CONDITIONER (CONTROL Direct the remote control towards Direct the remote control towards PANEL RESET) the unit. the unit. Press the button on the touch With the remote control off, press Press the "Mode"...
- Page 22 After performing the electrical reset of the unit and entering the information, perform a search for the unit (Search appliance) and continue the configuration. V 11/20...
- Page 23 Configuration of the main functions In the Homepage click on the device you wish to control and access the operating interface of it. 1. Select, operating mode, temperature and fan speed. Mode 2. Temperature for each mode: just slide your finger on the indicated temperature 3.
- Page 24 Click Function (Func) in the lower left corner of the interface to enter the advanced settings X-FAN function Vertical flap swinging Horizontal flap swinging (if available) Sleep function Light on indoor unit display Temperature unit conversion Swing setting Click Up & down swing to turn the swing function on or off. Click the arrow in the lower right corner of the icon to go to the next screen and set the swing level.
- Page 25 List of Preselections Click Timer. Then click + and make adjustments. Other functions 1. Homepage menu Click on the profile picture in the upper left corner of the homepage and set each menu function. 2. Group Control Click Group Control to use the present devices (Ex. Change the group name to "hhh" and set up the devices in the group list).
- Page 26 3. Home Management Click Home Management to create or manage a "family system". You can add new members to the family system of the registered account. V 11/20...
- Page 27 4. Help EWPE SMART APP. Press Help to view the instructions for 5. Feedback Click Feedback to send a feedback on the product. 6. How to reset the air conditioner WiFi module: Turn off the unit with the remote control and disconnect the air conditioner power for at least 10 seconds. Reconnect the power supply.
- Page 28 Analysis of common network setting errors: If the short distance control does not work, perform the checks specified below: • Make sure the air conditioner power is connected. • Make sure that the air conditioner's WiFi function is normally active. •...
- Page 29 Confirm to add Google Home device and click “Yes”. It will give out a sound to confirm that you have connected to the right device. After hearing the sound, click “Yes” to enter the next step. V 11/20...
- Page 30 Join in Help Improve Google Home and click “Yes, I’m in” or “No thanks”. Distinguish the room of Google Home from the other Google device areas, click “NEXT”, revise room name and click “Continue”. V 11/20...
- Page 31 Then select Wi-Fi network and click “NEXT” to wait for device network connection. Set Google Home and click “More” V 11/20...
- Page 32 Click “I AGREE”. According to the prompting, choose if you agree the corresponding operation, if it displays “Google Home is ready”, choose “Continue” to the next step. V 11/20...
- Page 33 Here comes the language control guidance course, after listening, click “Finish setup”, then Google Home setting is completed. 4. Add EWPE app account In Google Home App homepage, click “+” button. Click “Set up device”. V 11/20...
- Page 34 Select Works with Google. Search “Ewpe SmartHome”. Search Ewpe SmartHome on the list and click it, choose the country where your Ewpe Smart App account is, input EWPE App account and password and click “Ewpe SmartHome” to add it. V 11/20...
-
Page 35: Air Speed
After adding, your device will appear on the device list. 5. Use Google Home to control your intelligent device Now, you can use Google Home to control your intelligent device. Take Air Conditioning as an example, the supporting instruction includes: Ok Google, turn on/off Air Conditioning. -
Page 36: Care And Maintenance
Ok Google, set the AC mode to cool. Temperature Ok Google, set the temperature at 16°C. CARE AND MAINTENANCE WARNING! Prior to carrying out any cleaning or maintenance, unplug the unit from the power socket. 1. Cleaning the air filters The air filter must be checked at least once every two weeks of operation. - Page 37 4. Transport. Preferably keep the air conditioner in the vertical position when transporting it. Should this not be possible, rest it on its right-hand side; when it reaches its destination, immediately put the appliance in the vertical position and wait at least 4 hours before using it in the cooling mode.
- Page 38 REGULATION (EU) No. 517/2014 – F-GAS The unit contains R290, a natural greenhouse gas with global warming potential (GWP) = 3 - Kg. 0.30 = 0.0009 Tons CO equiv. Do not release R290 into the atmosphere. INFORMATION FOR THE CORRECT DISPOSAL OF THE PRODUCT IN ACCORDANCE WITH EUROPEAN DIRECTIVE 2012/19/EU This appliance may not be scrapped with domestic waste at the end of its life cycle.
Need help?
Do you have a question about the MAXIME PLUS EU and is the answer not in the manual?
Questions and answers