Table of Contents
Advertisement
Advertisement
Table of Contents

Related Manuals for SKY-WATCHER VIRTUOSO GTi


Summary of Contents for SKY-WATCHER VIRTUOSO GTi
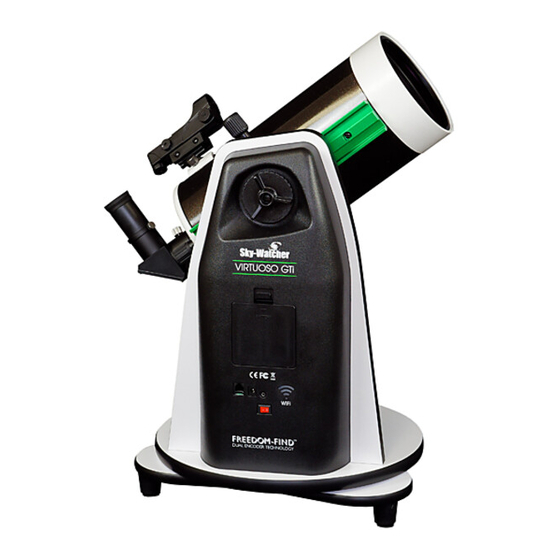
- Page 1 INSTRUCTION MANUAL VIRTUOSO GTi 202102V1 Copyright © Sky-Watcher...
-
Page 2: Table Of Contents
CONTENT Parts Diagram PART I : SETTING UP THE VIRTUOSO GTi MOUNT 1.1 Installing the Telescope ..................4 PART II : ELECTRONIC CONTROL INTERFACE 2.1 Control Panel ......................5 2.2 Panel Interface Components ...................5 2.3 Pinout of the Interfaces ...................6 2.4 DSLR Control Cables ....................6 2.5 Power Supply Requirements ...................6... -
Page 3: Parts Diagram
Parts Diagram Dovetail Locking Knob Dovetail Groove Azimuth Clutch Knob Bubble Level Altitude Clutch Wheel Battery Compartment for 8x AA Batteries SNAP Port LED Indicator Power Switch External Power Hand Controller Port... -
Page 4: Part I : Setting Up The Virtuoso Gti Mount
PART I : SETTING UP THE VIRTUOSO GTi MOUNT 1.1 Installing the Telescope Dovetail Locking Knob Saddle Tighten Dovetail Groove Loosen Altitude Clutch Wheel Tighten Loosen Fig. 1.1a Fig. 1.1b Loosen the altitude clutch wheel and rotate the saddle until the dovetail groove is horizon-... -
Page 5: Part Ii : Electronic Control Interface
PART II : ELECTRONIC CONTROL INTERFACE 2.1 Control Panel The control panel of the VIRTUOSO GTi mount is shown below: Hand Control Power SNAP Fig. 2.1 2.2 Panel Interface Components: POWER: This is an input for external power to avoid running on the 8 AA batteries in the VIRTUOSO GTi mount battery compartment. -
Page 6: Pinout Of The Interfaces
PART II: ELECTRONIC CONTROL INTERFACE 2.3 Pinout of the Interfaces: Note: The SNAP port provides two trigger signals Internal Circuit to the stereo plug. For a camera which only needs a shutter-release signal, either trigger Optoisolator TRIGGER Control Signal signals will work. For a camera which requires an extra “Focus”... -
Page 7: Part Iii : Using The Virtuoso Gti Mount
PART III : USING THE VIRTUOSO GTi MOUNT 3.1 Manually Rotating the Mount Refer to the following diagrams: Tighten Loosen Tighten Loosen Fig. 3.1a Fig. 3.1b Loosen the Alt clutch wheel to manually rotate the telescope vertically. Loosen the Azimuth adjustment knob to manually rotate the telescope horizontally. -
Page 8: Freedom Find Function
3.5 Freedom Find Function The VIRTUOSO GTi mount is equipped with auxiliary encoders on both the azimuth axis and altitude axis. Therefore, the mount can keep track of its current position even when a user unlocks the clutches and rotates the mount in azimuth axis and altitude axis manually. -
Page 9: Part Iv: Assembling Your Telescope
PART IV: Assembling Your Telescope REFLECTOR A. Eyepiece B. Hex Focusing Ring / Eyepiece Holder C. Red Dot Finder D. Telescope Main Tube E. Slider Lock Screw F. Dovetail... - Page 10 PART IV: Assembling Your Telescope REFLECTOR A. Focus knob B. Eyepiece C. Red Dot Finder D. Red Dot Finder Bracket E. Telescope Main Tube F. Dovetail...
- Page 11 PART IV: Assembling Your Telescope MAKSUTOV A. Red Dot Finder B. Red Dot Finder Bracket C. Telescope Main Tube D. Eyepiece E. Dovetail F. Diagonal G. Focus knob...
-
Page 12: Finderscope/Red Dot Finder Assembly
PART IV: Assembling Your Telescope Before you begin instructions carefully before beginning. Your telescope should be assembled during daylight hours. Choose a large, open area to work to allow room for all parts to be unpacked. 4.1 Finderscope/Red Dot Finder Assembly re ector Maksutov Fig.4.1.1a... -
Page 13: Eyepiece Assembly
PART IV: Assembling Your Telescope 4.2 Eyepiece Assembly 1. Inserting eyepiece for Maksutov(Fig.4.2.1a) Loosen the thumbscrew on the end of the focus tube. Insert the diagonal into the focus tube and re-tighten the thumbscrew to hold the diagonal in place. Loose the thumbscrews on the diagonal. -
Page 14: Part V: Operating Your Telescope
PART V: Operating Your Telescope 5.1 Using the Red Dot Finder The Red Dot Finder is a zero magnification pointing Battery Sight Tube tool that uses a coated glass window to superimpose ON/OFF cover insulation Brightness the image of a small red dot onto the night sky. The sheet Control Red Dot Finder is equipped with a variable brightness... -
Page 15: Focusing The Telescope
PART V: Operating Your Telescope 5.2 Focusing the Telescope Slowly turn the focus knobs under the focuser, one way or the other, until the image in the short focal ratio telescopes, particularly when they haven’t yet reached outside tempera ture. Refocusing is almost always necessary when you change an eyepiece. Fig.5.2.a 5.3 Choosing the Appropriate Eyepiece length by the focal length of the eyepieces you are going to use. -
Page 16: Part Vi: Observing The Sky
PART VI: Observing the sky 6.1 Sky Conditions steadiness of the air, and transparency, light scattering due to the amount of water va- pour and particulate material in the air. When you observe the Moon and the planets, and they appear as though water is running over them, you probably have bad “seeing” because you are observing through turbulent air. -
Page 17: Cooling The Telescope
6.7 Download SynScan App User’s Manual http://www.skywatcher.com/download/manual/synscan-hand-control-and-synscan-app/ 6.8 Wireless Telescope Control The VIRTUOSO GTi mount will be equipped with a telescope optical tube for astronomy observa- tion purpose. Please refer to the telescope optical tube manual for use of the telescope and its accessories. -
Page 18: Part Vii: Proper Care For Your Telescope
PART VII: Proper Care for Your Telescope 7.1 Collimation Collimation is the process of aligning the mirrors of your telescope so that they work in concert with each other to deliver properly focused light to your eyepiece. By observing out-of-focus star images, you can test whether your telescope’s optics are aligned. -
Page 19: Cleaning Your Telescope
PART VII: Proper Care for Your Telescope Aligning the Primary Mirror There are 3 large bolts and 3 small screws at the back of your telescope. The large bolts are the adjusting screws and the small screws are the locking screws (Fig.7.1f). - Page 20 VIRTUOSO GTi Mount...
Need help?
Do you have a question about the VIRTUOSO GTi and is the answer not in the manual?
Questions and answers
How do you get battery holder back into compartment where it doesn’t seem to fit? Where can I see a film of someone doing this? Telescope is Skywatcher Virtuoso GTi Maksutov