Table of Contents
Advertisement
OPERATING AND MAINTENANCE MANUAL
Section 1
a)
Operating and Maintenance Instructions ................................................................ I27028 R2
Section 2
a)
Flow Diagram ....................................................................................................... I20694 R1
b)
General Arrangement Drawing R05 ....................................................................... 88093 R4
c)
General Arrangement Drawing R10 ....................................................................... 88094 R4
d)
General Arrangement Drawing R15 ....................................................................... 88142 R1
Section 3
a)
Wiring Diagram R05 Dual Reactivation, 460V ............................................... K51525-01 R7
b)
Wiring Diagram R10 Dual Reactivation, 460V ............................................... K51526-01 R7
c)
Wiring Diagram R15 Dual Reactivation, 460V ............................................. K51527-01 R10
Section 4
Process Fan Curve – R05
a)
Reactivation Fan Curve – R05
b)
Process Fan Curve – R10
c)
Reactivation Fan Curve – R10
d)
Process fan Curve – R15
e)
Reactivation Fan Curve – R15
f)
Section 5
a)
Spare Parts List R05 ................................................................................................... 21791
b)
Spare Parts List R10 ................................................................................................... 21792
c)
Spare Parts List R15 ................................................................................................... 21793
Section 6
a)
Rigging Diagram ..................................................................................................... I27080-01 R0
MODEL: R SERIES
6.5.2020
Advertisement
Table of Contents
Troubleshooting

Related Manuals for Munters R Series


Summary of Contents for Munters R Series
- Page 1 OPERATING AND MAINTENANCE MANUAL MODEL: R SERIES Section 1 Operating and Maintenance Instructions ..............I27028 R2 Section 2 Flow Diagram ....................... I20694 R1 General Arrangement Drawing R05 ............... 88093 R4 General Arrangement Drawing R10 ............... 88094 R4 General Arrangement Drawing R15 ............... 88142 R1 Section 3 Wiring Diagram R05 Dual Reactivation, 460V ..........
- Page 2 Revision Changes: 6-5-2020: Wiring Diagrams updated (K51525-01 now Rev 7 and K51527-01 now Rev 10) 6.5.2020...
- Page 3 INVESTMENT performance may be the answer. A preventive maintenance service program is available on all Munters units - new and used. Our service programs are customized to your requirements with one to twelve visits annually. Parts or additional service needed for equipment under a service agreement are provided for at a discounted rate.
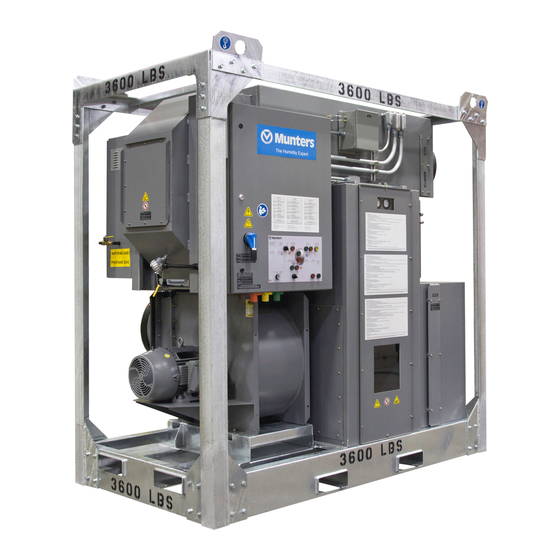
- Page 4 R-5000 unit shown MODEL R-Series DEHUMIDIFIERS with Electric & Direct Fired Gas Reactivation Units with Siemens Programmable Logic Controller Manual# I27028 Rev. 2 -11/22/2017...
- Page 5 Manual# I27028 Rev. 2 -11/22/2017...
- Page 6 TABLE OF CONTENTS CHAPTER 1 – REVISION HISTORY ....................iii CHAPTER 2 – INTRODUCTION ..................... 1-1 CHAPTER 3 – SAFETY NOTES ..................... 2-1 CHAPTER 4 – PRINCIPLES OF OPERATION ................3-1 Dehumidifier Operating Principle ..................3-1 About the R-Series Units ...................... 3-3 Control System and Power Distribution ................
- Page 7 CHAPTER 8 - TROUBLESHOOTING ..................... 7-1 Troubleshooting Guide ......................7-2 Checking the Power Distribution System ................7-5 Checking the Heating Elements ................... 7-5 Checking the Gas Modulation Valve ..................7-6 Checking the Airflow Switch ....................7-6 Checking the High Temperature Limit Switch ..............7-6 Checking the Flame Rod Sensor ..................
- Page 8 REVISION HISTORY APPROVED DATE REASON FOR CHANGE 05/15 R15 model added AMcD Model numbers updated. Gas train images 011/17 AMcD updated. HMI option added Manual# I27028 Rev. 2 – 11/22/2017...
- Page 9 The manual describes how the dehumidifier works, and how to get the best service from the unit. While a Munters dehumidifier is easy to operate, it is a bit different from most air handling equipment.
- Page 10 TCP Communication port. If any part of this manual is not understood, or there is a question concerning the dehumidifier, call the Service Operations Department of Munters and speak with a Service Operation Technicians at (800) 843-5360. Manual# I27028 Rev.
- Page 11 2 - SAFETY NOTES Munters is concerned about the safety of anyone who uses or services the R-Series unit. Some of the parts inside the R-Series unit can be dangerous if an untrained person tries to service the unit. Throughout this manual, hazards are pointed out which may occur in the use of the R-Series unit.
- Page 12 Do not use any kind of filter coating on the reactivation inlet filter. This filter is located just upstream of the electric heating elements. Some filter coatings give off volatile chemicals, which could be pulled into the heating elements. This could create a fire hazard. (If a filter is installed in the process air duct, it is OK to use filter coating on this filter.
- Page 13 3 - PRINCIPLES OF OPERATION DEHUMIDIFIER OPERATING PRINCIPLE Figure 3-1 shows how the R-Series unit removes moisture from the air. The “heart” of ® the system is the HoneyCombe wheel. The detail in Figure 3-1 shows how this wheel is made. The wheel has a series of air passages or channels arranged in a honeycomb pattern.
- Page 14 Reactivation air outlet (moist) Reactivation sector of wheel Reactivation Reactivation Blower Filter Heater Reactivation air inlet (outside air) Desiccant wheel (dry Additional Blower filter Process Drive sector of Motor wheel Bypass damper (R15 only) Figure 3-2 COMPLETE OPERATING UNIT Figure 3-1 Figure 3-2 show that, at one moment, the wheel is being used to pick up moisture, and a moment later, the wheel is being heated to drive off the moisture.
- Page 15 ABOUT THE R-SERIES UNITS This is a simplified explanation of the operating principle. Further explanation illustrates how this principle works in the R-Series unit. Figure 3-3 thru Figure 3-8 show most of the ® important parts of the machine: the HoneyCombe wheel, process air stream and reactivation air stream.
- Page 16 Electric heaters Reactivation air filter access Process and reactivation pressure gauges HoneyCombe® wheel and seals (behind access panel) Control panel Process air filter access Inspection window Drive motor (behind cover) Figure 3-3 R05 UNIT – FRONT VIEW Direct fired gas burner Ignition control module, REACTIVATION main gas shut-off valve,...
- Page 17 Electric heaters Reactivation air filter access (behind hinged Process and panel) reactivation pressure gauges REACTIVATION HoneyCombe® AIR IN wheel and seals (behind access panel) Process air PROCESS filter access AIR OUT Inspection window Drive motor (behind cover) Figure 3-5 Control panel R10 UNIT –...
- Page 18 Electric heaters Reactivation air filter access (behind hinged panel) Process and reactivation pressure gauges REACTIVATION AIR IN HoneyCombe® wheel and seals (behind access panel) PROCESS Process air AIR OUT filter access Inspection window Drive motor (behind cover) Figure 3-7 R15 UNIT – FRONT VIEW Direct fired gas burner Reactivation...
- Page 19 CONTROL SYSTEM AND POWER DISTRIBUTION The R-Series unit is controlled by a “programmable logic controller” or “PLC.” The PLC is a small computer which executes a simple set of commands or “program.” The program is organized as a loop which repeats continuously. LEDs on the front of the PLC show the status of each of the inputs and outputs.
- Page 20 constant 120°F (R05, R10) and 130°F (R15) at the output of the reactivation air stream. Less moisture absorbed by the wheel means less evaporative cooling taking place in the reactivation air stream. This means that less heat is required to maintain the temperature at the reactivation outlet.
- Page 21 4 - INSTALLATION INSPECTION When the unit arrives, check it immediately for signs of shipping damage. If there is any noticeable damage, report it to the trucking company right away. Check the outside of the unit. Open the damper for the reactivation blower. Try to turn the blower by hand.
- Page 22 • Air inlets and outlets, process and reactivation. If an air inlet or outlet is operated without ductwork, allow a clearance of at least 24" in front of the inlet. • Air filters • Electrical control panels • Gas train enclosures •...
- Page 23 The reactivation air should come from outside of the conditioned space. There is no point using dehumidified air for this purpose. The air at the reactivation outlet is very damp and should be vented to a space where this is not a problem. Even though this air is heated, it is too damp to use for most space heating purposes.
- Page 24 Duct riser with trap ISOLATION at bottom DAMPER 3’ min. OUTDOORS COOL SPACE 3’ min. Reactivation air OUT – ISOLATION to outdoors DAMPER Reactivation air IN – Output pipe has slope of 1/8” per 12” of run from outdoors Process air OUT – Process air IN –...
- Page 25 It is also important that the hot, moist reactivation air not be allowed to leak back into the conditioned space. All of the joints for the reactivation ducts must be completely sealed. After the reactivation air passes through the unit, it is very hot and can put a heat load on the conditioned space.
- Page 26 If electric reactivation heat is to be used, then both sets of connections are required. Connect the power cables and equipment ground to the Munters unit via the Cam- Lok type connectors. Ensure all connectors are firmly attached.
- Page 27 Do not operate the unit if the fans are turning backwards. The fans have much lower output when they operate backwards. Always use the Auto/Off/Manual switch to turn off the machine. Other than emergency situations, do not shut down the system by de-energizing the main power disconnect.
- Page 28 5 - OPERATING INSTRUCTIONS CONTROLS AND INDICATORS Figure 5-1 shows the controls on the main panel of the machine: Auto/Off/Manual switch – The center of the Auto/Off/Manual switch will light whenever the unit is receiving power and is ready to operate. When this switch is set to the Manual position, the unit will run continuously.
- Page 29 STARTING THE UNIT The units have a disconnect switch on the front panel. Be sure power is available to the Munters unit and this switch is turned on. Check to see that the center of the Auto/Off/Manual switch is lighted. This means the unit has power.
- Page 30 After the machine is switched on, there will be a normal delay up to 30 seconds before the fans start. As the machine is warming to normal operating temperature (first 30 minutes of machine operation), the unit will not display the Reactivation Low Temperature warning.
- Page 31 110°F. REACTING TO ALARMS The operational status of the Munters unit is determined via indicating lights mounted on a silkscreened label on the main control panel. Alarms will be annunciated by red, illuminated, LEDs and warnings will be annunciated by yellow, illuminated, LEDs.
- Page 32 To determine the details of the fault or warning, view the illuminated indicating LEDs on the main control panel. Figure 5-2 shows the indicating lights and the faults that cause them. Fault Chart (Unit will shut down) Inlet Temp Constant Red React Heated To Over Temperature Flashing Red Electric Heater Over Temperature...
- Page 33 stop. Other than emergency situations, do not shut down the system by de-energizing the main power disconnect. De- energizing the main power disconnect will cause all components to immediately shut down and power to be isolated. A hard shut down will damage the system, as the components will not be cooled down in a controlled manner.
- Page 34 PURGING When the selector switch is turned off, or the system stops calling for dehumidification, the dehumidification wheel must continue to turn so it can be "dried out" before it stops. Normally the purge cycle runs for three minutes. STANDBY The system is running in AUTO mode and the desired humidity condition is being met without the dehumidifier running.
- Page 35 Figure 5-5 DETAILED REACTIVATION TEMPERATURE INFO Here are the items on this screen: SETPOINT Setpoint for reactivation outlet temperature Current reactivation inlet or outlet temperature "Control Variable" - percentage of full reactivation heat output. Although the temperatures may be displayed in °F or °C, the factory default is °F. To return to the Machine Running display, press the BACK button, followed by the MAIN button.
- Page 36 Here are the items on this screen: SYSTEM RTM Total run time for whole system, including the dehumidifier and any additional equipment mounted upstream or downstream DH RTM Total run time for dehumidifier only HMI - REACTING TO ALARMS Note - The operator interface display reports on operating conditions inside the dehumidifier, but they are really two separate units.
- Page 37 Figure 5-8 INFORMATION ON FAULT CONDITION Recovering from a fault is a three-step process. The fault must be cleared on both the dehumidifier and the operator interface display. • On the dehumidifier, locate the cause of the problem that caused the fault, and correct it.
- Page 38 Use these suggested schedules as a starting point, and modify them to suit the specific installation. Munters dehumidifiers are designed to be very rugged and reliable. However, this does not mean the maintenance can be skipped completely. Poor maintenance can result in poor performance, increased downtime and additional operating costs.
- Page 39 R10 and R15 units only - Change the oil in the bevel gear drive for Drive unit, behind access panel the wheel. Use Mobil Glygoyle 460 (Munters P/N 94602-01) Change the flame rod sensor In the burner. See Figure 6-3.
- Page 40 ® roughly. Some units have been provided with chain drive mechanisms, while others have Munters traditional belt drive system. Turn off the unit. Switch off the power supply to the unit and employ lock out/ tag out procedures.
- Page 41 The wheel assembly is heavy, particularly if it is wet. Use a ® helper when lifting the HoneyCombe wheel. It is safe to roll the wheel. To replace the wheel, reverse the steps listed above. It is easiest to work from the rear of the unit.
- Page 42 Section 7. If, after the drying procedure the wheel is still soft, consult the Service Operations Department and/or the Parts Department at Munters. Also check for damage to the ends of the flutes. This may indicate a problem with the alignment of the wheel.
- Page 43 Do not use high-pressure air to clean the wheel. Do not hold the air jet near the surface of the wheel. The honeycomb structure inside the wheel may be damaged. ® Do not use any other procedure to clean the HoneyCombe wheel.
- Page 44 Fit the new seal into the same clips. 6.10 INSPECTING THE BLOWER FANS Turn off the unit before checking the blower fans. Turn off the power at the disconnect switch and follow lock out/tag out procedures. After the unit is turned off, wait three minutes to allow the unit to stop operating. The blowers inside the R-Series unit spin at a high rate of speed.
- Page 45 access panels so the wheels can be accessed. Each pair of wheels is supported on a shaft. Each shaft is held in place by two collars. There should be a small side-to-side play on the shaft. If the wheels become worn, excessive play may develop. This can cause uneven ®...
- Page 46 In order to lubricate the chain, it’s best to start with a clean chain. The chain can be cleaned using commonly available cleaning/degreasing products (found at home centers, hardware and automotive stores) and shop rag. Munters recommends lubricating the chain with a dry lubricant spray such as Manual# I27028...
- Page 47 DuPont Teflon® Mutli-Use Lubricant. Follow “Directions for Use” on the lubricant. Check for alignment and centering of the chain relative to the ring sprocket on the perimeter of the desiccant wheel. Inspection should be performed on the return from the drive motor sprocket to the return of the ring sprocket. Check that all hardware and set screws are tight before returning equipment to service.
- Page 48 6.17 BURNER ADJUSTMENT PROCEDURE If the information in this manual is not followed exactly, a fire or explosion may result, causing property damage, personal injury or loss of life. Do not store or use gasoline or other flammable vapors and liquids in the vicinity of this or any other appliance.
- Page 49 property damage, severe injury, or loss of life. The dehumidifier/air handler and all other gas appliances sharing the gas supply line must be firing at maximum capacity to properly measure the inlet supply pressure. The pressure can be measured at the supply pressure port on the inlet manual ball valve.
- Page 50 Modulating Supply Gas Main Gas Gas Valve Pressure Safety Shut Regulator Gauge Off Valves Regulated Gas Pressure Gauge Pilot Gas Pilot Shut Off Regulator Valves R10 & R15 Gas Trains Modulating Gas Valve Safety Shut Main Gas Off Valves Regulator Regulated Gas R05 Gas Train Pressure Gauge...
- Page 51 If leaks are found, isolate the main gas supply from the equipment and correct the leaks. Check the gas supply pressure to the first gas train component on the Munters supplied equipment. Ensure that it is between the minimum and maximum supply pressures listed on the rating plate.
- Page 52 Allow the burner to fire and ensure that the 'heated to' value entering the desiccant wheel does not exceed 300°F. Confirm that when the burner is firing, the supply gas pressure up to the Munters supplied equipment is between the minimum and maximum gas supply pressure values listed on the rating plate.
- Page 53 If the pressure is less than the number on the rating plate, increase the gas supply pressure to the butterfly valve. To adjust the "Full Rate Manifold Pressure," use the regulator supplied with the Munters equipment gas train, not the supply pressure regulator that is part of the site's gas utilities.
- Page 54 6.18 CHECKING THE FLAME ROD Be sure that the rod is securely mounted. If the outside of the rod is corroded, gently clean it using fine (#0000) steel wool. The rod should be replaced once a year. Check the wiring and replace it if it is dried or cracked. 6.19 CHECKING THE SPARK PLUG Remove the plug and check the gap.
- Page 55 Keep hands away from the blowers while the unit is turned on. If this documentation does not address a specific issue, call the Technical Support Department at Munters. Technicians are available to answer questions and assist with troubleshooting: Tel: 1-978-241-1100...
- Page 56 TROUBLESHOOTING GUIDE Problem Possible Cause Recommended Remedy No power to the unit or Power turned on, unit loss of one phase of Check power to the unit. does not run, and no power. indicator lights Determine which fuse failed and why. Failed fuses Replace fuses if necessary.
- Page 57 Inspect unit operation for overblowing or closed dampers. Adjust and reset with button on starter. Reactivation air flow is Inspect reactivation blower damper position. high. Consult flow diagram for correct pressure drops across wheel. See “Maintenance” Ensure bypass damper is not fully closed (R15 only).
- Page 58 Check power to flame safety controller. Ignition controller system Check alarm status on flame safety issue controller. Check ignition transformer and connection. Check supply pressure. Check manual isolation valves are fully open. Insufficient gas supply pressure to main / pilot Check gas pressure regulator setting.
- Page 59 CHECKING THE POWER DISTRIBUTION SYSTEM For details of the power distribution system, see the Wiring Diagram. If supplied, the three-phase AC entering the unit is checked by a three-phase power monitor (PMO1). If one of the phases is missing, or if the rotation of the motors is reversed, a red LED on this unit will light.
- Page 60 find the wiring diagram for the heating elements. If an element is operational, there should be a resistance of a few Ohms through the element. An open circuit or a high resistance indicates a failed element. CHECKING THE GAS MODULATION VALVE The gas modulation valve is controlled by the PLC, based on the temperature at the reactivation outlet.
- Page 61 CHECKING THE FLAME ROD SENSOR The flame rod sensor checks for flame during the start-up process. When the gas is turned on, the ignitor begins to spark. If the flame rod does not detect the flame within a few seconds, the gas is shut off. The dehumidifier will shut down and lock into a fault condition.
- Page 62 Color Normal Behavior Solid Red Defective hardware Error Flashing Red PLC error Solid Yellow PLC in Run mode (not program mode) Solid Green PLC in Stop mode Run / Stop Alternating Green PLC is in Startup mode & Yellow Flashes whenever a memory card is inserted. The CPU then changes to STOP mode and one of the following functions needs to be performed to initiate the Maintenance...
- Page 63 for that input lights up. These LEDs can be used to quickly check the condition of the whole machine. The Wiring Diagram gives more information on the functions indicated by the LEDs. Manual# I27028 Rev. 2 – 11/22/2017...
- Page 64 7.11 TERMINAL BLOCK WIRING INSTRUCTIONS Manual# I27028 7-10 Rev. 2 – 11/22/2017...
- Page 65 Munters Corporation 79 Monroe Street P.O. Box 540 Amesbury, MA 01913-0640 TEL (978) 241-1100 or 1-800-843-5360 FAX (978) 241- 1217...
- Page 66 Munters Corporation - Dehumidification Division I20694 Rev 1 1/14/15 Flow Data Sheet – Rental Units AMcD R-5000, R-10000, R-15000 Series Dehumidifier Wheel Metal Mesh Filter React Heat React Fan React* React Inlet React Outlet Temp R05 =2.1” 120°F (R05/R10) R05 – 1,400 scfm R10 =2.1”...
- Page 72 Munters...
- Page 73 Munters...
- Page 74 Munters...
- Page 75 Munters...
- Page 76 Munters...
- Page 77 Munters...
- Page 78 Munters...
- Page 79 Munters...
- Page 80 6ES7 232-4HA30-0XB0 Munters...
- Page 81 Munters...
- Page 82 Munters...
- Page 83 Munters...
- Page 84 Munters...
- Page 85 Munters...
- Page 86 Munters...
- Page 87 REACTIVATION REACTIVATION GAS BURNERS (ENC1) GAS BURNERS (ENC1) PANEL LAYOUT 14x16 CH ENCLOSURE PANEL Munters...
- Page 88 Munters...
- Page 89 Munters...
- Page 90 Munters...
- Page 91 Munters...
- Page 92 Munters...
- Page 93 Munters...
- Page 94 Munters...
- Page 95 Munters...
- Page 96 Munters...
- Page 97 6ES7 232-4HA30-0XB0 Munters...
- Page 98 Munters...
- Page 99 Munters...
- Page 100 Munters...
- Page 101 Munters...
- Page 102 Munters...
- Page 103 Munters...
- Page 104 REACTIVATION REACTIVATION GAS BURNERS (ENC1) GAS BURNERS (ENC1) PANEL LAYOUT 14x16 CH ENCLOSURE PANEL Munters...
- Page 105 Munters...
- Page 106 Munters...
- Page 107 Munters...
- Page 108 Munters...
- Page 109 Munters...
- Page 110 Munters...
- Page 111 Munters...
- Page 112 Munters...
- Page 113 Munters...
- Page 114 6ES7 232-4HA30-0XB0 Munters...
- Page 115 Munters...
- Page 116 Munters...
- Page 117 Munters...
- Page 118 Munters...
- Page 119 Munters...
- Page 120 START STOP POWER ON FAULT TURN POWER OFF BEFORE SERVICING. WARNING NOTE: REACTIVATION AIR MADE IN WILL CONTINUE THE U.S .A. FOR 3 MINUTES AFTER CONTROL INTERUPTION. Munters...
- Page 121 Munters...
- Page 122 Munters...
- Page 123 REACTIVATION REACTIVATION GAS BURNERS (ENC1) GAS BURNERS (ENC1) PANEL LAYOUT 14x16 CH ENCLOSURE PANEL Munters...
- Page 124 Munters...
- Page 125 ISO 9001 Company CHICAGO BLOWER CORPORATION • 1675 Glen Ellyn Road • Glendale Heights, IL • 60139 Description Job Description: Munters CHICAGO BLOWER SALES OF BOSTON Reference: AD (Bert) Jordan Fan Type: Square Fans Phone: (603) 425-7979 Fan Model:...
- Page 126 12_25 R05 - Reactivation Fan 3 HP Motor 12 1/4 Blower Curves 2 HP < 1200 SCFM 3 HP > 1200 SCFM 9.00 3 HP for HCD2250 8.00 7.00 6.00 5.00 70 Deg F 120 Deg F 140 Deg F 4.00 3.00 2.00...
- Page 127 ISO 9001 Company CHICAGO BLOWER CORPORATION • 1675 Glen Ellyn Road • Glendale Heights, IL • 60139 Description Job Description: Munters CHICAGO BLOWER SALES OF BOSTON Reference: R-10k Supply Fan AD (Bert) Jordan Fan Type: Airfoil Centrifugal Fans Phone: (603) 425-7979...
- Page 128 ISO 9001 Company CHICAGO BLOWER CORPORATION • 1675 Glen Ellyn Road • Glendale Heights, IL • 60139 Description Job Description: Munters CHICAGO BLOWER SALES OF BOSTON Reference: R-10k Reactivation Air Fan AD (Bert) Jordan Fan Type: Square Fans Phone: (603) 425-7979...
- Page 129 ISO 9001 Company CHICAGO BLOWER CORPORATION • 1675 Glen Ellyn Road • Glendale Heights, IL • 60139 Description Job Description: Munters CHICAGO BLOWER SALES OF BOSTON Reference: R15000 Process Fan, 2 Fans AD (Bert) Jordan Fan Type: Airfoil Centrifugal Fans...
- Page 130 • Glendale Heights, IL • 60139 Description Job Description: R15 React Fan CHICAGO BLOWER SALES OF BOSTON Reference: Munters AD (Bert) Jordan Fan Type: Square Fans Phone: (603) 425-7979 Fan Model: Design 36A SQAD SW Airfoil Direct Drive Fax: (603) 425-7703...
- Page 131 Spare Parts List Desc: R05 460V 5,000 SCFM REV 1 – EFFECTIVE FOR UNITS SHIPPED AFTER DECEMBER 2014 REV 2 – EFFECTIVE FOR UNITS SHIPPED IN 2017 ONWARDS REV 3 – EFFECTIVE FOR UNITS SHIPPED IN Q3 2018 ONWARDS COMPONENT DESCRIPTION BALLOON REV 2 / REV 3...
- Page 132 ORANGE, 600V 1.00 94100-04 CONN MALE, QUICK DISCONNECT, CONN YELLOW, 600V 1.00 94100-05 CONN MALE, QUICK DISCONNECT CONN GREEN 600V 1.00 94100-12 CAMLOCK BROWN 45 DEGREE…………………………………..ADDED REV 2 1.00 94100-13 CAMLOCK ORANGE 45 DEGREE…………………………………ADDED REV 2 1.00 94100-14 CAMLOCK YELLOW 45 DEGREE…………………………………ADDED REV 2 1.00 94100-15 CAMLOCK GREEN 45 DEGREE……………………………………ADDED REV 2...
- Page 133 15A, SIEMENS 4.00 K95551-04 CONTROL RELAY, MINI, DPDT, 120VAC, CR07 15A, SIEMENS 2.00 K95551-06 CONTROL RELAY, MINI, 3PDT, 120VAC, CR10 15A, SIEMENS 1.00 K95551-08 CONTROL RELAY, MINI, 4PDT, 120VAC, CR09 15A, SIEMENS 5.00 K95551-09 RELAY SOCKET, FOR MINI SPDT, CR06 PREMIUM LINE, SIEMENS 4.00 K95551-10...
- Page 134 LPG5-D0042N 2.00 94887-04 VALVE, BALL, BRASS 1/2IN NPT 0.125IN SIDE TAP 4.00 94888-03* CAP, BLACK ROUND, 20" OD, PLASTIC 4.00 94888-05* CAP, BLACK ROUND, 18” OD, PLASTIC * - SELECT EITHER 18” OR 20” OD CAPS – NOT BOTH 21791 R3...
- Page 135 Spare Parts List Desc: R10 460V 10,000 SCFM REV 1 – EFFECTIVE FOR UNITS SHIPPED AFTER DECEMBER 2014 REV 2 – EFFECTIVE FOR UNITS SHIPPED IN 2017 ONWARDS REV 3 - EFFECTIVE FOR UNITS SHIPPED IN Q3 2018 ONWARDS COMPONENT DESCRIPTION BALLOON REV 2/ REV 3...
- Page 136 1.00 94100-04 CONN MALE, QUICK DISCONNECT, CONN…………DELETED REV 2 YELLOW, 600V 1.00 94100-05 CONN MALE, QUICK DISCONNECT CONN………….DELETED REV 2 GREEN 600V 1.00 94100-12 CAMLOCK BROWN 45 DEGREE……………………………………ADDED REV 2 1.00 94100-13 CAMLOCK ORANGE 45 DEGREE…………………………………..ADDED REV 2 1.00 94100-14 CAMLOCK YELLOW 45 DEGREE……………………………………ADDED REV 2 1.00 94100-15...
- Page 137 10.00 K95350-11 CONTACTOR, 40HP, 50A(I)60A(R), 120V CN01-55…….DELETED REV 2 CNTR,1NO, S2 3.00 K95350-12 AUX SWITCH, TRANSVERSE, 1NO, SCREW OLR1…………DELETED REV 2 CN 3RH19211CA10 3.00 K95350-13 AUX SWITCH, SIDE MOUNT, 1NO/1NC, MS03…………DELETED REV 2 SCREW CONN. (3RH) 1.00 K95935-01 S7-1200 CPU PLC1 1.00 K95935-03...
- Page 138 Spare Parts List Desc: R15 460V 15,000 SCFM REV 1 – EFFECTIVE FOR UNITS SHIPPED IN 2017 ONWARDS REV 2 - EFFECTIVE FOR UNITS SHIPPED IN Q3 2018 ONWARDS COMPONENT DESCRIPTION BALLOON REV 2/ REV 3 WHEEL / DRIVE ASSEMBLY / CHAIN 1.00 40107-01 DETECTOR S/A ROTATION 1125-900...
- Page 139 2.00 94100-13 CAMLOK ORANGE 45 DEGREE 2.00 94100-14 CAMLOK YELLOW, 45 DEGREE 2.00 94100-15 CAMLOK GREEN 45 DEGREE 1.00 94632-03 FLAME CONTROLLER DISPLAY FSC1 1.00 94632-04 FLAME AMP FOR FLAME ROD FSC1 1.00 94632-12 FLAME CONTROLLER, 30 SEC PURGE FSC1 2.00 94891-05 FILTER KIT, SAGINAW 7”...
- Page 140 1.00 Z19315-29 BURNER CTRL HWELL RM7897C1000/U FSC1 1.00 Z19520-06 FLAME ROD 1.00 Z19520-41 SPARK PLUG 1.00 K95938-01 WATLOW TEMP. LIMIT CONTROLLER TS01 1.00 K95941-01 CONTACTOR, 120V COIL 3HP @ 460V MS01……………….ADDED REV 2 1.00 K95941-04 CONTACTOR, 120V COIL 10HP @ 460V MS02……………….ADDED REV 2 4.00 K95941-05...
- Page 141 4/13/2018 This document contains proprietary information and its contents are the exclusive property of Munters AB and its assignees and subsidiaries and its receipt or possession does not convey any rights to reproduce or disclose its contents, or to manufacture,...
Need help?
Do you have a question about the R Series and is the answer not in the manual?
Questions and answers