
Related Manuals for Potterton Titanium 12 Heat


Summary of Contents for Potterton Titanium 12 Heat
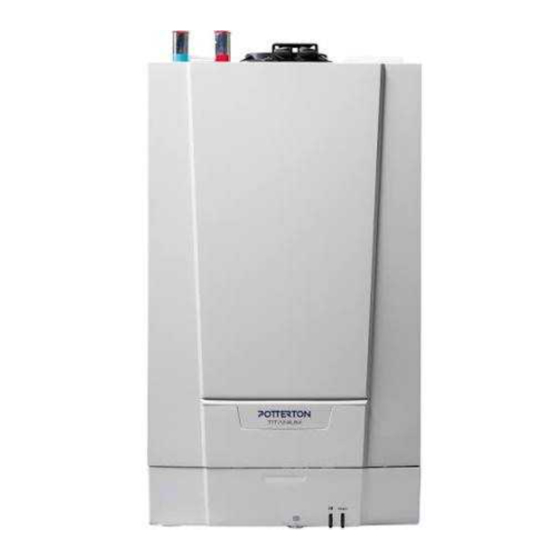
- Page 1 United Kingdom Engineer’s Service Manual Condensing Central Heating Boiler Titanium Heat 12 - 15 - 18 - 24 - 30...
-
Page 2: Table Of Contents
Contents Contents General Description Alpha Codes Main component parts Sequence of operation Boiler layout L.E.D sequences Electrical connections Wiring diagrams Boiler electrical diagram Useful electrical checks Checking the operational (working) gas pressure Measuring the gas rate Setting and checking the air/gas ratio Setting the boiler to full &... -
Page 3: General Description
General Description 1. The Potterton Titanium Heat models are gas fired wall mounted powered flue condensing boilers. 2. The boiler modulates automatically to the system load up to the set output. It is designed for use on Natural Gas (G20) only. -
Page 4: Sequence Of Operation
Sequence of Operation 1. Switched Live On: When the boiler switched live Mains ON turns on the boiler, a 20 second check cycle takes (CH or DHWdemand) place. If the flow temperature is less than the boiler set-point temperature the ignition cycle will start. Pre-purge, Ignition and Burner on. -
Page 5: Boiler Layout
Boiler Layout Potterton Titanium Heat main components Heat Exchanger Combustion Control Unit Condensate Trap Exhaust Tube Inlet Silencer User Interaction Controller Gas Cock Air Pressure Switch (24 & 30 model only) System Drain Cock Air Vent... -
Page 6: Hmi
Heating water temperature rotary knob Chimney Sweep button and Status signals RESET-button and on/off signal The HMI has 2 illuminating push buttons which provide information about the operating condition of the boiler. The ‘RESET’ button lights up green when the boiler has a demand. The ‘Chimney Sweep’... -
Page 7: Electrical Connections
Electrical Connections The boiler is supplied with 1 metre of 3 core cable connect- ed to the boiler. Switched live must be connected to the brown (live) wire of the 3 core cable. Connecting External Devices: This boiler operates on a switched live only. To comply with Part L1 of the Building Regulations the heating system into which the boiler is installed should include the following:... -
Page 8: Boiler Electrical Diagram
6.2 Boiler Electrical Diagram Electrode Gas Valve RS232 Safety Thermostat User Interaction Controller Mains Electrical Test Point Not used Return Sensor Flow Sensor Parameter Unit Pressure Switch Titanium Heat 24 & 30 Models only FROM COLOUR LINK HIGH LIMIT BLACK PRESSURE SWITCH FLOW SENSOR BLACK... -
Page 9: Useful Electrical Checks
6.3. Useful Electrical Checks RS232 Computer connection Return sensor Ignition transformer Flow sensor Ignition/ionisation electrode Storage parameter Power supply Connection box Safety thermostat Air pressure switch Plug Function Pins Colours Voltage Resistance 1 – 2 G/Y – Br 240v AC Mains 1 –... -
Page 10: Setting And Checking The Air/Gas Ratio
Setting and checking the air/gas ratio 7.1 Setting the boiler to full load & part load Use this procedure when Commissioning, Servicing & Replacing the Gas valve. Flue Sampling The full load status can only be reached via the part load Point status. -
Page 11: Error Codes
Error Codes Heating water temperature rotary knob Chimney Sweep button and Status signals RESET-button and on/off signal The status signal for the ‘Chimney Sweep’button can flash in a range of colours and at different frequencies. The meaning of these signals can be found below. 8.1 Shutdowns and lock-outs 8.1.1 Blocking A (temporary) blocking mode is a boiler operating function caused by an unusual situation. - Page 12 8.1.2 Lock-out (continued) Blocking Sensor error Maximum security Ignition fault Fan fault Parameter error Miscellaneous Reset Working to reset Press the RESET key for 5 seconds: The status signals will flash red quickly and the boiler will start its reset proce- dure.If the error code continues to display, search for the cause in the error table and apply the solution.
-
Page 13: Hard Reset
8.1.3 Hard Reset. Note: a lock-out condition can be re-set up to 5 times within one hour using the reset button. If a more than 5 resets have been carried out the boiler will require a ‘Hard Reset’. This will be indicated by the ‘Chimney Sweep’ (red) and ‘Reset’... -
Page 14: Maintenance
Maintenance 9.1 General WARNING - When changing components ensure that both the gas and electrical supplies to the boiler are isolated before any work is started. Use the electrical test point to confirm safe isolation. - When a component has been changed recommission the boiler as described in the Installation &... -
Page 15: Operation
9.2 Standard Inspection and Maintenance Operation Check the Combustion Performance (CO/CO2 ratio) Flue Sampling Point - Set the boiler to operate at maximum rate as described in Plug Section 7. - Remove the plug from the flue sampling point and insert the analyser probe and obtain the CO/CO ratio. - Page 16 Standard Inspection and Maintenance Operation (cont.) - An ESD wrist strap should be used when working on these Over Centre components. Catches - A T25 screwdriver will be required. - Remove the air duct by pulling the bottom of the duct forward to disengage it from the gas valve and then sliding the top of the duct left away from the fan.
-
Page 17: Spare Parts
Spare Parts - Titanium Heat 10.1 General 1. If, following the annual inspection or maintenance any part of the boiler is found to need replacing, use Baxi Genuine Parts only. 10.2 Spare Parts List Manufacturer’s Description Part No. Sensor Kit 7216301 Automatic Air Vent 7216300... -
Page 18: Notes
Notes... - Page 19 Notes (continued)
- Page 20 e&oe All descriptions and illustrations provided in this document have been carefully prepared but we reserve the right to make changes and improvements in our products which may affect the accuracy of the information contained in this leaflet. All goods are sold subject to our standard Conditions of Sale which are available on request.
Need help?
Do you have a question about the Titanium 12 Heat and is the answer not in the manual?
Questions and answers