Table of Contents
Advertisement
Quick Links
Advertisement
Table of Contents

Related Manuals for CDA SL400SS


Summary of Contents for CDA SL400SS
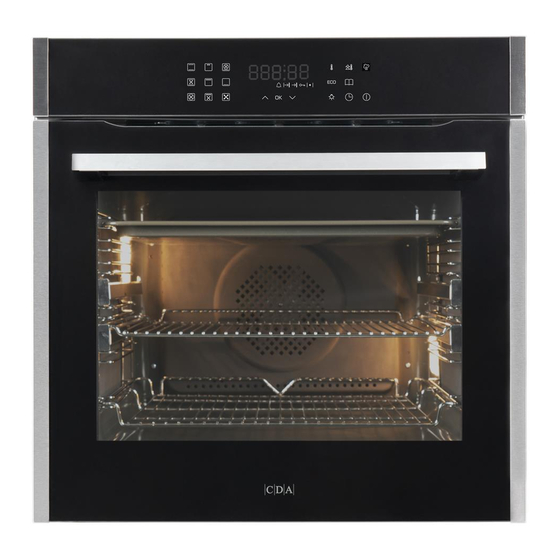
- Page 1 SL400SS Twelve function electric oven with timer Use and maintenance...
-
Page 2: Table Of Contents
Contents Important information Rapid preheating First use of the oven Oven preheat Standby mode Temperature Control panel Cooling fan and residual heat Function indicator symbols Lighting Setting the time Cleaning and maintenance Minute minder Changing the oven light bulbs Child lock Installation Semi automatic cooking Mains electrical connection... -
Page 3: Important Information
Any other use could be dangerous and may lead to premature failure of the appliance. The CDA Group Ltd. cannot be held responsible for injuries or losses caused by incorrect use or installation of this product. Please note that CDA reserves the right to invalidate the guarantee supplied with this product following incorrect installation or misuse of the appliance. - Page 4 Appliance information Please enter the details on the appliance rating plate below for reference, to assist CDA Customer Care in the event of a fault with your appliance and to register your appliance for guarantee purposes. Appliance Model Serial Number...
-
Page 5: First Use Of The Oven
First use of the oven In order to remove oil residues accumulated during the manufacturing process and dust accumulated during storage and transport, we recommend a preliminary cleaning before first use. This is to protect your health and provide optimum quality in cooking. IMPORTANT! Remove the protective foil from the telescopic runners before using the oven. -
Page 6: Control Panel
Control panel The control panel is equipped with an LED display and backlit touch sensors. Conventional oven The thermostat enables the user to set the temperature within a range of 30°C to 280°C. This setting is ideal for baking cakes, meat, fish, bread. - Page 7 Warming oven This function radiates heat from the bottom element, baking cakes from underneath until done. Fan oven This function uses the circular heating element with a temperature between 30°C and 280°C. The fan then circulates the hot air which helps to achieve uniform heat distribution. Fanned full grill This function radiates heat from the grill element and the top element but also uses the fan to circulate hot air.
-
Page 8: Function Indicator Symbols
Function indicator symbols Minute minder active Duration End time Child lock active Heating active Setting the time When the appliance is connected to power, the display will show the hour digits flashing, the minute digits will be illuminated. • to set the hours. Touch to confirm the setting, the hour digits will now be illuminated and the minutes will be flashing •... -
Page 9: Minute Minder
Child lock Child lock is intended to prevent changes to the oven settings and the oven being turned on. When the appliance is on simultaneously touch and hold for 3 seconds to activate the child lock. symbol will be illuminated. When the child lock is activaed in standby mode it prevents the oven from being turned on. -
Page 10: Semi Automatic Cooking
Semi automatic cooking This function allows for a cooking time to be set. When the set time elapses the oven will switch the set function off and an acoustic signal will sound to alert the user. The cooking time available ranges from between 1 minute and 10 hours. -
Page 11: Automatic Cooking
Automatic cooking This function allows for a duration and an end time to be set for cooking. For example, if you set the cooking duration to 1 hour, and the end time to 15:00, then the oven will activate the function at 14:00. To switch on automatic cooking •... -
Page 12: Using The Grill
Using the grill Important! When using any grill functions the oven door should be kept closed. When the grill is in use accessible parts can become hot and it is advisable to keep children away from the oven. When using the half grill, full grill or fanned grill functions the maximum temperature that can be set is 280 °C. -
Page 13: Operations
Operations Temperature Oven Elements [°C] Default Function Description Temperature [°C] Min. Heating functions Conventional Oven ✓ ✓ ✓ Fan assisted oven ✓ ✓ ✓ ✓ Fan oven ✓ ✓ ✓ Half grill ✓ ✓ Full grill ✓ ✓ ✓ Fanned full grill ✓... -
Page 14: Preset Programmes
Pre-set programmes This oven features a number of preset programmes which create the ideal cooking environment (time, temperature etc.) for certain dishes. These can be accessed by pressing the sensor and cycling through the programmes in the table below using the sensors. -
Page 15: Practical Tips
Practical tips The times given in the table below apply to a dish that is placed in to a cold oven. For a preheated oven the times should be reduced by 5 - 10 minutes. The figures given below are approximate and can be altered based on your own experience and cooking preferences. -
Page 16: Steam Cleaning Function
Steam clean function When the steam clean function is selected, the programme will start and there is no option to adjust the temperature. The function operates as a preset programme with the oven temperature at 80°C and a duration of 30 minutes. When the function is in progress the symbols will be illuminated. -
Page 17: Oven Preheat
Oven preheat When the symbol is illuminated, it indicates the oven is heating up towards the temperature set. The symbol will go out once the temperature is reached. To show the set temperature is being maintained The symbol will illuinate and go out periodically. Temperature At any time during a heating function, it is possible to find out what temperature the oven is currently operating at. -
Page 18: Cleaning And Maintenance
Cleaning and maintenance Keeping your oven clean and well maintained helps to prolong its fault-free lifespan. It is important that, before any cleaning or maintenance is performed, you switch off the oven at the mains supply. Do not start any cleaning or maintenance until the oven has been allowed to cool completely. - Page 19 Cleaning and maintenance Abrasive cleaning agents or scouring pads/cloths should not be used on the cavity surface. IMPORTANT: • Steam cleaners must not be used when cleaning this appliance • Once care and maintenance is complete, ensure that all parts are correctly replaced before using the oven Removing the appliance door In order to allow easier access into the oven cavity for cleaning, it is...
- Page 20 Cleaning and maintenance Replacing the appliance door • Hold the door to the appliance in the closed position and manoeuvre the hinges so that the part of the hinge, highlighted by the star in fig. 2, inserts into the hinge slot in the cavity frame •...
- Page 21 Cleaning and maintenance Important: Do not disassemble the door without it having been removed from the oven. Weight differences could cause the door to snap shut, causing damage to the oven and/or the user Removing the inner door glass With the door removed, the inner glass can also be taken out for cleaning purposes.
- Page 22 Cleaning and maintenance • The middle pane of glass can also be removed but it is important that this pane is reinserted facing the same way that it was when removed • There are a number of rubber guides attached to the inner pane and these must be returned to their original positions when reassembling the door.
- Page 23 Cleaning and maintenance This oven is equipped with telescopic runners allowing you to remove large or heavy items from within the oven cavity safely and easily. Removing the telescopic runners • Offer your index finger up to the lower clip and rest your thumb on the upper clip as shown in fig.
- Page 24 Cleaning and maintenance Important: Always remember to allow the oven to cool sufficiently, if it has been in use, before carrying out any maintenance. To remove the shelf supports • Take a firm hold of the shelf support in the middle. Place your thumb against the oven wall and lever the support out of the support holes...
-
Page 25: Changing The Oven Light Bulbs
Changing the oven light bulbs Important: Before any maintenance is started involving electrical parts, the appliance must be disconnected from the power supply. If the oven has been in use, let the oven cavity and the heating elements cool down before attempting any maintenance. Never use screwdrivers or other utensils to remove the light cover. -
Page 26: Installation
Installation Important! If installing this oven below a hob, ensure that the required air gap between the two appliances is observed. This gap is usually detailed in the hob’s manual. The installation of this appliance must be carried out by a suitably qualified person. - Page 27 Installation The walls of the kitchen units must be able to withstand temperatures of 75˚C above ambient (typically this is between 90˚C and 100˚C). When correctly installed ensure that there is a gap of 4mm minimum between the sides of the oven and adjacent furniture doors. How to install your oven You will need the housing area in fig.
-
Page 28: Mains Electrical Connection
Mains electrical connection Warning! This appliance must be earthed. This appliance must be connected by a competent person, using fixed wiring via a double pole switched fused spur outlet, protected by a 13A fuse. DOUBLE POLE SWITCHED FUSED SPUR OUTLET We recommend that the appliance is connected by a qualified FUSE... - Page 29 Mains electrical connection Please note: • The mains cable must only be replaced by a qualified electrician or service engineer and must be of equivalent or better rating (i.e. 3 x 1.5 mm ² , HO5VV-F) • This appliance is intended to be connected to the mains supply with a cable of cross sectional area 1.5 mm ²...
-
Page 30: Technical Assistance
Technical assistance In the event of your appliance requiring technical assistance and/or spare parts, please contact CDA Customer Care. For more information about the warranty of your product, including terms and conditions, please visit www.cda.eu/warranty CDA Customer Care Phone: 01949 862 012 Email: customer.care@cda.eu... -
Page 31: Error Codes
Typically an error code is the letter E followed by a number. In the event of an error code being displayed, note the code and the corresponding reason and contact CDA Customer Care. Instruction Manual | 31... -
Page 32: Specifications
Specifications Model SL400SS 12247.3eTeKDpScVQUtX Oven Dimensions 595 x 595 x 570 mm (HxWxD) Rated voltage 220-240 V ~ 50/60Hz Total rated input 2800 W This product meets the requirements of European standards EN 60335 -1; EN60335-2-6. The data on the energy labels of electric ovens is given according to standard EN60350-1 / IEC60350-1. -
Page 33: Product Fiche
Commision Delegated Regulation (EU) NO 65/2014 supplementing Directive of the European Parliament and of the Council 2010/30/EU with regard to energy labelling of household ovens and range hoods. Supplier name Model identifier SL400SS 12247.3eTeKDpScVQUtX Energy efficiency index (EEI cavity) 81.6 Energy efficiency class... -
Page 34: Product Information
Product information given in accordance with Commission Regulation (EU) No 66/2014 supplementing Directive of the European Parliament and Council Directive 2009/125/EC with regard to eco-design requirements for household ovens, hobs and range hoods. Model identifier SL400SS 12247.3eTeKDpScVQUtX Oven type (electricity or gas) Electric Appliance weight [kg] 49.1... - Page 35 Notes Instruction Manual | 35...
- Page 36 The CDA Group Harby Road Langar Nottinghamshire NG13 9HY Sales Department Phone: 01949 862010 Email: sales@cda.eu Customer Care Department Phone: 01949 862012 Email: customer.care@cda.eu ©2020 CDA Group Ltd IO-CBI-1787 v1 / 8509066...
Need help?
Do you have a question about the SL400SS and is the answer not in the manual?
Questions and answers