Table of Contents
Advertisement
Quick Links
R T U
R T U
R T U
S T A
S T A
S T A
N U A
N U A
N U A
M A
M A
M A
r o b
r o b
r o b
H y d
H y d
H y d
3 3 2
3 3 2
3 3 2
n c .
a , I
r i v e
e r i c
h D
A m
5 2 4
T e c
L N S
a s t
o 4
O h i
1 E
a t i ,
4 6 2
6 7 4
c i n n
8 . 5
7 3 3
. 5 2
C i n
5 1 3
8 . 5
3 2 0
. 5 2
n e #
8 . 8
5 1 3
. 5 2
P h o
x #
5 1 3
i n f a
m
a . c o
f a x #
M a
e r i c
v i c e
S A m
S e r
. L N
w w
: / / w
h t t p
P
P
P
L
L
L
x p r
a r E
a r E
a r E
A
U S
5
e s s
e s s
e s s
x p r
x p r
MADE IN USA
Advertisement
Table of Contents

Related Manuals for LNS Hydrobar Express 332


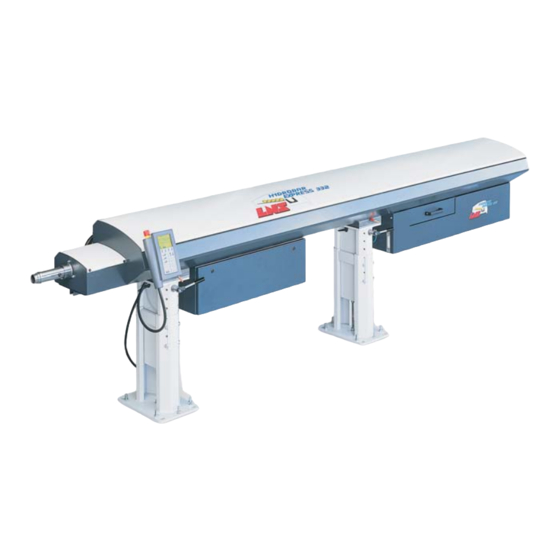
Summary of Contents for LNS Hydrobar Express 332
- Page 1 R T U R T U R T U S T A S T A S T A N U A N U A N U A e s s e s s e s s x p r x p r x p r a r E a r E...
-
Page 2: Table Of Contents
PUTTING THE BAR FEED SYSTEM INTO OPERATION SETTINGS RELATED TO INSTALLATION End of bar position Top-cut position SETTINGS RELATED TO BAR STOCK AND MACHINED PARTS Parameters settings Mechanical settings PUTTING THE LATHE INTO OPERATION Spindle reduction tubes Material Startup Reference Guide HYDROBAR EXPRESS 332... -
Page 3: Putting The Bar Feed System Into Operation
The length of the part changes The procedures to be followed are shown in this chapter. When a setting needs to be done on one of the devices, it is referenced in the chapter dealing with this subject. HYDROBAR EXPRESS 332... -
Page 4: Settings Related To Installation
The maximum remnant length (Max) is obtained when there is not enough material for machining an additional part (Lp - 1 mm). Maximum remnant length = Lp - 1mm + Min HYDROBAR EXPRESS 332... - Page 5 The display reads the current end of bar position Press the key [FWD] and advance the pusher to the desired position (see previous page). To validate the new end of bar position, keep [ENTER] pressed until the icon disappears. HYDROBAR EXPRESS 332...
- Page 6 START UP MANUAL 6. To exit the set mode, press the keys [MENU] or [STOP]. HYDROBAR EXPRESS 332...
-
Page 7: Top-Cut Position
3. Press twice the key attributed to the icon [PAGE DOWN]. The display reads : PARAMETERS RELATED TO POSITIONING 4. Press the key attributed to the icon [ENTER]. The display reads : END OF BAR POSITION **** MM HYDROBAR EXPRESS 332... - Page 8 Press the key [FWD] and advance the bar stock to the desired position (see previous page). To validate the new top cut position, keep [ENTER] pressed until the icon disappears. 7. To exit the set mode, press the keys [MENU] or [STOP]. HYDROBAR EXPRESS 332...
-
Page 9: Settings Related To Bar Stock And Machined Parts
On the keypad, enter [390], which represents the sum of the bar length and the thickness of the cutoff tool. Press the [ENTER] key twice to store the data. Press the [ESC] key to exit the set-up functions. HYDROBAR EXPRESS 332... - Page 10 On the keypad, enter [170], which represents the sum of the bar length and the thickness of the cutoff tool. Press the [ENTER] key twice to store the data. Press the [ESC] key to exit the set-up functions. HYDROBAR EXPRESS 332...
- Page 11 On the keypad, enter [460], which represents the sum of the bar length and the thickness of the cutoff tool. Press the [ENTER] key twice to store the data. Press the [ESC] key to exit the set-up functions. HYDROBAR EXPRESS 332...
-
Page 12: Mechanical Settings
The inclination of the surface stays the same, independently of the diameter, the profile, or the material of the bars to be loaded. Procedure : 1. Loosen the locking handles (F) and raise the upper limiters (A) HYDROBAR EXPRESS 332... - Page 13 Lower the upper limiters (A) to obtain a clearance of around 1-mm with the bars positioned on the inclined surface. Tighten the locking handles (F). Note : For bars larger than 12 mm in diameter, the upper limiter is superfluous. HYDROBAR EXPRESS 332...
- Page 14 Install the support unit (and its pusher) corresponding to the installed guiding elements.. Ensure that the lock pin is positioned correctly in the flag. Tighten the fastening screws (H). Put the replacement pusher support unit on the brackets of the bar magazine. HYDROBAR EXPRESS 332...
- Page 15 7 / Pushers 16 - 36 mm point 3.3. On the 16 to 36 mm diameter pushers, the elements are assembled with pins (A). To replace them, extract (1) the pins (A), then take them apart (2). HYDROBAR EXPRESS 332...
- Page 16 Lift the jaws (C) out. Drop the new jaws in and secure with the screws (B). Press the [MENU] or [STOP] keys to exit the set-up functions. Designation Article No Description 028.29.024 Clamping jaws with round profile HYDROBAR EXPRESS 332...
-
Page 17: Putting The Lathe Into Operation
(diameter of the bar + 1 mm), but should always be larger than that of the diameter of the feeding pusher. For inserting and removing the spindle reductions, move the bar feed system using the retraction device (Chapter 7/ Point 8). Spindle reduction tubes are available from LNS, upon request. HYDROBAR EXPRESS 332... -
Page 18: Material
It is recommended to install a bushing, inside the clamping device, with the same inside profile (+ 0.2 mm) as the bar. The rear of this collet and the front of the bars should be flat. During the loading cycle, a slight rotation of the spindle (about 30 RPM) is desirable. HYDROBAR EXPRESS 332... -
Page 19: Startup Reference Guide
PSI) reach past cut-off Oil level in hydraulic tank full Press STOP on bar feeder Remnant tray empty Reset CNC program Covers and safety switches installed Press F1 (START) on the bar feeder and functional HYDROBAR EXPRESS 332...
Need help?
Do you have a question about the Hydrobar Express 332 and is the answer not in the manual?
Questions and answers