
Related Manuals for GE Definium AMX 700


Summary of Contents for GE Definium AMX 700
- Page 1 Definium AMX 700 X-Ray System Operator Manual 5161515-1EN Rev. 6 (10 February 2008) © 2008 General Electric Company. All rights reserved.
-
Page 2: Table Of Contents
About the Definium AMX 700 ........ - Page 3 Maintenance Schedule ..............7-2 Chapter 8: Messages on Display Appendix A: GE Portable DR Detector Operating Instructions A1: Detector Overview Detector Functions .
- Page 4 Delete Suspended Procedures ............A3-14 TOC-3 Definium AMX 700 X-Ray System 5161515-1EN Rev.
- Page 5 Save Changes to Images..............A5-27 TOC-4 Definium AMX 700 X-Ray System 5161515-1EN Rev.
- Page 6 Remove Pre-set Annotation ............A7-27 TOC-5 Definium AMX 700 X-Ray System 5161515-1EN Rev.
- Page 7 Detector Cleaning ..............A8-13 TOC-6 Definium AMX 700 X-Ray System 5161515-1EN Rev.
- Page 8 Use LDAP Console............... . B-16 TOC-7 Definium AMX 700 X-Ray System 5161515-1EN Rev.
- Page 9 Department of Health, USA). Underwriters' Laboratories, Inc. (UL), an independent testing laboratory. Canadian Standards Association (CSA). International Electrotechnical Commission (IEC), international standards organization, when applicable. Definium AMX 700 X-Ray System 5161515-1EN Rev. 6 (10 February 2008) Operator Manual © 2008 General Electric Company. All rights reserved.
- Page 10 GE Healthcare 3000 N Grandview Ave Waukesha WI 53188-1696 US Phone number: United States: 262-544-3011 International: +1-262-544-3011 Web address: www.gehealthcare.com Definium AMX 700 X-Ray System 5161515-1EN Rev. 6 (10 February 2008) Operator Manual © 2008 General Electric Company. All rights reserved.
- Page 11 Corrected description of Accession number in table A3-2. A3-9 Corrected first bullet below step 3. A3-20 Corrected description of Accession number in table A3-4. Definium AMX 700 X-Ray System 5161515-1EN Rev. 6 (10 February 2008) Operator Manual © 2008 General Electric Company. All rights reserved.
- Page 12 Deleted redundant caution. Changed “Slow Charging” to “Standby Mode” and updated description of function. Changed “Slow Charging” to “Standby Mode” and updated procedure. Definium AMX 700 X-Ray System 5161515-1EN Rev. 6 (10 February 2008) Operator Manual © 2008 General Electric Company. All rights reserved.
- Page 13 Corrected information in “Nameplates and Markings” section. Corrected information in “Detector Alignment” section. A1-5 Updated information in table A1-1. A1-6 Added section on “Electro-magnetic Interference”. Definium AMX 700 X-Ray System 5161515-1EN Rev. 6 (10 February 2008) Operator Manual © 2008 General Electric Company. All rights reserved.
- Page 14 Added additional guidance for correcting high and low DEI. B-13 Added clarification about inactivity time out. Miscellaneous grammatical and typographical corrections. Definium AMX 700 X-Ray System 5161515-1EN Rev. 6 (10 February 2008) Operator Manual © 2008 General Electric Company. All rights reserved.
-
Page 15: Chapter 1: About This Guide
The instructions in this operation manual are for use with the Definium AMX 700, model numbers 5151481-3 and 5151481-4 Topics covered include: •... -
Page 16: Graphic Conventions And Legends
Text you enter into a text box. Select Preferences > The path of selecting option(s) in a tree structure. Worklist. Definium AMX 700 X-Ray System 5161515-1EN Rev. 6 (10 February 2008) Operator Manual © 2008 General Electric Company. All rights reserved. -
Page 17: Safety Notices
NOTE: A Note provides additional information that is helpful to you. It may emphasize certain information regarding special tools or techniques, items to check before proceeding, or factors to consider about a concept or task. Definium AMX 700 X-Ray System 5161515-1EN Rev. 6 (10 February 2008) Operator Manual ©... -
Page 18: Chapter 2: Safety And Regulatory
X-ray equipment if not properly used may cause injury. Accordingly, the instructions herein contained should be thoroughly read and understood by everyone who will use the equipment before you attempt to place this equipment in operation. GE Healthcare, will be glad to assist and cooperate in placing this equipment in use. -
Page 19: Radiation Protection
Chapter 2: Safety and Regulatory Radiation Protection This device emits x-ray radiation for medical purposes. Each Definium AMX 700 has been tested for leakage radiation and the test results are recorded in the final test protocol. As radiation is harmful to human body, the necessary safety precautions must be observed and the radiation protection regulations of individual countries must be complied with. -
Page 20: Certified Electrical Contractor Statement
In performing all electrical work on these products, GE will use its own specially trained field engineers. All of GE’s electrical work on these products will comply with the requirements of the applicable electrical codes. -
Page 21: Disposal Of Waste
Safety First This equipment is to be used by authorized medical personnel only. Your Definium AMX 700 is engineered for years of reliable service. To promote optimum safety, be sure to read this manual carefully, before operating the unit. WARNING: This X-Ray unit may be dangerous to patient and operator, unless safe exposure factors, operating instructions and maintenance schedules are observed. -
Page 22: Good Operating Practices
CAUTION: If the GE Portable DR Detector is used in a fixed installation, it is the User’s responsibility to provide the means for audio and visual communication between the Operator and the patient. -
Page 23: Iec 60601-1 Classifications
To avoid damage do not place a load in excess of 160kg (350lb) on the detector. In accordance with UL 60601-1, the Definium AMX 700, is classified as Type B Equipment, Class I Equipment, Internally Powered Equipment, Ordinary Equipment and continuous operation. - Page 24 Indicates positioning lock or brake release. Indicates terminal and receptacle location for hand-held radiographic and light field control. Definium AMX 700 X-Ray System 5161515-1EN Rev. 6 (10 February 2008) Operator Manual © 2008 General Electric Company. All rights reserved.
- Page 25 Control for indicating radiation field by using light. Collimator blades closed. The controlled blades are shown in thicker lines. Collimator blades open. The controlled blades are shown in thicker lines. Definium AMX 700 X-Ray System 5161515-1EN Rev. 6 (10 February 2008) Operator Manual ©...
-
Page 26: Chapter 3: Hardware Overview
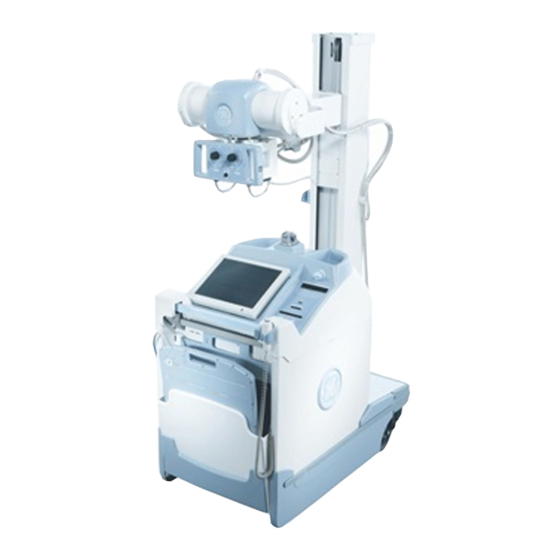
(p. 3-9) Unit Features Since the Definium AMX 700 is battery operated, there’s no need to plug in your mobile x-ray unit before taking exposures. Battery operation makes the Definium AMX 700 easily adapted to operating, intensive care, and emergency room applications. - Page 27 Chapter 3: Hardware Overview Figure 3-1 Definium AMX 700 back and front Back Front Table 3-1 Definium AMX 700 features Item Description Tube head. Refer to Chapter 4: Moving and Positioning-Position the Tube (p. 4-5) for more information. Collimator controls. Refer to Chapter 4: Moving and Positioning-Adjust the Collimator (p.
- Page 28 USB ports (between the drive handle and the detector). Allow you to connect USB accessory devices, such as an external CD drive. There are also two USB ports on the front of the unit. Refer to item 18. GE Portable DR Detector and grid. Refer to Appendix A: GE Portable DR Detector Operating Instructions for more information.
- Page 29 Detector tether. Connects the detector to the unit. Refer to Appendix A: GE Portable DR Detector Operating Instructions for more information. Definium AMX 700 X-Ray System 5161515-1EN Rev. 6 (10 February 2008) Operator Manual © 2008 General Electric Company. All rights reserved.
-
Page 30: Control And Display Panel
Display and control panel. Displays the status of the battery charge. When in acquisition mode, displays the currently selected kVp and mAs and any system status messages or errors. Definium AMX 700 X-Ray System 5161515-1EN Rev. 6 (10 February 2008) Operator Manual ©... -
Page 31: Hand Switch
Some units may have a wireless TechSwitch to be used instead of the hand switch shown in Figure 3-3. Refer to TechSwitch (p. 3-7) for information. Definium AMX 700 X-Ray System 5161515-1EN Rev. 6 (10 February 2008) Operator Manual © 2008 General Electric Company. All rights reserved. -
Page 32: Techswitch
This produces X-rays that are recorded. Release the Prep/ Expose button after the exposure is completed. TechSwitch The TechSwitch option may be purchased for use with the Definium AMX 700. The remote TechSwitch can be used instead of the standard wired hand switch. Definium AMX 700 X-Ray System 5161515-1EN Rev. - Page 33 NOTE: The transmitter must be put back in the cradle within three (3) minutes after use. If not replaced, the Remote Finder feature will activate, causing the transmitter to continuously sound a series of beeps. Definium AMX 700 X-Ray System 5161515-1EN Rev. 6 (10 February 2008) Operator Manual ©...
-
Page 34: Test The Battery
• Provides easy to read real time information on patient dose. • Allows for simple manual transcription of this information into patient records. Definium AMX 700 X-Ray System 5161515-1EN Rev. 6 (10 February 2008) Operator Manual © 2008 General Electric Company. All rights reserved. -
Page 35: External Cd Drive
The CD drive connects to the unit through a USB port. Plug in the CD drive power supply and insert the connection cable into any USB port. NOTE: The Definium AMX 700 does not have a dedicated space or storage area for the CD drive. It is recommended that the CD drive be disconnected and stored before moving the unit. -
Page 36: Chapter 4: Moving And Positioning
(XX represents the code) and contact your service representative. Drive the Unit A compact design and dual motor assembly makes driving and maneuvering the Definium AMX 700 an easy process. Definium AMX 700 X-Ray System 5161515-1EN Rev. - Page 37 Then, simply grip the drive handle (Figure 4-2) and steer the unit to your destination. Figure 4-2 Drive handle WARNING: Movement of the Definium AMX 700 x-ray unit could cause the horizontal arm to slide and strike an operator or patient if not latched properly. Latch telescoping arm properly before moving the unit.
- Page 38 (As with any mobile equipment, however, when driving the unit be sure to exercise reasonable care.) With the telescoping arm extended for a patient exam, the Definium AMX 700 pivots on the spot, rotating and maneuvering easily for exact positioning. Again, grip the drive handle and turn the unit to the desired position.
- Page 39 When climbing inclines or moving over carpeting or other rough surfaces the drive motors will automatically adjust to the floor surface. When descending inclines or pushing the Definium AMX 700 to make it go faster, it may stop and display the message RELEASE HANDLE. If this happens, release the handle to clear the message and then continue with normal operation.
-
Page 40: Position The Tube
NOTE: The unit may be driven while the system software is booting up. Position the Tube This section describes how to setup and position mechanical components of the Definium AMX 700. Steps for mechanical positioning are organized in the following way. -
Page 41: Adjust Column And Telescoping Arm
Figure 4-7 Lock release mechanism Adjust Column and Telescoping Arm In the following steps you can free the Definium AMX 700 components for positioning in one of two ways: by gripping the collimator handle(s) to keep the lock system released or, whenever necessary, overriding the lock system with slight force. -
Page 42: Rotate The Tube
6. 0° Detent Adjust the Collimator The Definium AMX 700 manual collimator limits patient radiation exposure to a desired area at a given distance from the x-ray tube focal spot. 1. Press the field light button (on either the collimator face or hand switch) to activate the high-intensity field lamp. - Page 43 Manual lock method: Pull out the knob, position the collimator to the desired angle (other than 90° detent), and turn the knob clockwise to secure. (Turn the knob counterclockwise to unlock the collimator and reposition.) Figure 4-11 Collimator rotation knob Definium AMX 700 X-Ray System 5161515-1EN Rev. 6 (10 February 2008) Operator Manual...
-
Page 44: Chapter 5: Taking Exposures
Chapter 5: Taking Exposures Chapter 5: Taking Exposures This chapter describes the procedures for working with the Definium AMX 700 unit hardware when acquiring images. Refer to Appendix A: GE Portable DR Detector Operating Instructions-Chapter A4: Image Acquisition for more information about the system software used to acquire, view, and manage images. -
Page 45: Technique Adjustment
11. Park tube and detector. Technique Adjustment The software provided with the GE Portable DR Detector contains the recommended default technique settings for both digital and cassette exams. Technique adjustment should always be made on the Acquisition screen. Refer to... - Page 46 – 0.4, 0.5, 0.64, 0.8, 1, 1.25, 1.6, 2, 2.5, 3.2, 4, 5, 6.40, 8, 10, 12.5, 16, 20, 25, 32, 40, 50, 64, 80, 100, 125, 160, 200, 250 and 320. Refer to Table 5-1 for maximum technique ratings. Definium AMX 700 X-Ray System 5161515-1EN Rev.
- Page 47 25% heated tube assembly (75% heat units remaining), while the actual maximum allowable kVp and mAs ratings are based upon a cold tube assembly. The Definium AMX 700 generator contains a proprietary heat loading algorithm which protects the tube assembly for all heat loading conditions.
-
Page 48: Chapter 6: Charging The Batteries
Main Power Circuit Breaker (p. 6-6) Overview Battery charging is as easy as driving the Definium AMX 700 to a correctly rated wall outlet and plugging the unit in. Ratings are as follows: Table 6-1 Wall socket rating by model number... -
Page 49: Capacity Gauge Features
When the Definium AMX 700 capacity gauge drops to 0%, inhibiting x-ray exposures, it is possible to access some emergency capacity to finish an exam by turning the Definium AMX 700 off and then back on. After it has completed its power-up tests, the Definium AMX 700 will provide enough capacity for approximately 45 seconds of usage before x-ray exposures are again inhibited. -
Page 50: Recharge Recommended
Recharge Recommended When battery charge dips below approximately 10%, recharge is recommended. As the Definium AMX 700 is used in its various modes of operation, the number of segments lit will slowly decrease. It’s important to note that you do not have to raise your kVp and mAs value to compensate for low battery capacity. -
Page 51: Application Tip
When recharging the batteries, always locate the unit in a well ventilated area. 1. Drive the Definium AMX 700 to a designated battery charging station or to a correctly rated wall outlet. Position the unit to within 10 feet of the outlet. - Page 52 This same protection scheme can cause the main circuit breaker to trip if the Definium AMX 700 is turned on while still plugged into the AC wall outlet after the “Charge Complete” message is displayed (there may be a delay of 30 - 180 seconds after the unit is turned on before the breaker will trip).
-
Page 53: Main Power Circuit Breaker
If the unit does not turn off when the key switch is turned off, isolate the unit to prevent unauthorized operation, use the circuit breaker to remove power from the unit, and have the unit checked by a qualified service representative. Definium AMX 700 X-Ray System 5161515-1EN Rev. 6 (10 February 2008) Operator Manual ©... -
Page 54: Chapter 7: Maintenance And Service
(p. 7-2) Cleaning the Unit We recommend that you clean the Definium AMX 700 regularly with a soft cloth and a mild, non-abrasive cleaner. Apply the cleaner to the cloth, not directly to the unit, to safe-guard against damage to the circuitry. -
Page 55: Qualified Service Available
Chapter 7: Maintenance and Service Qualified Service Available GE Healthcare and its associates maintain a worldwide organization of service personnel specially trained on medical x-ray equipment. Consult your GE representative to find out more about all the available service programs. Maintenance Schedule... - Page 56 Auxiliary items (battery Every year (Refer to GE Portable DR Detector PM Schedule.) charger, HV cables, etc.) Detector calibration Every year (Refer to GE Portable DR Detector PM Schedule.) Visual inspection of detector, Every year (Refer to GE Portable DR Detector PM Schedule.)
- Page 57 Chapter 7: Maintenance and Service Table 7-2 Sample chart for technique accuracy tests Technique Selected Primary Volts Time (Sec.) Definium AMX 700 X-Ray System 5161515-1EN Rev. 6 (10 February 2008) Operator Manual © 2008 General Electric Company. All rights reserved.
-
Page 58: Chapter 8: Messages On Display
Two kinds of messages can appear on the message display on the control cover: status messages and error messages. Status messages simply inform you of the operating condition of the Definium AMX 700, and look something like this. Figure 8-1 Ready message Another type of message, called an error message, may appear should a problem occur with the equipment. - Page 59 MIN Displayed on the alphanumeric display any time an attempt is made to decrease the mAs below 0.40. Definium AMX 700 X-Ray System 5161515-1EN Rev. 6 (10 February 2008) Operator Manual...
- Page 60 The Definium AMX 700 was moving faster than the drive motors allow. Release the Drive Handle to clear the message, and then continue with normal operation. This may happen if you push the Definium AMX 700 too hard when driving down a ramp.
- Page 61 NO DIG RESPONSE Digital Radiography components are not responding. TURN OFF SWITCH System PC has shut down. Turn Off the unit using the Key Switch Definium AMX 700 X-Ray System 5161515-1EN Rev. 6 (10 February 2008) Operator Manual © 2008 General Electric Company. All rights reserved.
-
Page 62: Appendix A: Ge Portable Dr Detector Operating Instructions
Appendix A: GE Portable DR Detector Operating Instructions Appendix A: GE Portable DR Detector Operating Instructions This appendix details all the software that is provided with the GE Portable DR Detector used with the Definium AMX 700. Topics covered in this appendix include: •... - Page 63 (p. A1-10) • Specifications (p. A1-11) – Detector Size and Weight (p. A1-11) – Environmental Constraints (p. A1-11) A1-1 Definium AMX 700 X-Ray System 5161515-1EN Rev. 6 (10 February 2008) Operator Manual © 2008 General Electric Company. All rights reserved.
-
Page 64: Detector Functions
Figure A1-1 Detector front 1. LED indicator lights 2. Handle 3. Tether 4. Detection area (inside white marker lines) A1-2 Definium AMX 700 X-Ray System 5161515-1EN Rev. 6 (10 February 2008) Operator Manual © 2008 General Electric Company. All rights reserved. -
Page 65: Panel
Detector surfaces have been treated with a finish to allow a smooth and easily cleanable surface. Care shall be taken to protect the surface from scratches. Nameplates and Markings A label on the back of the detector contains the GE part number. A1-3 Definium AMX 700 X-Ray System 5161515-1EN Rev. -
Page 66: Detector Safety Labels
Chapter A1: Detector Overview Detector Safety Labels The back of the GE Portable DR Detector displays the following symbols and information: Figure A1-3 Labels on back of detector 1. Attention, consult CAUTION: Do Not Drop. accompanying CAUTION: Device weighs 5.89kg documents. -
Page 67: Use
Diagnostic Running Test Running Image Transfer Active data transfer Lost Communication No communication with the system A1-5 Definium AMX 700 X-Ray System 5161515-1EN Rev. 6 (10 February 2008) Operator Manual © 2008 General Electric Company. All rights reserved. -
Page 68: Electro-Magnetic Interference
EMG equipment • Infusion pumps • RF ablators • Powered surgical equipment • Heaters • Air conditioners • Refrigerators A1-6 Definium AMX 700 X-Ray System 5161515-1EN Rev. 6 (10 February 2008) Operator Manual © 2008 General Electric Company. All rights reserved. -
Page 69: Detector Grid
Chapter A1: Detector Overview Detector Grid The GE Portable DR Detector grid is integrated with a holder that fits the detector exactly. The grid fits over the detector handle and has raised edges to fit around the detector. Once together, you may handle the grid and detector as one unit. -
Page 70: Handling And Cleaning
• Do not drop the detector at any time. • Do not prop the device on an edge, against wall or bed. Keep detector in cradle, bucky, or other GE- supplied container. • Do not place other objects or patients on the detector if it is not on a flat surface, as shown in Figure A1-5. -
Page 71: Tether Handling
Clean the grid regularly (between each patient) with an approved chemical. Refer to Cleaning (p. A1- 10) for more information. A1-9 Definium AMX 700 X-Ray System 5161515-1EN Rev. 6 (10 February 2008) Operator Manual © 2008 General Electric Company. All rights reserved. -
Page 72: Cleaning
Do not leave disposable wipes or cleaning cloths on the detector or grid for more than 60 seconds. • Let the detector dry at least 60 seconds between cleanings. The following chemicals and products have been tested and approved by GE for cleaning the GE Portable DR Detector, grid, and tether. •... -
Page 73: Specifications
A1-11 Definium AMX 700 X-Ray System 5161515-1EN Rev. 6 (10 February 2008) Operator Manual © 2008 General Electric Company. All rights reserved. - Page 74 Cargo hold during shipment shall be within the atmospheric pressure range of 700-1100hPa A1-12 Definium AMX 700 X-Ray System 5161515-1EN Rev. 6 (10 February 2008) Operator Manual © 2008 General Electric Company. All rights reserved.
- Page 75 (p. A2-10) – Expose Hold (p. A2-10) – System Status Area (p. A2-10) – Message Log (p. A2-11) A2-1 Definium AMX 700 X-Ray System 5161515-1EN Rev. 6 (10 February 2008) Operator Manual © 2008 General Electric Company. All rights reserved.
-
Page 76: Virtual Keyboard
Chapter A2: General Information Virtual Keyboard When used in a mobile system, the GE Portable DR Detector software works with a touch screen instead of a keyboard and mouse. The GE Portable DR Detector provides a “virtual keyboard” on screen that allows you to enter text and numbers. -
Page 77: International Language Configuration
2. Press the accent key. 3. Press the letter to which you want to add the accent. Figure A2-2 Virtual keyboard for French A2-3 Definium AMX 700 X-Ray System 5161515-1EN Rev. 6 (10 February 2008) Operator Manual © 2008 General Electric Company. All rights reserved. -
Page 78: Software Start Up And Shutdown
Chapter A2: General Information Software Start Up and Shutdown This section describes the procedure for starting up and shutting down the GE Portable DR Detector software only. Start Up Refer to Chapter 7: Maintenance and Service-Periodic Maintenance by Service Personnel (p. -
Page 79: Login And Log Off
1. Start up the system or log off the previous user. The Login screen appears. 2. Enter your Login Name, if necessary. 3. Type in your Password. A2-5 Definium AMX 700 X-Ray System 5161515-1EN Rev. 6 (10 February 2008) Operator Manual © 2008 General Electric Company. All rights reserved. -
Page 80: Invalid Password Message
Depending on the system’s configuration, you may be prompted to enter your name. Enter your name and press [LOGIN]. 2. The Worklist screen appears. A2-6 Definium AMX 700 X-Ray System 5161515-1EN Rev. 6 (10 February 2008) Operator Manual © 2008 General Electric Company. All rights reserved. -
Page 81: Inactivity Timeout
This allows you to update the Worklist or print and send images while the unit is moving or if you are in a location that does not have a cable network port. Please contact your GE Service representative to activate this option. -
Page 82: Software Reset
2. On the Worklist or Image Management screen, press [UTILITIES]. The System – System screen (Figure A2-7) appears. Figure A2-7 System – System screen with Software Reset button A2-8 Definium AMX 700 X-Ray System 5161515-1EN Rev. 6 (10 February 2008) Operator Manual... -
Page 83: System Reset
Every attempt must be made to assure markers are not located in regions of direct radiation, but are located in regions where some patient attenuation of radiation is present without obstructing the anatomical information of interest. A2-9 Definium AMX 700 X-Ray System 5161515-1EN Rev. 6 (10 February 2008) Operator Manual... -
Page 84: System Status And Messages
The message tells you to Continue or to Continue/Call Service (continue and call service). NOTE: To clear the system status area, open the Message Log (described below) and close it again. A2-10 Definium AMX 700 X-Ray System 5161515-1EN Rev. 6 (10 February 2008) Operator Manual... -
Page 85: Message Log
This screen allows operators and service personnel to display, review, and analyze system status messages. Figure A2-11 Message Log A2-11 Definium AMX 700 X-Ray System 5161515-1EN Rev. 6 (10 February 2008) Operator Manual... -
Page 86: Overview
Worklist can automatically update from the central HIS/RIS database. Other units or workstations can be configured to access these procedures. If the GE Portable DR Detector is used in a mobile unit, the Worklist can only update with new information from the HIS or RIS if the unit is connected to the facility network. - Page 87 The individual buttons are described below. [WORKLIST] Opens the Worklist screen where patient procedures may be added to the schedule and exams started. A3-2 Definium AMX 700 X-Ray System 5161515-1EN Rev. 6 (10 February 2008) Operator Manual © 2008 General Electric Company. All rights reserved.
- Page 88 Refer to Filter List (p. A3-8) for information on how to filter the Worklist. A3-3 Definium AMX 700 X-Ray System 5161515-1EN Rev. 6 (10 February 2008) Operator Manual © 2008 General Electric Company. All rights reserved.
- Page 89 If the selected procedure has a Status of “Suspended”, the button name changes to [RESUME EXAM]. A3-4 Definium AMX 700 X-Ray System 5161515-1EN Rev. 6 (10 February 2008) Operator Manual © 2008 General Electric Company. All rights reserved.
- Page 90 Chapter A4: Image Acquisition-Conduct a Cassette Exam (p. A4-10) for more information. network connection status Appears when the Definium AMX 700 is connected to the hospital network. wireless network connection If the wireless network connection is enabled, displays the status status of the connection and signal strength.
-
Page 91: Patient List Columns
Completed, Suspended, and Discontinued exams. Location For mobile units, the location of the patient within the facility. A3-6 Definium AMX 700 X-Ray System 5161515-1EN Rev. 6 (10 February 2008) Operator Manual © 2008 General Electric Company. All rights reserved. -
Page 92: Manage List / Find Procedures
For example, if you want to see all the procedures that have a status of “Suspended”, press the “Status” column heading. An arrow appears in the column heading to indicate which column is currently being sorted. A3-7 Definium AMX 700 X-Ray System 5161515-1EN Rev. 6 (10 February 2008) Operator Manual... -
Page 93: Filter List
Figure A3-4 Worklist filter screen The filter screen has several options for accepting or rejecting the information from the Worklist. Table A3-3 describes the filter screen functions. A3-8 Definium AMX 700 X-Ray System 5161515-1EN Rev. 6 (10 February 2008) Operator Manual... - Page 94 The Filter Screen appears 2. Select the Show list for option. 3. Select the Include options. 4. Select the Date option. A3-9 Definium AMX 700 X-Ray System 5161515-1EN Rev. 6 (10 February 2008) Operator Manual © 2008 General Electric Company. All rights reserved.
- Page 95 If no procedures met all the criteria, the Worklist will be blank. 8. Press [REFRESH] to remove the filter. A3-10 Definium AMX 700 X-Ray System 5161515-1EN Rev. 6 (10 February 2008) Operator Manual © 2008 General Electric Company. All rights reserved.
-
Page 96: Refresh
The message remains until the refresh process is complete. NOTE: You will not be able to make selections or access Worklist functions while the Worklist is refreshing. Figure A3-7 Auto refresh message A3-11 Definium AMX 700 X-Ray System 5161515-1EN Rev. 6 (10 February 2008) Operator Manual... -
Page 97: Select Procedures
To switch the button between “Delete” and “Delete All”: 1. Press on the small arrow on the right side of the button. A list appears with the available actions. A3-12 Definium AMX 700 X-Ray System 5161515-1EN Rev. 6 (10 February 2008) Operator Manual... -
Page 98: Delete A Single Procedure
2. Press [OK] to delete the procedures. The selected procedures are deleted and the Worklist appears. [CANCEL] closes the message, retains the procedures, and takes you back to the Worklist. A3-13 Definium AMX 700 X-Ray System 5161515-1EN Rev. 6 (10 February 2008) Operator Manual... -
Page 99: Delete Suspended Procedures
Discontinued and the information is sent to PACS. [CANCEL] closes the message and returns you to the Worklist without deleting procedures. The procedures are removed from the Worklist. A3-14 Definium AMX 700 X-Ray System 5161515-1EN Rev. 6 (10 February 2008) Operator Manual... -
Page 100: Add / Edit Patient Information
NOTE: The Patient Information button is unavailable when multiple exams are selected at the same time. Figure A3-9 Add Patient or Patient Information A3-15 Definium AMX 700 X-Ray System 5161515-1EN Rev. 6 (10 February 2008) Operator Manual... - Page 101 Refer to Chapter A7: Set Preferences-Preset Names (p. A7-15) for information on adding names to the drop-down list. A3-16 Definium AMX 700 X-Ray System 5161515-1EN Rev. 6 (10 February 2008) Operator Manual © 2008 General Electric Company. All rights reserved.
- Page 102 Worklist. NOTE: This button does not appear if the Patient Information screen is opened from the Image Viewer or Image Management screens. A3-17 Definium AMX 700 X-Ray System 5161515-1EN Rev. 6 (10 February 2008) Operator Manual...
-
Page 103: Add Patient
Press [CANCEL] to close the Add Patient screen without saving changes. NOTE: For a new exam on a existing patient, the patient information cannot be edited. A3-18 Definium AMX 700 X-Ray System 5161515-1EN Rev. 6 (10 February 2008) Operator Manual... -
Page 104: Edit Patient Information
3. Edit the information as necessary. 4. Press [SAVE] to record the changes and return to the Worklist. Pressing [CANCEL] closes the Patient Information screen without saving changes. A3-19 Definium AMX 700 X-Ray System 5161515-1EN Rev. 6 (10 February 2008) Operator Manual... -
Page 105: Overview
Chapter A4: Image Acquisition Chapter A4: Image Acquisition This section details the process of acquiring images using the GE Portable DR Detector or free cassette. Topics covered include: • Overview (p. A4-1) • Re-start Completed or Discontinued Exams (p. A4-6) •... - Page 106 NOTE: When acquiring multiple images or if you need to retake an image, you must switch back to the Acquisition screen in order to record the exposure. A4-2 Definium AMX 700 X-Ray System 5161515-1EN Rev. 6 (10 February 2008) Operator Manual...
- Page 107 Ends the exam when the procedure has been opened but the exam cannot continue. Refer to End Exam (p. A4-13) for more information. A4-3 Definium AMX 700 X-Ray System 5161515-1EN Rev. 6 (10 February 2008) Operator Manual © 2008 General Electric Company. All rights reserved.
- Page 108 The buttons on the left of the field adjust the kV by 5 units. The kVp selection range is 40-150, in1 kVp increments. A4-4 Definium AMX 700 X-Ray System 5161515-1EN Rev. 6 (10 February 2008) Operator Manual © 2008 General Electric Company. All rights reserved.
- Page 109 Recommended Position: Displays the recommended patient position relative to the detector. network connection status Appears when the Definium AMX 700 is connected to the hospital network. wireless network connection If the wireless network connection is enabled, displays the status status of the connection and signal strength.
-
Page 110: Re-Start Completed Or Discontinued Exams
4. Press the button of the action to perform. [APPEND EXAM] creates a new series within the existing exam and opens the Select Protocols screen. A4-6 Definium AMX 700 X-Ray System 5161515-1EN Rev. 6 (10 February 2008) Operator Manual © 2008 General Electric Company. All rights reserved. -
Page 111: Resume Suspended Exams
Refer to Chapter A7: Set Preferences-Protocols (p. A7-39) for information on adding protocols to the protocol database. A4-7 Definium AMX 700 X-Ray System 5161515-1EN Rev. 6 (10 February 2008) Operator Manual © 2008 General Electric Company. All rights reserved. - Page 112 The category and exam name appear in the Selected Protocols list. 4. Press the exam again to de-select it. The category and exam name are removed from the Selected Protocols list. A4-8 Definium AMX 700 X-Ray System 5161515-1EN Rev. 6 (10 February 2008) Operator Manual...
-
Page 113: Conduct A Digital Exam
This section describes the adjustments required when conducting a digital exam. Follow this process to conduct an exam using the GE Portable DR Detector. NOTE: If you need to interrupt the exam and resume it at a later time, press the [SUSPEND] button. You will be returned to the Worklist. -
Page 114: Conduct A Cassette Exam
6. Make technique adjustments as necessary: kV and mAs. NOTE: Press [RESET TECHNIQUE] at any time to reset the technique to the default protocol settings. 7. Position the GE Portable DR Detector under the patient. 8. Confirm or adjust the Patient Side, if applicable. - Page 115 Follow this process to conduct a Cassette Exam. NOTE: Make sure that the GE Portable DR Detector is in the detector bin before beginning a cassette exam. Exposures will be inhibited if the detector is placed in the bin after the exam has begun. To clear the inhibit, either: –...
-
Page 116: Conduct An Emergency Exam
No patient information available – There is no patient information to enter due to the patient’s medical condition. For example, the patient was found unconscious with no identification. A4-12 Definium AMX 700 X-Ray System 5161515-1EN Rev. 6 (10 February 2008) Operator Manual ©... -
Page 117: End Exam
Image Management screen. Any acquired images are stored in a temporary database until they are committed to the permanent storage database upon closure of the exam. A4-13 Definium AMX 700 X-Ray System 5161515-1EN Rev. 6 (10 February 2008) Operator Manual... -
Page 118: Close
If multiple procedures were selected, the discontinued status applies to all procedures that were open when the exam was discontinued. Press [CANCEL] to close the message and return to the Acquisition screen. A4-14 Definium AMX 700 X-Ray System 5161515-1EN Rev. 6 (10 February 2008) Operator Manual... -
Page 119: Overview
You are able to view single or multiple images at once. When viewing multiple images, an aqua border identifies the currently selected image. Table A5-1 describes the functions for the Image Viewer screen. A5-1 Definium AMX 700 X-Ray System 5161515-1EN Rev. 6 (10 February 2008) Operator Manual... - Page 120 NOTE: When acquiring multiple images or if you need to retake an image, you must switch back to the Acquisition screen in order to record the exposure. A5-2 Definium AMX 700 X-Ray System 5161515-1EN Rev. 6 (10 February 2008) Operator Manual...
- Page 121 Changes the action of the pointer when pressed and dragged on the image. Refer to Change Pointer Controls (p. A5-21) for more information. A5-3 Definium AMX 700 X-Ray System 5161515-1EN Rev. 6 (10 February 2008) Operator Manual © 2008 General Electric Company. All rights reserved.
-
Page 122: Tool Panel Selection
Refer to Save Changes to Images (p. A5-27) for more information. network connection status Appears when the Definium AMX 700 is connected to the hospital network. wireless network connection If the wireless network connection is enabled, displays the status status of the connection and signal strength. Refer to Chapter A2: General Information-Wireless Network Connection (p. -
Page 123: Select Images To View
To view an image, press an image preview. Figure A5-3 Images – Processed panel A5-5 Definium AMX 700 X-Ray System 5161515-1EN Rev. 6 (10 February 2008) Operator Manual © 2008 General Electric Company. All rights reserved. -
Page 124: Change Image Display
True Size Shows the image in the exact size it was acquired from the detector (one centimeter on the detector equals one centimeter on screen). A5-6 Definium AMX 700 X-Ray System 5161515-1EN Rev. 6 (10 February 2008) Operator Manual © 2008 General Electric Company. All rights reserved. -
Page 125: Adjust Images
• Move the slider left for a darker image. Invert Reverses light and dark areas of the selected image. A5-7 Definium AMX 700 X-Ray System 5161515-1EN Rev. 6 (10 February 2008) Operator Manual © 2008 General Electric Company. All rights reserved. - Page 126 • Normal - image as acquired • Hard - adjusts the image towards black and white • Soft - adjusts the image towards gray The GE Portable DR Detectoruses a “Smart Windowing” algorithm to optimize image quality. Smart Windowing is an automated, image-based, and technique-independent method of selecting brightness and contrast for image display.
-
Page 127: Annotate And Mask Images
Places a Cobb angle (two lines) on the image that you may re-size, move, or angle. Cobb angle specifications are shown in the User Measurements annotation at the bottom right corner of the image. A5-9 Definium AMX 700 X-Ray System 5161515-1EN Rev. 6 (10 February 2008) Operator Manual... - Page 128 Only one marker may be placed on an image. Edit Opens a dialog box to edit or change the selected User Annotation (notes). A5-10 Definium AMX 700 X-Ray System 5161515-1EN Rev. 6 (10 February 2008) Operator Manual © 2008 General Electric Company. All rights reserved.
- Page 129 NOTE: This function is only available when the image is open in a live exam or for re-processed images. Refer to Adjust Image Shutter (Crop Image) (p. A5-15) for more information. A5-11 Definium AMX 700 X-Ray System 5161515-1EN Rev. 6 (10 February 2008) Operator Manual © 2008 General Electric Company. All rights reserved.
-
Page 130: Customize System Annotations
– +1 – +2 – +3 (largest) 5. Press [OK]. [CANCEL] closes the screen and leaves the selections unchanged. A5-12 Definium AMX 700 X-Ray System 5161515-1EN Rev. 6 (10 February 2008) Operator Manual © 2008 General Electric Company. All rights reserved. -
Page 131: Add Image Annotations
• To move: Press and drag the ellipse by its edge (not on a handle). • To change shape or re-size: Press and drag a square handle. A5-13 Definium AMX 700 X-Ray System 5161515-1EN Rev. 6 (10 February 2008) Operator Manual... - Page 132 • To move: Select the marker and drag to the desired area. • To switch between R and L: Press the RL button. NOTE: Only one RL marker is inserted per image. A5-14 Definium AMX 700 X-Ray System 5161515-1EN Rev. 6 (10 February 2008) Operator Manual...
-
Page 133: Delete Image Annotations
The shutter appears as a yellow box with red handles (Figure A5-11). Anything outside of the box will be blacked out when the shutter is applied. A5-15 Definium AMX 700 X-Ray System 5161515-1EN Rev. 6 (10 February 2008) Operator Manual... -
Page 134: Automatic Shutter
This allows the system to provide a shuttered image on the viewer regardless of where the collimated image edges lie on the detector. A5-16 Definium AMX 700 X-Ray System 5161515-1EN Rev. 6 (10 February 2008) Operator Manual ©... -
Page 135: Re-Process Images
Images cannot be re-processed with a different image type than originally acquired. Patient size Changes the patient size. A5-17 Definium AMX 700 X-Ray System 5161515-1EN Rev. 6 (10 February 2008) Operator Manual © 2008 General Electric Company. All rights reserved. -
Page 136: Determine If Images Should Be Retaken (Dei)
The display of the Detector Exposure Index and the DEI ranges are configured from the Image Viewer preferences screen. Refer to Chapter A7: Set Preferences-DEI (Detector Exposure Index) (p. A7-28) for more information. A5-18 Definium AMX 700 X-Ray System 5161515-1EN Rev. 6 (10 February 2008) Operator Manual © 2008 General Electric Company. All rights reserved. - Page 137 The specific limits and retake rules should be ultimately determined by the appropriate staff at your facility. A5-19 Definium AMX 700 X-Ray System 5161515-1EN Rev. 6 (10 February 2008) Operator Manual...
-
Page 138: Corrective Actions
DEI value. NOTE: User must select the appropriate FOV for the anatomy imaged, and use proper collimation at all times. A5-20 Definium AMX 700 X-Ray System 5161515-1EN Rev. 6 (10 February 2008) Operator Manual © 2008 General Electric Company. All rights reserved. -
Page 139: Change Pointer Controls
45° angle, brightness and contrast will change equally; however, if you move the pointer at a 20° angle (more horizontally) the brightness will change more than the contrast. A5-21 Definium AMX 700 X-Ray System 5161515-1EN Rev. 6 (10 February 2008) Operator Manual... -
Page 140: Apply Quality Check Indicator (Auto Tag)
Film Manager allows configuration and printing of multiple images in a series. • Manual Print allows configuration and printing of the currently selected image. Figure A5-18 Print panel A5-22 Definium AMX 700 X-Ray System 5161515-1EN Rev. 6 (10 February 2008) Operator Manual © 2008 General Electric Company. All rights reserved. -
Page 141: Print Multiple Images
3. Drag the image thumbnails from the Images - Raw or Images - Processed panel (Figure A5-20) to the Film Composer screen. Figure A5-20 Images - Processed panel A5-23 Definium AMX 700 X-Ray System 5161515-1EN Rev. 6 (10 February 2008) Operator Manual... -
Page 142: Print Current Image
Print Images screen and adjust the settings. If the image placement is acceptable, press [PRINT] to print the image. Figure A5-21 Example of Print Preview with incorrect settings A5-24 Definium AMX 700 X-Ray System 5161515-1EN Rev. 6 (10 February 2008) Operator Manual... - Page 143 The accepted range is between 40% and 90%. If True Size or Fit to Film are selected as the Print Mode, the text box remains disabled. A5-25 Definium AMX 700 X-Ray System 5161515-1EN Rev. 6 (10 February 2008) Operator Manual...
- Page 144 Shows how the image will appear on the film or paper with the current settings. [PRINT] Prints the image. [CANCEL] Cancels printing. A5-26 Definium AMX 700 X-Ray System 5161515-1EN Rev. 6 (10 February 2008) Operator Manual © 2008 General Electric Company. All rights reserved.
-
Page 145: Send Images
A message appears: “Would you like to save the changes made to the images?” 3. Press [YES]. [NO] closes the Image Viewer screen without saving changes. A5-27 Definium AMX 700 X-Ray System 5161515-1EN Rev. 6 (10 February 2008) Operator Manual... -
Page 146: Overview
Image Management screen. In the Image Details section, each row is an image. Selecting a row makes a small preview image, or “thumbnail,” appear. The image may be opened for viewing, adjustment, or deletion. A6-1 Definium AMX 700 X-Ray System 5161515-1EN Rev. 6 (10 February 2008) Operator Manual... - Page 147 Opens the Worklist screen where patient procedures may be added to the schedule and exams started. Refer to Chapter A3: Worklist for more information. A6-2 Definium AMX 700 X-Ray System 5161515-1EN Rev. 6 (10 February 2008) Operator Manual © 2008 General Electric Company. All rights reserved.
- Page 148 CAUTION: If both exam and images are selected, the exam will be deleted upon confirmation. A6-3 Definium AMX 700 X-Ray System 5161515-1EN Rev. 6 (10 February 2008) Operator Manual © 2008 General Electric Company. All rights reserved.
- Page 149 [UNLOCK] removes the lock from the selected exams. Refer to Lock Exams from Deletion (p. A6-14) for more information. A6-4 Definium AMX 700 X-Ray System 5161515-1EN Rev. 6 (10 February 2008) Operator Manual © 2008 General Electric Company. All rights reserved.
- Page 150 Selects where images are to be copied or saved. The first button switches between the local unit and any configured network hosts. NOTE: If the GE Portable DR Detector is used in a mobile unit, network hosts will only be available when the unit is connected to the network.
- Page 151 Displays the message log since the last system re-start. Refer to Chapter A2: General Information-System Status and Messages (p. A2-10) for more information. A6-6 Definium AMX 700 X-Ray System 5161515-1EN Rev. 6 (10 February 2008) Operator Manual © 2008 General Electric Company. All rights reserved.
-
Page 152: View Patient Information
8. Open the exams from the Local database. NOTE: If the exams are being viewed on a computer that has the DICOM viewer installed, images may be viewed directly from the CD. A6-7 Definium AMX 700 X-Ray System 5161515-1EN Rev. 6 (10 February 2008) Operator Manual... -
Page 153: Synchronize To His Or Ris Or Pacs
Sort by Column Sorting allows you to organize the procedures by the column of your choice. A6-8 Definium AMX 700 X-Ray System 5161515-1EN Rev. 6 (10 February 2008) Operator Manual © 2008 General Electric Company. All rights reserved. -
Page 154: Open Exams And Images
Refer to Chapter A7: Set Preferences for information about configuring network hosts. NOTE: If the GE Portable DR Detector is used in a mobile unit, the unit must be connected to the network. A6-9 Definium AMX 700 X-Ray System 5161515-1EN Rev. -
Page 155: Copy Images To Another Exam
Completed. NOTE: You can only copy the images from one exam at a time. NOTE: You cannot copy images to multiple Worklist procedures. A6-10 Definium AMX 700 X-Ray System 5161515-1EN Rev. 6 (10 February 2008) Operator Manual... - Page 156 [CANCEL] stops the copy process, closes the message, and returns you to the Image Management screen. All series and images are copied to the exam. A6-11 Definium AMX 700 X-Ray System 5161515-1EN Rev. 6 (10 February 2008) Operator Manual © 2008 General Electric Company. All rights reserved.
-
Page 157: Copy Exams To A Cd
CD. [WRITE] begins the copying process. [CANCEL] closes the screen and returns you to the Image Management screen. A6-12 Definium AMX 700 X-Ray System 5161515-1EN Rev. 6 (10 February 2008) Operator Manual... -
Page 158: Delete Exams, Series, Or Images
The message closes. The items are deleted from the Image Management screen. [CANCEL] closes the message and the items remain on the Image Management screen. A6-13 Definium AMX 700 X-Ray System 5161515-1EN Rev. 6 (10 February 2008) Operator Manual © 2008 General Electric Company. All rights reserved. -
Page 159: Lock Exams From Deletion
NOTE: The original exam is not modified in any way, only a copy is altered. NOTE: Once an anonymous exam is created, there is no way to recover the patient’s identifying information. A6-14 Definium AMX 700 X-Ray System 5161515-1EN Rev. 6 (10 February 2008) Operator Manual... - Page 160 A message appears: “The selected exams will be copied without patient identification. The originals will not be deleted.” 3. Press [OK]. The Image Management screen updates with copied, anonymous exams. A6-15 Definium AMX 700 X-Ray System 5161515-1EN Rev. 6 (10 February 2008) Operator Manual © 2008 General Electric Company. All rights reserved.
- Page 161 (p. A7-28) Preferences are set on the Utilities screen (Figure A7-1), which is accessed by pressing the [UTILITIES] button on the Worklist. A7-1 Definium AMX 700 X-Ray System 5161515-1EN Rev. 6 (10 February 2008) Operator Manual © 2008 General Electric Company. All rights reserved.
-
Page 162: System
1. On the Worklist screen, press [UTILITIES]. The System-System screen appears. 2. Press [NETWORK CONNECTIONS]. The Network Connections screen (Figure A7-2) appears. A7-2 Definium AMX 700 X-Ray System 5161515-1EN Rev. 6 (10 February 2008) Operator Manual © 2008 General Electric Company. All rights reserved. -
Page 163: Add Or Edit Network Host
If adding a new connection, press [ADD]. 1. Complete requested information for both tabs (see Table A7-1 and Table A7-2) and press [SAVE] to add the network host or save the changes. A7-3 Definium AMX 700 X-Ray System 5161515-1EN Rev. 6 (10 February 2008) Operator Manual... - Page 164 Designates if the host will store image data. Storage Commitment - The DICOM application title. Application Entry Title A7-4 Definium AMX 700 X-Ray System 5161515-1EN Rev. 6 (10 February 2008) Operator Manual © 2008 General Electric Company. All rights reserved.
- Page 165 Table A7-2 Add Network Host – Preferences tab description Function Description Allow this host to query the (GE Allows this host to search and filter the GE Portable DR Portable DR Detector system name) Detectorsystem. Allow this host to retrieve from the...
-
Page 166: Remove Network Host
[CANCEL] closes the message and returns you to the Network Connections screen without removing the connection. The network host is removed. A7-6 Definium AMX 700 X-Ray System 5161515-1EN Rev. 6 (10 February 2008) Operator Manual © 2008 General Electric Company. All rights reserved. -
Page 167: Perform C-Echo Test
1. On the Worklist screen, press [UTILITIES]. The System-System screen appears. 2. Press [NETWORK CONNECTIONS]. The Network Connections screen (Figure A7-5) appears. A7-7 Definium AMX 700 X-Ray System 5161515-1EN Rev. 6 (10 February 2008) Operator Manual © 2008 General Electric Company. All rights reserved. -
Page 168: Add Or Edit Dicom Printers
2. Complete requested information for all tabs (see Table A7-3, Table A7-4, and Table A7-5) and press [SAVE] to add the printer or save the changes. A7-8 Definium AMX 700 X-Ray System 5161515-1EN Rev. 6 (10 February 2008) Operator Manual... - Page 169 A place for you to add notes about the printer or configuration. Information Density Sets the minimum and maximum density range. A7-9 Definium AMX 700 X-Ray System 5161515-1EN Rev. 6 (10 February 2008) Operator Manual © 2008 General Electric Company. All rights reserved.
- Page 170 Designates the memory size of the printer. This is specified by the printer manufacturer. Figure A7-7 Add Printer screen – Layouts tab A7-10 Definium AMX 700 X-Ray System 5161515-1EN Rev. 6 (10 February 2008) Operator Manual © 2008 General Electric Company. All rights reserved.
- Page 171 Sets how high the film is in pixels. This value is provided by the printer manufacturer based on what the printer supports. A7-11 Definium AMX 700 X-Ray System 5161515-1EN Rev. 6 (10 February 2008) Operator Manual © 2008 General Electric Company. All rights reserved.
-
Page 172: Remove Dicom Printer
[CANCEL] closes the message and returns you to the Network Connections screen without removing the connection. The printer is removed. A7-12 Definium AMX 700 X-Ray System 5161515-1EN Rev. 6 (10 February 2008) Operator Manual © 2008 General Electric Company. All rights reserved. -
Page 173: Worklist
1. Complete or edit the Worklist Default Query screen (Figure A7-10). Table A7-6 describes the fields in detail. 2. Press [SAVE] to change the Default Query. A7-13 Definium AMX 700 X-Ray System 5161515-1EN Rev. 6 (10 February 2008) Operator Manual... - Page 174 __ Days __ Hours NOTE: If the “Days” value is left blank, the worklist query will be based on current time minus the number of hours entered. A7-14 Definium AMX 700 X-Ray System 5161515-1EN Rev. 6 (10 February 2008) Operator Manual...
-
Page 175: Auto Refresh
Figure A7-11 Drop-down lists on the Add Patient screen 1. Follow the procedures below to Add, Edit, or Remove Preset Names. 2. When finished, press [SAVE] to retain the changes you made. A7-15 Definium AMX 700 X-Ray System 5161515-1EN Rev. 6 (10 February 2008) Operator Manual... -
Page 176: Add Preset Names
1. Select the name to change. 2. Press [EDIT] for the group. 3. Edit the name as appropriate. 4. Press [SAVE]. A7-16 Definium AMX 700 X-Ray System 5161515-1EN Rev. 6 (10 February 2008) Operator Manual © 2008 General Electric Company. All rights reserved. -
Page 177: Remove Preset Names
2. Press [REMOVE] for the group. 3. Press [OK] to remove the name. Press [NO] to keep the name. A7-17 Definium AMX 700 X-Ray System 5161515-1EN Rev. 6 (10 February 2008) Operator Manual © 2008 General Electric Company. All rights reserved. -
Page 178: Image Management
3. Press Copy Exam [ON] to enable the function. Copy Exam [OFF] disables the function. 4. Press [CLOSE]. A7-18 Definium AMX 700 X-Ray System 5161515-1EN Rev. 6 (10 February 2008) Operator Manual © 2008 General Electric Company. All rights reserved. -
Page 179: Auto Tag (Quality Check)
4. Complete the information as described in Table A7-7. 5. When finished, press [SAVE] to retain your changes. 6. Press [CLOSE]. A7-19 Definium AMX 700 X-Ray System 5161515-1EN Rev. 6 (10 February 2008) Operator Manual © 2008 General Electric Company. All rights reserved. - Page 180 90%. If True Size or Fit to Film are selected as the Print Mode, the text box remains disabled. A7-20 Definium AMX 700 X-Ray System 5161515-1EN Rev. 6 (10 February 2008) Operator Manual © 2008 General Electric Company. All rights reserved.
- Page 181 Image Viewer screen. [SAVE] Saves the current selections and values as the default printing configuration. A7-21 Definium AMX 700 X-Ray System 5161515-1EN Rev. 6 (10 February 2008) Operator Manual © 2008 General Electric Company. All rights reserved.
-
Page 182: Auto Send (Auto Push)
Lists the available network locations where images may be transferred. Refer to Network Connections (p. A7-2) for information about how to configure the available Network Hosts. A7-22 Definium AMX 700 X-Ray System 5161515-1EN Rev. 6 (10 February 2008) Operator Manual © 2008 General Electric Company. All rights reserved. -
Page 183: Auto Delete
4. Complete the information as described in Table A7-9. 5. When finished, press [SAVE] to retain your changes. 6. Press [CLOSE]. Figure A7-16 Auto Delete A7-23 Definium AMX 700 X-Ray System 5161515-1EN Rev. 6 (10 February 2008) Operator Manual © 2008 General Electric Company. All rights reserved. - Page 184 [SAVE] Saves your changes and closes the screen. [CANCEL] Closes the screen without saving changes. A7-24 Definium AMX 700 X-Ray System 5161515-1EN Rev. 6 (10 February 2008) Operator Manual © 2008 General Electric Company. All rights reserved.
-
Page 185: Image Viewer
2. Select Preferences > Viewer. 3. Press Pre-set Annotation [EDIT]. The Pre-set Annotations editing screen (Figure A7-18) appears. A7-25 Definium AMX 700 X-Ray System 5161515-1EN Rev. 6 (10 February 2008) Operator Manual © 2008 General Electric Company. All rights reserved. -
Page 186: Add Pre-Set Annotation
1. From the Pre-set Annotations screen, select the annotation. 2. Press [EDIT]. 3. Edit the text of the annotation. A7-26 Definium AMX 700 X-Ray System 5161515-1EN Rev. 6 (10 February 2008) Operator Manual © 2008 General Electric Company. All rights reserved. -
Page 187: Remove Pre-Set Annotation
2. Press [REMOVE]. A message appears: “Are you sure you would like to delete the annotation – (annotation name)?” 3. Press [OK]. A7-27 Definium AMX 700 X-Ray System 5161515-1EN Rev. 6 (10 February 2008) Operator Manual © 2008 General Electric Company. All rights reserved. -
Page 188: Dei (Detector Exposure Index)
4. Continue with Change the DEI Display (p. A7-29) or Change the Lower and Upper Limits (p. A7-29). A7-28 Definium AMX 700 X-Ray System 5161515-1EN Rev. 6 (10 February 2008) Operator Manual © 2008 General Electric Company. All rights reserved. -
Page 189: Change The Dei Display
1. On the Detector Exposure Index screen, press an anatomical category to expand it. Press the category again to close it. 2. Change the lower and upper limits in the text boxes as appropriate for the view. A7-29 Definium AMX 700 X-Ray System 5161515-1EN Rev. 6 (10 February 2008) Operator Manual... -
Page 190: Export Dei Log
Figure A7-21 Technical Mode checkbox Export DEI Log The DEI log records the exposure levels of images. Medical Physicists in your facility or GE Service Personnel use the log to determine if there is a problem with the detector and to determine what adjustments to make to correct exposure errors. -
Page 191: Image Processing
Image Processing Preferences also allow you to view the settings of default factory looks or to create up to five (5) custom looks. NOTE: Custom looks and the default looks mapping can be backed up by having GE Service personnel perform a system backup. It is recommended that a system backup be performed after any change to the default looks mapping or when custom looks are built. -
Page 192: Build Custom Looks
• Factory Look 4 – highly digital look, high edge, high TE Follow this process to create an new custom look. A7-32 Definium AMX 700 X-Ray System 5161515-1EN Rev. 6 (10 February 2008) Operator Manual © 2008 General Electric Company. All rights reserved. - Page 193 10. Check the Make Default box to set this look at the default for the selected Anatomy. 11. Adjust parameters as described in Table A7-10. Parameters may be adjusted in any order. A7-33 Definium AMX 700 X-Ray System 5161515-1EN Rev. 6 (10 February 2008) Operator Manual ©...
- Page 194 • Move the slider right to make images sharper. • Move the slider left to make images smoother. Range: 1 to 10 (discrete setting) with increments of 1 A7-34 Definium AMX 700 X-Ray System 5161515-1EN Rev. 6 (10 February 2008) Operator Manual...
- Page 195 14. Select the Patient Size to save the new look to. 15. Press [SAVE]. 16. Press [CLOSE] on the Image Processing Preference Editor. A7-35 Definium AMX 700 X-Ray System 5161515-1EN Rev. 6 (10 February 2008) Operator Manual © 2008 General Electric Company. All rights reserved.
-
Page 196: Change Image Processing From The Viewer
In combination with the wide dynamic range of the digital detector, TE allows display of more information collected in a single shot, reducing re-takes and increasing throughput. A7-36 Definium AMX 700 X-Ray System 5161515-1EN Rev. 6 (10 February 2008) Operator Manual ©... -
Page 197: Te Usage
AREA to 30% for under-penetrated region uses the pixels within the dotted ROI. Increasing AREA to 60% increases the number of pixels where TE is applied, as indicated by the solid ROI. A7-37 Definium AMX 700 X-Ray System 5161515-1EN Rev. 6 (10 February 2008) Operator Manual ©... - Page 198 The effect of varying AREA and STRENGTH in TE is demonstrated in Figure A7-28 for under-penetrated regions. Increasing STRENGTH while keeping the AREA constant makes the pixel grayer in the shoulder region. Increasing AREA extends the region that becomes gray. A7-38 Definium AMX 700 X-Ray System 5161515-1EN Rev. 6 (10 February 2008) Operator Manual...
-
Page 199: Protocols
Protocols Protocols preferences allow you to create backup copies of the protocol database, retrieve saved backups, and create new protocols. A7-39 Definium AMX 700 X-Ray System 5161515-1EN Rev. 6 (10 February 2008) Operator Manual © 2008 General Electric Company. All rights reserved. -
Page 200: Backup Protocol Database To Cd
4. Select Preferences > Protocols. 5. Press [BACK UP]. A message appears: “Press OK to continue with Protocol Database back up.” A7-40 Definium AMX 700 X-Ray System 5161515-1EN Rev. 6 (10 February 2008) Operator Manual © 2008 General Electric Company. All rights reserved. -
Page 201: Retrieve Protocol Database From Cd
Database backup is done by pressing the [BACKUP] button on the Preferences - Protocols screen. Refer to Backup Protocol Database to CD (p. A7-40) for more information. A7-41 Definium AMX 700 X-Ray System 5161515-1EN Rev. 6 (10 February 2008) Operator Manual © 2008 General Electric Company. All rights reserved. -
Page 202: Add Or Edit Category
Add or Edit Category NOTE: The screens and process to edit a category are the same as for adding a category. From the Exam Menu: A7-42 Definium AMX 700 X-Ray System 5161515-1EN Rev. 6 (10 February 2008) Operator Manual © 2008 General Electric Company. All rights reserved. -
Page 203: Add Or Edit Exam
1. Select the category for the new exam. 2. Press [ADD EXAM] or [EDIT EXAM]. The Add Exam (or Edit Exam) screen appears A7-43 Definium AMX 700 X-Ray System 5161515-1EN Rev. 6 (10 February 2008) Operator Manual © 2008 General Electric Company. All rights reserved. -
Page 204: Add Or Edit View
The Add View (or Edit View) screen (1 of 2) appears. 4. Type a View Name. Do not use spaces. Use underscores ( _ ) to separate words. A7-44 Definium AMX 700 X-Ray System 5161515-1EN Rev. 6 (10 February 2008) Operator Manual ©... - Page 205 – If the anatomy is unpaired, the selections are Head Down or Head Up – If the anatomy is paired, the selections are Digits to Back, Digits to Feet, Digits to Front, Digits to Head. A7-45 Definium AMX 700 X-Ray System 5161515-1EN Rev. 6 (10 February 2008) Operator Manual...
- Page 206 13. Select all Patient Sizes you want available for the view. The default size will automatically be selected. 14. Select Receptors and Modes for each selected receptor. 15. Select the Default Receptor - cassette or GE Portable DR Detector. A7-46...
- Page 207 The default patient size is shown with an asterisk (*) to the left of the size indicator. 17. Select the patient size to edit. 18. Press [EDIT TECHNIQUE]. A7-47 Definium AMX 700 X-Ray System 5161515-1EN Rev. 6 (10 February 2008) Operator Manual...
- Page 208 [RESET] clears all changes to the database since the last time it was saved. 23. Press [OK]. The Preferences – Protocols screen appears. A7-48 Definium AMX 700 X-Ray System 5161515-1EN Rev. 6 (10 February 2008) Operator Manual © 2008 General Electric Company. All rights reserved.
-
Page 209: Protocol Editor Copy Functions
1. Select the Category to copy 2. Press [COPY CAT]. 3. Enter the new name to use or retype the existing name A7-49 Definium AMX 700 X-Ray System 5161515-1EN Rev. 6 (10 February 2008) Operator Manual © 2008 General Electric Company. All rights reserved. -
Page 210: Copy Exam
2. Press [COPY VIEW]. 3. Enter the Exam Name to use or retype the existing name. 4. Select the Copy to Category from the list. A7-50 Definium AMX 700 X-Ray System 5161515-1EN Rev. 6 (10 February 2008) Operator Manual © 2008 General Electric Company. All rights reserved. - Page 211 NOTE: Remember to back up the database when finished editing. Refer to Backup Protocol Database to (p. A7-40) for more information. A7-51 Definium AMX 700 X-Ray System 5161515-1EN Rev. 6 (10 February 2008) Operator Manual © 2008 General Electric Company. All rights reserved.
- Page 212 This chapter explains the Quality Assurance and Maintenance process for the GE Portable DR Detector. To assure continued performance of the GE Portable DR Detector, a periodic inspection program must be established. Daily functional checks should be part of this program.
-
Page 213: When To Perform Quality Tests
The QAP process begins when the QAP button is clicked. The button is located at the bottom of the Worklist or Acquisition screen. NOTE: QAP cannot be performed if an exam is open or being reviewed. A8-2 Definium AMX 700 X-Ray System 5161515-1EN Rev. 6 (10 February 2008) Operator Manual... -
Page 214: Perform Detector Check
2. Select Quality Control Tests from the left side of the screen (Figure A8-3). Figure A8-3 QAP selection from left side of screen The Quality Assurance Program screen appears. A8-3 Definium AMX 700 X-Ray System 5161515-1EN Rev. 6 (10 February 2008) Operator Manual... - Page 215 4. Press [START] to begin the Detector Check. 5. Wait for the test to complete. The Detector Check result screen appears automatically after tests have been completed. A8-4 Definium AMX 700 X-Ray System 5161515-1EN Rev. 6 (10 February 2008) Operator Manual...
-
Page 216: Failed Detector Check
Detector Check tests. Figure A8-7 Failed Detector Check results Perform QAP QAP involves tests requiring exposures with the flat field phantom. The GE Portable DR Detector QAP kit includes a flat-field phantom (Figure A8-8) sized to fit the collimator. A8-5... - Page 217 2. Select Quality Control Tests from the left side of the screen (Figure A8-10). Figure A8-10 QAP selection from left side of screen The Quality Assurance Program screen appears. A8-6 Definium AMX 700 X-Ray System 5161515-1EN Rev. 6 (10 February 2008) Operator Manual...
- Page 218 Figure A8-12 Vertical Bar Calibration screen 5. Wait for the test to complete. The Detector Check Tests screen appears. A8-7 Definium AMX 700 X-Ray System 5161515-1EN Rev. 6 (10 February 2008) Operator Manual © 2008 General Electric Company. All rights reserved.
- Page 219 The Detector QC Tests screen appears automatically when the Detector Check Tests are complete. 7. Follow the instructions on screen to complete this portion of the test: A8-8 Definium AMX 700 X-Ray System 5161515-1EN Rev. 6 (10 February 2008) Operator Manual...
- Page 220 12. Press anywhere on the screen to close the Preview and return to the QAP screen. The QAP result screen (Figure A8-15) appears automatically after tests have been completed. A8-9 Definium AMX 700 X-Ray System 5161515-1EN Rev. 6 (10 February 2008) Operator Manual ©...
-
Page 221: Failed Qap
If multiple failures are confirmed, image quality may be affected; cease use of the unit and call for immediate service. A8-10 Definium AMX 700 X-Ray System 5161515-1EN Rev. 6 (10 February 2008) Operator Manual © 2008 General Electric Company. All rights reserved. -
Page 222: Result History
2. Press a test entry in the list to select it. 3. Press [SELECT]. The test details appear. Figure A8-17 QAP Result History screen A8-11 Definium AMX 700 X-Ray System 5161515-1EN Rev. 6 (10 February 2008) Operator Manual © 2008 General Electric Company. All rights reserved. -
Page 223: Maintenance And Cleaning
Periodic maintenance checks are required thirteen months after installation and every year thereafter. A periodic maintenance schedule and a sample mAs/kVp accuracy chart are provided on the following pages. As the manufacturer of the GE Portable DR Detector, GE accepts no responsibility for safety, reliability or performance unless: •... -
Page 224: Cleaning And Disinfecting
GE Portable DR Detector and its accessories. • Refer to Chapter 7: Maintenance and Service-Cleaning the Unit (p. 7-1) for information about cleaning the surface of the Definium AMX 700. A8-13 Definium AMX 700 X-Ray System 5161515-1EN Rev. 6 (10 February 2008) Operator Manual ©... -
Page 225: Appendix B: Login Administration
On the Service User Interface, click on the Configuration Tab and select the Advanced Options. Click on the Radio Buttons available to Enable/ Disable the HIPAA option. By default the HIPAA option is disabled. The Login feature can be turned on or off by your GE Field Engineer. Definium AMX 700 X-Ray System 5161515-1EN Rev. -
Page 226: Understanding Local And Enterprise Environments
Understanding Privileges, Groups, and Users Privileges are the rights to access a system or piece of equipment and perform certain functions. Privileges are assigned to groups. The privileges are created by GE and cannot be changed. They are: • GE Service allows access to all functions for service and maintenance personnel. -
Page 227: Administering Groups And Users
[CANCEL] closes the message and returns you to the main Login screen. 7. Click [EXIT] on the bottom of any login administration screen to return to the standard login screen. Figure B-1 Administrator access message Definium AMX 700 X-Ray System 5161515-1EN Rev. 6 (10 February 2008) Operator Manual ©... -
Page 228: Working With Groups
2. Click [ADD GROUP]. 3. Type a name for the group in the text box that appears near the bottom of the screen (Figure B-3). Figure B-3 Add group text box Definium AMX 700 X-Ray System 5161515-1EN Rev. 6 (10 February 2008) Operator Manual ©... -
Page 229: Assign Privileges To Groups
Understanding Privileges, Groups, and Users (p. B-2) for definitions of privileges. NOTE: The Service privilege is protected and cannot be selected. Only GE Service personnel can assign a group to the Service privilege. 3. Click on a selected checkbox to remove the privilege. - Page 230 Appendix B: Login Administration Figure B-4 Protected groups Definium AMX 700 X-Ray System 5161515-1EN Rev. 6 (10 February 2008) Operator Manual © 2008 General Electric Company. All rights reserved.
-
Page 231: Working With Users
2. Click [ADD USER]. Five text boxes appear near the bottom of the screen (Figure B-6). Figure B-6 Add user text boxes 3. Type a Username. Definium AMX 700 X-Ray System 5161515-1EN Rev. 6 (10 February 2008) Operator Manual © 2008 General Electric Company. All rights reserved. -
Page 232: Assign Users To Groups
NOTE: Remember the following when creating user names: – You cannot use the names “operator”, “admin”, or “administrator.” These names are reserved for use by the system and GE Service personnel. – User names cannot have spaces or uppercase (capital) letters. Use all lowercase letters in the username and use underscores to separate words. -
Page 233: Remove Users
There is a class of users identified as protected users. The privileges assigned to these users can only be modified by a GE Service Engineer. Select the Show Protected Users checkbox to see these users. Protected users and groups are shown with a violet (light purple) background. - Page 234 Appendix B: Login Administration Figure B-8 Protected users B-10 Definium AMX 700 X-Ray System 5161515-1EN Rev. 6 (10 February 2008) Operator Manual © 2008 General Electric Company. All rights reserved.
-
Page 235: Viewing The Audit Log
Configuration-Audit Log tab. Refer to Configure Audit Log (p. B-15) for more information. Figure B-9 Log Viewer tab B-11 Definium AMX 700 X-Ray System 5161515-1EN Rev. 6 (10 February 2008) Operator Manual © 2008 General Electric Company. All rights reserved. -
Page 236: Administering System Configuration
Emergency Login button appears, and to enable enterprise authorization. Table B-1 describes each function. Figure B-10 Configuration-Configuration tab B-12 Definium AMX 700 X-Ray System 5161515-1EN Rev. 6 (10 February 2008) Operator Manual © 2008 General Electric Company. All rights reserved. -
Page 237: Configure Enterprise Authorization
[APPLY CONFIGURATION] button was last clicked. Configure Enterprise Authorization The Configure-Enterprise Tab is used by the site’s IT (Information Technology) or GE Service personnel. It provides connectivity to the site’s user database. If you do not have a network established in your facility, this tab will not be used. - Page 238 Appendix B: Login Administration Figure B-11 Configuration-Enterprise tab B-14 Definium AMX 700 X-Ray System 5161515-1EN Rev. 6 (10 February 2008) Operator Manual © 2008 General Electric Company. All rights reserved.
-
Page 239: Configure Audit Log
Click [SUBMIT] to apply the settings. Figure B-12 Configuration -Audit Log tab B-15 Definium AMX 700 X-Ray System 5161515-1EN Rev. 6 (10 February 2008) Operator Manual © 2008 General Electric Company. All rights reserved. -
Page 240: Use Ldap Console
Lightweight Directory Access Protocol (LDAP) functions are available from the Configuration-LDAP Console tab. Figure B-13 Configuration-LDAP Console tab B-16 Definium AMX 700 X-Ray System 5161515-1EN Rev. 6 (10 February 2008) Operator Manual © 2008 General Electric Company. All rights reserved.