Table of Contents
Advertisement
Advertisement
Table of Contents

Related Manuals for SAJ eSolar RS485


Summary of Contents for SAJ eSolar RS485
- Page 1 RS485 Kit PDC Bo Installation Manual www.saj-electric.com...
-
Page 2: Table Of Contents
Content 1 INTRODUCTION..............- 2 - 1.1 P ...............- 2 - RODUCT NTRODUCTION 1.2 S ................. - 3 - YSTEM IAGRAM 2 INSTALLATION INSTRUCTION........... - 4 - 2.1 P ..............- 4 - NSTALLATION HECK 2.2 I ..............- 4 - NSTALLATION NSTRUCTIONS 3 DEBUGGING &... -
Page 3: Introduction
Installation and configuration instructions about eSolar RS485 Kit will be introduced in this installation Manual. eSolar-RS485 Kit include eSolar WiFi-485 and eSolar MeterS-485. SAJ Sununo Plus inverters could be matched with this set of device to realize power limit control function. - 2 -... -
Page 4: System Diagram
1.2 System Diagram Figure 1-1 Diagram with eSolar RS485 Kit - 3 -... -
Page 5: Installation Instruction
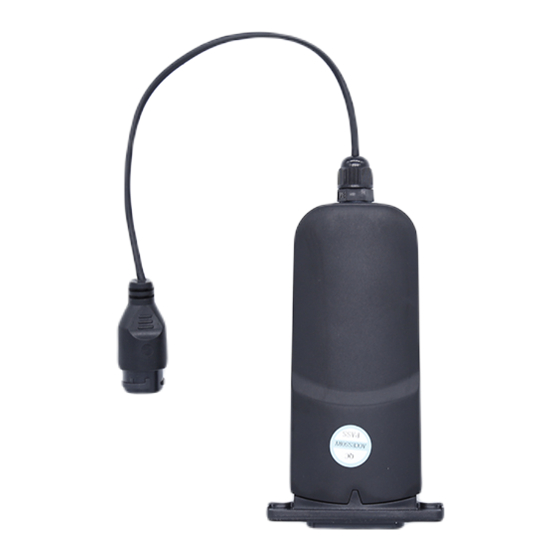
2.1.2 Accessories Checking Accessory items and quantity information can be found through the sticker on the packing box. Please check and contact distributors/SAJ if there is any accessory missing. 2.2 Installation Instructions The installation manual is with installation instructions to eSolar RS485 Kit 2.2.1 Installation Steps... - Page 6 ②Lead the cable through the sheath and connect the cable with eSolar WiFi-485; ③Screw up the sheath in clockwise direction. Figure 2-1 Figure 2-2 RS485 Pin to eSolar WiFi-485 Pin Number Description RS485+ RS485- - 5 -...
- Page 7 ④Install Module Remove the RS232 interface protective cover under the inverter → insert the module into RS232 interface and screw up with M4 screws. Figure 2-3 Step 2: eSolar MeterS-485 Installation Instructions ①Power Lines Connection Connect Live wire to terminal “L” of the eSolar MeterS-485 and connect Neutral wire to terminal “N”...
- Page 8 Figure 2-4 ④ Fixing eSolar MeterS-485(DIN 35mm mounting) There are buckles at the bottom of the meter. Buckle it on to proper grooves for tighten. ⑤CT Installation CT can be opened. Push the buckle by the side to open the CT. Penetrate the live wire of the power grid through portal of terminal P1.
- Page 9 Figure 2-5 ⑥Power On Power on the eSolar MeterS-485 and it will start operation. (If meter failed to communicate with module, it will display “off line” in the meter screen ; if succeeded, “on line” will be displayed.) Note: 1.There are 11 terminals on the eSolar MeterS-485 in total while actually only 6 will be used, as shown in Figure 2-4.
-
Page 10: Debugging & Commissioning
3.1.1 APP Configuration ① Download eSolar APP and register account Web to eSolar website https://fop.saj-electric.com to scan the QR code and download “eSolar O&M” APP (or download it from Google Play or App Store by searching “eSolar O&M”) and register an account. - Page 11 Configure the router : select a valid router from the router list (E.g.: SAJ) as ④ shown in Figure 3-3 → Fill in “password” of the router → turn on “DHCP” (default: open) → “save” the settings as shown in Figure 3-4. → “Connected”...
- Page 12 ③ After login to the WiFi web server page, Click “WIZARD” → Click “1. Scan” →select one valid Wifi (E.g. Wifi: SAJ_Phone) → Enter the password for the Wifi (I.e #p101017@saj) and click “3.Next”→ Choose “DHCP” and click “Join” →Connected. After connected, the WiFi module will reconfigure the wireless network.
- Page 13 Figure 3-7 Figure 3-8 Figure 3-9 - 12 -...
-
Page 14: Export Limitation Function
④ The data of inverter will be uploaded to the server after WiFi connecting with Network . Users can monitor the inverter remotely through eSolar website or APP. 3.2 Export Limitation Function 3.2.1 Inverter Configuration Inverter LCD Display is as below: Figure 3-10 Note: ①... - Page 15 Press “▲” / “▼”to change the value of “P-Limit”, after a certain value ③ settled, press “ENT”to move the cursor point to the last number, press “ENT”again then the settings complete. E.g.: When Sununo Plus 1K is used, if set the“P-Limit” valueinto 1000W, the Max.
- Page 16 Note: 1. Export limitation refers to the system’s adjustment and controls based on the power fed into the grid; Power adjustment refers to limit the inverter maximum output power. Export limitation function and power adjustment function can’t be open at the same time.
-
Page 17: Check Information
4 Check Information 4.1 eSolar WiFi-RS485 Information Check Indicator lamp LED lamp state Description Flicker once When it’s just power-on Flicker once When interaction with APP data Green Flicker 0.5s/once When Router is not configured Flicker 1s/once When data is normally uploaded on the server Always on When data hasn’t been uploaded on the server 4.2 eSolar MeterS-RS 485 Information... - Page 18 Figure 4-1 - 17 -...
-
Page 19: E Solar Rs485 Kit Datasheet
Annex I eSolar RS485 Kit Datasheet - 18 -... - Page 20 *The product updates continuously and no additional notification would be made if there is any change in parameters. - 19 -...
- Page 21 Guangzhou Sanjing Electric CO., LTD. Guangzhou Sanjing Electric CO., LTD. ADD: SAJ Innovation Park, No.9, Lizhishan Road, Science City, Guangzhou High-tech Zone, Guangdong, P.R.China Email: info@saj-electric.com Zip: 510663 Tel: +86 20 6660 8588 Fax: 020-6660 8589 http //www.saj-electric.com Web: Edition No: V1.01...
Need help?
Do you have a question about the eSolar RS485 and is the answer not in the manual?
Questions and answers